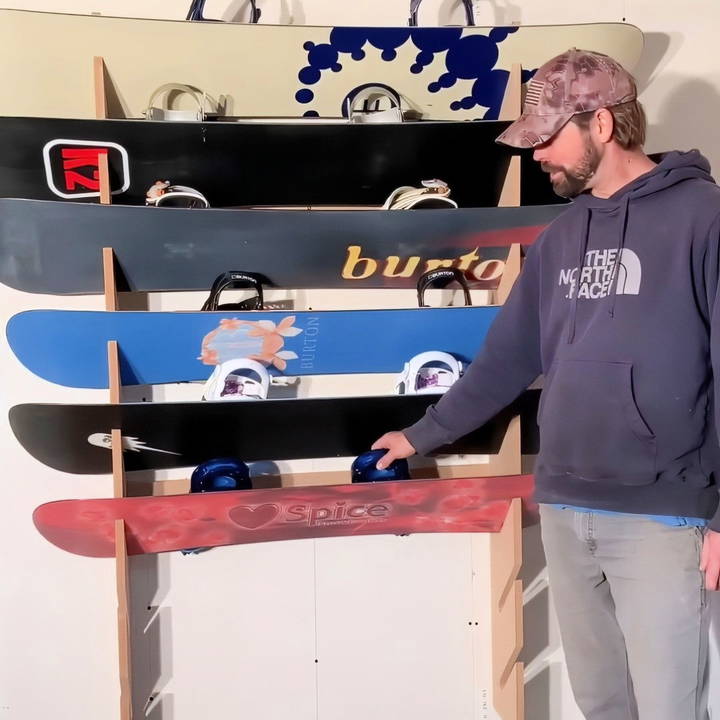
Are you tired of your snowboards cluttering up the garage or basement? Building a DIY snowboard rack is an easy and practical way to organize your gear. Not only will it save space, but it will also keep your snowboards safe from damage when they're not in use. In this guide, you'll find instructions for building a snowboard rack that can hold eight boards, using tools and materials that are easy to find. Let's begin!
Tools and Materials You'll Need
Before diving into the step-by-step process, it's important to gather the tools and materials you'll need. This will ensure that the building process goes smoothly and efficiently.
Tools:
- Circular Saw: For cutting large pieces of MDF (Medium-Density Fiberboard) to size.
- Jigsaw: Used to make precise cuts for the snowboard slots.
- Impact Drill: For drilling holes and screwing the rack together.
- Quick Square: Helps in marking straight and accurate lines.
- Tape Measure: To ensure all measurements are accurate.
- Pencil: For marking where to cut and drill.
- Table Saw (Optional): This can make cutting MDF easier, but a circular saw will work just fine if you don't have one.
Materials:
- 3/4 Inch MDF (Medium-Density Fiberboard): This is the primary material we'll be using for the rack. MDF is sturdy and affordable, making it a good choice for this project.
- Cabinet Screws: These screws will hold the rack securely to the wall.
- Screws for Assembling: Use screws that are long enough to join the MDF pieces together without splitting the material.
- Countersink Drill Bit: For making flush holes where the screws will go, making the final product look cleaner.
Step by Step Instructions
Learn how to build your own snowboard rack with our step-by-step instructions. Perfect DIY solution for organizing your snowboards efficiently.
Step 1: Cutting the MDF
The first step in building your snowboard rack is cutting the MDF into manageable pieces. For this project, we'll need two pieces of MDF that will serve as the sides of the rack, and two additional strips that will be used to secure the rack to the wall.
- Measure and Mark the MDF: Cut two pieces of 3/4 inch MDF to 8 inches wide and 67 inches long. These will serve as the sides of your snowboard rack.
- Mark Holes for Snowboards: Along one of the edges of the MDF, mark off the spaces where the snowboards will go. Starting from one end, mark at 8-inch intervals (8", 16", 24", etc.) until you reach the end of the board. These will be the centers of the holes that will hold the snowboards.
Step 2: Building the Snowboard Slots
Now that you have your side pieces cut and marked, it's time to build the slots that will hold the snowboards in place.
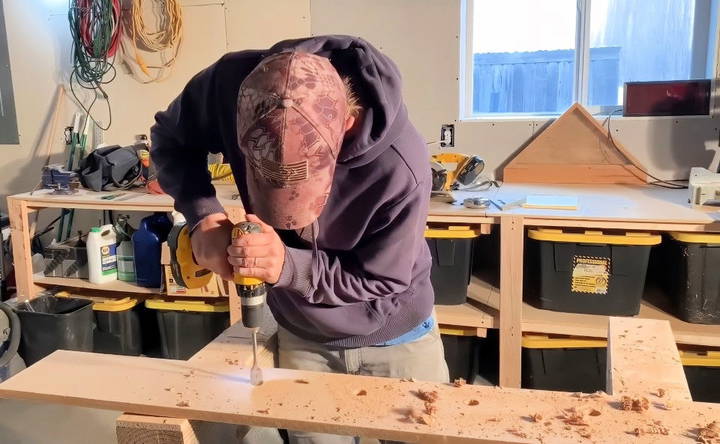
- Drill Pilot Holes: At each mark (8-inch intervals), use a 1-inch drill bit to drill pilot holes. Make sure your board is supported so you don't accidentally drill through anything underneath.
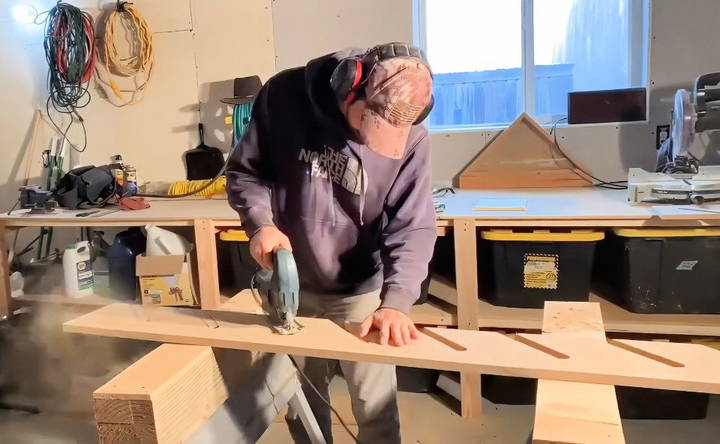
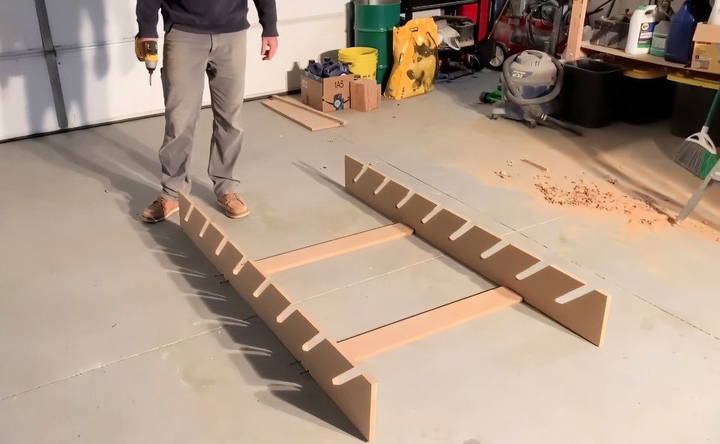
- Cut the Slots: Using a circular saw, cut along the lines you've marked to form slots where the snowboards will sit. Aim for a 45-degree angle for the cuts, as this will give the rack more holding power and make it easier to slide the snowboards in and out. If your quick square isn't long enough to guide your cuts all the way, you'll need to eyeball the last part of each cut. After the initial cuts, use a jigsaw to finish the slots without cutting too far into the MDF.
Step 3: Assembling the Rack
Once you have both side pieces cut and slotted, it's time to assemble the rack and attach it to the wall.
- Cut the Support Strips: Cut two 4-inch wide pieces of MDF, each 36 inches long. These strips will hold the sides together and give you a surface to screw the rack into the wall.
- Pre-drill and Countersink: Using a countersink bit, drill pilot holes into the support strips to prevent the screws from splitting the MDF. This also allows the screws to sit flush with the wood for a clean finish.
- Screw the Pieces Together: Attach the two side pieces to the support strips using screws. The support strips should be positioned at the top and bottom of the rack. Ensure the screws are driven in securely but don't over-tighten them, as MDF can be fragile and might split.
Step 4: Mounting the Rack
Now that the snowboard rack is assembled, it's time to mount it on the wall.
- Locate the Wall Studs: Using a stud finder, locate the studs in your wall. The snowboard rack is going to be holding quite a bit of weight, so it's essential to secure it directly into the studs. Studs are typically spaced 16 inches apart, but be sure to check.
- Drill Pilot Holes in the Rack: Once you've located the studs, mark their positions on the back of the snowboard rack and drill pilot holes for the screws.
- Mount the Rack: Using cabinet screws, attach the rack to the wall. Be sure to drive screws into at least two studs to provide adequate support. This ensures that the rack can hold the weight of the snowboards without pulling out of the wall.
Step 5: Test and Final Adjustments
With the rack now mounted, it's time to test it out.
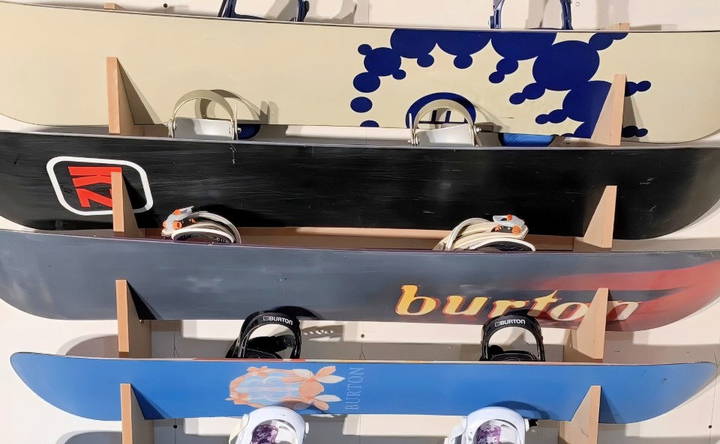
- Place the Snowboards: Slide your snowboards into the slots you've cut. The boards should fit snugly but be easy to remove when needed.
- Check Stability: Once all your snowboards are in place, gently shake the rack to make sure it's stable and securely fastened to the wall.
- Make Adjustments (If Necessary): If the rack feels loose, you may need to add more screws or adjust the placement to ensure it's firmly attached.
Tips for Success
- Use Hardwood for Aesthetic Appeal: MDF is a practical choice for building the snowboard rack, but if you're looking for a more polished, aesthetically pleasing look, you might want to use hardwood instead. Pine, oak, or maple can give the rack a more finished, professional appearance.
- Customize Slot Widths: If you have a mix of snowboards and skis, you can adjust the width of the slots accordingly. For skis, you may need narrower slots, while larger snowboards might need more space.
- Add a Protective Finish: Although MDF works great for a shop or garage setup, it's prone to wear and tear. If you want your rack to last longer, consider adding a protective coat of paint or sealant.
Conclusion
Building your own DIY snowboard rack is not only cost-effective but also rewarding. It's a straightforward project that requires basic tools and materials, and it can be completed in an afternoon. By following the steps outlined above, you can build a functional and durable rack that holds up to eight snowboards, keeping your gear organized and safe.
This project is perfect for both beginners and experienced DIY enthusiasts. Whether you're making it for your personal use or as a gift for a snowboarding enthusiast, this rack will ensure that your boards are stored safely and ready for your next adventure. Plus, it's a great way to reclaim valuable floor space in your garage or shop.
FAQs About DIY Snowboard Rack
Discover the top FAQs about DIY snowboard racks. Learn how to build and install effective storage solutions to organize your gear.
Snowboards may sit differently based on their camber (curve). To ensure a snug fit, make the slots wide enough to accommodate different board widths. Adjust the slot size if needed for wider or narrower boards to keep them secure.
Yes, while MDF is affordable and easy to work with, you can use hardwood like pine or oak for a sturdier and more aesthetically pleasing rack. Just ensure the wood is thick enough to hold the weight.
You can use a standard ruler or even a template to guide your 45-degree cuts. Just make sure your measurements are consistent for all slots to keep the rack looking uniform.
To avoid splitting, always pre-drill your holes and use a countersink bit. This allows screws to sit flush with the wood and reduces the risk of cracking the MDF.
This could be due to the different widths or cambers of your boards. If you notice they don’t sit flush, widen the slots or adjust the angle slightly to accommodate the unique shape of each board.
Yes! You can adjust the width of the slots for skis. Typically, skis will need narrower slots than snowboards. Modify the slot measurements according to the size of your skis.
Use a stud finder to locate wall studs before mounting the rack. Ensure at least two screws are driven into the studs for maximum stability. Cabinet screws are ideal for this purpose.
Absolutely! You can round off the ends using a jigsaw for a more polished appearance. While the tutorial shows a simple, square design, feel free to personalize it to match your space.
If mounted correctly into wall studs, the rack can hold eight snowboards comfortably. However, make sure you use sturdy materials and secure all screws tightly to the wall.
A circular saw will work just fine for cutting the MDF. If you don't have a table saw, ensure your cuts are precise by using a quick square or guide to help maintain straight lines.


