Starting your own DIY solar battery project can be a rewarding experience. I love working on these projects because it helps me understand how renewable energy works. Not only do I save money on electric bills, but I also feel good knowing I am helping the environment. The satisfaction of building something useful from scratch makes it all worthwhile.
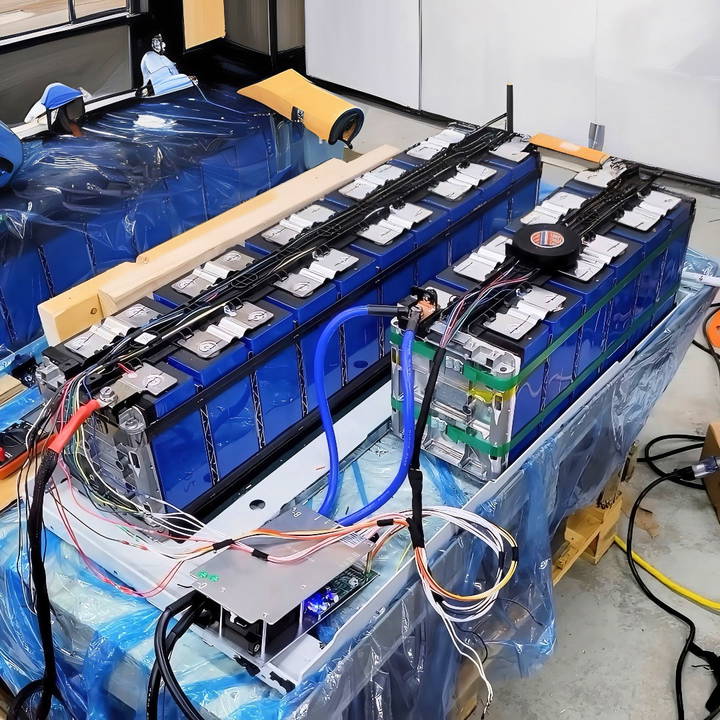
Trying this DIY solar battery bank project gave me confidence and technical skills. I learned about solar panels, wiring, and batteries. Each step taught me something new and useful. By the end of the project, I had a functional and cost-effective energy source. This guide will help you get started with your own project, and I'm confident you'll enjoy it as much as I did.
These simple steps below will help you begin and complete your DIY solar battery project efficiently.
Why Build Your Own Battery?
Building your own solar battery has several benefits:
- Cost Savings: DIY batteries can be made for about $150 per kilowatt-hour, compared to $300 per kilowatt-hour for pre-built batteries.
- Customization: You can configure the battery to meet your specific energy storage needs.
- Learning Experience: Provides hands-on experience and a better understanding of your energy system.
Materials Needed
- Lithium Iron Phosphate Cells (LiFePO4): These are known for their longevity and safety compared to other lithium-ion batteries.
- Battery Management System (BMS): Essential for monitoring and balancing cells to prevent overcharging or discharging.
- Wiring and Connectors: Necessary for connecting cells and the BMS.
- Tools: Including screwdrivers, multimeter, wire cutters, and a soldering kit.
- Heat Shrink Tubing and Electrical Tape: For insulating connections.
- Crate or Box: For housing the battery cells securely.
- Plywood or Metal Frame: To provide a sturdy structure for the battery pack.
Step by Step Instructions
Learn to build your own solar battery with our step-by-step DIY guide. Follow the instructions from unboxing to installation and ensure safety at every step.
Step 1: Unboxing and Preparing the Cells
- Unbox the Cells: Carefully unpack the lithium iron phosphate cells from their shipping crate.
- Inspect Each Cell: Use a multimeter to measure the voltage of each cell. They should all be at a similar voltage.
Example: 3.2 volts per cell.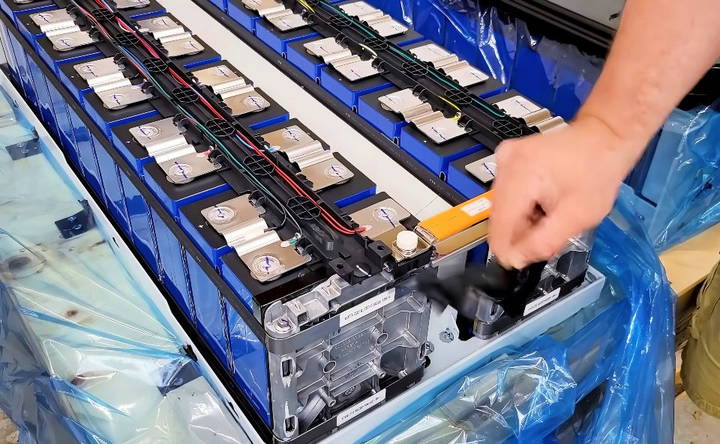
Step 2: Configuring the Cells
- Arrange Cells in Series: For a typical 48V system, arrange the cells in series (16 cells in total).
- Group Cells: Group the cells and secure them with a plywood frame to ensure they stay in place.
Example: 16 cells × 3.2 volts = 51.2V nominal.
Step 3: Connecting the Cells
- Add Bus Bars: Connect each cell in series using bus bars. Ensure the connections are tight and secure.
- Wire the BMS: Attach the BMS to the battery pack. The BMS will monitor each cell's voltage and temperature.
- Secure Connections: Use heat shrink tubing and electrical tape to insulate all connections.
Example: BMS negative wire to the first cell's negative terminal.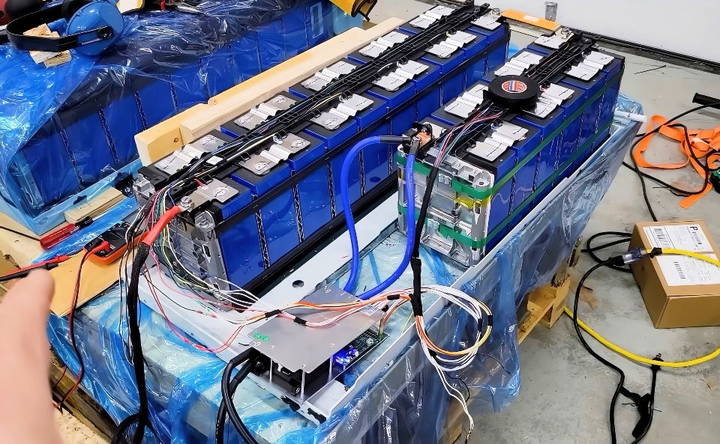
Step 4: Testing the Battery Pack
- Initial Voltage Test: Use the multimeter to check the voltage of the entire pack. It should read around 51.2 volts.
- BMS Setup: Configure the BMS settings according to the manufacturer's instructions.
Example: Set over-voltage protection to 3.65 volts per cell.Step 5: Final Assembly
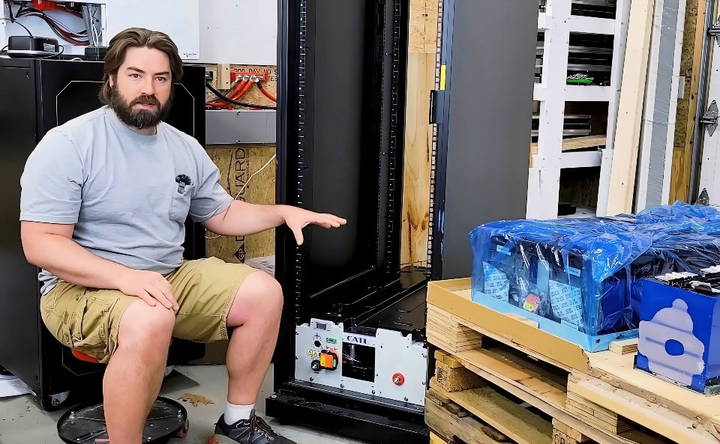
- Secure the BMS: Mount the BMS securely within the battery crate.
- Install Wiring: Route all wiring neatly to avoid short circuits or loose connections.
- Ventilation: Ensure proper ventilation for heat dissipation. Use a fan if necessary.
Step 6: Installation and Usage
- Mount the Battery: Place the battery pack in a secure, vented location.
- Connect to Inverter: Connect the battery to your inverter following the inverter's manual.
- Initial Charge: Charge the battery fully to ensure all cells are balanced.
- Monitor Performance: Regularly check the BMS and cell voltages.
Safety Precautions
- Wear Safety Gear: Safety goggles and gloves are recommended.
- Avoid Short Circuits: Double-check all connections and insulate exposed wires.
- Handle with Care: Lithium batteries can be dangerous if punctured or mishandled.
Latest Trends in Solar Batteries
Solar energy is rapidly evolving, and with it, the technology for storing this clean power is also advancing. In 2024, we're seeing some exciting new trends in solar batteries that promise to make renewable energy more efficient and accessible than ever before.
- Perovskite Tandem Solar Cells: One of the most significant breakthroughs has been the development of perovskite tandem solar cells. These cells layer traditional silicon with perovskites, materials with a unique crystal structure, to achieve higher efficiency levels. While silicon-based cells have an efficiency cap below 30%, perovskite tandem cells have exceeded 33% in laboratory settings. This means they can convert more sunlight into electricity, potentially at a lower cost.
- Lithium Iron Phosphate (LFP) Batteries: For those seeking reliable backup power, LFP batteries are becoming a popular choice. They are known for their safety, long life, and stability, making them ideal for home energy storage.
- Zinc-Based and Iron-Based Batteries: As we look for alternatives to lithium-ion batteries, zinc-based and iron-based batteries are emerging as promising options. They offer the potential for holding energy for longer periods, which is crucial for the future of solar energy storage.
- Integration with Solar Panels: Integrating energy storage systems with solar panels is witnessing significant updates. Advanced battery technologies like lithium-ion and flow batteries are being specifically designed for solar energy storage, allowing for more efficient and seamless use of solar power.
These trends reflect a move towards more sustainable and efficient energy solutions. By staying informed about these developments, you can make better decisions for your solar energy needs and contribute to a greener future.
Troubleshooting Common Issues
When it comes to DIY solar batteries, a few common issues might arise. Understanding these can help you maintain an efficient and reliable system. Here's a straightforward guide to identifying and resolving some typical problems:
- Battery Not Charging: If your solar battery isn't charging, first check the connections to ensure they're secure and corrosion-free. Also, verify that the solar panels are receiving sunlight and not shaded. Sometimes, the issue could be with the charge controller settings, so make sure they're correctly configured for your battery type.
- Reduced Capacity: Over time, batteries can lose their ability to hold a charge. This is often due to overcharging or deep discharging beyond the recommended levels. To prevent this, regularly monitor your battery's charge levels and avoid letting it drop too low.
- Inverter Issues: If your inverter is not working properly, it could be due to overheating or incorrect installation. Ensure that the inverter is in a well-ventilated area and that all connections are tight and correct.
- Corrosion: Battery terminals can corrode, leading to poor performance. Clean any corrosion with a mixture of baking soda and water, and apply anti-corrosive paste to prevent future buildup.
- Temperature Effects: Extreme temperatures can affect battery performance. Keep your batteries insulated against severe cold and avoid placing them in areas that can become excessively hot.
- System Monitoring: Regularly check your system's performance. If you notice a sudden drop in efficiency, it could indicate a problem with the solar panels, wiring, or batteries themselves.
Stay vigilant and address issues promptly to keep your DIY solar battery system reliable. Always prioritize safety: follow the manufacturer's guidelines and consult a professional if you are unsure.
FAQs About DIY Solar Battery
Find answers to common questions about DIY solar battery systems. Learn installation tips, benefits, costs, and more about DIY solar batteries in our FAQs.
A DIY solar battery is a system you can build to store energy from the sun. It’s like a savings account for electricity, keeping power from your solar panels safe until you need it. This is especially handy when the sun isn’t shining.
Building your own solar battery can cut down your electricity bills and give you a backup power source during outages. Plus, it’s a green choice, helping to reduce harmful emissions and protect the environment.
There are mainly three types: lead-acid, lithium-ion, and saltwater. Lead-acid batteries are a popular DIY choice because they’re affordable and widely available.
You'll need a few key components, such as a deep-cycle battery, solar panels, a charge controller, and an inverter. Always prioritize safety by wearing gloves and goggles and working in a well-ventilated area.
One of the biggest mistakes is underestimating the size and capacity needed for your battery bank. Make sure to calculate your energy needs accurately and choose the right battery type for your setup.
Conclusion
Building your own DIY solar battery can save you thousands of dollars, provide a highly customizable solution, and offer a valuable learning experience. By following this step-by-step guide and using high-quality materials, you can build a reliable and efficient energy storage solution for your home or off-grid setup.
Additional Tips
- Top Balancing: Ensure all cells are balanced by charging them up to the same voltage before final assembly.
- Software Monitoring: Consider using software tools to monitor your BMS via Bluetooth or other interfaces.
- Maintenance: Periodically check the connections and clean any dust or debris from the battery pack and its enclosure.


