Building your own DIY solar generator is a fantastic way to harness renewable energy. It's an eco-friendly solution that can provide power during emergencies or for off-grid living. In this guide, you'll find all the steps and materials needed to build a solar generator from scratch. It's designed to be easy to understand and follow, ensuring you can successfully create a reliable power source independently.
By following these instructions, you'll not only gain a valuable skill but also reduce your carbon footprint. DIY solar generators are a smart investment, cutting down long-term energy costs while promoting sustainability. Continue reading to discover the detailed steps and essential tips for assembling your solar generator efficiently and safely.
Understanding Solar Power
Solar power harnesses the energy from the sun and converts it into electricity that we can use in our homes and businesses. It’s a clean, renewable source of energy that can help reduce our reliance on fossil fuels and decrease our carbon footprint.
How Does Solar Power Work?
At the heart of solar power technology are solar panels. These panels are made up of many smaller units called photovoltaic (PV) cells. PV cells are made of semiconductor materials, typically silicon, which can capture sunlight and convert it into electricity.
Here’s a simple breakdown of the process:
- Sunlight hits the solar panel: Each PV cell within the panel contains two layers of silicon. When sunlight hits these cells, it energizes the electrons in the silicon.
- Electrons create an electric current: The energized electrons move through the cell and generate an electric current. This current is captured by wires connected to the cells.
- The current is converted: The electricity generated by the solar panels is in the form of direct current (DC). Most homes and appliances use alternating current (AC), so the DC electricity is passed through an inverter to convert it to usable AC electricity.
- Electricity is used or stored: Once converted, this electricity can either be used immediately, fed into the grid, or stored in batteries for later use.
Why is Solar Power Important?
Solar power is important for several reasons:
- Renewable: The sun provides a virtually limitless supply of energy.
- Environmentally Friendly: Solar power produces no harmful emissions.
- Cost-Effective: After the initial setup cost, the energy produced is free.
- Energy Independence: Solar power can reduce dependence on foreign oil and fossil fuels.
The Benefits of Solar Power
- Reduces Electricity Bills: Solar power can significantly lower your monthly energy costs.
- Increases Property Value: Homes with solar power systems have higher property values.
- Supports Energy Independence: Using solar power helps reduce our need for imported fuels.
- Promotes a Cleaner Environment: Solar energy doesn’t pollute our air or water.
By learning how solar power works and its benefits, you can decide if it’s right for you and your community. It’s a move towards a sustainable, independent energy future. Each bit of sunlight converted reduces fossil fuel use, leading to a cleaner world for all.
Step by Step Instructions
Learn how to build a DIY solar generator with step-by-step instructions, from choosing a toolbox to final assembly and testing. Perfect for beginners!
Choosing the Toolbox
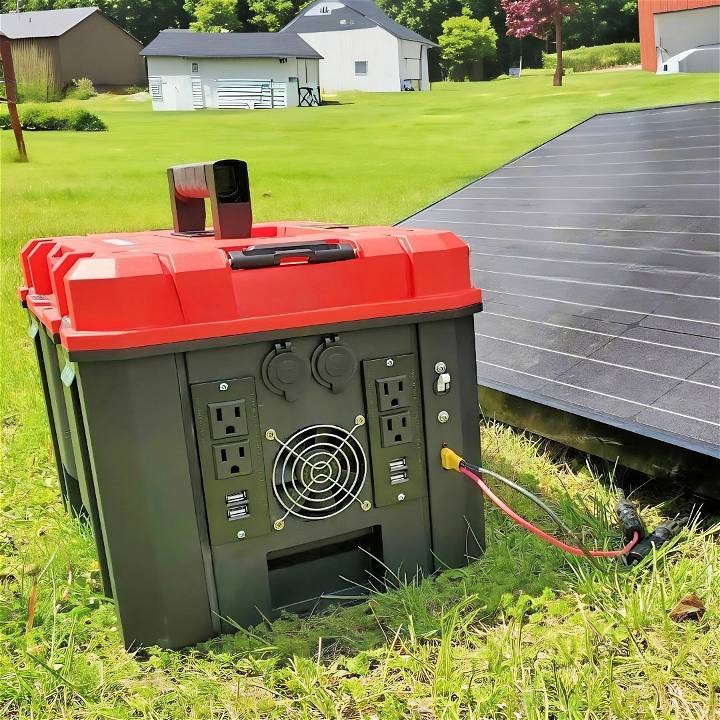
The project’s first step was selecting the right toolbox. I opted for a durable and heavy-duty craftsman toolbox, which provided ample space for the components I was about to assemble. My choice hinged on the toolbox’s sturdiness and capacity, which are essential traits for housing a solar generator.
Batteries – The Power Source
Deciding on the battery type was critical. I settled on 18650 lithium-ion cells due to their reliability and energy density. The procurement process involved dismantling packs from used modems, extracting cells using wire cutters and pliers – a tedious yet rewarding process. Testing each cell was paramount to ensure consistency in capacity, leading to the elimination of a few outliers but thankfully not encountering a single defective unit. This process underscored the value of patience and precision in DIY projects.
Building the Battery Packs
Constructing the battery packs demanded meticulous attention to detail. Utilizing 4x5 18650 cell holders, I embarked on assembling two packs in a 14x13 configuration. Choosing a design that balanced energy density with manageability, I prioritized simpler assembly and maintenance, even though it meant settling for slightly less storage capacity. Assembling the packs involved arranging cells in alternating orientations to facilitate series and parallel connections, a strategy that optimized space within the toolbox and ensured electrical efficiency.
Wiring and Safety Measures
Wiring the battery packs required a delicate touch, utilizing nickel strips for connections while prioritizing safety by applying Kapton tape over finished sections to mitigate short-circuit risks. This phase taught me the importance of double-checking each step, ensuring correct polarities, and never rushing the process, as the slightest oversight could pose significant hazards.
Incorporating Electronics
The next phase involved integrating essential electronic components, including a BMS (Battery Management System) for safeguarding the battery pack, an inverter to convert DC to AC, and various outlets for versatile connectivity options. The selection of electronics was guided by a balance between cost, efficiency, and reliability, underscoring the necessity of thorough research and planning in DIY projects.
Final Assembly
Assembling all components within the toolbox was like putting together a complex puzzle. Ensuring efficient airflow for cooling, making all connections secure, and arranging components for easy access and maintenance were my top priorities. This stage was a testament to the importance of foresight in DIY projects – envisioning the final assembly helped in optimizing the layout and simplifying future adjustments.
Testing and Adjustments
The moment of truth came with testing. Carefully activating the system and monitoring its performance under different loads was both nerve-wracking and exhilarating. This phase was crucial for identifying any issues that required adjustments, reaffirming the iterative nature of DIY projects – test, learn, and improve.
Customization Tips for Your DIY Solar Generator
Customizing your DIY solar generator can significantly enhance its efficiency and functionality to meet your specific needs. Here are some practical tips to help you tailor your solar generator for optimal performance:
Choose the Right Solar Panels
Selecting the right solar panels is crucial. Consider the size, efficiency, and type of solar panels. Monocrystalline panels are more efficient but also more expensive. Polycrystalline panels are cost-effective and work well in most conditions.
Battery Capacity
The battery stores the energy generated by your solar panels. To customize your setup, calculate your energy needs and choose a battery with enough capacity to meet your requirements. Lithium-ion batteries are a popular choice due to their long lifespan and high energy density.
Charge Controller
A charge controller regulates the voltage and current coming from the solar panels to the battery. Opt for a Maximum Power Point Tracking (MPPT) charge controller for greater efficiency, especially in varied weather conditions.
Inverter Selection
The inverter converts DC power from the solar panels to AC power for your appliances. A pure sine wave inverter provides clean, stable power and is ideal for sensitive electronic devices.
Monitoring Systems
Consider installing a monitoring system to keep track of your energy production and consumption. This can help you optimize your energy usage and ensure your system is running smoothly.
Portability
If you intend to move your solar generator, design it with portability in mind. Use lightweight materials and consider adding wheels or handles for easy transportation.
Expandability
Plan for the future by making your system expandable. Ensure you can add more solar panels or batteries without a complete overhaul.
Weatherproofing
Protect your investment by weatherproofing all components. Use durable materials and sealants to safeguard against the elements.
Aesthetic Integration
Your solar generator doesn’t have to be an eyesore. Customize the design to blend with your environment or reflect your personal style.
Safety Features
Safety is paramount. Include features like circuit breakers and fuses to protect against electrical hazards.
Follow these tips to build a solar generator that meets your energy needs and reflects your lifestyle. Successful DIY projects require planning and attention to detail.
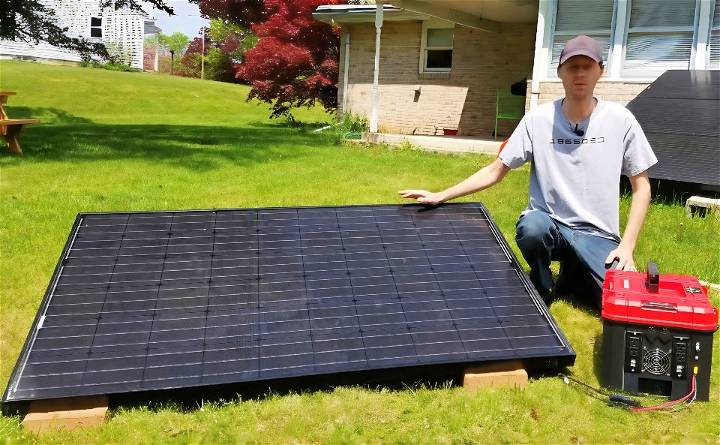
Maintenance and Care for Your DIY Solar Generator
Proper maintenance is key to ensuring your DIY solar generator remains efficient and reliable over time. Here’s a straightforward guide to keeping your solar generator in top condition:
Regular Cleaning
- Solar Panels: Keep the solar panels clean to ensure they’re absorbing as much sunlight as possible. Gently wipe them with a soft cloth or sponge and soapy water.
- Power Station: Dust off the power station with a dry cloth. Ensure the ports and outlets are free from debris that could interfere with connections.
Battery Care
- Avoid Overcharging: Overcharging can reduce the battery’s lifespan. Use a charge controller to prevent this issue.
- Proper Storage: If you’re not using the generator for an extended period, store the battery at half charge in a cool, dry place.
System Checks
- Inspect Wiring: Regularly check the wiring for any signs of wear or damage. Replace any frayed or damaged wires immediately.
- Check Connections: Ensure all connections are tight and secure. Loose connections can lead to power loss or safety hazards.
Ventilation
- Prevent Overheating: Make sure your generator has proper ventilation to avoid overheating. Never cover the vents or fans.
Usage Guidelines
- Don’t Overload: Never exceed the generator’s maximum capacity. Overloading can cause damage to the system and connected devices.
- Operational Breaks: Give your generator breaks. Running it continuously can lead to overheating and wear.
Updates and Upgrades
- Firmware Updates: Keep the generator’s firmware up to date to ensure optimal performance and access to new features.
- Component Upgrades: As technology advances, consider upgrading components like the battery or inverter for better efficiency.
Follow these maintenance tips to extend your DIY solar generator's life and ensure reliable power. A little care goes a long way in keeping your solar power system healthy.
FAQs About DIY Solar Generator
Get answers to common questions about DIY solar generators, from setup tips to cost efficiency, ensuring you harness solar power effectively.
A DIY solar generator is a portable power system that converts sunlight into electrical energy, which is stored in a battery and can be used to power various devices. It typically includes solar panels, a charge controller, a battery, and an inverter.
To calculate the size of your solar generator, you need to consider two main factors: wattage and capacity. Wattage is the total power load the generator can handle at once, while capacity is the total energy it can store. List all the devices you plan to power, their wattage, and how long you’ll use them to determine your needs.
Yes, you can build a solar generator for home use. The key is to ensure that the inverter and battery capacity are sufficient to handle your home’s energy requirements. You may need multiple batteries and panels for higher energy needs.
The lifespan of a DIY solar generator depends on the quality of its components and how well it’s maintained. Solar panels can last 25-30 years, while batteries typically last 5-15 years depending on their type and usage. Regular maintenance and proper usage can extend the life of your generator.
Yes, building and using a DIY solar generator is safe as long as you follow electrical safety guidelines and use quality components. Ensure all connections are secure and use a proper enclosure for the battery. It’s also wise to install a fuse or circuit breaker for added safety.
Conclusion:
In conclusion, making your own DIY solar generator is a great way to gain independence from conventional power sources while harnessing solar energy. This guide on how to build a solar generator provides clear, easy-to-follow steps to help you construct a reliable power source. Start your project today, and enjoy the benefits of renewable energy with your home-made solar generator.


