Solar cooking is a method that uses the sun's energy to heat and cook food. It's a simple, cost-effective, and environmentally friendly way to prepare meals without relying on traditional fuel sources like electricity or gas. Solar cookers come in various designs, but they all operate on the same basic principle: converting sunlight into heat. Today, in this article, you can learn how to make a DIY solar oven for $35 and cook your favorite meals using the power of the sun.
How Does Solar Cooking Work?
At its core, solar cooking involves three main processes: capturing sunlight, converting it into heat, and retaining that heat to cook food. Solar cookers typically use reflective materials, such as aluminum foil or mirrors, to focus sunlight onto a pot or cooking chamber. The concentrated light increases the temperature inside the cooker, allowing you to bake, boil, or steam food.
Why Choose Solar Cooking?
- Eco-Friendly: Solar cooking is a sustainable practice that reduces reliance on fossil fuels, helping to lower carbon emissions and combat climate change.
- Cost-Effective: After the initial investment in a solar cooker, the sun's energy is free, which can save you money on energy bills in the long run.
- Versatile: You can use solar cookers to prepare a wide variety of dishes, from stews and soups to bread and desserts.
- Portable: Many solar cookers are lightweight and foldable, making them perfect for camping trips, picnics, or emergency situations where traditional cooking methods aren't available.
Getting Started with Solar Cooking
To start solar cooking, you'll need a solar cooker, which you can either purchase or build yourself. If you choose to DIY, you'll gather materials like cardboard boxes, aluminum foil, and glass or clear plastic to make a greenhouse effect that traps the sun's heat.
Remember, the best time for solar cooking is when the sun is at its peak—usually between 10 AM and 4 PM. Always monitor your food while it cooks, as cooking times can vary based on the intensity of the sunlight and the type of solar cooker you're using.
How to Make a Solar Oven - Step by Step Guide
Learn how to make a DIY solar oven with our step-by-step guide. Discover the benefits of solar cooking and make your own eco-friendly oven at home.
Materials Needed and Why
- Scrap Wood or Plywood: I used scrap wood lying around in my garage. It's not only economical but also reduces waste. This forms the main structure of the oven.
- Plexiglass: Chosen for its durability and ability to withstand high temperatures without shattering, unlike regular glass.
- Foil Insulation: Essential for retaining and focusing the heat within the oven.
- Rust-Oleum High Heat: This special paint can withstand the oven's internal temperatures without degrading.
- Aluminum Foil Tape: Helps in reflecting the sun's rays inside the oven, maximizing the heat.
- Black Spray Paint: Black absorbs heat more effectively, contributing to the oven's efficiency.
- E 6000 Glue: A strong adhesive, crucial for attaching the plexiglass to the wood frame securely.
- Hinges, Screws, Staples, or Nails: For assembling parts of the oven together securely.
Step by Step Instructions
Learn how to build a DIY solar oven with this step-by-step guide. From measuring and cutting wood to adding a plexiglass lid, make your own eco-friendly oven.
Step 1: Measure and Cut the Wood
I started by measuring the plexiglass since its dimensions would dictate the size of the oven box. With those measurements in hand, I measured and marked the scrap wood before cutting it down to size. Accuracy here is key to ensure the box assembles neatly.
Step 2: Construct the Frame
Using the cut pieces, I began constructing the frame. It's akin to building a simple box; patience and a steady hand are your best friends here. Ensure your corners are square to keep the box stable and properly aligned.
Step 3: Insulation and Painting
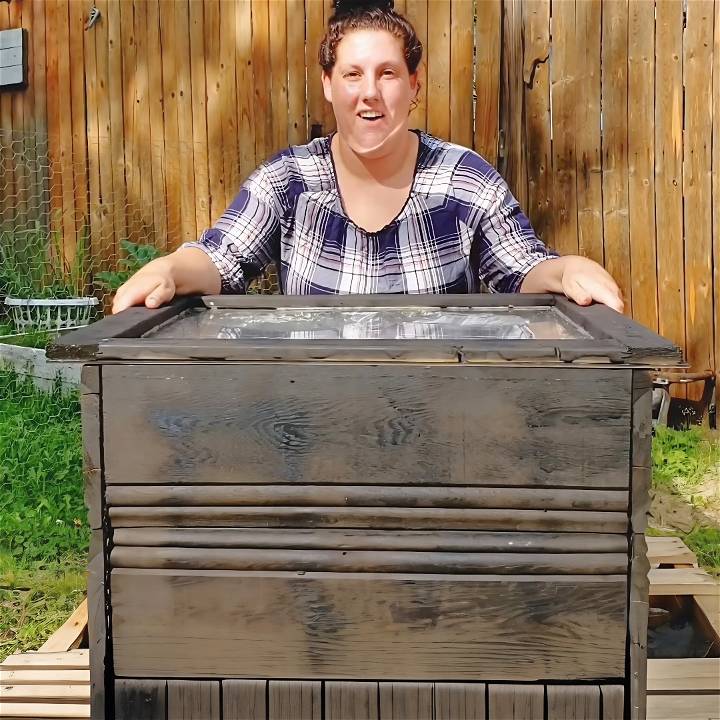
Once the frame was assembled, I added foil insulation to the inside of each panel. This step is crucial as it reflects the sun's heat, effectively turning the box into an oven. After insulating, I painted the exterior with black high-heat-resistant paint for maximum heat absorption.
Step 4: Adding the Plexiglass Lid
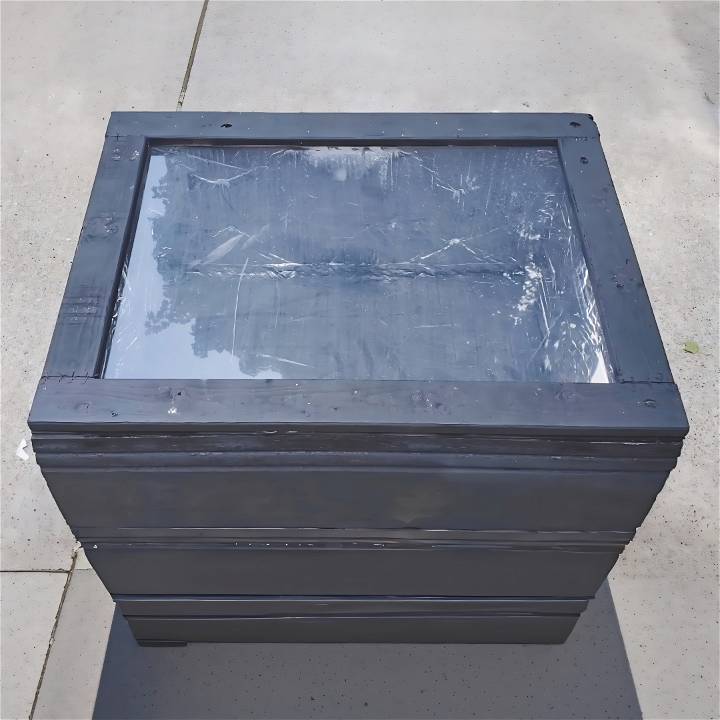
Making the lid was next. I painted the frame black for consistency and, once dry, glued the plexiglass onto it. This lid needs to be snug but also easily openable to access the oven's interior.
Step 5: Final Assembly
With the lid ready, I attached it to the box using hinges. This attachment method allows easy access to the oven's interior. I also added aluminum foil tape to any gaps, enhancing heat retention.
The Moment of Truth
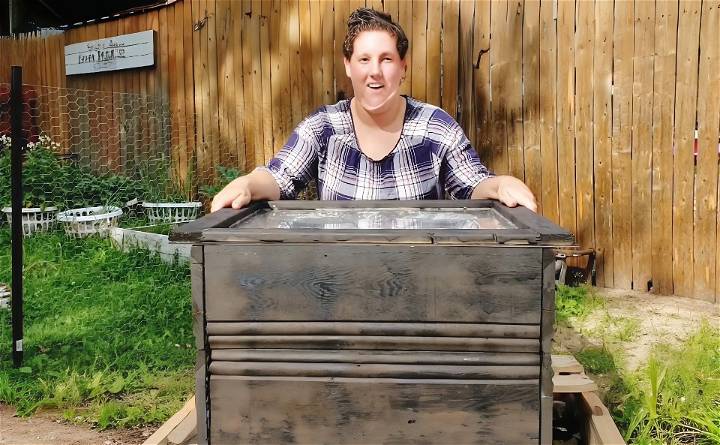
After attaching the lid, my DIY solar oven was complete. The total cost of the project came in just under $35, a modest sum for a functional solar oven. The moment I placed it under the direct sunlight, I could feel the interior warming up – a successful test of its capabilities.
Practical Considerations and Further Tips
- Orientation: Always position the oven to face direct sunlight for maximum efficiency.
- Cookware: Use dark, thin metal pots or pans inside the oven to maximize heat absorption.
- Safety: Never look directly at the reflective surfaces without protective eyewear to avoid glare.
Troubleshooting Common Issues with DIY Solar Ovens
Building and using a DIY solar oven can be a fun and rewarding experience. However, like any project, you might run into a few hiccups along the way. Here's a guide to help you identify and solve some common issues that may arise.
Problem: Inconsistent Cooking Temperatures
- Cause: The most common reason for fluctuating temperatures is the solar oven's inability to retain heat. This could be due to insufficient insulation or gaps in the oven's construction where heat can escape.
- Solution: Make sure your solar oven is well-insulated. Use materials like crumpled newspaper, wool, or foam as insulation. Check for any openings and seal them with tape or additional layers of insulation.
Problem: Slow Cooking Time
- Cause: If your food is taking too long to cook, it might be because the solar oven isn't capturing enough sunlight. This could be due to the angle of the reflective panels or the time of day.
- Solution: Adjust the position of your solar oven throughout the day to follow the sun's path. Use a stand or adjustable legs to help you angle the oven correctly. Cooking times will be shorter when the sun is at its peak, usually between 11 AM and 3 PM.
Problem: Difficulty Reaching High Temperatures
- Cause: A common challenge is getting the solar oven hot enough. This can happen if the reflective surfaces aren't directing enough sunlight into the cooking chamber.
- Solution: Use highly reflective materials like aluminum foil or mirrors. Make sure they are clean and positioned to maximize sunlight exposure. Sometimes, simply repositioning the reflective surfaces can make a significant difference.
Problem: Food Cooking Unevenly
- Cause: Uneven cooking is often a result of poor circulation of heat within the oven or the food not being placed correctly.
- Solution: Ensure that the cooking pot or tray is centered in the oven and not touching the sides. Use a dark-colored pot for better heat absorption. Consider using a pot stand to allow heat to circulate around the entire pot.
Problem: Moisture Buildup
- Cause: Condensation can occur inside the solar oven, which may make the food soggy.
- Solution: To prevent moisture buildup, make sure there's a small vent to allow steam to escape. This can be as simple as leaving a small gap when sealing the oven's door or lid.
Problem: Materials Deteriorating Over Time
- Cause: Exposure to the elements can cause wear and tear on your solar oven, especially if it's made from cardboard.
- Solution: Protect your solar oven from moisture by covering it with a clear plastic sheet or using waterproof paint. Store it in a dry place when not in use to extend its lifespan.
By knowing common issues and how to resolve them, your DIY solar oven can give you great cooking experiences. Remember, patience and experimentation are crucial for mastering solar cooking.
FAQs About DIY Solar Ovens
Discover everything you need to know about DIY solar ovens with our comprehensive FAQs guide. Learn how to harness the power of the sun for cooking.
Do Solar Ovens Really Work?
Yes, solar ovens do work. They use the sun's UV light rays, converting them into infrared light rays, which then heat up the water, fat, and protein molecules in food, causing it to cook. The process is similar to traditional cooking, just using a different heat source.
How Long Does It Take to Cook Food in a Solar Oven?
The cooking time in a solar oven can vary greatly and is usually longer than that of conventional methods. It depends on several factors, including the type of food, the intensity of the sunlight, and the design of the solar oven. Generally, solar ovens work best between 11:00 a.m. and 3:00 p.m., when solar radiation is at its peak.
Can I Cook Anything in a Solar Oven?
Most foods that you can cook in a conventional oven can be cooked in a solar oven, although it might take longer. This includes meats, vegetables, bread, and even desserts. The key is to use dark cookware to absorb more solar energy and to preheat the oven before cooking.
Is It Expensive to Build a Solar Oven?
Building a solar oven can be very cost-effective. Many designs use common household items or inexpensive materials that can be found at hardware stores. The most important components are reflective surfaces like aluminum foil and a clear cover like glass or plastic wrap to trap the heat.
Can I Use a Solar Oven on a Cloudy Day?
Solar ovens are most effective on sunny days. However, they can still be used on partly cloudy days, albeit with longer cooking times. On very cloudy days or in areas with low sunlight, it might not be possible to reach the necessary temperatures for cooking.
How Do I Maintain and Clean My Solar Oven?
Maintenance is generally minimal. Keep the reflective surfaces clean and free of dust for maximum efficiency. After use, wipe down the interior with a damp cloth to remove any food residue. Store the oven in a dry place when not in use to protect it from the elements.
What Are the Benefits of Solar Cooking?
Solar cooking offers several benefits:
- It's sustainable and doesn't rely on fossil fuels.
- It's cost-effective since the sun's energy is free.
- It's safe, with no open flames or risk of gas leaks.
- It's portable, making it ideal for camping or emergency situations.
By answering these questions, you'll be more confident in building and using your DIY solar oven. Try out renewable energy and cook with the sun's power.
Wrapping Up
Building my sun solar oven was not just about saving money or engaging in a fun project. It was a step towards sustainable living, using renewable energy for everyday tasks. For anyone interested in DIY projects or eco-friendly living, I highly recommend giving this a try. You'll learn a lot, contribute to a healthier planet, and perhaps find a new hobby in the process. Happy building, and may the sun power your next culinary adventure!


