Making a DIY spring wreath is a fun and relaxing task. I started by gathering all the supplies I needed, such as a wreath base, artificial flowers, and a hot glue gun. The process was simple enough for anyone to follow, and I felt proud to see my creation come to life. This guide will help you make a beautiful floral wreath and enjoy the process.
I hope these instructions inspire you to make your own spring wreath. With a few steps, you can make something lovely. Let's get started on this enjoyable craft project.
Historical Context of Spring Wreaths
Spring wreaths are more than just decorative items; they carry a rich history that spans cultures and centuries. The tradition of hanging wreaths dates back to ancient times and is steeped in symbolism and significance.
- Origins and Symbolism: The earliest wreaths date back to the ancient civilizations of Persia, Egypt, and Greece. They were symbols of victory, power, and honor. In Greece, wreaths made from laurel, olive, or oak leaves were awarded to athletes and poets, signifying triumph and glory.
- Cultural Significance: In Europe, the use of wreaths during springtime was closely tied to pagan festivals celebrating the vernal equinox, a time of renewal and rebirth. As Christianity spread, the wreath found new meaning. The circular shape, with no beginning or end, came to represent eternal life, and the use of evergreens symbolized growth and everlasting life.
- Modern Adaptations: Today, spring wreaths have evolved into a popular craft and home decor item. They are a welcoming sign of spring, often adorned with flowers, ribbons, and other elements that signify the season's freshness and new beginnings.
- Crafting Traditions: The art of wreath-making has been passed down through generations. It's a craft that encourages creativity and personal expression. Modern wreaths often incorporate a mix of traditional and contemporary materials, reflecting the maker's style and the influences of current trends.
Knowing the history of spring wreaths lets us value their cultural significance. They celebrate history and seasonal joy.
Materials Needed
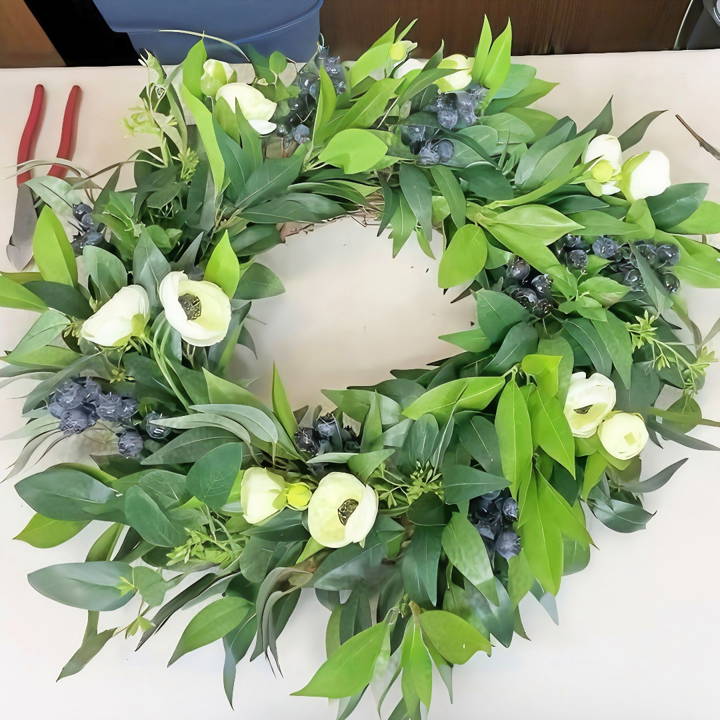
- Grapevine Wreath (14 inches): Serves as the foundation of our wreath. Its natural look and sturdy structure make it an ideal base.
- Greeneries: For this project, I used Osmanthus, Seated Eucalyptus, and Shikibu (Laurel leaves). They add volume and a natural, lush backdrop.
- White Ranunculus Flowers: With their dark centers, these add elegance and a focal point.
- Blueberries: Perfect for adding a pop of color and texture.
- Hot Glue Gun and Glue Sticks: Essential for securely securing all components onto the wreath.
- Wire Cutters: To trim the stems of your greenery and flowers to the desired length.
Each of these materials contributes to the aesthetic and longevity of the wreath.
Step by Step Instructions
Learn how to make a beautiful DIY spring wreath with our step-by-step guide. Perfect for adding fresh spring vibes to your home decor!
Step 1: Prepare the Grapevine Wreath
Start with a clean 14-inch grapevine wreath. Check for any loose pieces and trim them as needed. This provides a neat base for your design.
Step 2: Layering the Greenery
Begin by adding your greenery. I start with the most inexpensive type — in my case, Osmanthus. Cut the stems so that each piece is manageable and can be tucked into the grapevine. Secure each piece with hot glue, adhering to the wreath along the grain of the grapevine for a natural flow. Work your way around, adding each greenery type one layer at a time. This approach ensures an even distribution and a lush look.
Step 3: Incorporating Flowers
Once you're satisfied with your greenery base, it's time to add the white ranunculus flowers. These should be spaced evenly around the wreath, making a balanced look. I find that inserting these bright blooms brings the wreath to life and adds a touch of elegance.
Step 4: Adding Texture with Blueberries
The blueberries are a personal favorite addition of mine. They introduce an unexpected texture and a vibrant blue that stands out against the greenery. Dot these around the wreath, finding spots where they naturally fit. Remember, a little goes a long way with such eye-catching elements.
Step 5: Final Adjustments
Take a step back and look at your wreath from a distance. This helps to spot any gaps or uneven areas. If necessary, add more greenery or a few more blueberries until you're happy with the result. The beauty of this project is its flexibility — feel free to adjust it to your liking.
Tips for Hanging and Maintenance
To hang your wreath, you can either use a loop of twine secured to the back or simply hang it directly from the grapevine base. To keep your wreath looking fresh for as long as possible, consider spraying it with a UV-protectant spray, especially if it will be exposed to direct sunlight.
Adaptability through Seasons
One reason I love this wreath is its versatility. For summer, consider adding red flowers for a Fourth of July theme. In the fall, swap in some autumnal leaves and pinecones. The possibilities are truly endless.
Design Variations for Spring Wreaths
When it comes to making a spring wreath, the possibilities are as varied as the blossoms of the season. Here are some design variations that can cater to different styles and preferences, ensuring that every door can be adorned with a touch of spring's beauty.
- Classic Floral: A traditional floral wreath is timeless. Use a mix of seasonal flowers like tulips, daffodils, and hyacinths. Arrange them in a symmetrical pattern for a classic look, or go for an asymmetrical design for a more modern twist.
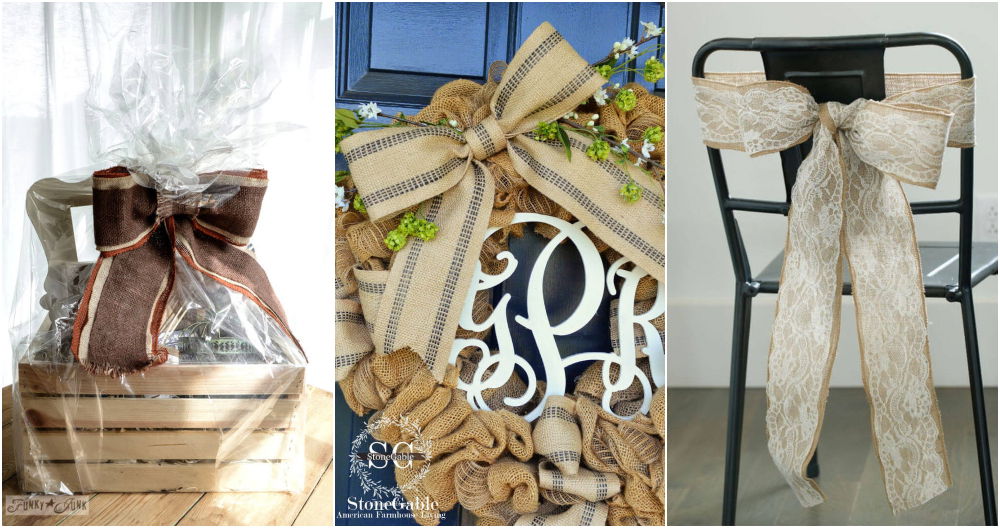
- Rustic Charm: For a rustic feel, incorporate elements from nature such as twigs, burlap ribbons, and moss. Adding small bird's nests or wooden ornaments can give your wreath a cozy, country vibe.
- Minimalist Elegance: Sometimes, less is more. A minimalist wreath might feature a simple green base with one or two standout blooms or a sleek bow. This style is perfect for a clean and sophisticated aesthetic.
- Vibrant and Bold: If you love color, don't hold back. Make a wreath that's bursting with vibrant hues. Think bright peonies, vivid greenery, and colorful ribbons to make a statement that's cheerful and bold.
- Edible Herb Wreath: Combine form with function by using fresh herbs like rosemary, thyme, and lavender. Not only will your wreath look stunning, but it will also be fragrant and can be used in cooking.
- Beachy Keen: For those who love the coast, a beach-themed wreath can bring the seaside to your doorstep. Use seashells, driftwood, and soft blue and sandy tones to capture the essence of the beach.
- Fairy Tale Whimsy: Add a touch of magic with a fairytale-inspired wreath. Incorporate delicate flowers, soft pastels, and whimsical accents like butterflies or fairy figurines.
- Night Sky: For something truly unique, make a night sky-themed wreath. Use dark foliage, silver accents, and representations of the moon and stars for a celestial look.
- Interactive Elements: Make your wreath interactive by attaching small envelopes with positive messages or seeds for planting. It's a lovely way to engage with visitors and spread joy.
- Seasonal Fruits: Adorn your wreath with representations of seasonal fruits like lemons, berries, or apples. This can add a fresh and abundant feel to your design.
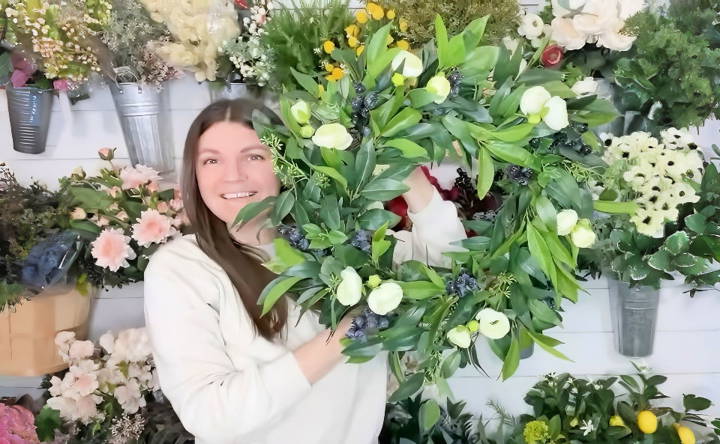
The key to a successful wreath design is to express your personal style and the joy of the season. Whether you prefer something understated or a wreath that makes a bold statement, let your creativity bloom.
Seasonal Pairings with Spring Wreaths
Pairing your spring wreath with other seasonal decor can transform your space into a celebration of the season. Here's how to make a harmonious and inviting atmosphere with thoughtful seasonal pairings:
- Front Door Ensemble: Match your wreath with a welcome mat and door hanger that complement the colors and theme of your wreath. If your wreath has yellow flowers, consider a mat with a warm, inviting message in a matching hue.
- Porch Decor Synergy: Extend the spring theme to your porch with potted plants that echo the flowers in your wreath. For instance, if you have roses on your wreath, place pots of rose bushes on either side of your doorstep.
- Window Dressings: Coordinate your window boxes with the wreath's style. If you have a rustic wreath, fill your window boxes with wildflowers or greenery that reflects that natural, earthy feel.
- Indoor Continuity: Carry the theme indoors with table centerpieces that mirror the elements of your wreath. A bowl of the same type of flowers or a candle surrounded by a mini wreath can tie the rooms together.
- Balcony Accents: If you have a balcony, drape garlands that feature flowers or ribbons similar to your wreath along the railing, making a cohesive look from the outside in.
- Garden Echoes: Reflect the design of your wreath in your garden by planting a bed of flowers that match those in your wreath. This makes a visual connection between your home and garden.
- Festive Tableware: For spring celebrations, use tableware that complements your wreath's colors. Napkins, placemats, and even dishes can be selected to match and enhance the festive mood.
- Lighting Mood: Soft, warm lighting can accentuate the colors and textures of your wreath. Consider solar or battery-operated lights to add a gentle glow to your evening ambiance.
- Seasonal Scents: Incorporate candles or diffusers with scents that match the flowers in your wreath. This adds another layer of sensory enjoyment to your decor.
- Color Harmony: Use a color wheel to find complementary colors for accessories like cushions, throws, and rugs. This will help make a balanced and inviting space that feels connected to your wreath.
Use seasonal pairings to make a harmonious and welcoming spring environment. Keep it simple, let nature's beauty shine, and enjoy bringing spring joy to every part of your home.
Troubleshooting Common Wreath-Making Issues
Making a spring wreath should be an enjoyable process, but sometimes, you might encounter a few hiccups along the way. Here's a helpful guide to troubleshooting common issues, ensuring your wreath-making experience is as smooth as possible.
Flowers and Leaves Wilting Quickly
- Solution: Make sure to use fresh materials and keep them hydrated before assembling your wreath. For non-living elements, consider high-quality silk flowers or durable dried plants.
Wreath Looks Sparse or Uneven
- Solution: Add more foliage to fill in the gaps. Use a variety of textures and lengths to make a fuller appearance. Remember, it's okay if it's not perfectly symmetrical—sometimes asymmetry adds character!
Decorations Keep Falling Off
- Solution: Secure your decorations firmly with floral wire or hot glue. If items continue to fall, they may be too heavy for the base; opt for lighter decorations or reinforce the base.
Wreath Form is Visible
- Solution: Wrap the form with ribbon or moss before adding your decorations. This not only hides the form but also provides a better grip for your materials.
Wreath Doesn't Hang Straight
- Solution: Adjust the placement of heavier elements to balance the weight evenly. Use a sturdy hook and ensure the wreath's back is flat against the door.
Colors Fade in Sunlight
- Solution: If your wreath is exposed to direct sunlight, use UV-resistant spray on natural elements and choose fade-resistant materials for a long-lasting vibrant look.
Wreath Damaged by Weather
- Solution: Apply a weatherproofing sealant to protect against moisture and wind. Place your wreath in a sheltered area if possible.
Allergic Reactions to Plants
- Solution: Be aware of any plant allergies you or your household may have. Substitute allergenic plants with hypoallergenic options or artificial counterparts.
By anticipating and solving these common problems, you can ensure that your wreath remains beautiful and intact throughout the season.
FAQs About DIY Spring Wreath
Discover everything you need to know about DIY spring wreaths in our comprehensive FAQs. With expert tips and advice, you can effortlessly make stunning wreaths.
Even if you’re new to crafting, making a spring wreath is quite straightforward. Start with a simple wreath form, choose some embellishments like faux flowers or ribbons, and use hot glue or floral wire to secure them. There’s no need for complex techniques, just let your creativity flow.
Spring wreaths look great with a variety of flowers. You can use silk, dried, fabric, or paper flowers. Popular choices include peonies, succulents, roses, and pampas grass. If you’re feeling adventurous, you can even incorporate fresh flowers for a vibrant touch.
Absolutely! Many DIY spring wreaths can be made with materials that are durable and can be stored for use year after year. Faux greenery and flowers are excellent choices for making a wreath that maintains its beauty over time.
Yes, there are numerous tutorials available that can guide you through the process. These often include step-by-step instructions and sometimes videos to help you make a beautiful wreath. Whether you prefer a rustic, chic, or colorful design, there's a tutorial out there for you.
Selecting the right color scheme for your spring wreath can really enhance its appeal. Consider the colors that you associate with spring, such as pastel pinks, yellows, greens, and blues. You can also draw inspiration from spring flowers like tulips, daffodils, and hyacinths. If you prefer a more natural look, opt for earthy tones and add pops of color with bright flowers or ribbons.
Conclusion
Making a DIY spring wreath can be a rewarding experience. You feel a burst of joy when you see the finished product hanging on your door. Plus, it adds a touch of spring to your home and makes you proud of your handiwork. Get your supplies ready and start making today!


