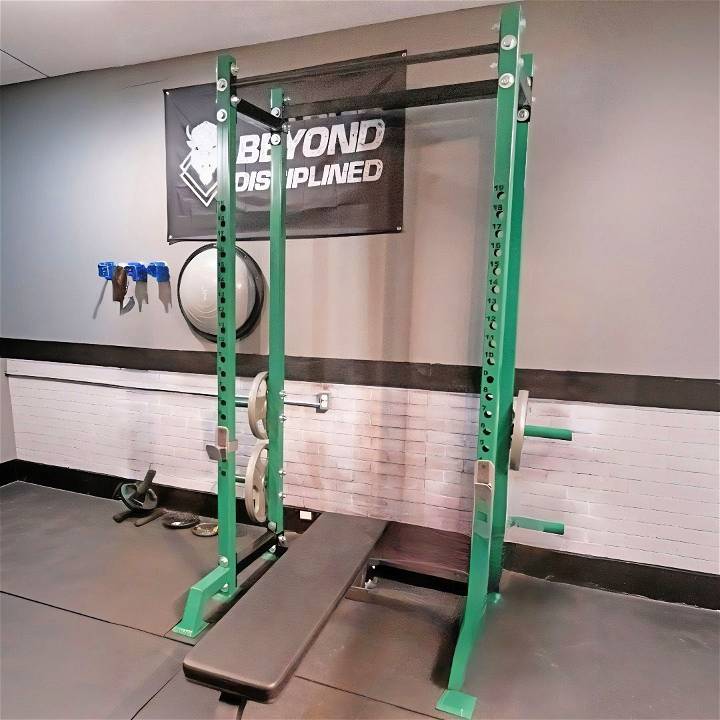
Building a commercial-grade squat rack from scratch may sound like an ambitious DIY project, but it was one I eagerly took on. Not only did I save a substantial amount of money, but I also gained invaluable welding and crafting experience. Here's a step-by-step guide, peppered with personal insights and useful tips, on how I built a sturdy and efficient squat rack in my garage.
Gathering Materials
- 11 Gauge Steel (2.5-inch Tubing): Chosen for its strength and durability. Commercial racks often use the same gauge, offering a solid foundation for heavy lifting.
- Welding Equipment: I used an ESAB Rebel 215 multi-process unit. Welding provides the structural integrity needed for the racks.
- Drill Press and Chop Saw: Essential tools for accurate cutting and hole drilling in the steel tubing.
- Miscellaneous: Including drill bits, gloves (although debatable for safety with certain machines), measuring tools, and painting supplies for aesthetics and rust protection.
Step by Step Instructions
Learn how to build your own DIY squat rack with step-by-step instructions including planning, cutting, welding, stability creation, painting, and assembly.
Step 1: Planning and Design
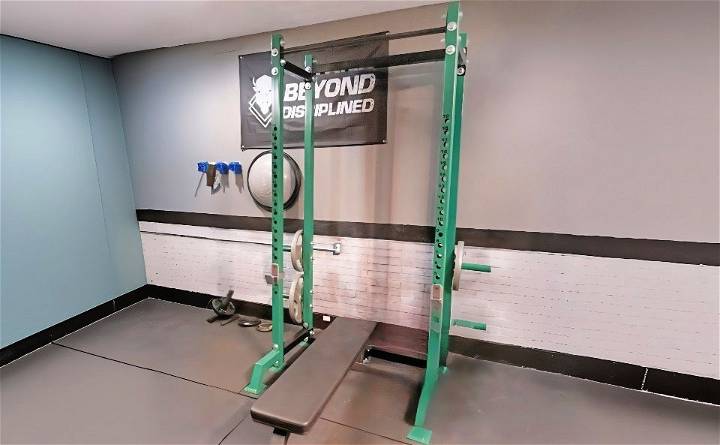
I began by sketching a design that would suit my space and lifting needs. Given my limited experience in welding, I opted for a simple, robust design focusing on stability and safety. I decided on a half rack with safety arms for squatting and benching, ensuring enough space for pull-ups.
Step 2: Cutting and Drilling
Most of my time was spent cutting the steel to length and meticulously drilling holes for the adjustment points. This step required patience and precision. I crafted a jig to maintain consistency of the holes, which was crucial for the adjustable features of the rack.
Tip: Regularly check your measurements before cutting or drilling. A small mistake in measurement can lead to bigger problems during assembly.
Step 3: Welding
Welding was the most daunting yet rewarding part of the project. My welds weren't always pretty, but they were strong. I learned that starting with tack welds then moving to full welds helped maintain the alignment and provided additional strength.
Learning Point: Don't be afraid to tackle welding. Practice on scrap material first. Welding is as much an art as it is a skill, and each mistake is a learning opportunity.
Step 4: Building Stability
The rack's stability is paramount, especially for a half rack where imbalance might pose a risk. I added angled supports extending out from the base, ensuring that the rack wouldn't tip during use. This step highlighted the importance of considering the physics behind the equipment I was building.
Step 5: Painting and Finishing Touches
Choosing a high-gloss paint not only made the rack look great but also added an extra layer of rust protection. I applied a truck bed liner to the pull-up bar for extra grip.
Advice: Take your time with the painting and finishing touches. It might seem like a small part of the project, but it makes a huge difference in the end result.
Step 6: Assembly
With all pieces cut, drilled, welded, and painted, assembly was straightforward. I used heavy-duty bolts and ensured everything was securely tightened. The assembly process was a testament to the careful planning and preparation—everything fit together perfectly.
Tip: Keep all bolts slightly loose until everything is in place, then tighten them down. This allows for minor adjustments and alignments as you go.
Reflection and Cost Breakdown
In the end, my DIY squat rack cost me about a third of what a commercial-grade one would. Here's a rough cost breakdown:
- Steel Tubing: $300
- Welding Supplies: $150
- Painting Supplies: $50
- Miscellaneous (bolts, drill bits, etc.): $100
- Total: $600
Compared to the $1500 price tag of commercial models, my savings were substantial. More importantly, I embarked on a journey that honed my skills and confidence in tackling large-scale DIY projects.
Building a squat rack is more than just saving money; it's about the satisfaction of creating something useful. For similar projects, plan well and take your time.
Customization Options for Your DIY Squat Rack
When it comes to building your own squat rack, customization is key. You want a rack that not only fits your space but also suits your personal workout style. Here's how you can tailor your DIY squat rack to meet your needs:
Adjust to Your Space
First, measure the area where you plan to place your squat rack. Consider the height, especially if you'll be doing overhead exercises. If space is limited, think about a foldable design that can be tucked away when not in use.
Personalize for Your Workouts
Think about the exercises you'll perform. If you're into powerlifting, you might want a sturdier base. For bodybuilding, consider adding a pull-up bar or a place to store weights.
Safety Features
Safety should never be compromised. Ensure your design includes safety bars or spotter arms, especially if you'll be lifting heavy weights alone.
Material Choices
Choose materials that are strong yet easy to work with. Steel pipes are durable and can handle heavy weights, while wooden racks can be more cost-effective and easier for a DIY project.
Add-Ons and Accessories
Plan for the future by making your rack expandable. You might want to add plate storage, band pegs for resistance work, or even an area for bench presses.
By customizing your squat rack, you not only get a piece of equipment that fits your workout needs but also the satisfaction of having built it yourself. Keep it simple, focus on safety, and make it yours. Happy lifting!
Workout Plans and Exercises Using Your DIY Squat Rack
Building a workout plan that incorporates your DIY squat rack can be both fun and effective. Here's a straightforward guide to help you get started:
Starting with Squats
The squat is a fundamental exercise that targets your lower body. Begin with bodyweight squats to perfect your form before adding weight. Stand with your feet shoulder-width apart, and as you squat down, keep your back straight and chest up.
Progressing to Weighted Squats
Once you're comfortable, add weight by using a barbell. Place it on the rack at shoulder height, step under the bar, and lift it off the rack by straightening your legs. Step back, squat by bending your knees, and then return to the starting position.
Incorporating Variations
Mix up your routine with different squat variations like front squats, overhead squats, or sumo squats. Each variation targets different muscle groups and adds diversity to your workout.
Full-Body Workouts
Your squat rack isn't just for squats. Use it for bench presses, deadlifts, and overhead presses. You can also attach resistance bands for added intensity or do pull-ups if you've installed a bar.
Safety First
Always prioritize safety. Use the safety bars on your rack to catch the barbell if you can't complete a lift. Never sacrifice form for weight, and consider having a spotter for heavy lifts.
Plan Your Sessions
Aim for two to three squat rack sessions per week, allowing for rest days in between. Start with three sets of eight to twelve reps and gradually increase the weight as you get stronger.
By following these simple steps, you'll make the most out of your DIY squat rack and see improvements in your strength and fitness.
FAQs About DIY Squat Racks
Discover all you need to know about DIY squat racks with our comprehensive FAQs. Get tips, ideas, and step-by-step guides. Perfect for your home gym!
How can I ensure my squat rack is stable?
Stability is crucial for safety. Make sure the base is wide and solid, and consider anchoring the rack to the floor or wall if possible. Additionally, use braces or crossbeams to reinforce the structure, and always test the rack with gradual weight increases before using it fully.
Can I adjust the height of my squat rack?
Yes, you can design your squat rack with adjustable J-hooks or bar holders. This allows you to change the height according to different exercises or users' heights. Ensure that any adjustable components are securely locked in place during use.
How much does it cost to build a DIY squat rack?
The cost can vary depending on the materials you choose and whether you already have some of them. On average, you can expect to spend between $50 to $150. This is generally cheaper than buying a pre-made rack and allows for customization.
Is building a DIY squat rack worth the effort?
Building your own squat rack can be very rewarding. It allows for customization to fit your space and needs, can be more cost-effective, and provides a sense of accomplishment. However, it requires time, effort, and some level of skill in DIY projects.
By addressing these common questions, you can help readers feel more confident about undertaking their DIY squat rack project, ensuring they have all the information they need to get started.
Conclusion:
In conclusion, building a DIY squat rack can be a cost-effective and practical solution for your home gym. With the right materials and tools, you can customize a rack that meets your fitness needs. Start building today!


