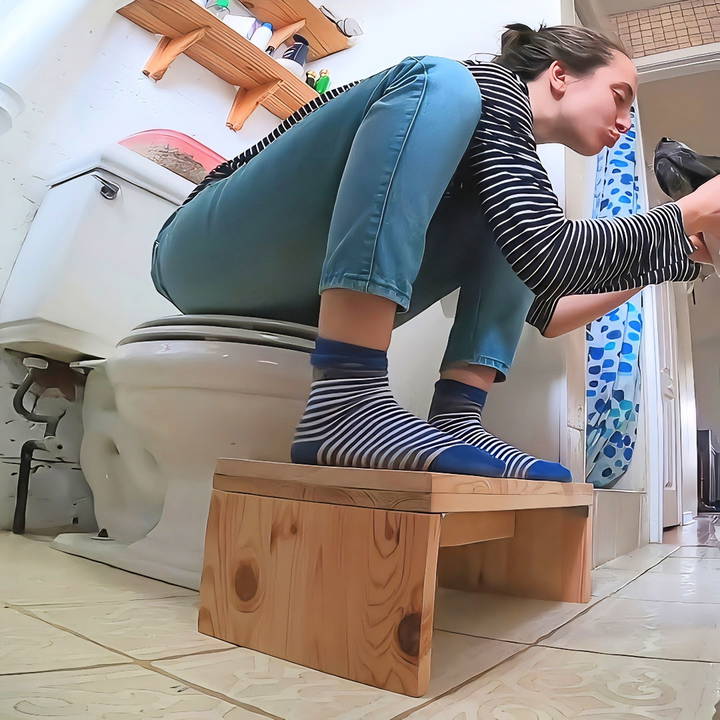
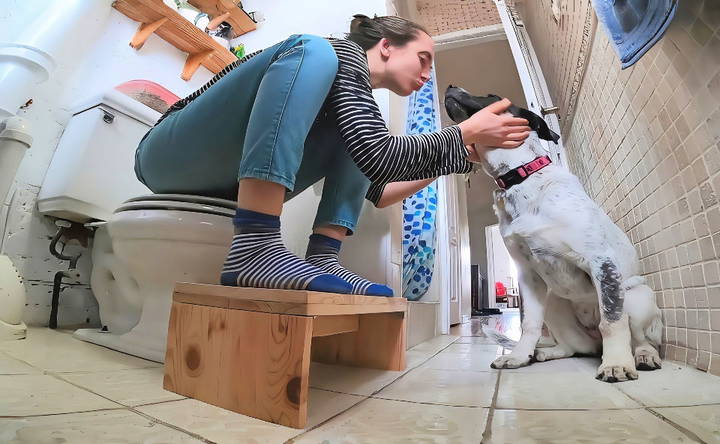
Building my own DIY squatty potty was a straightforward and rewarding project. I used simple materials like wood and a few basic tools. The process was easy to follow and finished in just a day. By raising my feet when using the bathroom, I immediately noticed a huge improvement in comfort and ease.

Making a wooden squatty potty saved me money and offered a natural way to support my health. The design promotes healthier bowel movements, and I felt relief almost instantly. I encourage you to give it a try; you'll be amazed at the benefits. This guide aims to help you make your own with ease and enjoy its great health perks.
I'm very excited to share this easy DIY project with you. It can really make a positive difference. Let's get started and make your own DIY squatty potty today!
Materials Required
Here's what you'll need to undertake this project:
- Wood: I repurposed wood from a free coffee table. It's eco-friendly and cost-effective.
- Sandpaper: To smooth out the wood surfaces.
- Continuous Hinge: Essential for the collapsible feature.
- Saw: For cutting the wood to the desired measurements.
- Screw, Nails, and Drill: For assembling parts together.
- Measuring Tape and Pencil: Precision is key, so measure twice and cut once.
- Rotary Tool (Optional): For sanding down finer details like the finger hole.
Step by Step Instructions
Learn how to build a DIY squatty potty with step-by-step instructions, from measuring and cutting wood to final assembly with a continuous hinge.
Measure and Cut the Wood
The first step involved deciding on dimensions. After some deliberation and foot-measuring, I settled on 18 by 10 inches for the top part, with a height of 8 inches off the ground. Accurate measuring and cutting are paramount here.
Sanding
Nobody likes splinters, so sanding the wood to a smooth finish was crucial. I focused on the surfaces that would be most in contact with hands and feet.
Assembling
The collapsible aspect was tricky but essential due to the limited space in our bathroom. Using a continuous hinge for the sides allowed the stool to fold neatly - a tidiness hack for small spaces.
Pocket Cutting
A middle piece would fold into a pocket when the stool was not in use. Precision in cutting the pocket ensured the middle piece folded neatly and didn't wobble.
Safety and Comfort Enhancements
I added a finger hole for easier manipulation of the collapsible mechanism and rounded the edges to avoid any accidental scrapes or bruises.
Final Assembly with Continuous Hinge
Cutting the hinge to the exact required length with tin snips, I made sure the folding mechanism worked seamlessly.
This project taught me patience, precision, and gave me an immense sense of accomplishment. Presenting the finished squatty potty to my partner, who was ecstatic at the sight (perhaps more than when I proposed, if memory serves me right), was the icing on the cake.
We placed it in our tiny bathroom, and true to design, it collapsed neatly away when not in use. Though I opted not to apply a finish for time's sake, I plan to add a protective layer to safeguard the wood from moisture later.
Customization Tips for Your DIY Squatty Potty
Building a DIY squatty potty not only adds a functional piece to your bathroom but also allows for personalization that can reflect your style and meet your specific needs. Here are some tips to customize your squatty potty:
Choose the Right Material
- Wood: A classic choice that offers warmth and can be painted or stained.
- Plastic: Durable and easy to clean; consider repurposing old plastic containers.
- Metal: Gives a sleek, modern look but requires some metalworking skills.
Select a Design That Suits You
- Adjustable Height: Add sections that can be stacked or removed to cater to different users.
- Foldable: Incorporate hinges to make it collapsible for easy storage.
- Decorative Shapes: Cut the platform into a shape that pleases you, like a leaf or footprint.
Pick a Color or Pattern
- Paint: Choose a color that matches your bathroom decor or go bold with a contrasting hue.
- Decals: Apply waterproof stickers for a fun and changeable look.
- Wood Stain: If using wood, select a stain that enhances its natural beauty.
Add Comfort Features
- Soft Top: Attach a cushioned mat on the top surface for extra comfort.
- Foot Grips: Use non-slip tape or rubber pads to prevent your feet from sliding.
Ensure Stability
- Rubber Feet: Fix rubber pads underneath to keep the squatty potty firmly in place.
- Weight Support: Reinforce the structure to support various weights safely.
Personal Touches
- Engravings: Carve your initials or a favorite quote into the material.
- Accessories Holder: Attach a small basket or holder for reading materials or a phone.
By following these tips, you can build a squatty potty that is not only functional but also a reflection of your personality and style.

Safety Precautions
When making your DIY squatty potty, safety is paramount. Here are some key precautions to ensure your project is completed without injury:
Work Area
- Keep it Clean: Make sure your workspace is tidy and free of clutter to avoid trips and falls.
- Good Lighting: Ensure you have bright, clear lighting to see what you're doing.
Tools and Materials
- Handle with Care: Always use tools according to their instructions and wear protective gear when necessary.
- Quality Check: Inspect materials for defects before use to prevent structural failures.
Construction Safety
- Stable Surface: Build on a flat, stable surface to prevent the squatty potty from tipping over.
- Secure Fastening: Double-check that all screws and joints are tight to ensure the structure is secure.
Chemical Safety
- Ventilation: If you're painting or sealing wood, work in a well-ventilated area to avoid inhaling fumes.
- Proper Storage: Store glues, paints, and other chemicals away from heat sources and out of reach of children.
Final Product
- Non-Slip Surface: Add a non-slip surface to the top of the squatty potty to prevent feet from slipping.
- Weight Testing: Test the squatty potty with a heavier weight than it will normally support to ensure it's safe for use.
By following these safety precautions, you can enjoy crafting your DIY squatty potty while keeping yourself and others safe.
FAQs About DIY Squatty Potty
Discover answers to frequently asked questions about DIY squatty potty. Learn how to build and use your own for better bathroom comfort.
A DIY squatty potty is a homemade stool designed to mimic the natural squatting position while using the toilet. It helps align the colon for easier and more complete elimination.
Using a squatty potty can lead to a more comfortable and efficient bathroom experience. It positions your body in a way that is said to be more natural for bowel movements, potentially reducing strain and the time spent on the toilet.
You can build a squatty potty using simple materials like wood or plastic. The key is to ensure that the stool raises your knees above your hips to achieve the desired squatting position. There are many tutorials online that offer step-by-step instructions.
Yes, you can design your squatty potty to be adjustable. This allows you to find the most comfortable height and angle for your body's needs. Some designs include hinges or sliding parts for this purpose.
No, making your own squatty potty can be quite cost-effective. You can repurpose materials like pallet wood or purchase inexpensive items to construct it. The overall cost will depend on the complexity of the design and the materials you choose.
Closing Thoughts
Wrapping up, making your own DIY squatty potty can be a rewarding project that promotes a natural and healthy way to go. Using a wooden squatty potty not only benefits your posture but also adds a rustic charm to your bathroom. Start your DIY journey today and enjoy the health benefits.


