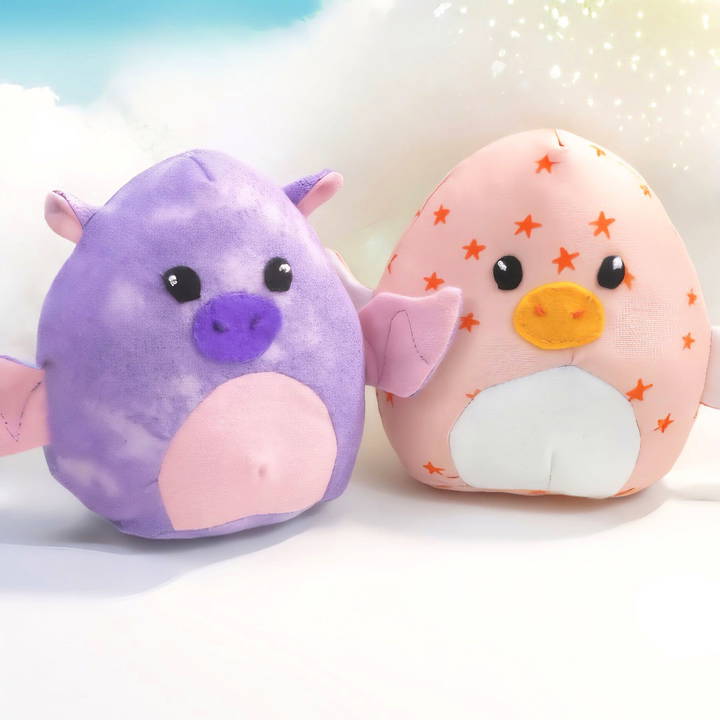
Making your own DIY squishmallow is a fun and creative project that can be tailored to your personality and preferences. Through my experience, I've learned that you don't need to be a professional to make something cute and satisfying. Here, I’ll guide you through the process of making a squishy plush from start to finish, using simple hand sewing techniques and basic materials. Let's dive into the steps!
Materials You'll Need
Gathering your materials is the first step, and it's essential to get everything you need before starting. Here’s what you’ll need:
- Fabrics: The most important material is the fabric for your plush. I suggest soft materials like velvet or spandex for the main body. You can also mix and match fabrics for different parts like the tummy, wings, and ears.
- Thread: You'll need a spool of thread that matches your fabric. Use strong thread if you're hand sewing to ensure your stitches hold.
- Needle: A double-threaded needle will help secure your stitches and make the project durable.
- Scissors: It's crucial to use separate scissors for cutting paper and fabric. Fabric scissors must remain sharp to give you clean cuts.
- Pins and Clips: These help hold your fabric in place while you sew.
- Pattern Pieces: Download and print a squishmallow pattern to guide you through cutting your fabric accurately.
- Stuffing (Fiberfill): This is what makes your squishy plush soft and huggable. Make sure to have enough on hand.
- Felt and Embroidery Floss: You’ll use felt for details like eyes and nose, while embroidery floss will allow you to add some extra decorative touches.
Step by Step Instructions
Learn how to make your own DIY Squishmallow with our step-by-step instructions on DIY squishmallow, from choosing fabric to adding final touches.
Step 1: Prepare Your Pattern Pieces
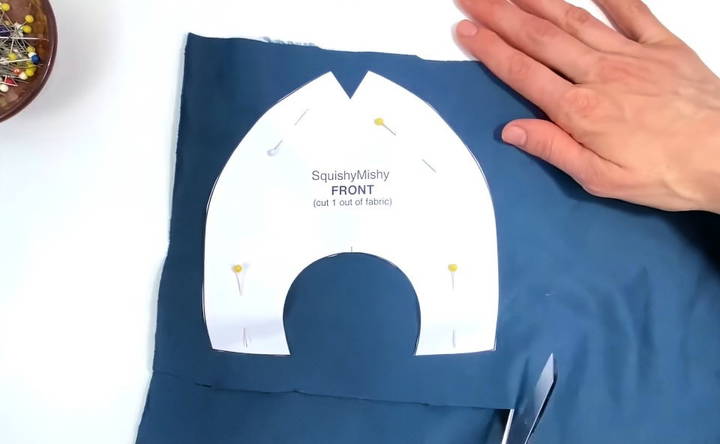
Once you have all your materials, the next step is to cut out your pattern pieces. The pattern I used was for a basic plush with a body, tummy, wings, and ears. Here’s a tip: Use paper scissors to cut out your paper pattern pieces and always reserve your fabric scissors for fabric only. Dull scissors make fabric cutting messy, so keep them sharp for the best results.
You'll need to cut out pieces for the body, wings, ears, and tummy. If your pattern includes darts (small triangles that help shape the plush), don't forget to cut those out too. Darts are important for making the plush rounded and three-dimensional.
Choosing Your Fabric
I chose a combination of blue velvet and pink spandex because I wanted a soft yet fun texture. You might find yourself debating between fabrics. In my experience, it’s always a good idea to pick materials that you love to touch. Velvet adds a luxurious softness, while spandex can give your plush a stretchy, flexible feel.
Step 2: Cut the Fabric
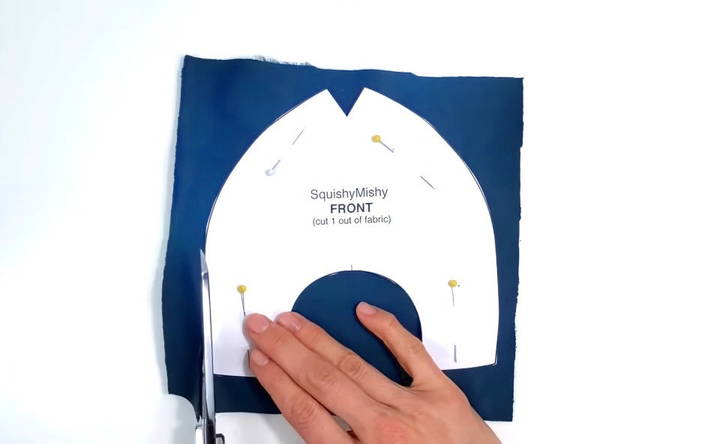
Now it's time to cut the fabric for your plush. You’ll need to pin the paper pattern pieces to your fabric, making sure to cut from the wrong side of the fabric (the back side). This ensures that your plush comes together neatly when you sew it.
Pro Tip: Cutting Two Identical Pieces
Some pieces, like the wings or body, require you to cut two mirrored pieces. A simple way to do this is to fold the fabric in half with the right sides facing each other, pin the pattern piece on top, and cut through both layers. This way, you get two pieces in one go, and they’ll be perfectly mirrored!
Step 3: Sew the Darts
Before assembling the plush, you’ll want to start by sewing the darts on each piece. Darts give the plush its round shape and make it look like a cute little squishmallow instead of a flat pillow.
To sew the darts, fold the fabric along the dart line and pin it in place. Use a double-threaded needle for strength and sew small stitches (around 5 to 6 per inch) along the dart. This gives a neat, tight seam that won’t pull apart when stuffed.
Step 4: Assemble the Body
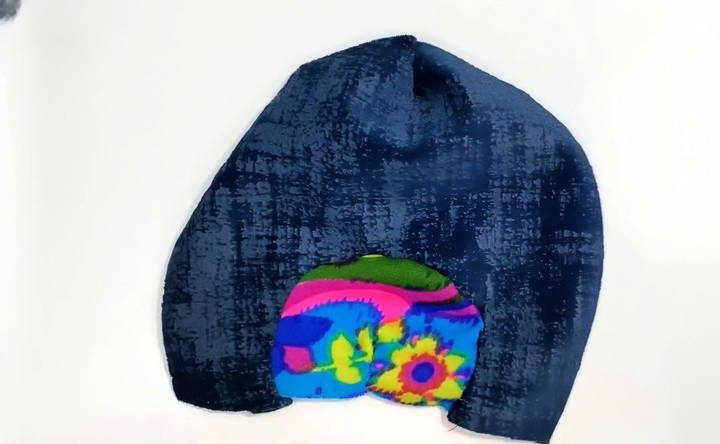
Once the darts are sewn, you’ll start assembling the main body. Lay the front piece of the plush face up, then pin the tummy fabric in place, aligning the center notch of the tummy with the center of the body. Sew this piece carefully, following the curves of the fabric.
After attaching the tummy, sew the two back pieces of the plush together along the center seam. Be sure to match up the edges and seams carefully to create a smooth, professional look.
Step 5: Add the Ears and Wings
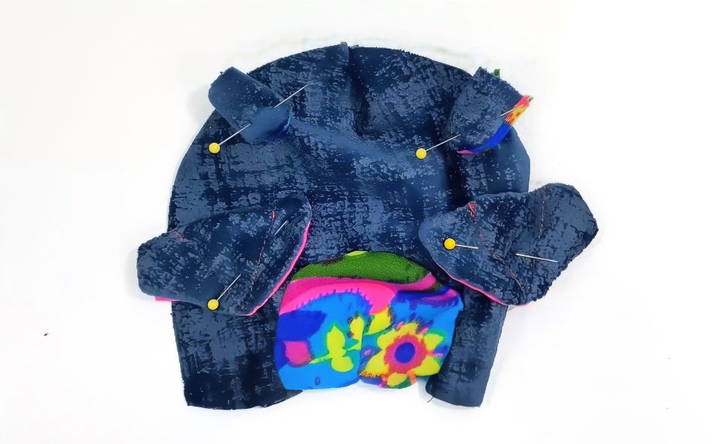
Now comes the fun part—adding the ears and wings! These pieces will make your plush unique and give it personality. You’ll need to pin them onto the front piece of the body with the right sides together. This means you pin the wings and ears facing inward, so when you turn the plush right-side out, they stick out properly.
Tip for Ears:
If you want your plush’s ears to have a little fold or curve, you can fold the fabric slightly before pinning it in place. This gives the plush an adorable, lifelike expression.
Step 6: Sew the Body Together
With the wings and ears in place, it’s time to sew the front and back of the body together. Pin everything securely, then sew around the entire perimeter, leaving an opening at the bottom. This is where you’ll stuff the plush later.
If you’re using velvet or thicker fabrics like I did, sewing can be a bit tricky. I had to sew slowly and use clips instead of pins to keep the fabric from shifting. Take your time here—this step is essential for a neat finish.
Step 7: Stuff the Plush
Now for the fun part—stuffing your plush! Use small pieces of fiberfill and stuff them into the plush a little at a time. Always start with the furthest points (like the ears or wings) and gradually fill the body.
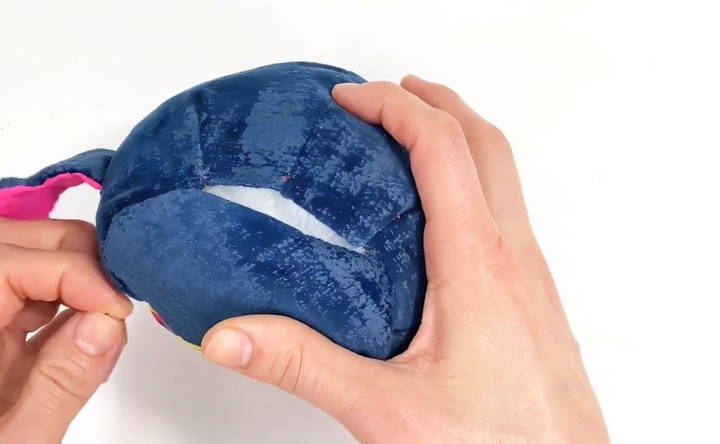
The amount of stuffing you use depends on how firm you want your plush to be. I like mine a little firmer, but you can use less stuffing for a softer, squishier feel.
Step 8: Close the Opening
After stuffing your plush to your desired squishiness, it’s time to close the opening. Use a blind stitch to sew the bottom seam closed. A blind stitch hides the thread inside the fabric, so your plush will look seamless.
Step 9: Add the Eyes and Nose
Your plush isn’t complete without its face! Cut out eyes and a nose from felt, and sew them onto the plush using small, neat stitches. You can also add a little embroidery to give the eyes more detail. For example, I used black embroidery floss to create small dots inside the eyes, which gave my plush a bit more character.
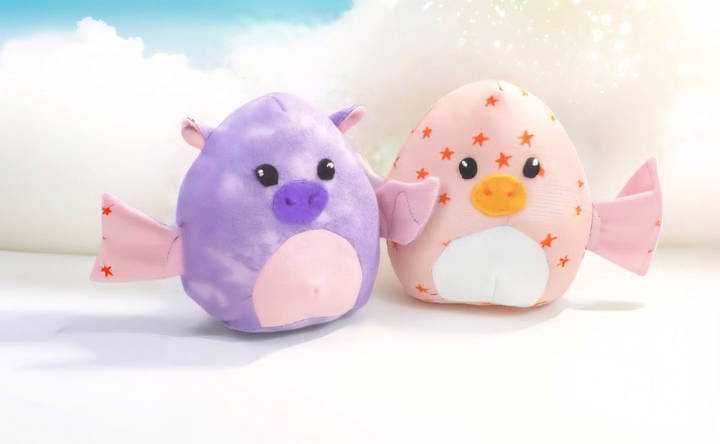
If you’re not comfortable embroidering, you can also glue on the felt pieces, but hand sewing is more durable, especially if the plush will be handled frequently.
Step 10: Final Touches
Now that everything is sewn in place, give your plush a good fluff and adjust the stuffing if necessary. If you see any lumps, use your fingers to redistribute the fiberfill.
Customization Ideas
Customizing your DIY Squishmallow can make it unique and special. Here are some easy and fun ideas to personalize your creation:
1. Personalization Tips
Add Names and Messages:
- Use fabric markers or embroidery to add names, dates, or special messages.
- This is perfect for gifts or commemorating special occasions.
Use Different Fabrics:
- Mix and match different fabrics to create a unique look.
- Consider using textured fabrics like velvet or fleece for added variety.
Embellishments:
- Add buttons, ribbons, or sequins to give your Squishmallow some sparkle.
- Be sure to securely attach any small parts if the Squishmallow is for a child.
2. Themed Squishmallows
Holiday Themes:
- Create Squishmallows for different holidays like Christmas, Halloween, or Easter.
- Use holiday-themed fabrics and colors to match the occasion.
Animal Themes:
- Design your Squishmallow to look like different animals.
- Add ears, tails, and other features to make it resemble a favorite animal.
Character Themes:
- Make Squishmallows inspired by popular characters from movies, books, or TV shows.
- Use specific colors and accessories to capture the character’s essence.
3. Creative Techniques
Fabric Painting:
- Use fabric paint to add designs, patterns, or even faces to your Squishmallow.
- This allows for a high level of customization and creativity.
Appliqué:
- Sew on additional fabric pieces to create patterns or images.
- This technique can add depth and interest to your Squishmallow.
Embroidery:
- Embroider details like eyes, mouths, or decorative patterns.
- This can give your Squishmallow a handmade and detailed look.
4. Tips for Success
Plan Your Design:
- Sketch your design before you start to ensure you have all the materials you need.
- This helps in visualizing the final product and making any adjustments beforehand.
Take Your Time:
- Customizing can be detailed work, so take your time to ensure everything is done neatly.
- Patience will result in a more polished and professional-looking Squishmallow.
Experiment:
- Don’t be afraid to try new techniques or ideas.
- Customization is all about making your Squishmallow unique, so have fun with it!
By following these customization ideas, you can create a Squishmallow that is truly one-of-a-kind.
Troubleshooting Common Issues
When making your DIY Squishmallow, you might encounter some common issues. Here are some tips to help you troubleshoot and fix them:
1. Uneven Stitching
Problem:
- Your stitches are uneven, making the Squishmallow look messy.
Solution:
- Use a sewing machine for more consistent stitches.
- If sewing by hand, take your time and make sure each stitch is the same length.
- Practice on scrap fabric to improve your technique.
2. Overstuffing
Problem:
- The Squishmallow is too firm and loses its soft, squishy feel.
Solution:
- Remove some stuffing until it feels just right.
- Distribute the stuffing evenly to avoid lumps.
- Use a softer stuffing material if needed.
3. Fabric Fraying
Problem:
- The edges of your fabric are fraying, making it hard to sew.
Solution:
- Use pinking shears to cut the fabric, which helps prevent fraying.
- Apply a fabric sealant to the edges.
- Choose fabrics that are less prone to fraying, like fleece.
4. Misaligned Pieces
Problem:
- The fabric pieces don’t line up correctly when sewing.
Solution:
- Pin the pieces together before sewing to keep them aligned.
- Double-check your pattern and cut pieces accurately.
- Sew slowly and adjust as needed to keep everything in place.
5. Loose Embellishments
Problem:
- Buttons, ribbons, or other embellishments are coming loose.
Solution:
- Sew embellishments securely with strong thread.
- Avoid using glue, as it may not hold well on fabric.
- Check and reinforce any loose parts regularly.
6. Uneven Stuffing
Problem:
- The stuffing is lumpy or uneven, affecting the shape.
Solution:
- Use small amounts of stuffing at a time and distribute it evenly.
- Massage the Squishmallow to spread the stuffing out.
- Add more stuffing gradually to avoid lumps.
7. Fabric Stretching
Problem:
- The fabric stretches out of shape while sewing.
Solution:
- Use a stabilizer or interfacing to reinforce the fabric.
- Handle the fabric gently to avoid stretching.
- Choose fabrics with less stretch for easier handling.
8. Incorrect Size
Problem:
- The finished Squishmallow is too big or too small.
Solution:
- Double-check your pattern measurements before cutting.
- Adjust the pattern size if needed to match your desired outcome.
- Make a test version with scrap fabric to ensure the size is correct.
By addressing these common issues, you can ensure your DIY Squishmallow turns out just the way you want it.
FAQs About DIY Squishmallow
Discover all you need to know with our FAQs about DIY squishmallows, from materials to techniques. Perfect for beginners and enthusiasts!
Yes, you can hand sew your Squishmallow. Use a backstitch for durability. It might take a bit longer, but it’s entirely doable.
You can personalize your Squishmallow by choosing unique fabric colors and patterns. Add embellishments like buttons, ribbons, or embroidery to give it a special touch.
Polyester fiberfill is commonly used for stuffing Squishmallows. It’s soft, and washable, and gives the plush toy its signature squishiness.
Use non-toxic materials and avoid small parts that could be a choking hazard. Make sure all embellishments are securely attached. Double-check your stitching to ensure there are no loose threads.
Yes, you can wash your Squishmallow. Use a gentle cycle with cold water and mild detergent. Air dry it to maintain its shape and softness.
Conclusion
Making a DIY squishy plush is not only fun but also gives you a one-of-a-kind creation that reflects your personality. Whether you make it for yourself or as a gift, this project allows endless customization options. By following these steps, you can confidently make your own soft, huggable plush and learn a few new sewing techniques along the way.


