Hey there! Like many families, we found ourselves cooped up at home during quarantine and needed a fun and creative way to keep the kids entertained. My husband, Jorge, came up with this brilliant idea inspired by something we'd seen online: a DIY stair slide for the kids to play on. He went all out, even adding lights to it and making it extra special.
I'm excited to share with you step-by-step how we made this amazing stairs slide. If you're looking for a fun project, stick around and let me guide you through the process!
Materials Needed
Before we start, let's gather all the materials. Each item plays an essential role in making a fun and safe slide for your kids.
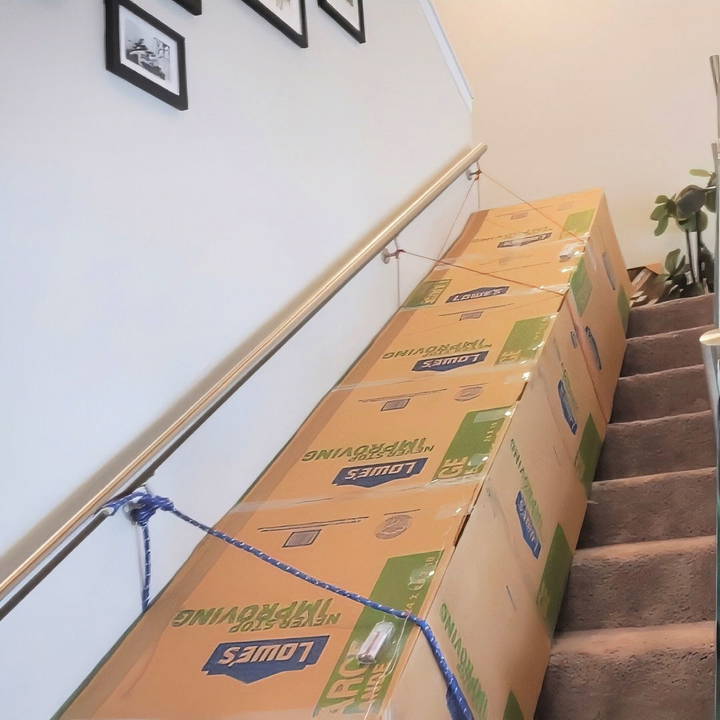
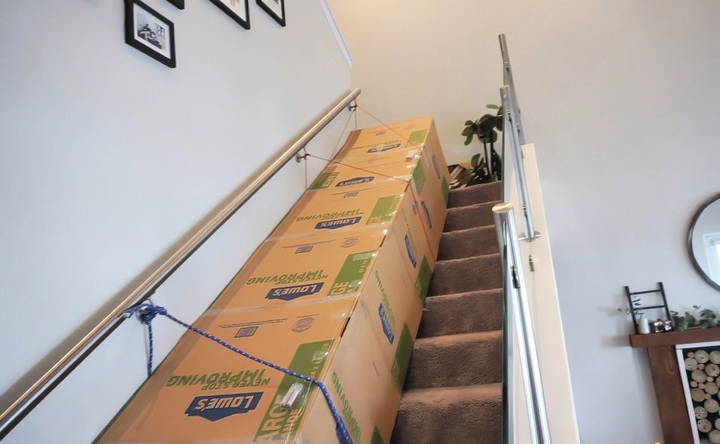
- Large Cardboard Boxes: We used Lowe's large boxes which cost around $1.80 each. We bought ten of them. The cardboard will build the slide's surface.
- Clear Tape: Essential for taping the boxes together securely.
- Thin Rope: Useful for securing the slide to the stairs banister.
- Battery-Powered Twinkle Lights (Optional): For added fun and to give the slide an extra magical touch.
Step by Step Instructions
Learn how to make a fun and safe DIY stair slide with our step-by-step guide, from measuring and cutting to securing and testing. Perfect for kids!
Step 1: Preparation
Learn how to prepare, measure, and accurately cut boxes with our comprehensive guide on preparation, measuring, and planning.
Measuring and Planning
First, you need to measure your stairs to determine how many boxes you'll need. We bought ten large boxes, and that was perfect for our slide. Make sure the boxes are large enough to cover the width of the stairs and long enough to build a decent slide length from the top to the bottom.
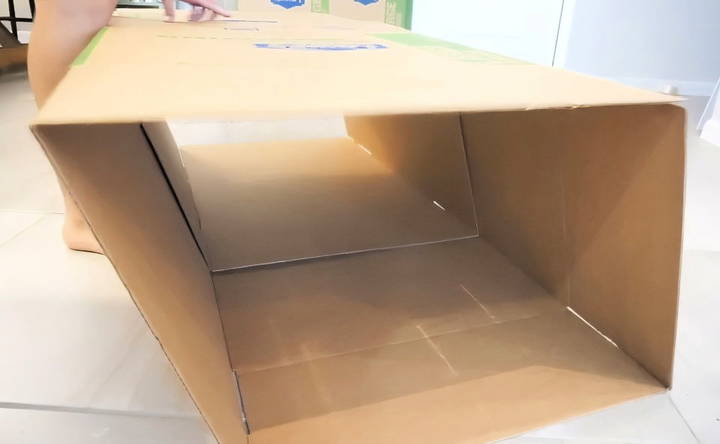
Cutting the Boxes
Open up the boxes and cut them so they lay flat. Each flattened box will form part of the sliding surface.
Step 2: Building the Slide
Learn the steps to build a slide, from taping boxes together to securing the slide, ensuring a fun and safe play experience.
Taping the Boxes Together
Lay the boxes out in a line, with each box slightly overlapping the one before it. Use the clear tape to secure the boxes together. Be generous with the tape to ensure that they don't come apart. Make sure the surface is smooth. Each taped section should be flat to avoid any bumps that could disrupt the slide.
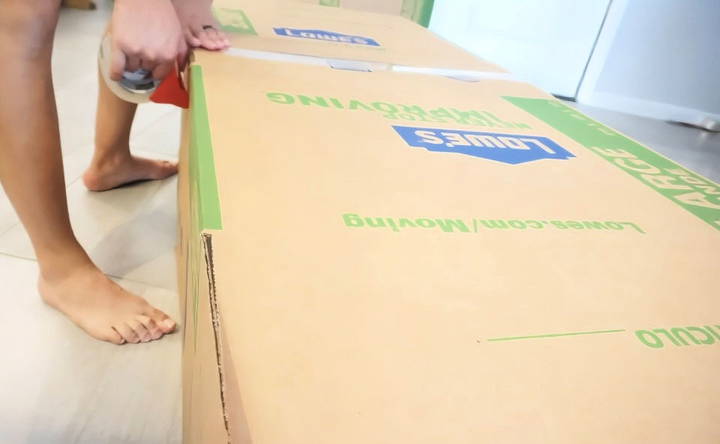
Securing the Slide
Position the slide on the stairs. We used thin rope to tie the top of the slide to the stair banister for extra security. This prevents the slide from moving as the kids go down.
Step 3: Adding Lights (Optional but Fun!)
Jorge decided to add some twinkle lights to make the slide more fun. Here's how we did it:
- Drill Small Holes: Drill small holes at regular intervals along the sides of the cardboard slide.
- Insert Lights: Insert a light in each hole and secure them with tape on the underside of the slide.
- Battery Packs: Attach the battery packs of the twinkle lights to the side of the slide where they are easily accessible.
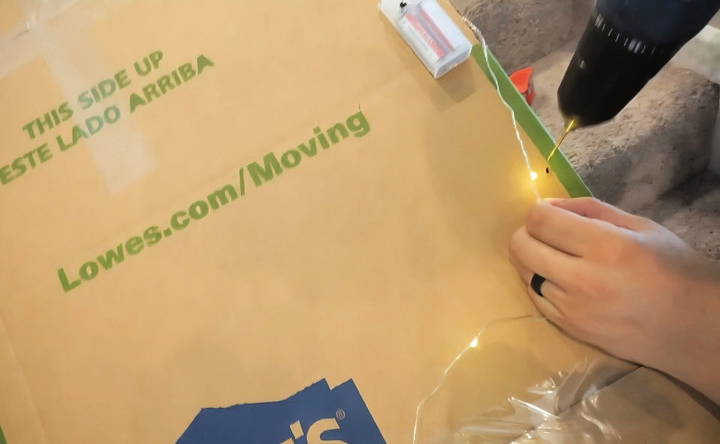
The lights added a magical touch and the kids absolutely loved it!
Step 4: Test the Slide
Before letting the kids loose on the slide, it's crucial to test it yourself to ensure it's safe and secure.
Safety First
I tested the slide myself to see if there were any unstable parts or potential hazards. Once I confirmed it was safe, it was time for the kids to enjoy!
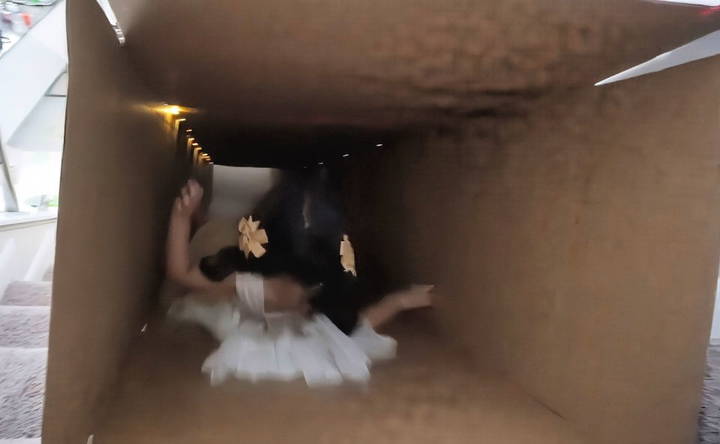
Step 5: The Kids' Turn
We told our girls to wait upstairs because it was a surprise. They were so excited when they saw the finished slide.
Lights Off
Jorge turned off the lights in the hall and turned on the twinkle lights. It buildd an enchanting atmosphere that made the slide even more exciting.
First Slide
“Leigha, you can come down now!” I called out. She was the first brave soul to try the slide, and her giggles as she slid down filled the entire house with joy. We took turns going down the slide, and the kids couldn't get enough of it.
Maintenance and Safety Tips
To ensure the slide remains safe and fun:
- Regular Checks: Regularly check the slide for any damage or wear and tear.
- Supervision: Always supervise children while they are using the slide.
- Reinforce Tape: Over time, you may need to reinforce the tape as it could come loose.
FAQs About DIY Stair Slide
Discover essential FAQs about DIY stair slides. Learn safety tips, installation steps, and materials needed for a fun and safe stair slide project.
Safety first! Always supervise children when using the slide and ensure they are using it properly, sliding feet first and one at a time. Add extra padding at the bottom of the stairs for a soft landing. If the slide is too steep or fast, adjust the angle or add more friction.
Carpeted stairs can be tricky for a slide. You'll need to create a smooth, slippery surface. Consider using a long sheet of plastic or a roll of vinyl flooring over the carpet. Ensure it's securely fastened to prevent slipping and bunching.
Yes, you can! Outdoor slides can be made from various materials like wood, metal, or even inflatable options. Just make sure to choose weather-resistant materials and secure the slide firmly to prevent accidents. Consider adding a water feature for extra fun!
Cleaning depends on the materials used. Cardboard and foam can be wiped down with a damp cloth. Inflatable slides can be washed with soap and water. For permanent installations, follow the manufacturer's cleaning instructions. Regularly check for any wear and tear and repair or replace parts as needed.
Get creative! You can add tunnels, curves, or even a small pool at the bottom for a splash landing. Decorate the slide with colorful paint or stickers. Just remember to prioritize safety and ensure any additions don't build hazards.
Conclusion
Building this DIY stairs slide was a fantastic way to beat quarantine boredom and provided endless entertainment for our kids. It was a simple project that brought smiles and laughter into our home. I hope this guide inspires you to build your own fun slide. If you do, I'd love to hear about your experience!


