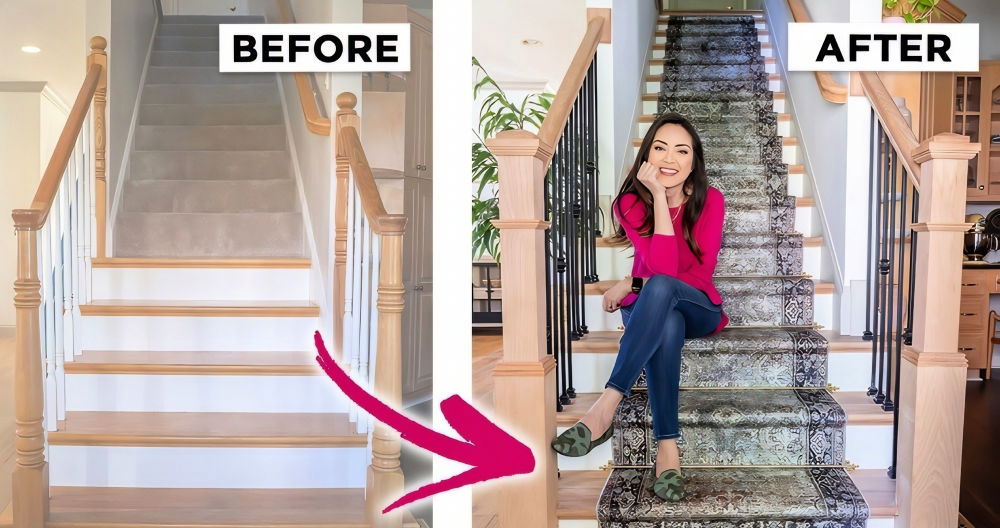
Revitalizing my staircase gave my home a new life. I always thought renovating stairs would be challenging, but I discovered that making my own DIY stair treads was both simple and rewarding. I learned how to build custom stair treads that not only look stylish but are also durable. With a few basic tools and materials, I transformed my stair landing into a focal point of my home.
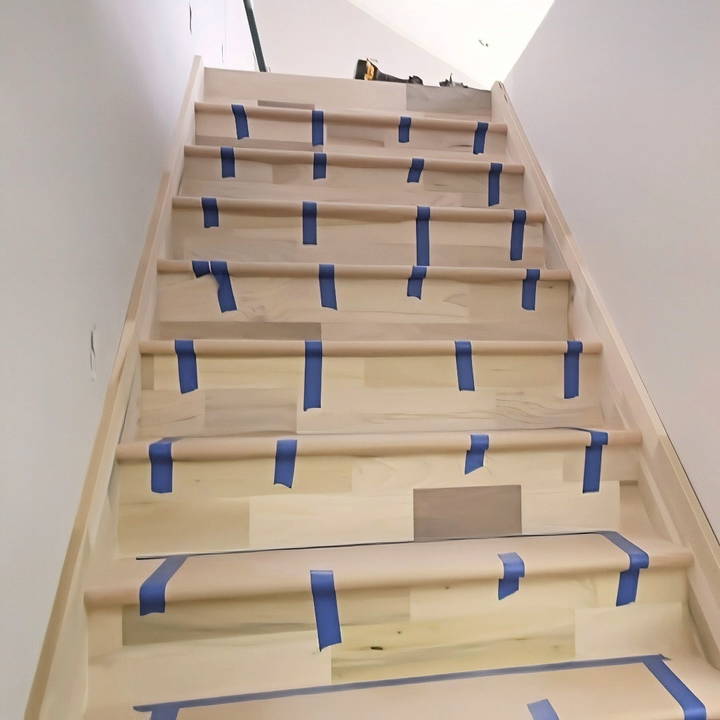
After completing this project, I realized that anyone can upgrade their stairs without hiring a professional. The process of making stair treads is straightforward, and it adds a personal touch to your home. Not only did I save money, but I also gained new DIY skills along the way.
I invite you to join me as I guide you through the steps on how to make stair treads. With my tips, you'll be able to give your stair landing a stylish upgrade that will make a real difference in your home.
Materials You'll Need
- Stair Tread Gauges: Essential for precise measurements.
- Festool HKC Track Saw: Ensures clean and accurate cuts.
- Utility Knife: For sharp and precise marking.
- PL Premium Adhesive: A strong adhesive for securing risers and treads.
- Gauge Block: To ensure consistent spacing.
- GRK Screws: For securing the framing to the skirting board.
- Pocket Hole Screws: To secure the tread from the backside.
- Protective Paper: To keep the new treads clean during installation.
- Pry Bar: Useful for adjustments and fitting.
Using the right materials ensures that the job is easier and the final result is professional and durable.
Step by Step Instructions
Learn how to install DIY stair treads with our step-by-step guide. From prepping to finishing touches, transform your stairs easily and affordably!
Step 1: Preparing the Treads and Risers
The first step involves preparing your treads and risers. It's essential to ensure that each piece is correctly cut and beveled.
Measuring for the Riser
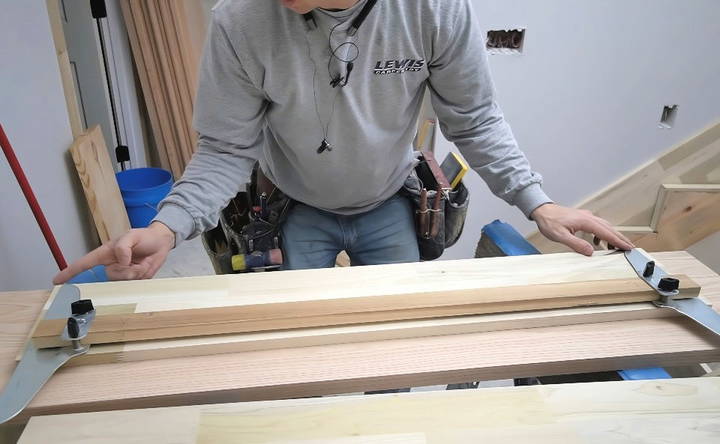
- Use the Stair Tread Gauges: Loosen the wing nuts and position the gauges tightly on both sides of the staircase.
- Mark the Gauges: Use a pencil to mark the right and left sides, so you don't mix them up.
- Build a Template: Once satisfied with the alignment, carefully remove the gauges and place them on the riser material.
- Mark with a Utility Knife: Use a utility knife instead of a pencil for a sharper and more accurate line.
Cutting the Riser
- Set Your Saw to 5 Degrees: To ensure a tight fit, set your track saw to a 5-degree bevel.
- Align and Cut: Align the splinter guard on the pencil line and make your cuts.
Step 2: Installing the Riser
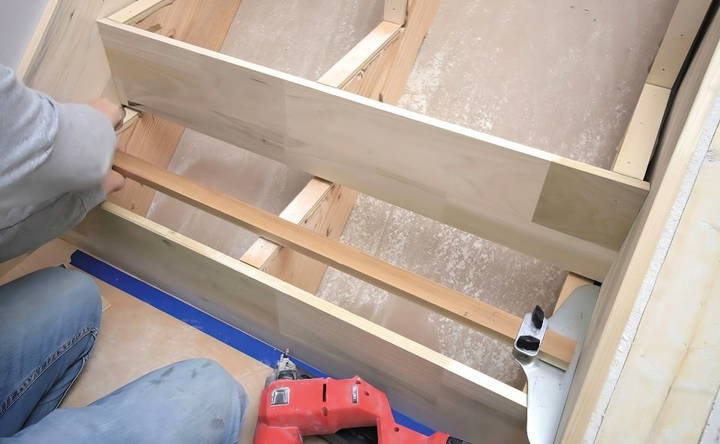
- Apply PL Premium Adhesive: Apply a generous amount of adhesive on the riser, especially on the ends where the 5-degree bevel will help secure it to the skirt board.
- Insert the Riser: Place one end in and rock it into place. The bevel will make this easier.
- Secure the Riser with Nails: Use a gauge block to ensure the riser is slightly higher than the tread and then nail it at the top.
- Check for Straightness: Ensure that the riser is aligned correctly. If your stringers are not perfectly in plane, adjust as necessary using a tap and fill any gaps with adhesive.
Step 3: Measuring for the Tread
- Use the Same Gauges: Loosen the gauges just enough to get a tight fit on the ends.
- Align with the Riser: Ensure that the back edge of your tread gauge is aligned with the front edge of the riser.
- Mark with a Utility Knife: Once again, use a utility knife to mark your cut lines.
- Set the Saw to Zero or Five Degrees: Depending on the cut needed, adjust your saw. For this step, a one-degree bevel might also be required.
- Cut the Tread: Make your cut, ensuring you remember to move back to five degrees for certain areas to help the tread fit snugly.
Step 4: Installing the Tread
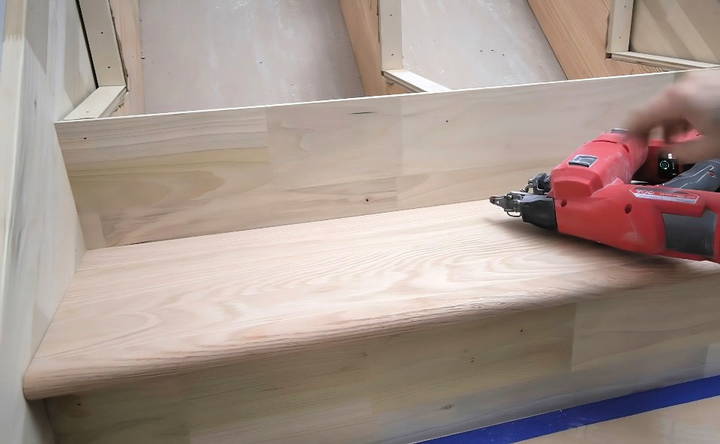
- Prevent Skirt Board Gaps: Use a GRK screw through the framing stringer into the skirt board to close any gaps.
- Apply Adhesive to the Tread: Place a bead of PL Premium along the back and ends.
- Fit the Tread: Carefully fit the tread into place, ensuring it fits snugly and there are no gaps.
- Secure the Tread with Nails and Screws: Nail along the front edge and use pocket hole screws from the back side of the riser to pull everything together tightly.
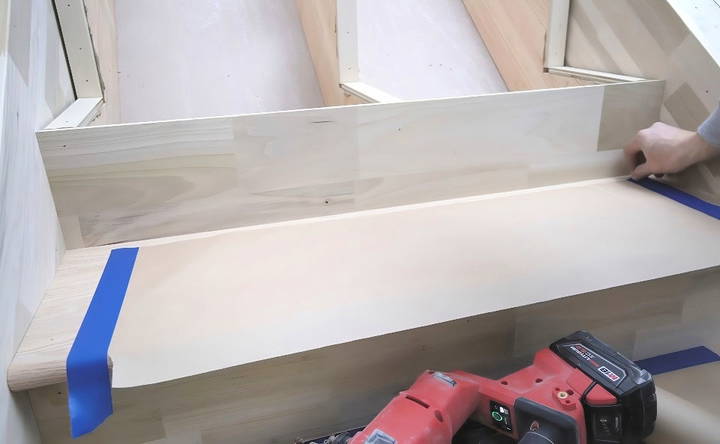
Step 5: Protect Each Tread
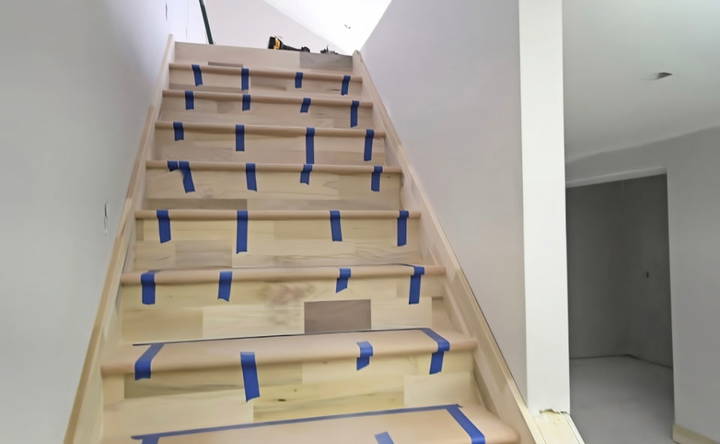
Immediately after installing each tread, unroll some protective paper over it. This simple step saves you time and effort by preventing adhesive from getting tracked onto the newly installed treads.
Step 6: Finishing Touches
For the final tread, apply plenty of PL Premium behind the riser and use a pry bar to ensure it's pulling in tightly. Even though you cannot screw this from the back, the adhesive will bond it securely.
Troubleshooting Common Issues with DIY Stair Treads
When embarking on a DIY stair tread project, you might encounter a few hiccups along the way. Here's a helpful guide to troubleshooting common issues and ensuring your stair treads are both safe and beautiful.
Stair Treads Are Slipping
- Solution: Ensure that each tread is securely attached to the stair. Use adhesive and fasteners appropriate for your tread material. For wooden treads, wood glue and finishing nails can provide extra stability.
Gaps Between Treads and Risers
- Solution: Measure the space accurately before cutting your threads. If gaps occur, wood filler can be used for wooden stairs. For larger gaps, it may be necessary to re-cut the tread for a snug fit.
Uneven Tread Surfaces
- Solution: An uneven surface can be a tripping hazard. Use a level to check the treads after installation. Sand down any high spots on wooden treads, and for other materials, ensure they are laid flat and even.
Treads Are Not Level
- Solution: Remove the tread and check for debris or imperfections on the stair where the tread sits. Make adjustments as necessary and reinstall the tread, checking with a level before finalizing the placement.
Wear and Tear Over Time
- Solution: Choose durable materials and finishes to extend the life of your stair treads. Regular maintenance, such as cleaning and applying a fresh finish, can prevent wear and tear.
Squeaky Stairs
- Solution: Squeaks are often caused by movement between the tread and the underlying stair. Tighten any loose fasteners and add adhesive where needed to reduce movement and noise.
Difficulty Matching Existing Decor
- Solution: Take a sample of your flooring or a photo of the area to the store when selecting materials. This will help you find the best match for your existing decor.
Patience and precision are key to a successful DIY project. If you're unsure about any step, it's always best to consult with a professional. Safety should always be your top priority.
Safety Considerations for DIY Stair Treads
When it comes to DIY stair tread projects, safety is paramount. Here's a comprehensive guide to ensure your stair treads are not only attractive but also secure and compliant with safety standards.
Choose the Right Material
Select materials that are durable and have a non-slip surface to prevent falls. Materials like rubber and textured wood are excellent choices for high traction.
Correct Measurements
Accurate measurements are crucial. An improperly sized tread can lead to trips and falls. Use a reliable measuring tape and double-check your numbers.
Secure Attachment
Stair treads must be firmly attached to the stairs. Use adhesives designed for the material of your treads and stairs, and consider additional fasteners for extra security.
Visibility
Ensure each step is visually distinct to help prevent missteps. Use contrasting colors or materials to clearly define the edge of each tread.
Building Codes
Familiarize yourself with local building codes and regulations. These codes are in place to ensure the safety and accessibility of your stairs.
Handrails and Balusters
Check that handrails and balusters are stable and at the correct height. They should be able to support someone if they stumble.
Regular Inspection
Inspect your stair treads regularly for wear and tear. Look for signs of loose treads, worn materials, or other hazards.
Professional Advice
If you're unsure about any aspect of your DIY project, seek professional advice. A small consultation fee can prevent costly mistakes and accidents.
By following these safety considerations, you'll build a set of stair treads that are not only beautiful but also provide peace of mind, knowing they're built with safety in mind.
FAQs About DIY Stair Treads
Discover essential FAQs about DIY stair treads, covering installation tips, materials, and safety to enhance your home improvement knowledge.
Measure the width and depth of each step to determine the size of your treads. Use a saw to cut the wood to size, ensuring each piece fits snugly. If you’re adding nosing, measure and cut it to extend slightly over the edge of the tread.
Yes, you can install wood treads and risers over old steps. Remove any old coverings to expose the base layer, then attach the new treads using construction adhesive and secure them with screws. Staining and finishing the wood before installation is recommended.
To keep wooden stair treads looking their best, regular cleaning with a soft cloth and wood-safe cleaner is essential. For carpet treads, vacuum regularly and spot clean as needed. Reapply finish or sealant to wooden treads every few years to protect them from wear.
Safety is paramount when installing stair treads. Ensure that all treads are securely attached and that the surface is non-slip. If you opt for wood, consider adding a grip tape or anti-slip coating. Always follow local building codes and regulations.
To ensure your stair treads are level, use a spirit level when placing each tread. For proper alignment, mark a consistent distance from the front edge of the step to where the tread will sit. It's also helpful to use a template made from cardboard or thin wood as a guide for cutting and placing all treads uniformly.
Conclusion
Completing this DIY stair treads project was truly rewarding. Seeing the transformation of my staircase every day brings me joy. I hope my experience inspires you to take on your own stair upgrade. Remember, with some effort and creativity, you can make a big impact on your home's look and feel.


