When I first got into working with concrete as a hobby, one of the most practical projects I discovered was making my own DIY stepping-stone molds. This simple yet useful project allows you to make the most out of leftover concrete or mortar. Instead of tossing that small blob at the bottom of your bucket, you can build beautiful, durable stepping stones for your garden or walkway. It's a great way to avoid waste and make something functional at the same time.
I'm here to walk you through how I buildd my own stepping stone molds, sharing the lessons I learned along the way to make your process smoother. So, let's dive into this fun and simple project!
Choosing the Right Mold Material
Before we get started, let's talk about the materials. There are several options when it comes to making a mold. The easiest and cheapest is using scrap wood—something you might already have lying around in your garage.
Wood Molds: Practical but Short-Lived
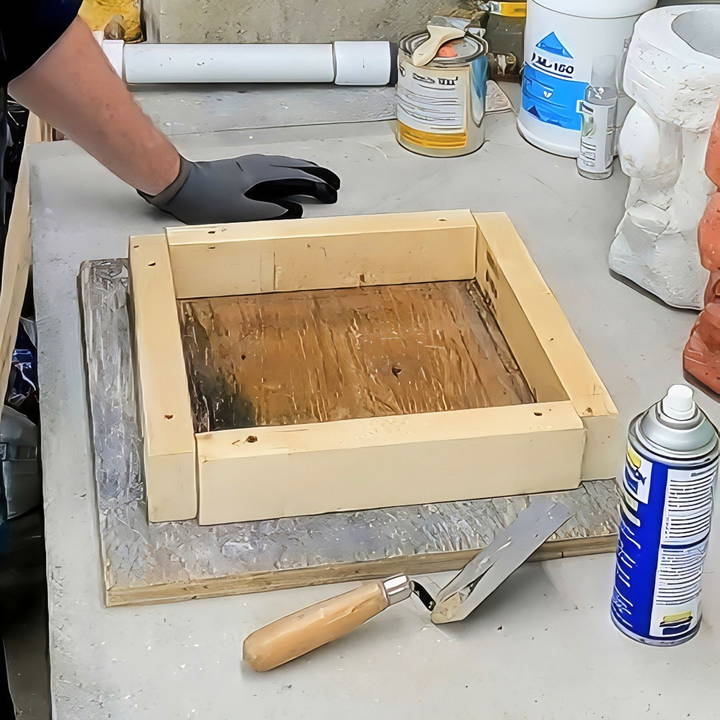
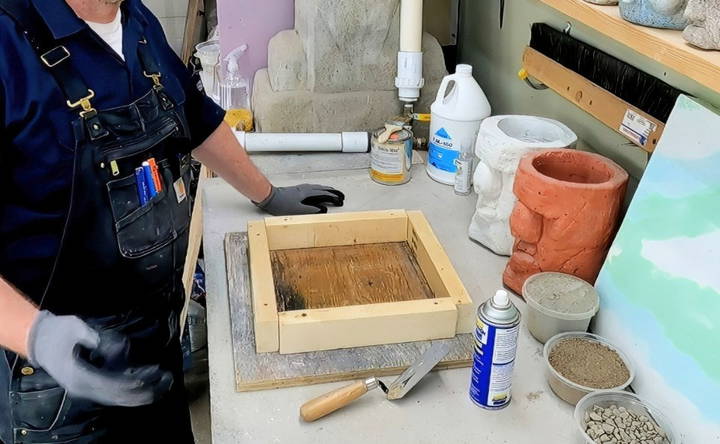
For my project, I used 2x3 wood to build a 12x12-inch mold. It's thick enough for a solid stepping stone, but if you want something thinner, you can go with a 1½-inch thickness. Keep in mind that if you're using a lightweight concrete mix, a thicker mold will help prevent cracking.
Now, the downside of using wood is that it's porous. It tends to absorb water from the concrete, which can cause warping and decrease the mold's lifespan. If you're planning on using the mold multiple times, this is something to consider. After casting a few stones, I noticed my mold wasn't producing consistent results because the wood had started to absorb too much moisture.
Protecting the Wood for Longevity
I didn't want to go through the hassle of building a new mold every time, so I found some ways to extend the life of my wooden molds. Here are some methods that worked well for me:
- Wax Paste: This is one of the cheapest and most effective ways to protect wood. I applied a generous amount of wax paste with a brush, ensuring it covered all the surfaces of the mold. This buildd a skin-like barrier that helped prevent water from seeping into the wood.
- Silicone Coating: If you want your mold to last even longer, consider applying 100% silicone caulking to the inside of the mold. I mixed the silicone with cornstarch to speed up the curing process and applied it in a thin layer. This added a more durable protective barrier, allowing me to reuse the mold multiple times.
Step by Step Instructions
Learn how to make DIY stepping stone molds with step-by-step instructions, from choosing materials to pouring concrete and finishing techniques.
Crafting the Mold
Now that you have your materials ready let's start building the mold. Here's how I made mine:
- Cut the Wood to Size: I cut four pieces of wood—two 12 inches and two 14 inches long. The extra length on the sides makes it easier to remove the stepping stone from the mold later on.
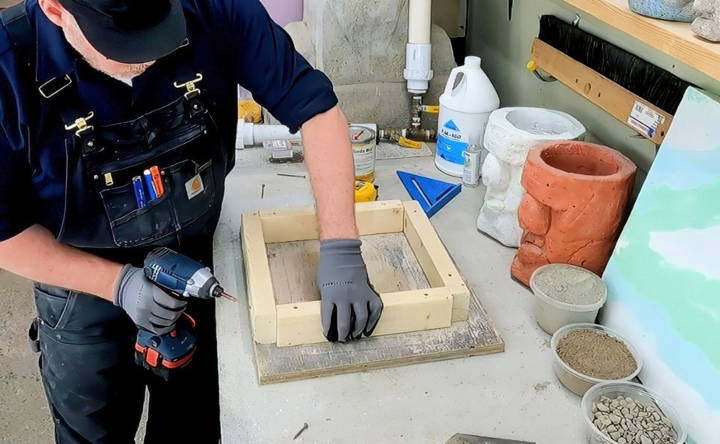
- Assemble the Mold: Using screws, I fastened the wood pieces together to form a box. I made sure everything was lined up straight by using a factory edge from the plywood base. This ensures your stones are square and consistent in size.
- Seal the Wood: After assembling the mold, I applied the wax paste to all the wooden surfaces. This step is crucial, especially if you're planning to use the mold more than once.
- Optional: Add a Release Agent: To make the demolding process easier, I sprayed the inside of the mold with a release agent. While I used a commercial product that's a bit pricey, you can also make a homemade release agent. I've found a simple mix of vegetable oil and water works well in a pinch.
Mixing the Concrete
Now for the fun part: mixing the concrete. I used a 3:1 ratio of sand to Portland cement, which gives you a strong mix suitable for stepping stones. For this project, I experimented with white Portland cement and white silica sand, but you can use regular concrete if you prefer.
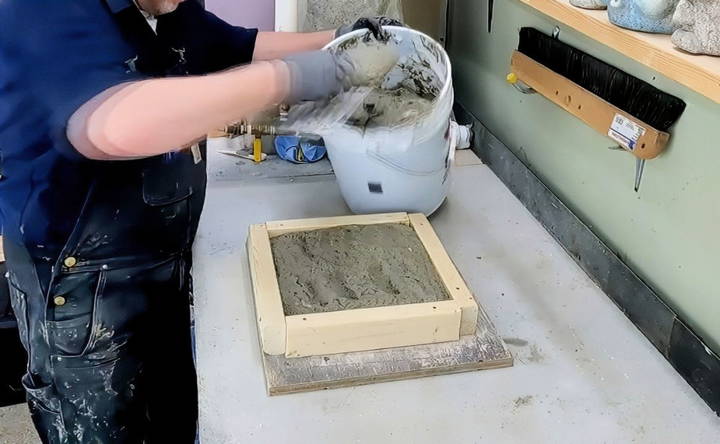
I like to mix the concrete to a consistency similar to that of pancake batter. Not too watery, but just enough to pour and settle into the mold. If you're using coarse sand like I did, don't worry if the surface doesn't come out perfectly smooth. In fact, a rougher texture is better for stepping stones as it provides more grip and reduces the risk of slipping.
Pouring the Concrete
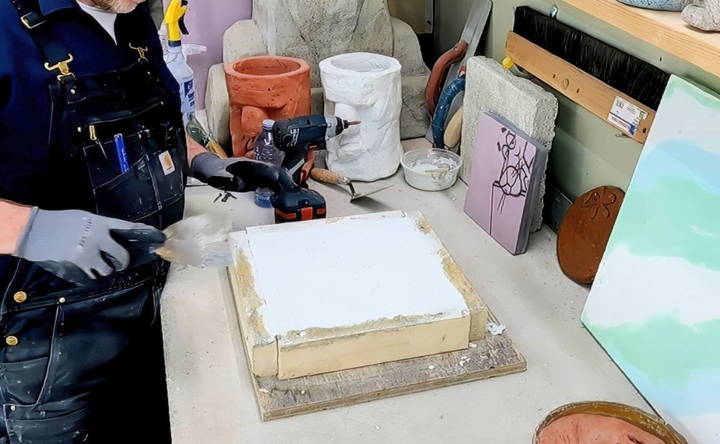
When you pour the concrete, make sure to tap the sides of the mold gently to release any air bubbles. Air pockets can weaken the final product, so it's important to remove them before the concrete sets. After pouring, I used a trowel to smooth out the surface. If you're not aiming for a smooth finish, a wet broom dragged across the surface can build a nice texture.
Finishing Techniques
For one of my stepping stones, I used a sponge to build a textured finish. This method adds traction, which is ideal for outdoor use. If you prefer a smoother finish, you can go over the surface with a wet trowel once the concrete starts to set.
Demolding and Curing
Now, patience is key! You'll want to let the concrete cure for at least 24 to 48 hours before attempting to demold. Depending on the weather and the type of cement you used, it might take a bit longer.
When it's time to demold, carefully remove the sides of the mold. If you used a release agent, this step should be fairly easy. After demolding, I like to scrape the surface lightly with a straight edge to remove any loose sand or imperfections.
Let the stepping stone cure fully for another few days before using it. The longer it cures, the stronger it becomes.
Creative Variations
One of the things I love about making these stepping stones is the endless customization possibilities. You can:
- Add Color: Mix in some latex paint with your concrete to build colorful stepping stones. I experimented with a few shades of green and brown, which gave my stones a natural, earthy look.
- Use Texture Skins: I used a polyurethane texture skin to give one of my stones a granite-like finish. You can buy these texture skins from specialty concrete suppliers or make your own using silicone.
- Change Thickness: Depending on your project, you might want thicker or thinner stones. For a tabletop project, I used high-density foam to adjust the thickness of the concrete in my mold.
Creative Ideas and Customizations
Making your own stepping stones allows you to add a personal touch to your garden. Here are some creative ideas and customizations to make your stepping stones unique and beautiful.
Personalized Designs
Personalizing your stepping stones can make them special. You can:
- Add Names or Dates: Use letter stamps or carve names and dates into the wet concrete. This is great for commemorating special occasions like birthdays or anniversaries.
- Handprints or Footprints: Press your hand or foot into the wet concrete to build a lasting impression. This is a fun activity for kids and makes a memorable keepsake.
Embedding Objects
Embedding objects into your stepping stones can add texture and color. Consider:
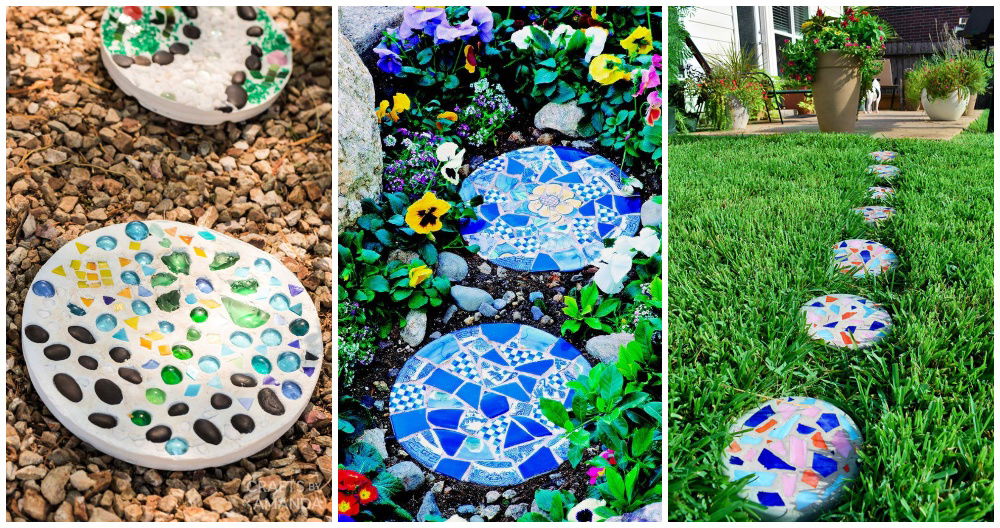
- Colorful Tiles or Glass Beads: Arrange tiles or beads in patterns or random designs. They catch the light and add a splash of color.
- Natural Elements: Press leaves, flowers, or shells into the concrete. These items can build beautiful, nature-inspired designs.
Mosaic Patterns
Making mosaic patterns is a wonderful way to add intricate designs to your stepping stones. You can:
- Use Broken Ceramics: Arrange pieces of broken plates or cups into a mosaic. This is a great way to recycle old ceramics.
- Build Geometric Patterns: Use small tiles or stones to form geometric shapes and patterns. This can give your garden a modern look.
Painting and Staining
Adding color to your stepping stones can make them stand out. You can:
- Paint Designs: Use outdoor acrylic paint to add designs or patterns once the concrete is dry. Seal the paint with a clear outdoor sealer to protect it from the elements.
- Stain the Concrete: Use concrete stain to add color to the entire stone. Stains come in various colors and can give your stones a natural or vibrant look.
Imprinting and Texturing
Adding texture to your stepping stones can make them more interesting. Try:
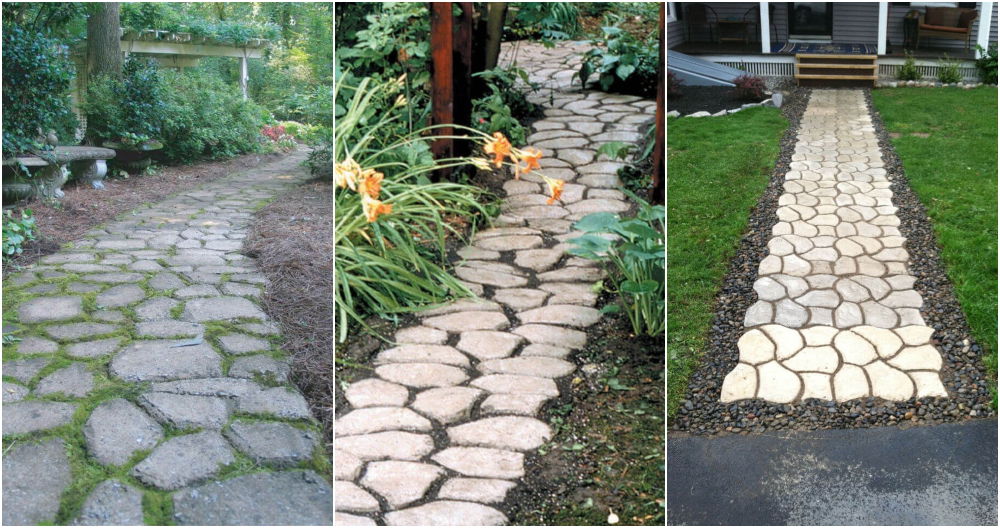
- Imprinting Patterns: Use textured mats or stamps to press patterns into the wet concrete. This can mimic the look of stone, brick, or other materials.
- Adding Texture with Tools: Use tools like combs, brushes, or sticks to build textures in the wet concrete. This can add a unique, handmade feel to your stones.
Themed Stepping Stones
Making themed stepping stones can tie your garden together. Consider:
- Seasonal Themes: Build stones that reflect the seasons, like snowflakes for winter or flowers for spring.
- Hobby Themes: Incorporate elements of your hobbies, like musical notes for music lovers or paw prints for pet owners.
By using these creative ideas and customizations, you can make stepping stones that are not only functional but also a beautiful addition to your garden.
Common Mistakes and Troubleshooting
Making DIY stepping stones can be a fun and rewarding project, but it's easy to make mistakes. Here are some common issues and how to fix them.
Incorrect Concrete Consistency
- Problem: If your concrete mix is too dry, your stepping stones might crack. If it's too wet, it may not be set properly.
- Solution: Aim for a consistency similar to thick brownie batter. You should be able to scoop it into your mold, not pour it. Add water slowly and mix thoroughly to avoid lumps.
Air Bubbles in Concrete
- Problem: Air bubbles can build holes and weak spots in your stepping stones.
- Solution: After pouring the concrete into the mold, gently tap the sides of the mold to release trapped air bubbles. You can also lift and drop the mold slightly to help air escape.
Improper Mold Preparation
- Problem: If the mold isn't prepared correctly, the concrete might stick, making it hard to remove the stepping stone.
- Solution: Always use a mold release agent like light vegetable oil or a commercial mold release. Apply it evenly with a brush and remove any excess to prevent puddles.
Moving the Mold Too Soon
- Problem: Moving the mold before the concrete has set can cause cracks or deformities.
- Solution: Let the concrete set for at least 24-48 hours before moving the mold. If you need to move it, place a sturdy board underneath to support the weight.
Inconsistent Thickness
- Problem: Uneven thickness can lead to weak spots and breakage.
- Solution: Use a level surface to pour your concrete and ensure the mold is filled evenly. Check the thickness with a ruler or measuring tape.
Not Allowing Proper Curing Time
- Problem: Rushing the curing process can result in weak stepping stones.
- Solution: Allow the concrete to cure for at least a week before using the stepping stones. Keep them in a cool, shaded area and cover with plastic to retain moisture.
Ignoring Safety Precautions
- Problem: Concrete can be harmful if it comes into contact with your skin or eyes.
- Solution: Always wear gloves, safety goggles, and a dust mask when working with concrete. Work in a well-ventilated area to avoid inhaling dust.
Troubleshooting Tips
- Cracks in Stepping Stones: If you notice cracks, it might be due to too much water in the mix or insufficient curing time. Ensure the mix is the right consistency and allow adequate curing.
- Sticking to the Mold: If the stone sticks to the mold, try using more mold release next time. For now, gently tap the mold and use a thin tool to help release the stone.
- Uneven Surface: If the surface is uneven, it might be due to improper leveling. Use a flat surface and check the level before the concrete sets.
By avoiding these common mistakes and following these troubleshooting tips, you can build beautiful and durable stepping stones for your garden.
FAQs About DIY Stepping Stone Molds
Explore essential FAQs about DIY stepping stone molds, including tips, materials, and steps to build your own garden masterpieces.
Yes, you can use items like:
Baking pans
Plastic containers
Old trays Just ensure they are sturdy and can hold the weight of the concrete.
Concrete typically takes 24-48 hours to set. However, it's best to wait at least a week before using the stepping stones to ensure they are fully cured.
Use a fine-textured concrete mix or “repair concrete” for smooth and durable stepping stones. Avoid mixes with large gravel pieces.
You can add decorations by:
Pressing items like stones, shells, or glass pieces into the wet concrete.
Using stencils or molds to build patterns.
Mixing pigments into the concrete for color.
Yes, if you take care of them. Clean them thoroughly after each use and store them in a dry place. Wooden molds may need occasional re-oiling.
Final Thoughts
Making your own DIY stepping stone molds is a rewarding and creative way to repurpose leftover concrete. Whether you're making a few for your garden or experimenting with different textures and finishes, this project is perfect for both beginners and experienced DIYers. By using a mix of affordable materials and techniques, you can make molds that last and build stepping stones that are both functional and beautiful.
So, go ahead and give it a try! You might be surprised by how versatile and enjoyable working with concrete can be.


