Learning to make a DIY stethoscope is a fascinating project that helps you understand both the science and the technology behind common medical tools. It's a fun and easy activity that can be done with a few household items, offering a unique way to listen to the sounds inside your body, like your heartbeat or lung function. This guide provides you with a step-by-step approach to making a stethoscope at home.
What Is a Stethoscope?
A stethoscope is a medical device used to listen to sounds made within the body, such as the heartbeat, lung sounds, or even digestive noises. Invented over 200 years ago by Dr. René Laennec in France, the first stethoscope was simply a long tube with a hole through the middle. Modern stethoscopes have evolved significantly, now featuring a bell and diaphragm on one end to amplify sounds, along with earpieces for the listener. By making your own stethoscope, you can get a close look at how this essential device functions.
Materials You'll Need
To make a DIY stethoscope, you'll only need a few common items:
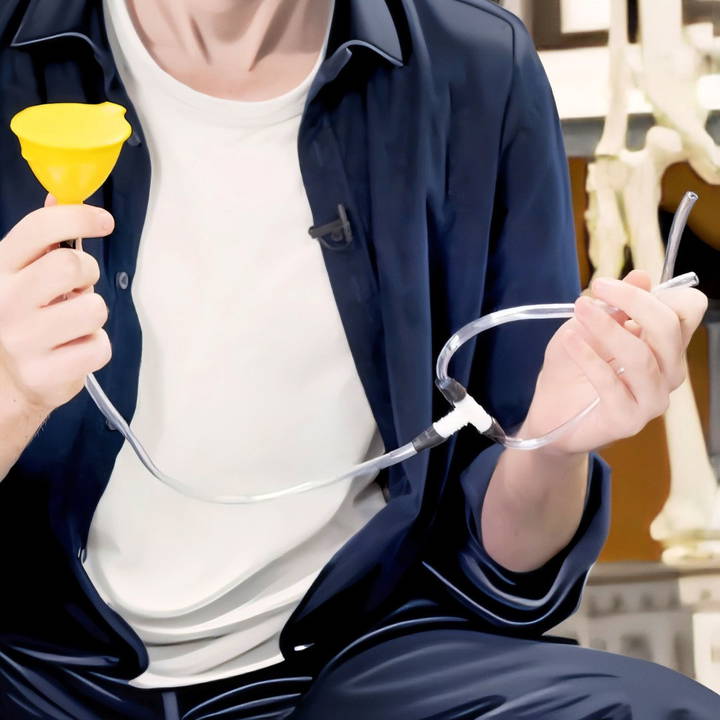
- Clear Vinyl Tubing: This will form the main structure of your stethoscope.
- Funnel: Acts as the main part where sound is captured.
- Y Connector: Divides the tubing into two separate earpieces.
- Balloon: Used to make a diaphragm that amplifies sound.
- Tape: For securing the funnel and tubing together.
- Scissors: To cut tubing and balloon pieces as needed.
With these simple items, you'll be able to construct a stethoscope capable of picking up sounds inside the body.
Step by Step Instructions
Learn how to make a DIY stethoscope with our simple guide. Step-by-step instructions and expert tips for optimal use and troubleshooting are included.
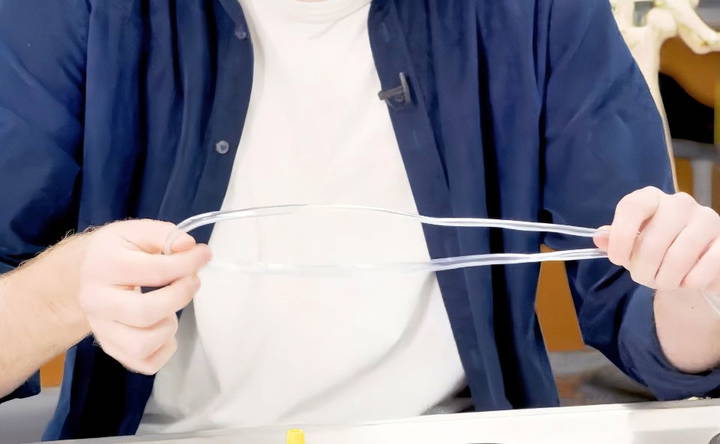
Step 1: Prepare the Tubing
- Measure and Cut the Tubing: Start with a long piece of clear vinyl tubing. Fold it in half and use scissors to cut it into two equal lengths.
- Further Cut for Earpieces: Take one of the halves and cut it again into two smaller pieces. These will serve as the earpieces of your stethoscope. After this step, you should have one long piece and two shorter pieces of tubing.
Step 2: Connect the Funnel to the Tubing
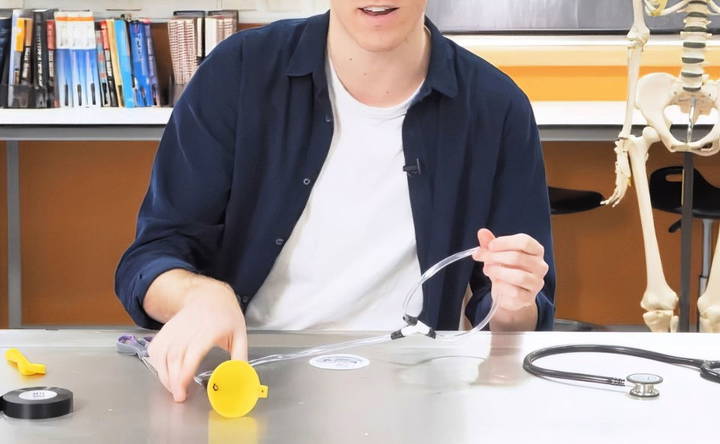
- Attach the Funnel: Take the long piece of tubing and connect one end to the narrow end of the funnel.
- Secure with Tape: Use a piece of tape to tightly secure the funnel to the tubing, ensuring there are no gaps where sound could escape. The funnel will act as the chest piece, capturing the sounds from the body.
Step 3: Set Up the Y Connector
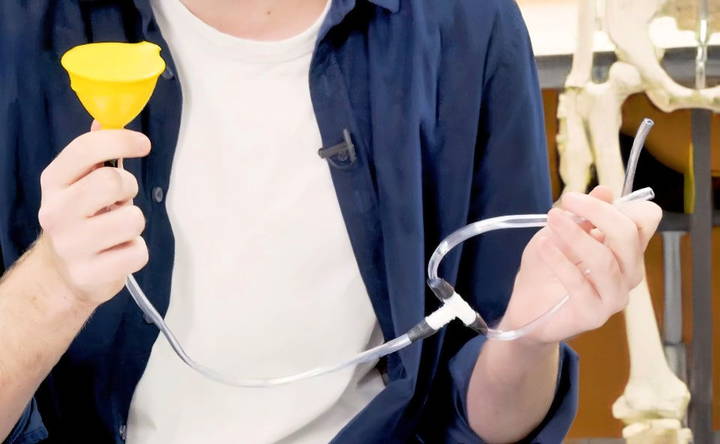
- Connect the Y Connector: Attach the other end of the long tubing piece to the Y connector.
- Attach Earpieces: Take the two shorter pieces of tubing (from Step 1) and connect them to the two branches of the Y connector. These pieces will serve as the earpieces. Now, the basic structure of your stethoscope is in place, with the funnel on one end and earpieces on the other.
Step 4: Make the Diaphragm
- Prepare the Balloon: Take a balloon and cut off the rounded end.
- Stretch the Balloon over the Funnel: Stretch the cut portion of the balloon tightly over the wide opening of the funnel. This will make a diaphragm, which helps amplify the sound. By adding the balloon diaphragm, you make it easier to capture and amplify internal body sounds like the heartbeat.
Using Your DIY Stethoscope
With the stethoscope complete, it's time to put it to use. Place the earpieces in your ears and hold the diaphragm (the funnel end with the balloon) against your chest, ideally near your heart. You should hear the rhythmic sound of your heartbeat, commonly described as a "lub-dub" pattern.
Understanding the Heartbeat Sound
The heartbeat has a distinctive sound that doctors listen to with a stethoscope. Here's a breakdown:
- Lub: This sound occurs when two of the heart's valves shut quickly, making pressure as blood is pumped through the heart.
- Dub: This is the second sound, made when another pair of valves closes as blood is pushed out of the heart and into circulation.
The "lub-dub" pattern is crucial in determining heart health. Medical professionals listen for any irregularities, which could indicate issues like heart murmurs.
Tips for Optimal Listening
- Find a Quiet Space: Background noise can interfere with the stethoscope's ability to pick up body sounds. A quiet environment enhances clarity.
- Press Firmly but Gently: Hold the diaphragm firmly against your chest, but don't press too hard, as excessive pressure can distort the sounds.
- Experiment with Different Body Areas: Try listening to sounds in different places, such as your upper chest for lung sounds or your stomach for digestive noises. This can be an educational experience, as each area produces unique sounds.
The Science Behind Your DIY Stethoscope
Stethoscopes work on the principle of sound amplification. The diaphragm (in this case, the balloon stretched over the funnel) captures sound waves, which travel through the tubing to the listener's ears. This simple setup mimics the design of professional stethoscopes, albeit with a less sophisticated level of sound clarity and amplification.
The funnel captures sound waves over a broad surface area, focusing them into the tube, which channels the sound to your ears. By dividing the tubing with the Y connector, sound is equally distributed to both ears, allowing you to hear internal sounds more clearly.
Troubleshooting Common Issues
Here are some quick fixes if you experience issues with your DIY stethoscope:
- Sound Too Faint: Double-check that all connections are secure and that there are no gaps where sound could escape. The balloon should also be stretched tightly across the funnel.
- Uncomfortable Earpieces: If the tubing feels uncomfortable, you can cover the ends with soft material, like cotton or small foam pieces.
- Muffled Sound: Ensure the balloon is not too loose. If it is, the sound won't travel effectively.
Conclusion
Making a DIY stethoscope is a simple, rewarding project that can be done with a few basic household items. This homemade stethoscope provides a functional way to explore the sounds of your body, offering an intriguing glimpse into medical technology. From understanding the lub-dub of your heartbeat to experimenting with other internal sounds, this DIY stethoscope allows you to explore and learn more about your health.
Now that you know how to make a stethoscope, try it out and see what sounds you can discover. Whether you're a student, a curious DIY enthusiast, or just looking for an educational activity, this stethoscope project is a fantastic way to learn more about your body and the science of sound.
FAQs About DIY Stethoscope
Discover answers to common questions about DIY stethoscopes, including materials, construction steps, and usage tips. Perfect for healthcare enthusiasts.
A DIY stethoscope can pick up basic sounds like a heartbeat or lung sounds, but it lacks the sensitivity and clarity of a professional stethoscope. It’s ideal for educational purposes but not for clinical diagnoses.
Clear vinyl tubing is recommended because it’s flexible and readily available. Using a different type of tubing may impact sound quality or durability.
Yes, a small plastic bottle cap can work instead of a funnel, and if a Y connector is unavailable, try taping two smaller tubes together to make a split for earpieces.
If sounds are faint, ensure all connections are tightly sealed, especially around the funnel and balloon. Also, try reducing background noise and pressing the diaphragm gently but firmly against the chest.
Aside from your heartbeat, you can listen to lung sounds by placing it on your upper chest and digestive sounds by placing it over your abdomen. Each area offers unique sounds to explore.
Yes, making a DIY stethoscope is safe for kids and a great educational activity. Ensure the materials are age-appropriate and that adult supervision is provided during assembly.
Wipe the tubing and funnel with an alcohol wipe or warm soapy water after each use. Avoid submerging the balloon or Y connector to maintain its shape and integrity.
Using a thicker balloon for the diaphragm and ensuring the tubing is cut precisely can help improve sound transmission. Experiment with pressing the diaphragm at different angles to find the clearest sound.


