Making a DIY stick horse, also known as a hobby horse, is a fun and easy project you can tackle at home. Not only is this project beginner-friendly, but it also requires only a handful of materials—most of which you might already have. Plus, with a little creativity, you can transform your stick horse into a magical unicorn! You'll find every step here, from prepping your materials to perfecting the finishing details. Let's dive right in!
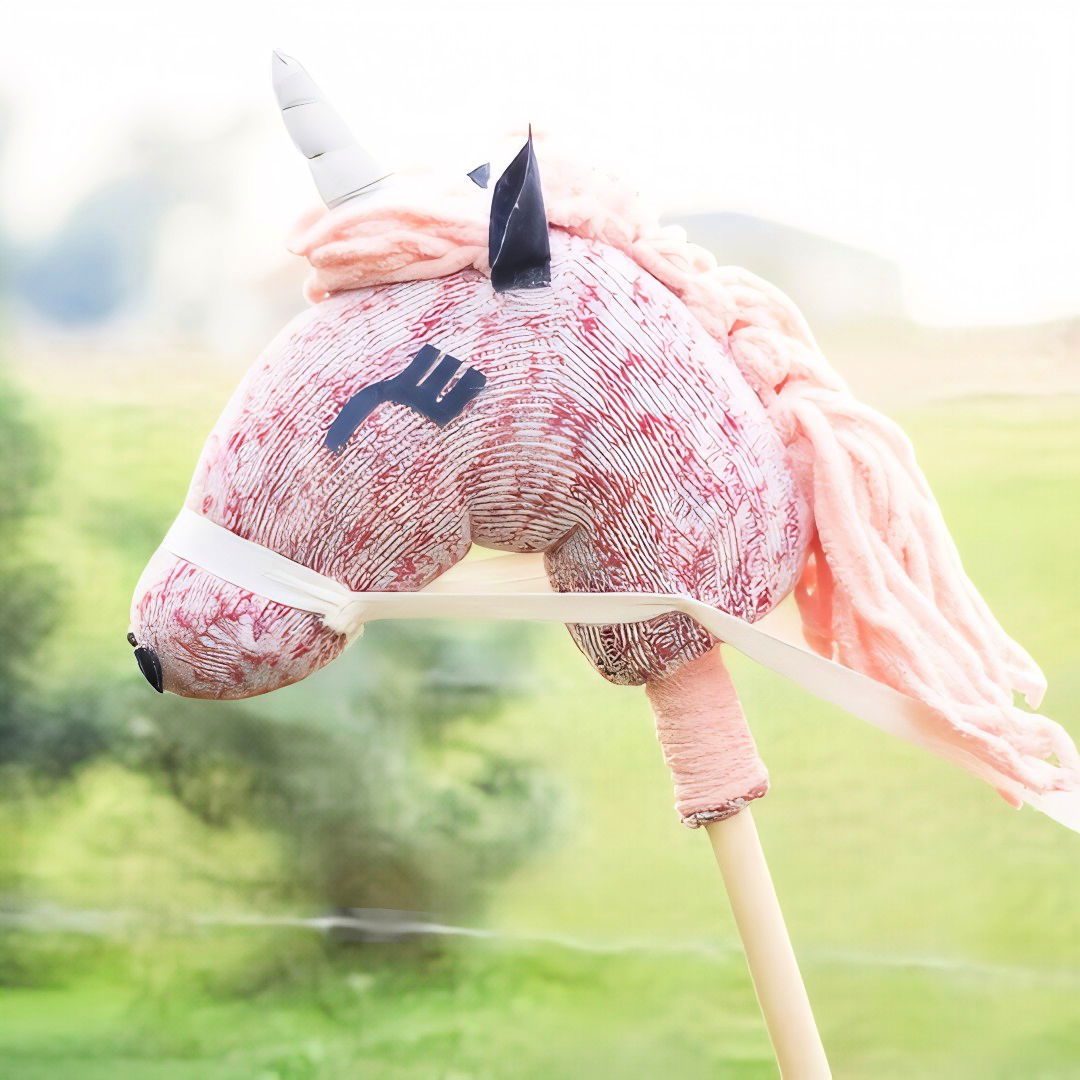
Materials Needed for the DIY Stick Horse
Before you begin, gather the following materials:
- Sock (for the horse's head)
- Stuffing (polyfill, cotton, or fabric scraps)
- Stick or Dowel (¾-inch dowel recommended, though any sturdy stick will work)
- Yarn (for the mane and decorative accents)
- Hot Glue Gun (for securing parts)
- Crochet Hook (for attaching the mane)
- Felt (for ears, eyes, and additional decoration)
- Needle and Thread (to attach features and secure sections)
- Ribbon (to make the halter)
- Scissors and Measuring Tape (for cutting and measuring materials)
Optional for Unicorn Stick Horse:
- Sparkly Thread (to add a magical touch to the horn)
- Extra Felt (for making a unicorn horn)
Step by Step Instructions
Learn how to make a DIY stick horse with our step-by-step guide, from crafting the head to adding a mane and turning it into a unicorn!
Step 1: Preparing the Sock for the Horse's Head
- Stuff the Sock: Start by filling the sock with your chosen stuffing. Aim for a shape that resembles a horse's head: narrower at the front (where the nose will be) and fuller toward the back.
- Tip: Pack the stuffing tightly, especially at the base, to maintain the head shape over time.
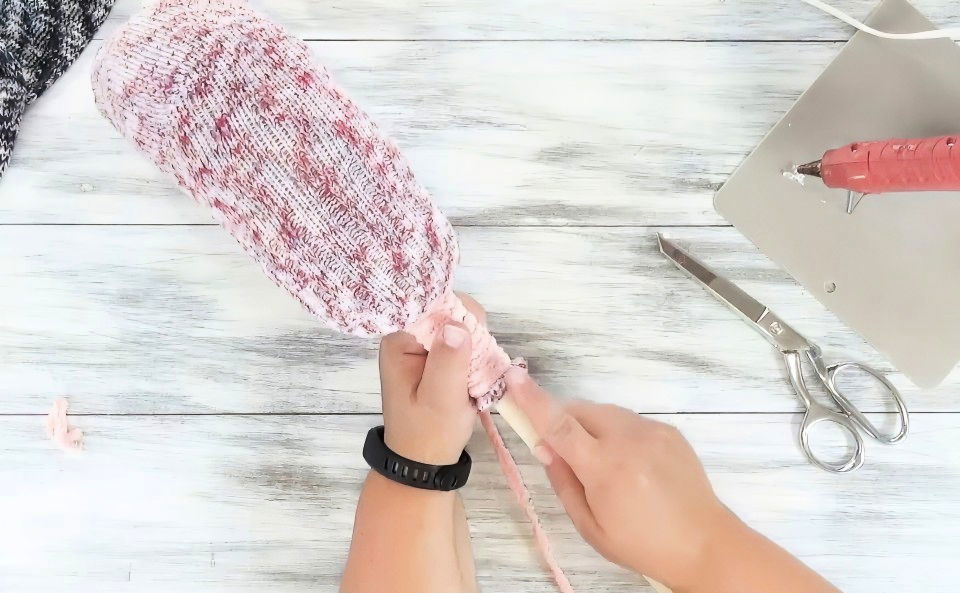
- Insert the Stick: Once the sock is shaped, insert the stick into the bottom. Make sure it goes deep enough into the sock to hold firmly but doesn't distort the head shape.
- Secure the Stick: Using hot glue, carefully glue the sock around the stick at the base. Ensure the glue cools and dries fully to provide a stable foundation.
Step 2: Adding the Horse's Mane
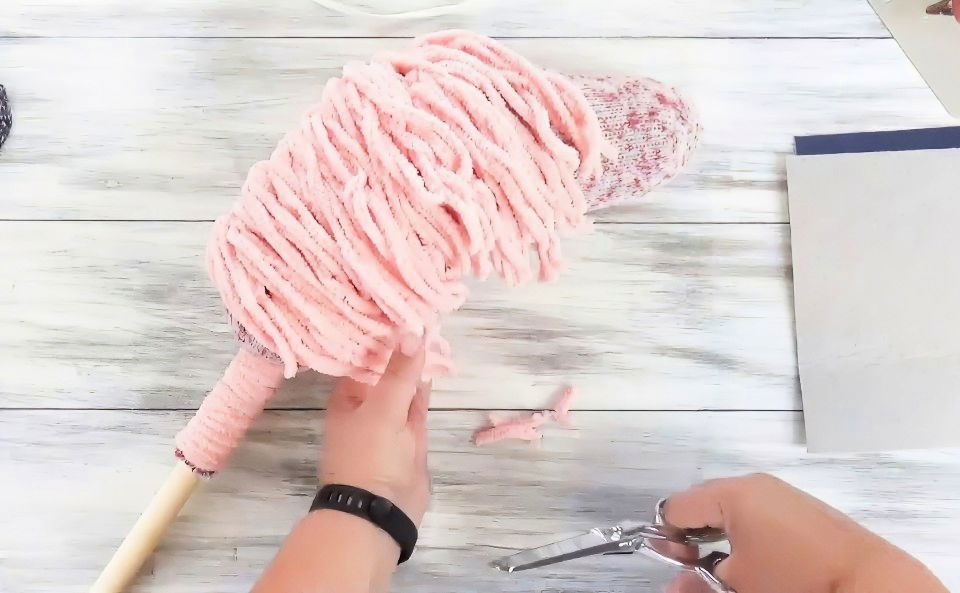
- Prepare the Yarn: Decide how long you want the mane to be; six inches is a manageable length that stays tidy. Wrap yarn around a measuring device (like a book or ruler) multiple times, then cut along one side to make even strands.
- Attach the Mane: Use a crochet hook to thread and knot the yarn along the horse's back, starting from the base of the head.
- Method: Insert the crochet hook through the sock, pull the yarn halfway through, and tie it securely. Repeat this process along the back of the head to make a full mane.
- Optional for Unicorn: If making a unicorn, add longer yarn strands along the front for a flowing, magical mane.
- Trim the Mane: Once all strands are attached, trim any uneven ends to give the mane a neat look.
Step 3: Crafting and Attaching the Ears
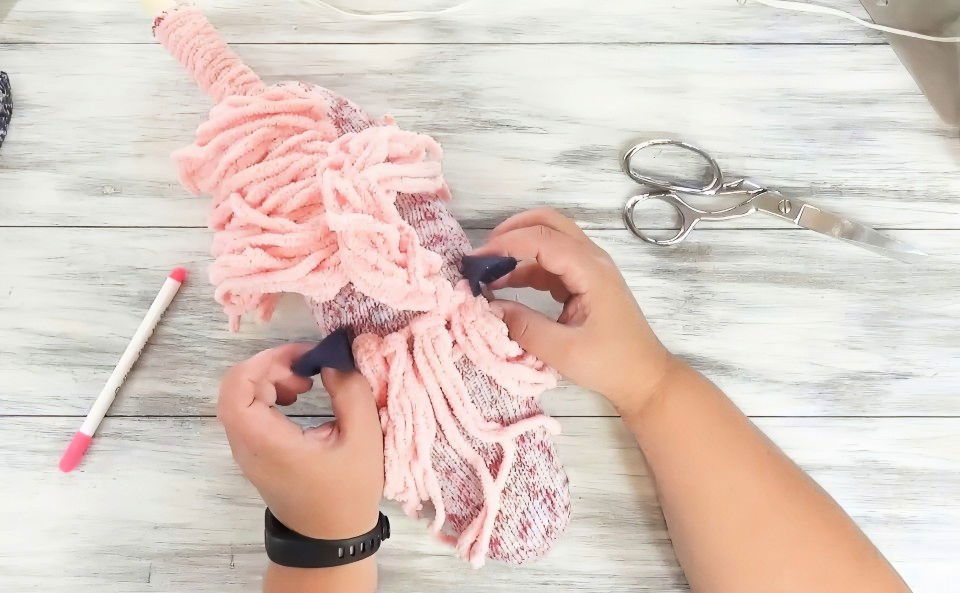
- Cut Felt for the Ears: Using two colors of felt (one for the inner ear, one for the outer), cut two large ear shapes and two smaller ones for contrast. Fold and glue the pieces to make a 3D effect.
- Position the Ears: Place the ears along the top of the head, where you marked a straight line for symmetry. Glue each ear in place, holding it until it cools and sets.
- Adjust for Realism: Ensure the ears are symmetrical and positioned evenly on both sides of the head.
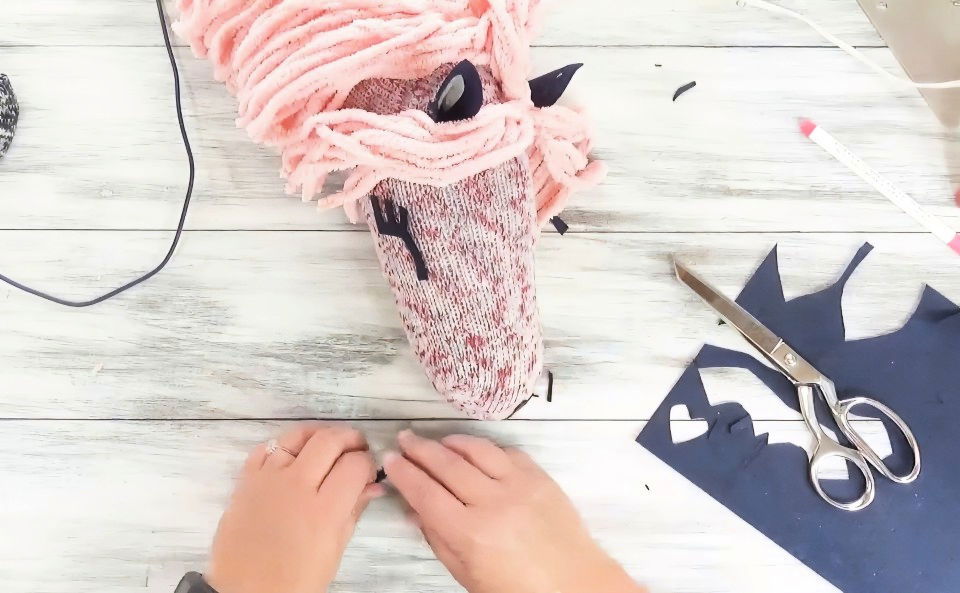
Step 4: Making and Attaching the Face Features
- Nose: For a traditional horse, you might use a simple oval shape in a natural color. However, for a unicorn, you can go whimsical with a heart-shaped nose.
- Cut and Attach: Cut the nose from felt and glue it securely to the tip of the sock. For a symmetrical heart shape, fold the felt in half before cutting.
- Eyes: The eyes can be crafted in different ways depending on the style you're going for. Here are two options:
- For Closed Eyes: Cut two felt shapes resembling closed eyes with eyelashes. Glue them on each side of the head.
- For Open Eyes: Cut two oval pieces, ensuring they are symmetrical. Position each eye slightly forward and toward the sides of the head for a playful look.
- Pro Tip: If you misplace an eye, gently heat the glue with a blow dryer to remove and reposition it.
Step 5: Adding the Halter and Reins
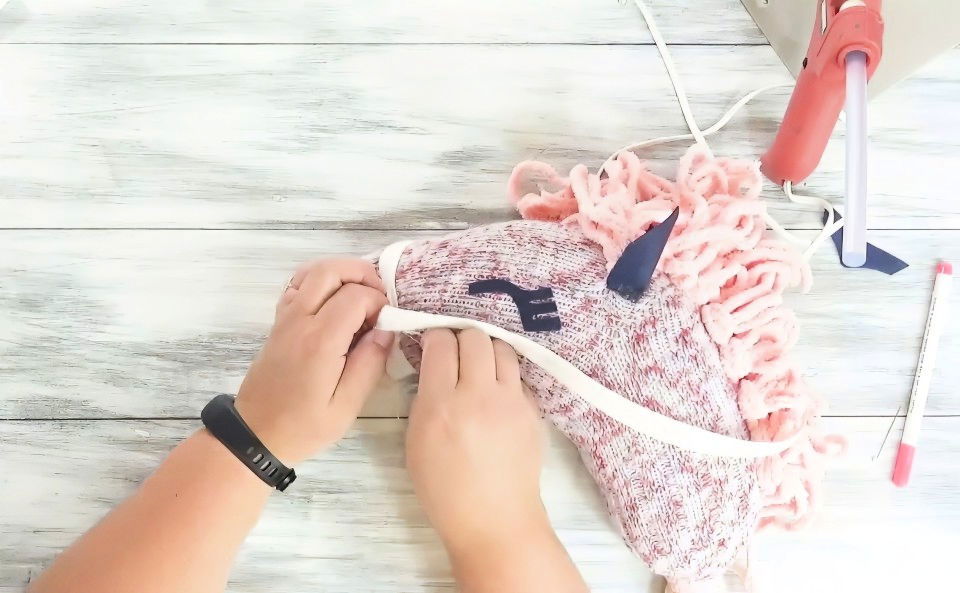
- Measure the Ribbon: Cut a piece of ribbon that fits snugly around the muzzle to make a horse halter. It should help keep the head shape defined.
- Sew the Halter in Place: Sew the ends of the ribbon securely, ensuring it stays in position.
- Attach the Reins: Measure and attach additional ribbon for the reins. Sew the reins to the halter on either side of the head, making sure they are even and secure.
- Secure Loose Ends: After sewing, use hot glue to reinforce the ribbon and trim off any excess to avoid fraying.
Step 6: Finishing Touches for a Traditional Stick Horse
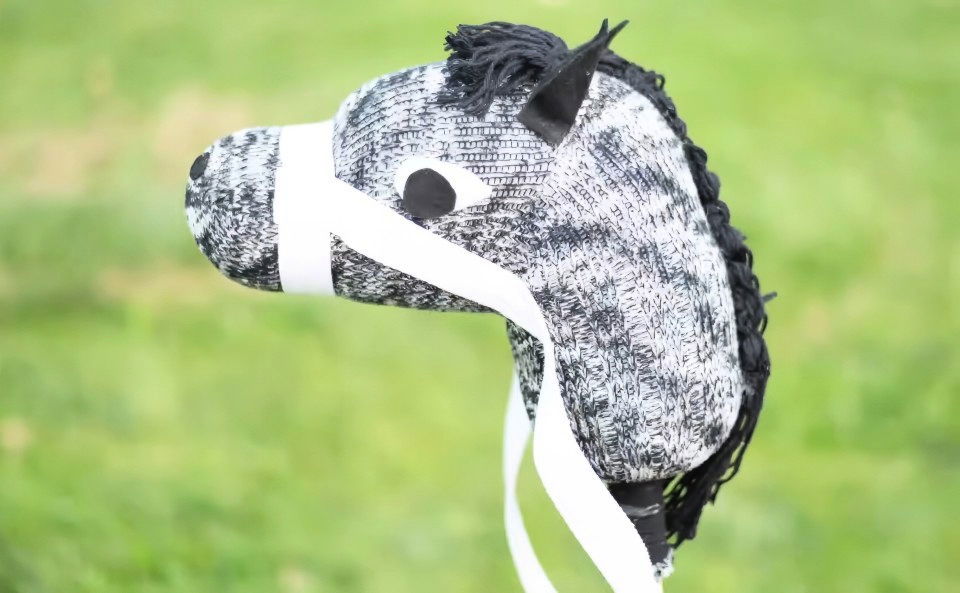
Once the halter and reins are attached, your basic stick horse is complete. This classic version can be customized with different colors of socks, yarn, or felt to make each horse unique.
Bonus Step: Transforming Your Horse into a Unicorn
To make your DIY stick horse truly magical, follow these steps to add a unicorn horn!
- Cut and Sew the Horn: Cut a horn shape from white felt, using a triangle template if desired. Sew along one edge to form a cone shape, then turn it right-side out.
- Add Sparkle: Using sparkly thread, wrap the horn in a spiral pattern to make the illusion of ridges. Stitch it in place as you wrap to keep the thread secure.
- Stuff the Horn: Fill the horn with stuffing, starting with small pieces to ensure a firm shape. Adjust the thread as needed to tighten or loosen the spiral effect.
- Attach the Horn: Decide on the best horn position—usually centered slightly back from the eyes. Sew it onto the head, tucking in the edges of the felt for a seamless finish.
Safety Tips and Maintenance
- Gluing and Sewing: Hot glue can burn, so use caution and ensure children aren't handling the hot glue gun. Use a blow dryer to loosen glue if you need to make adjustments.
- Play Safety: Since the stick can cause accidental bumps, consider rounding the end or adding padding if younger children will be using it.
- Storage and Care: To keep your stick horse looking its best, store it in a dry place. If it gets dusty, spot clean gently with a damp cloth.
Creative Variations and Ideas
- Rainbow Mane: Use multicolored yarn to make a vibrant mane for an extra-fun look.
- Spots and Patterns: Add spots or other patterns on the sock using fabric paint for added character.
- Decorative Halter: Try using patterned ribbon or adding small charms to the halter for a unique touch.
Making a DIY stick horse or unicorn is an enjoyable, hands-on project that encourages creativity. Whether you're crafting this hobby horse for a child or just for fun, you'll end up with a unique toy full of character. Follow these steps, experiment with colors and textures, and make a stick horse that's one of a kind. Enjoy your crafting!
FAQs About DIY Stick Horse
Explore everything you need to know about DIY stick horse projects. Find quick answers to FAQs and get started on your crafting journey today!
Yes, a broom handle or even a sturdy branch works as an alternative to a dowel. Just ensure it’s long enough and comfortable for holding. Sanding or coating the stick with Mod Podge can prevent splinters.
For symmetry, fold felt before cutting the eyes, nose, or ears. If you make a mistake with placement, gently heat the glue with a blow dryer to reposition the piece easily.
Look for large, colorful socks at craft stores or online. Some recommend Funsockcity.com for fun designs, but any thick, soft sock that matches your color theme will work well.
Yes, hot glue is a viable alternative to stitching for most parts. However, stitching will generally hold longer, especially if the stick horse will be played with frequently.
Absolutely! Customize the mane length to your preference. Six inches is common, but if you want a wild, flowing mane, you can make it longer or use more strands for a fuller look.
For added whimsy, try using sparkly felt for the unicorn’s horn or glittery thread for the mane. This extra detail adds a magical touch for a unique finish.
Try your local hardware or craft store, such as Home Depot or Hobby Lobby, for dowels. Dollar stores may also carry suitable sticks, especially if you're on a budget.
To avoid fraying, leave a bit of extra ribbon at the ends, tuck it under, and secure with glue. This will keep your halter looking neat and durable.


