Starting a new project can be exciting. I recently tried making my own DIY stone column wrap. At first, I felt overwhelmed by the task, but step-by-step instructions made it simple. Gathering the right materials took some time, but it was worth it for the smooth process ahead.
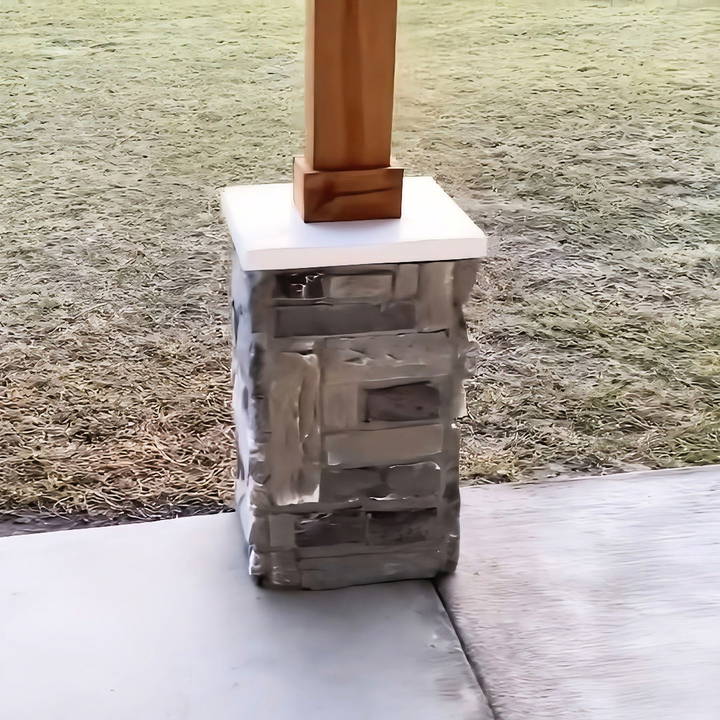
Next, I carefully followed the guide to attach the stone wraps to the columns. Watching the transformation happen was incredibly satisfying. It was a project that turned out better than I expected, and now I'm thrilled to share how you can achieve the same amazing results.
Keep reading to learn how these tips will help you build your own beautiful DIY stone column wrap.
Materials Needed
- Stone Veneer: We used leftover stone from our previous project. The stone will give the columns an elegant, rustic look.
- 2x4 Lumber: You'll need this for building the frame where the stone will be attached.
- Post Bases: These provide stability for the columns.
- Felt Paper: This acts as a moisture barrier between the stone and the wood.
- Cement Board: Offers a sturdy backing for the stone veneer.
- Mortar: Needed to attach the stone veneer to the cement board.
- Grout: This fills the gaps between the stones.
- Muriatic Acid: Used for cleaning the finished columns.
- Screws and Nails: For assembling the frame and attaching various layers.
- Cordless Drill and Screwdriver: Essential tools for the job.
- Paintbrush and Simple Rake: For smoothing and cleaning the grout.
Step by Step Instructions
Learn how to make a attractive DIY stone column wrap with our step-by-step guide. Perfect for giving your outdoor space a polished look.
Step 1: Preparing the Frame
Prepare the frame by gathering lumber and installing post bases. Follow our step-by-step guide for a sturdy, reliable structure.
Gathering the Lumber
The first step is to prepare the framework for the stone veneer. You'll need 2x4 lumber scraps to build a sturdy frame:
- Measure the height and width of your columns.
- Cut the 2x4 lumber to size. You'll be making a box-like structure around each column.
Installing Post Bases
Post bases are crucial for stability:
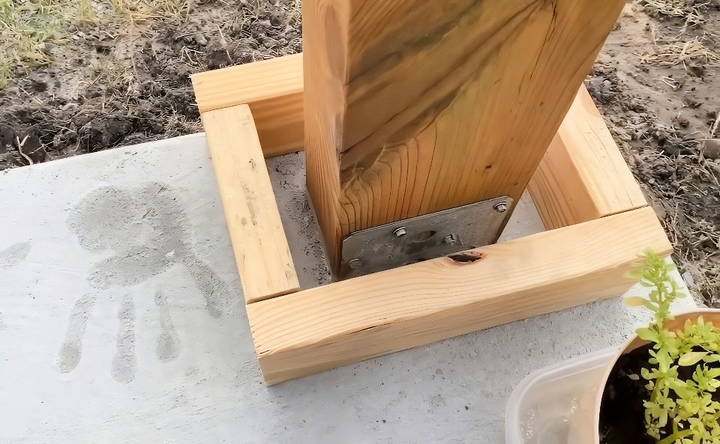
- Position the post bases around each column, ensuring they are level.
- Screw them into place. This will be the base for securing the lumber frame.
Step 2: Assembling the Frame
Learn step-by-step tips for assembling the frame. Master the basics of building the frame with this comprehensive guide!
Building the Frame
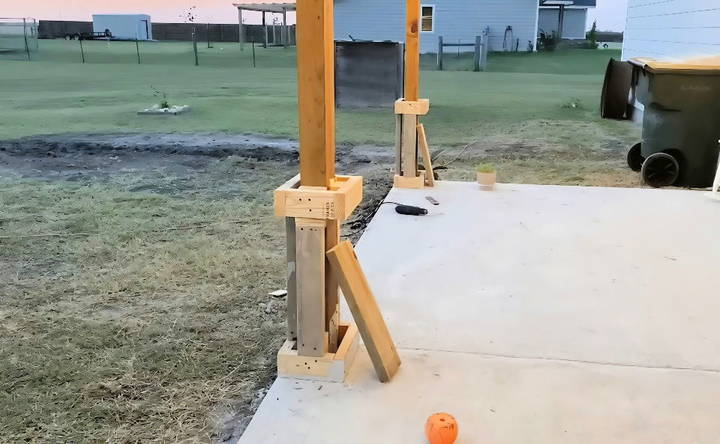
- Begin by attaching the 2x4s to the post bases. This forms the skeleton of your new stone-wrapped column.
- Reinforce the structure by adding extra supports to ensure it can hold the weight of the stone and mortar.
- Once the frame is stable, it's time to move to the next step.
Step 3: Wrapping the Frame with Felt Paper
Learn why felt paper is crucial for framing. Protect structures from moisture with this essential building material. Discover more benefits here!
Why Felt Paper?
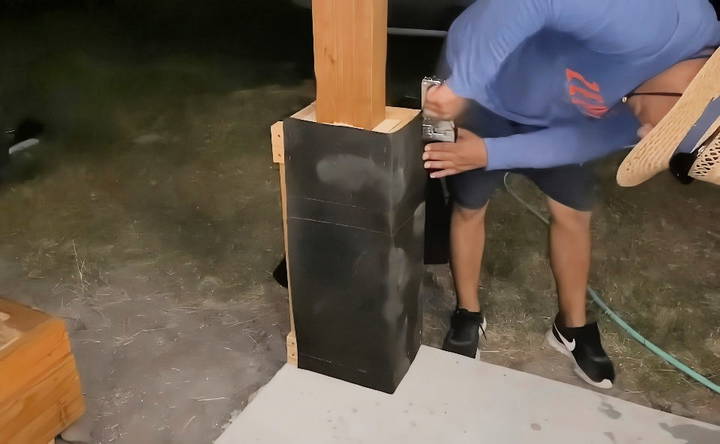
Felt paper acts as a moisture barrier, protecting the wooden frame:
- Cut the felt paper into lengths that will wrap around the frame.
- Staple or nail the felt paper to the 2x4s, ensuring it's snug and secure.
Step 4: Adding the Cement Board
Learn how to add the cement board layer with our step-by-step guide. Perfect for DIY enthusiasts upgrading their home projects!
The Cement Board Layer
- Measure and cut the cement board to fit the wrapped frame.
- Use screws to attach the cement board. This will provide a solid surface for the mortar and stone to adhere to.
Step 5: Preparing for the Stone
Get ready for success with our final preparations guide in preparing for the stone. Essential tips for a perfect finish in just a few steps!
Final Preparations
Make sure the cement board is securely attached and that all edges are smooth:
- Double-check that the frame is stable and the cement board is secure.
- Clear your workspace of clutter to make room for mortar and stone placement.
Step 6: Mixing and Applying the Mortar
Learn how to mix mortar and apply stone veneer efficiently with our step-by-step guide. Master the techniques for a flawless finish!
Mixing the Mortar
Follow the instructions on the mortar packaging for mixing:
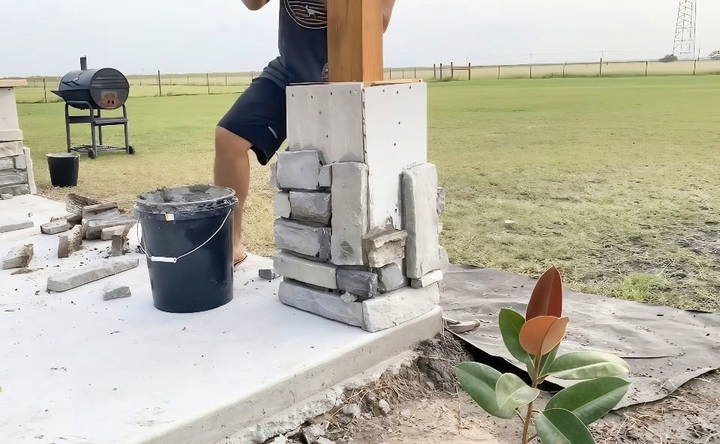
- In a large bucket, mix the mortar until it reaches a spreadable consistency.
- Use a trowel to apply the mortar directly to the cement board.
Placing the Stone Veneer
- Press each stone into the mortar, starting from the bottom and working your way up.
- Ensure that each stone is firmly in place, adding additional mortar as needed.
Step 7: Grouting the Stone
Learn how to grout stone by filling gaps and smoothing grout for a flawless finish. Expert tips and step-by-step guide.
Filling the Gaps
Once the stones are in place, the next step is to grout:
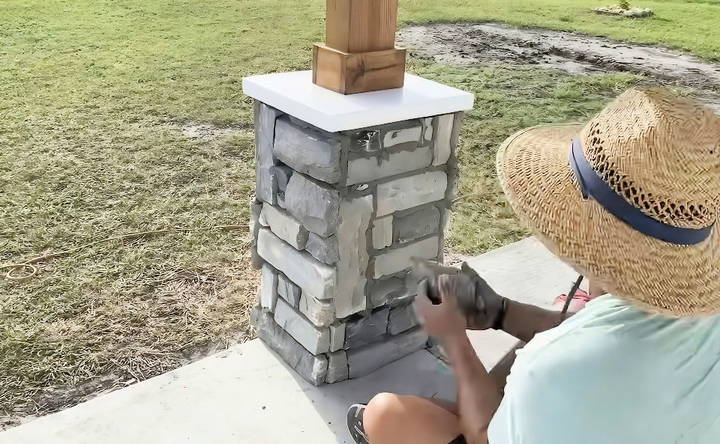
- Apply grout between the stones using a grout float or similar tool.
- Fill the gaps thoroughly, ensuring no voids.
Smoothing the Grout
- Use a simple rake or similar tool to smooth out the grout and ensure an even finish.
- Clean the surface of the stones with a paintbrush, removing any excess grout.
Step 8: Clean Up with Muriatic Acid
Learn the safest steps to clean stone surfaces with muriatic acid. Ensure proper safety measures for effective results.
Safety First
Muriatic acid is potent, so always follow safety guidelines:
- Wear gloves, long sleeves, and protective eyewear.
- Mix the acid according to manufacturer recommendations, and only work in well-ventilated areas.
Cleaning the Stone
- Apply the muriatic acid to the stone surface with a brush.
- Rinse thoroughly with water to remove any residue.
Customization Ideas for Your DIY Stone Column Wrap
When it comes to adding a personal touch to your DIY stone column wrap, the possibilities are endless. Customization not only reflects your personal style but also ensures that the column blends seamlessly with the surrounding environment. Here are some ideas to inspire your creativity:
- Choose Your Stone Wisely: The type of stone you select can dramatically alter the appearance of your column. Consider the color, texture, and size of the stone veneers. For a rustic look, go for rough-cut stones. For a modern touch, select stones with clean lines and uniform colors.
- Play with Patterns: The way you lay the stones can build different visual effects. A horizontal stack bond gives a contemporary feel, while a random pattern mimics natural stone walls. Experiment with patterns before finalizing your design.
- Accent Features: Introduce accent stones in contrasting colors or textures to break the monotony. You can build a stripe effect, highlight certain areas, or frame the top and bottom of the column.
- Incorporate Lighting: Adding lights can enhance the beauty of your stone column after dark. Consider embedding LED strips or installing sconces for a warm glow that highlights the stone's texture.
- Mix Materials: Don't be afraid to mix materials. Combining stone with wood or metal can give your column a unique edge. For instance, a wooden cap or base can add warmth to the structure.
- Add Functionality: Your column can be more than just decorative. Think about integrating mailboxes, house numbers, or even planters into the design for added functionality.
- Seal for Style: Sealants not only protect your stone but can also affect its look. A glossy sealant will enhance the stone's natural colors, while a matte finish will give it a more subtle appearance.
The key to a successful DIY project is to plan ahead and take your time with the customization process.
Maintenance and Care Tips for Stone Column Wraps
Taking care of your stone column wrap is crucial for preserving its beauty and longevity. Here are some straightforward tips to help you maintain your stone column wrap effectively:
- Regular Cleaning: Dust and dirt can accumulate on the stone surface, making it look dull. Gently clean your stone column wrap with a soft brush or cloth. For deeper cleaning, use a mild detergent mixed with water and rinse thoroughly with clean water.
- Avoid Harsh Chemicals: Strong acids or alkaline cleaners can damage the stone. Always use pH-neutral cleaning agents specifically designed for stone care.
- Sealing the Stone: Apply a sealant to protect the stone from moisture and stains. Sealants should be reapplied every two to five years, depending on the product's instructions and the environmental conditions.
- Prompt Stain Treatment: If spills occur, clean them up immediately to prevent staining. Use a poultice for stubborn stains, which can draw out the stain from the stone.
- Inspect Regularly: Check your stone column wrap periodically for any signs of damage, such as cracks or loose stones. Early detection can prevent more extensive repairs later on.
- Winter Care: In areas with freezing temperatures, ensure that the stone is sealed and water is not allowed to accumulate and freeze, as this can cause cracking.
- Professional Help: For significant issues or for an annual check-up, consider hiring a professional stone cleaner to ensure your stone column wrap is in top condition.
By following these simple maintenance and care tips, you can ensure that your DIY stone column wrap remains a stunning feature of your home for years to come.
FAQs About DIY Stone Column Wrap
Discover essential answers to FAQs about DIY stone column wrap. Learn tips, tools, and techniques to build stunning DIY stone wraps for your home.
Ensure that the existing columns or posts are clean and dry. If you're constructing a subframe, it should fit within the dimensions of the wrap. Dry fit the wraps before applying adhesive to check for sizing and make any necessary adjustments.
While it is possible, installing a stone wrap on a tapered column can be challenging due to the corners. It requires a lot of cutting and fitting. If you decide to proceed, make sure to use stones designed for this purpose or consider a non-tapered design for easier installation.
After preparing the surface and materials, apply adhesive on the back of the wrap panels. Place them onto the plywood or subframe, pressing firmly to ensure good contact. Use textured caulk along the edges to seal the seams between panels.
Use exterior grade screws to attach the wrap to the subframe or plywood. The screws should be long enough to provide a sturdy hold. Additionally, the construction adhesive will help keep the panels in place while you work on securing them fully.
To cut the stone column wrap:
Measure the height and circumference of your column to determine the size of the wrap needed.
Mark the cutting lines on the wrap using a pencil and a straight edge.
Cut the wrap panels using a saw with a woodcutting blade. A circular saw or table saw can give you a straight, clean cut.
Dry Fit the cut panels around your column to ensure they fit properly before applying adhesive.
Conclusion
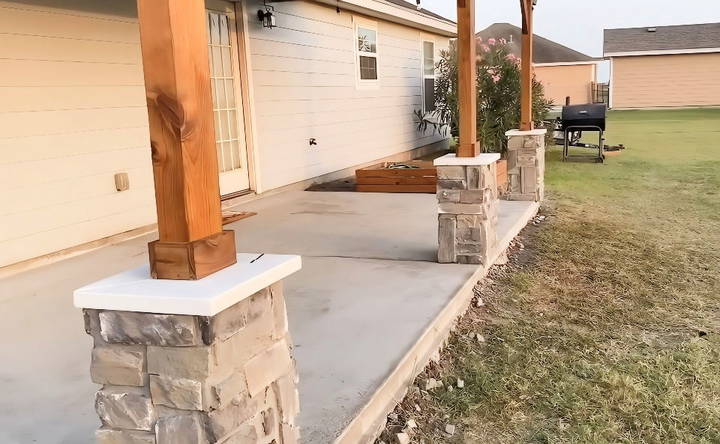
And there you have it! Our DIY stone-wrapped columns turned out beautifully, adding a rustic elegance to our back porch. The project was a challenge, but breaking it down into steps made it manageable. If you're up for a hands-on project that will significantly enhance your outdoor space, I encourage you to try this out.


