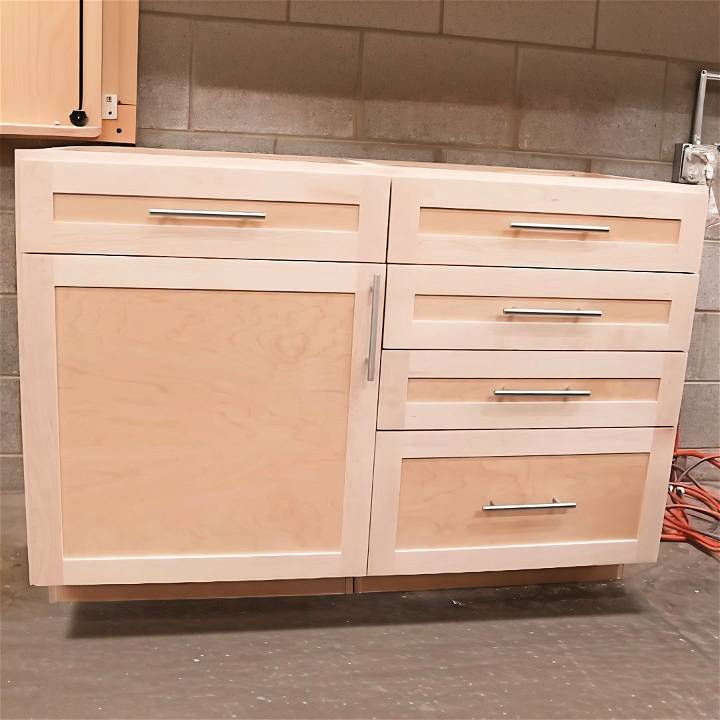
Building a custom DIY storage cabinet on a budget can be very rewarding. I remember the first time I built my own cabinet. It was a small wooden one for my living room. I used some leftover wood, nails, and paint. I was amazed by how practical and affordable it was.
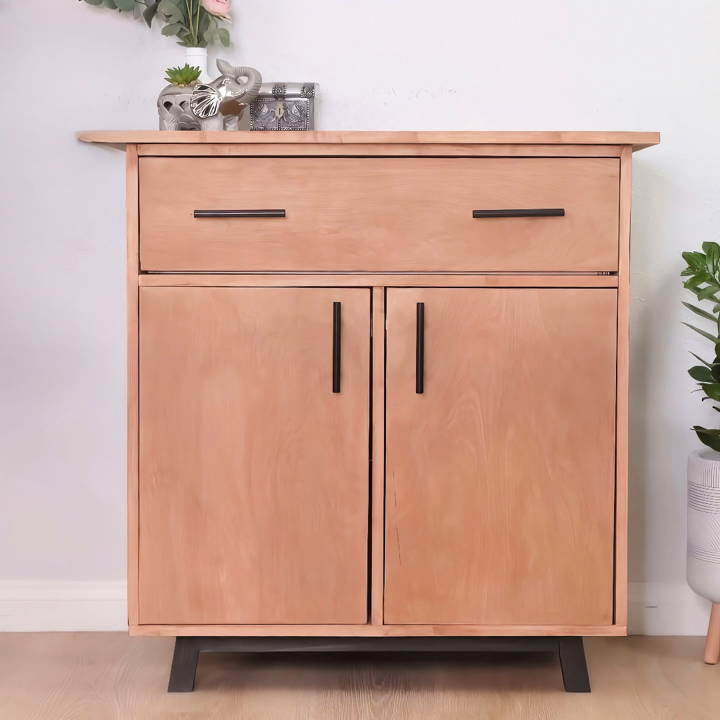
If you want to build your own storage cabinet, start with a simple design. Measure the space where you want to place the cabinet. Gather your materials and tools. Always plan before cutting or drilling. Following these steps will save you time and keep the project within budget.
I'm sharing this because building a storage cabinet can be simple and satisfying. This guide will help you get started. Making your own furniture is not just cost-effective but also fulfilling.
Materials Needed
The beauty of this project lies in its simplicity. You primarily need:
- Three-quarter inch plywood: For the structure. Plywood is sturdy, making it ideal for furniture.
- Two by twos: For the legs. They provide the necessary height and support.
- Pocket hole screws: Essential for joining the pieces.
- Edge banding: To give a finished look to the plywood edges.
- Hinges and knobs/pulls: For the doors and drawers.
Each material plays a crucial role in making a durable and aesthetic storage cabinet that not only serves its functionality but also complements your space.
Step by Step Instructions
Learn how to build a DIY storage cabinet with our step-by-step instructions, from cutting plywood to finishing touches. Perfect for beginners.
Step 1: Cutting the Plywood
Not having a car that fits a full sheet of plywood, I had mine cut down to a manageable size at the store. At home, I used a circular saw for precise cuts following the dimensions provided in the project plan. Ensuring precise cuts is crucial for the cabinet's final assembly and appearance. The cabinet being 18 inches deep dictated several cuts at this width, which I meticulously measured and executed.
Step 2: Preparing for Assembly
Before assembly, drilling pocket holes as per the project plan is necessary. Using a Kreg 720 made this task straightforward, but any pocket hole jig would work. Setting the drill bit collar to three-quarter inches, as the plywood thickness dictates, ensures the holes are correctly positioned for strong joints.
Step 3: Edge Banding
Applying edge banding to all visible plywood edges gives the cabinet a neat, seamless finish. Ironing on the banding and sanding off excess ensures a smooth, professional look. This step, while it might seem minor, profoundly impacts the cabinet's aesthetics.
Step 4: Assembly
The assembly starts with attaching the sides to the bottom against a clamped support for alignment, followed by fixing the rails and divider with pocket hole screws. To ensure the structure was square, I checked the diagonals before fully securing everything. This foundational structure is crucial for the overall integrity of the cabinet.
Step 5: Adding the Drawer and Doors
Building the drawer required cutting dados into the sides for the bottom panel, a process made easier by using larger plywood strips for safety. Installing drawer slides and attaching the top followed an orderly sequence, paying close attention to positioning and leveling for smooth operation. The doors required precise drilling for the hinges but were straightforward to attach with the right tools.
Step 6: Finishing Touches
Choosing a stain for the body, doors, drawer front, and base allowed for customization to fit my d* écor. After staining, attaching the base, doors, hardware, and finally the backer board brought the project to completion.
Lessons Learned
- Accuracy is Key: Measure twice, cut once. Accuracy in every step is critical for a final product that looks and functions as intended.
- Patience Pays Off: Rushing through the steps, especially during finishing, can lead to disappointing results. Take your time for each task.
- Right Tools, Smooth Process: Having the correct tools, like a pocket hole jig and a circular saw, immensely simplifies the process.
Customization Ideas for Your DIY Storage Cabinet
When it comes to making a DIY storage cabinet, customization is key to ensuring that the final product not only fits your space but also reflects your personal style. Here are some ideas to help you personalize your storage cabinet:
Choose Your Style
Start by deciding on the overall look you want for your cabinet. Do you prefer a modern, sleek design or a rustic, vintage feel? Your choice will guide the materials and finishes you select.
Selecting Materials
The materials you choose can greatly affect both the appearance and durability of your cabinet. Consider using:
- Plywood is a cost-effective and versatile option.
- Solid wood for a more durable and high-quality finish.
- MDF for a smooth surface that's easy to paint.
Paint and Finish
Painting your cabinet is a simple way to add a splash of color and personality. Use:
- Chalk paint for a matte, shabby, chic look.
- High-gloss paint for a bold, contemporary feel.
- Stain to highlight the natural beauty of wood.
Hardware Choices
The hardware on your cabinet is like jewelry for your furniture. Choose knobs and pulls that complement your style. Options include:
- Vintage knobs for a classic look.
- Metal handles for a modern touch.
- Leather pulls for a unique, tactile experience.
Functional Add-Ons
Think about how you can make your cabinet more functional. Add:
- Adjustable shelves for flexible storage.
- Drawer dividers to organize smaller items.
- Locks for securing valuable possessions.
Decorative Details
Add decorative elements to make your cabinet stand out. Consider:
- Trim or molding for an elegant touch.
- Glass panels in doors for displaying items.
- Lighting inside or under the cabinet for ambiance and visibility.
Eco-Friendly Options
If sustainability is important to you, choose eco-friendly materials like:
- Bamboo for a fast-growing, renewable option.
- Reclaimed wood for a rustic look and reduced environmental impact.
- Low-VOC paints and finishes to minimize harmful emissions.
Use these customization ideas to make a functional storage cabinet that reflects your taste and lifestyle. Take your time to ensure quality work.
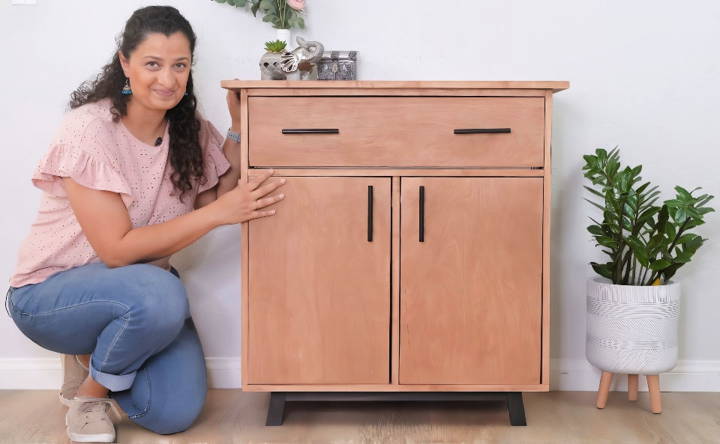
Advanced Techniques for Crafting Your DIY Storage Cabinet
Enhancing your DIY storage cabinet with advanced techniques can elevate its functionality and aesthetic appeal. Here's how you can apply some sophisticated carpentry methods to your project:
Dovetail Joints
Dovetail joints are renowned for their strength and beauty. They are ideal for drawer construction. You can build them using a dovetail saw and chisel or with a router and a dovetail jig.
Mortise and Tenon Joints
For a sturdy frame, consider mortise and tenon joints. These classic joints have been used for centuries in fine woodworking. You'll need a good chisel set and a mallet to craft these by hand, or you can use a mortising machine and tenon cutter for precision.
Biscuit Joinery
Biscuit joinery is great for aligning edges when making cabinet sides or shelves. A biscuit joiner cuts slots into which you insert biscuits and glue, making a strong, invisible bond.
Kerf Bending
To add a curved element to your cabinet, try kerf bending. This involves making a series of cuts (kerfs) on the inside of a piece of wood, allowing it to bend. It's a simple way to build a modern look.
Veneering
Veneering allows you to give your cabinet the appearance of expensive, exotic wood without the high cost. You'll need a veneer saw, some glue, and a lot of clamps. Practice on scraps first to perfect your technique.
French Cleat System
For a secure and adjustable wall mounting system, use a French cleat. This involves attaching one beveled cleat to the wall and the matching piece to your cabinet. It's strong and makes hanging your cabinet a breeze.
Finishing Techniques
Finally, don't forget the finish. Hand-rubbed oil finishes bring out the warmth of the wood. For a more durable surface, consider polyurethane or lacquer. Apply with a brush or sprayer for a professional look.
Use these techniques to make a functional and impressive DIY storage cabinet. These methods need practice and patience, so enjoy making something unique and high-quality.
Troubleshooting Common Issues in DIY Storage Cabinet Projects
Building a DIY storage cabinet can be a rewarding project, but it's not uncommon to encounter a few hiccups along the way. Here's a guide to troubleshooting some of the most common issues you might face:
Doors Won't Close Properly
If your cabinet doors aren't closing correctly, check the hinges. They may need tightening or adjusting. Make sure the doors are hung evenly and that the cabinet is level.
Drawers Stick or Won't Slide
Sticking drawers are often due to misaligned slides or an uneven cabinet. Ensure that the drawer slides are installed parallel to each other and that the cabinet is square.
Gaps in Joints
Gaps can appear if the wood warps or if measurements are off. To fix this, you can use wood filler for small gaps or disassemble and re-cut the pieces for a better fit.
Wood Splitting
When wood splits as you screw it together, it's usually because the screws are too large or you didn't pre-drill holes. Always choose the correct screw size and pre-drill holes to prevent splitting.
Finish Looks Uneven
An uneven finish can result from inconsistent sanding or applying the stain unevenly. Sand the surface thoroughly with progressively finer grits before applying any finish. When staining, apply with the grain and use even strokes.
Cabinet Isn't Sturdy
A wobbly cabinet often means the joints aren't tight or the structure isn't reinforced. Check all joints and strengthen them with corner braces or additional screws if necessary.
Scratches and Dents
For minor scratches and dents, you can use a wood repair kit or a color-matched wood filler. Sand the area smooth before reapplying the finish.
Fixing common issues makes your DIY storage cabinet beautiful and functional. Patience and detail are key in DIY projects. Measure twice, cut once, and seek advice or tutorials if unsure.
FAQs About DIY Storage Cabinet
Discover answers to your DIY storage cabinet questions, from materials to assembly, and build the perfect storage solution for your home!
Start by measuring the height, width, and depth of the area where you want to place your cabinet. Ensure you leave enough clearance for doors to open and consider the cabinet's purpose to determine the appropriate size.
Absolutely! You can adjust the dimensions of your cabinet to fit your space perfectly. Just make sure to recalculate the material needed and cut sizes based on your custom measurements.
The best way to assemble your cabinet is to:
Build the base using two-by-fours and plywood.
Attach the side panels to the base.
Add back panel support for stability.
Assemble and attach the face frame.
Install the cabinet in the desired location and secure it to wall studs.
Add doors and hardware last.
To ensure durability:
Use quality plywood and two-by-fours.
Apply wood glue at joints before screwing for extra strength.
Make sure the cabinet is level and square during assembly.
Secure the cabinet to wall studs if possible.
Apply a proper finish to protect the wood from moisture and wear.
To ensure the correct installation of doors on your DIY storage cabinet, follow these steps:
Measure the door openings accurately to determine the size of the doors.
Choose the right hinges that can support the weight of your doors.
Mark the hinge placements on both the door and the cabinet frame.
Pre-drill the holes for the hinges to avoid splitting the wood.
Attach the hinges to the door first, then align them with the frame.
Check the alignment by opening and closing the door to ensure it swings smoothly without scraping the frame.
Adjust as necessary by tightening or loosening the hinge screws until the door hangs straight.
Conclusion
Wrapping up, making a custom DIY storage cabinet on a budget is both rewarding and practical. This guide on DIY storage cabinet projects shows that it's possible to achieve stylish and functional storage without breaking the bank. By following the steps on how to build a storage cabinet, you can enjoy a personalized piece that fits your needs perfectly. Start your DIY journey today and bring creativity and order into your home!


