Making my own DIY stove top cover was easier than I thought. I wanted to upgrade my kitchen quickly, so I gathered some wood, sandpaper, and paint. It took me just an afternoon. I measured the stove top, cut the wood, and sanded it smooth. I then painted it to match my kitchen. The result was stunning and practical.
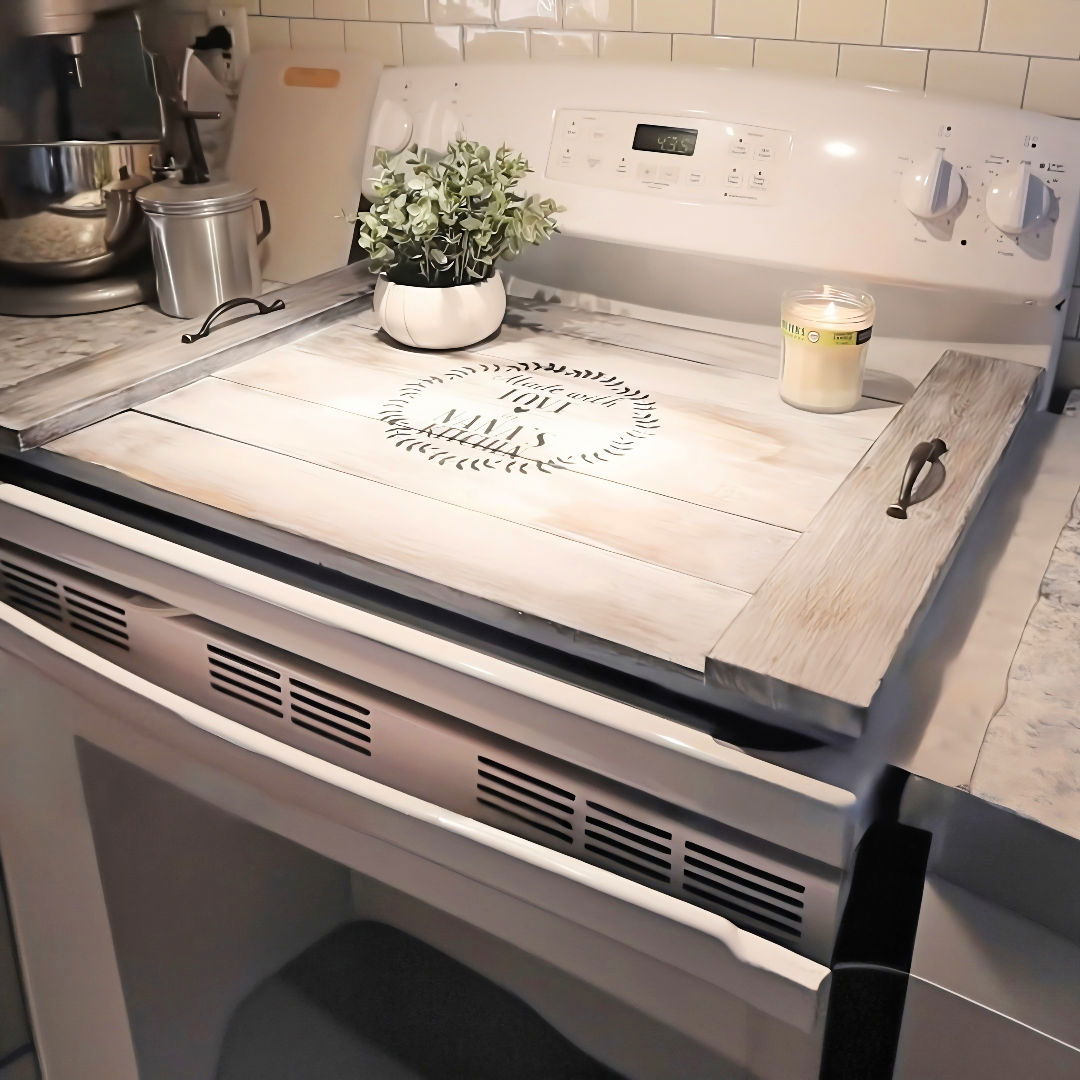
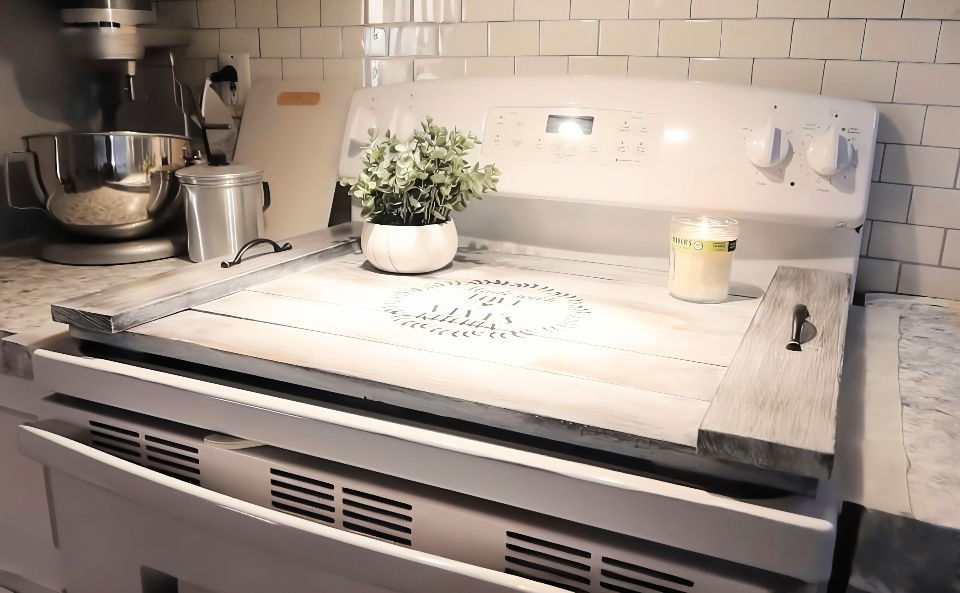
Working on this project made me realize how simple upgrades can make a big difference. Not only did my kitchen look better, but I also had more counter space. If you're thinking of making a DIY noodle board, this is a great project. DIY stove top cover could be just the upgrade you need. Enjoy getting started with these simply effective changes!
Making your own DIY stove top cover can transform your kitchen easily. Get your supplies, follow the steps, and see the difference.
Materials Needed and Their Purpose
- 1x4 boards: I used eight of these, with six cut to 29 inches and two cut to 22 inches. These form the base and edges of the noodle board.
- Wood stain (Dark Walnut): This provides the desired color and rustic effect.
- Wood glue: Essential for assembling the board pieces securely.
- Wood screws (1 * ¼ inch): These fasten the pieces firmly together.
- Fine grit sandpaper: Prepares the wood surface for staining and later for painting.
- White paint (for dry brushing): Achieves the whitewashed, rustic aesthetic.
- Vinyl stencil & a design of your choice: Personalizes the board with artistic detail.
- Craft paint & dabber: Used to fill in the stencil design.
- Polycrylic sealant: Protects the finished board without yellowing over time.
- Hardware (handles): Adds functionality and aesthetic appeal.
Step by Step Instructions
Build your own stylish DIY noodle board with our easy, step-by-step instructions. Create a functional kitchen accessory with our detailed guide.
1. Preparing and Cutting the Wood
The project began with selecting and cutting the 1x4 boards. Local hardware stores, like Lowe's, can usually make these cuts for you, which is incredibly convenient. Choose high-quality, straight boards to ensure your noodle board lies flat and looks polished upon completion.
2. Staining the Wood
Originally, I stained the boards before assembly, which I later realized was a mistake due to the wood glue's weak adherence to stained wood. Thus, it's wise to hold off on staining until after the boards are securely assembled.
3. Assembling the Noodle Board
Use wood glue to attach the 29-inch boards side by side, supported perpendicularly at each end by the 22-inch boards. Once the glue is set, reinforce the structure with wood screws. This ensures a sturdy, durable board that will sit safely atop your stove.
4. Sanding and Whitewashing
After the structure is solidified, lightly sand the entire surface to smooth any rough patches and allow the paint to adhere properly. Whitewashing builds a beautifully distressed look. Achieve this by lightly dragging a barely dipped paintbrush across the board's surface, allowing the stain to show through the paint.
5. Adding a Personal Touch with Stencil Design
The stencil design is where individual creativity shines. I chose a simple yet meaningful design from an online marketplace and used my Cricut cutter for precision. Adhering the vinyl stencil firmly to the board, I applied craft paint with a dabber. After removing the stencil, I touched up any bleed-through with a Q-tip, enhancing the board's handcrafted feel.
6. Sealing and Adding Hardware
To protect the noodle board and ensure longevity, seal it with a polycrylic spray instead of polyurethane, which can yellow over time. Finally, attach handles of your choice to each end. This not only aids in functionality but also contributes to the board's aesthetic, completing the project with a flourish.
Customization Ideas
When it comes to making a DIY noodle board, personalization is key. Here are some creative ways to customize your noodle board that will not only make it uniquely yours but also add a touch of charm to your kitchen:
- Choose Your Wood Wisely: Select a wood type that reflects your style. Pine is great for a rustic look, while oak offers a more refined finish. Consider the grain patterns and natural color of the wood for added character.
- Stain or Paint: Staining your noodle board can enhance the natural beauty of the wood, while painting allows for a pop of color. Go for a stain that complements your kitchen cabinets or a paint color that makes a statement.
- Add Handles: For a practical touch, attach handles to your noodle board. Leather pulls give a modern twist, whereas cast iron handles suit a farmhouse style.
- Engrave or Burn Designs: Personalize your board with an engraved or burned design. This could be anything from your family name to a favorite quote or a simple pattern.
- Seal for Protection: Apply a food-safe sealant to protect your board, especially if you plan to use it as a serving tray. This will help preserve the wood and make it easier to clean.
- Non-Slip Feet: Consider adding non-slip feet to the bottom of your noodle board. This will keep it stable on your stovetop or countertop and prevent scratches.
- Mix and Match: Don't be afraid to mix materials. Incorporate a tile or marble inset for a built-in trivet or a section of chalkboard paint for writing notes and recipes.
Incorporate these ideas to make a functional noodle board that reflects your taste and creativity. The best DIY projects are enjoyable to build and use daily.
Troubleshooting Common Issues
Building a DIY noodle board can be a rewarding project, but sometimes, you might encounter a few hiccups along the way. Here's a helpful guide to troubleshooting common issues so you can get back to crafting with confidence:
- Warping Wood: If your wood begins to warp, it's often due to moisture. Make sure the wood is completely dry before you start, and store it in a dry place. If warping occurs after crafting, laying the board flat under heavy objects for a few days can help.
- Cracking or Splitting: Wood can crack if it's not properly acclimated to your home's environment or if it dries out too quickly. To prevent this, let your wood adjust to the indoor temperature and humidity for a week before using it. Apply a sealant to protect it from drying out.
- Uneven Stain: Staining can be tricky. Always sand the board evenly before applying stain, and use a pre-stain wood conditioner to ensure even absorption.
- Sticky Finish: If your sealant or finish feels sticky, it may not be fully cured. Ensure you're allowing enough drying time in a well-ventilated area. If the issue persists, apply a thinner coat.
- Difficulty Attaching Handles: When attaching handles, it's essential to measure and mark the drill points accurately. If screws don't fit, check if you're using the correct size and type for your handles and wood thickness.
- Paint Bleeding: To avoid paint bleeding under the tape when making designs, make sure the tape is firmly pressed down and apply a clear sealant over the edges before painting.
By addressing these common issues, you'll be well on your way to making a beautiful and functional noodle board.
FAQs About DIY Noodle Board
Discover everything you need to know about DIY noodle board faqs, including materials, steps, and tips for crafting the perfect kitchen addition.
A noodle board is a multi-functional kitchen accessory that can serve as a stovetop cover, providing additional counter space when the stove is not in use. It’s often used for decorative purposes in the kitchen and can be customized to match your decor.
To build your own noodle board, you'll need some basic supplies like wood boards, a saw, screws, and a drill. Measure your stovetop to determine the size of your noodle board, cut the wood to size, assemble the pieces with screws, and add a finish of your choice.
It’s not recommended to prepare food directly on a decorative noodle board. If you intend to use it for food preparation, such as kneading dough, choose a hardwood like maple and apply a food-safe finish to ensure it’s safe for contact with food.
Yes, always remove the noodle board before turning on the stove or oven to prevent fire hazards. Ensure the stove has cooled completely before placing the board back on top. Do not use the noodle board if your stove has a pilot light or other continuous heat source.
Keep your noodle board clean by wiping it down with a damp cloth. If it's finished with a food-safe sealer, avoid harsh chemicals. Do not immerse in water or place in the dishwasher. Store in a cool, dry place when not in use.
Final Thoughts
Wrapping up, this DIY stove top cover to upgrade your kitchen in minutes is a fantastic way to enhance your kitchen's efficiency and style. A DIY noodle board project not only saves money but also adds a touch of personalization. With the right materials and a bit of creativity, you can transform your stove top quickly. Enjoy crafting your unique stove top cover and seeing its impact on your kitchen space!


