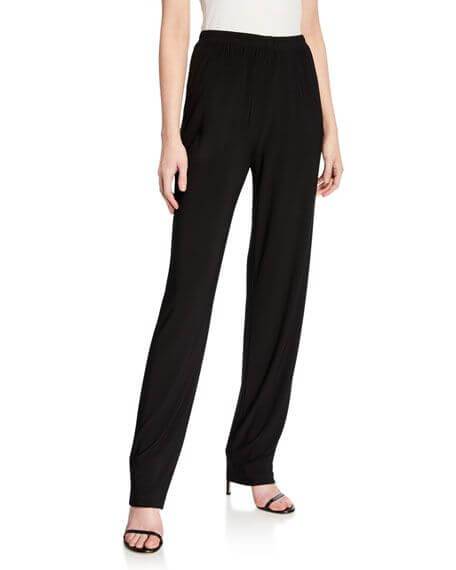
Dress pants are an important part of a woman’s wardrobe. They’re necessary if you work in an office, but they’re also great to wear for more formal occasions with family and friends. The Balance Small Business shares that there are a lot of cute dress pant styles available on the market, but it's more than possible to make your own if you're feeling creative.
One such style that is easy to make is straight leg knit pants. Not only that, but they're also the most comfortable and all-around style. Woman Within’s straight leg knit pants are an example of a pair of bottoms you can wear all day, due to their soft fabric and snug fit. The material makes it easy to move around, while the elastic waistband stretches to fit you perfectly. Macy's offers chic Style & Co straight leg stretch pants that are coveted by many, and now you can customize your own so that they look and fit just like them. Today we’ll be taking a step-by-step look at how to DIY the perfect straight leg knit pants you’ll never want to take off.

What You’ll Need To DIY Straight Leg Knit Pants:
- A pair of pajama pants or straight leg pants made from another fabric—should fit you similar to how you’d like your knit pants to fit
- Two pieces of knit fabric—make sure that they’re 5 inches taller and 2 inches wider than your pants
- A strip of elastic garter, 2 inches in length
- Sewing machine or sewing kit
- Scissors
- Measuring tape
- Sewing chalk
Once you’ve gathered all that you need, we can get started:
1. Fold Pants
First, we start by folding your pajamas or straight-leg pants in half and laying them down on a table. Make sure to pull out the crotch seam, so everything lies completely flat when you measure. Make sure you can see the seam from the ankle to the waist for both sides.
2. Trace the Pattern
Next, you’ll need to fold your fabric in half with the wrong side out. Then, lay your pants on the fabric so that the outer seam (the seam away from the crotch) is in line with the fold. Don’t worry if the pants curve and don’t line perfectly with the fold. Get your sewing chalk and trace around the edges of your pants. Make sure to leave 2 inches below the ankle, 2.5 above the waist, and ½ inches around the rest of the edges. Repeat this step on another fold of fabric to make the other side of your pants. Then, cut each piece around the chalk line while keeping in mind not to cut where you folded the fabric, which will work as your outer seam.
3. Stitch Up the Legs
After you have two pieces of cut out fabric in the shape of the legs, start sewing from the crotch to ankle hem. Remember that your fabric should still be the wrong side out. Do this for both legs. The Spruce Crafts reminds us that it’s important to zigzag stitch the raw edges before continuing. This will ensure that your pants don’t unravel in the washer later on.
4. Stitch the Crotch Seam
Now, we can start stitching the crotch where the legs meet. You’ll be doing a straight stitch from the bottom to the top of the front by the waistline. Do the same for the backside, starting from the bottom to the top. Remember to zigzag stitch the raw edges again.
5. Fold and Stitch the Waist
You start by doing a zigzag stitch all along the raw waistline. Afterwards, fold down the waist making sure the fold is wide enough to insert the elastic waistband. Straight stitch all the way around until you’re 2 inches from where you started. Leave an opening to insert the elastic then thread it through the opening and around the waist using safety pins if needed. Stitch the elastic ends together before stitching the rest of the waist closed.
6. Hem the Bottom
It’s finally time to turn your pants inside out and try them on so you can hem the bottom. When fitting them, you’ll have to decide how long you want the pants to be. Fold in and pin the hem length in place before taking the pants off and turn them inside out again. Then, zigzag stitch the raw edges of the ankles. Do a straight stitch along the hem, about ½ inches away from the raw edge. If you want, stitch the bottom hem for a cleaner look.
There you have it! You now have your own straight leg knit jeans for work and play. If you want to achieve a more youthful look, experiment with the fabric a bit by making them in more vibrant colors. To top it off, you can even pair your new bottoms with one of your DIY t-shirt creations for a head-to-toe DIY look.

