Making a cozy home for your toys brings joy and organization to a room. I had many stuffed animals scattered everywhere, and it often felt messy. I wanted to display them nicely while keeping my space tidy. That's when I discovered how to make a DIY stuffed animal hammock. It was a fun project that not only cleared up my clutter but also added charm to my room.
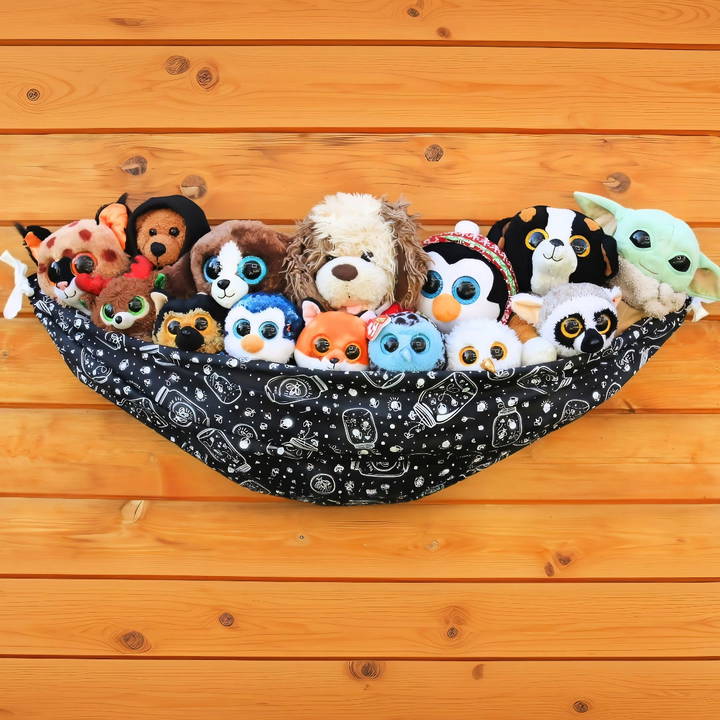
I'm here to help you with easy steps that will inspire your creativity and bring your ideas to life.
Why Make a Stuffed Animal Hammock?
Before diving into the process, let me share why sewing a stuffed animal hammock is a brilliant idea. Firstly, it declutters your space by giving all those fluffy friends a cozy spot that's off the floor. Secondly, it's a customizable and inexpensive solution. You can pick the fabric that matches your decor and adjust the size as needed. Lastly, it was an excellent opportunity for me to hone my novice sewing skills.
Materials Needed:
I gathered the following materials based on Tamara's advice:
- Fabric: I chose a sturdy cotton in a delightful pattern. The amount depends on the desired size, but for my first hammock, a yard was enough.
- Ribbon or Rope: For threading through the hammock to hang it. I opted for a ribbon about 1 inch wide.
- Sewing Machine & Basics: Including scissors, thread, pins, and a sewing needle.
- Iron and Ironing Board: For pressing the hems before sewing, ensuring a neat finish.
- Measuring Tape or Ruler: To measure the fabric and seam allowances accurately.
Each material plays a crucial role. The fabric's durability ensures it can hold the weight of the stuffed animals, the ribbon or rope serves as the hammock's hanging mechanism, and the sewing basics make the project possible. The iron guarantees a professional-looking finish by flattening hems and folds before sewing.
Step by Step Instructions
Learn how to make a stuffed animal hammock with our step-by-step guide. From preparing fabric to threading the ribbon, make a perfect storage solution.
Step 1: Prepare the Fabric
First, I ironed the fabric to remove any wrinkles, then trimmed the jagged edges using my scissors. I left the selvages intact since they'd be incorporated into the loops for hanging.
Step 2: Sew the Hems
I folded a half-inch hem along the longer edges, pressed it with an iron, folded it again, and then pinned it in place. Sewing this double-fold hem adds durability. I repeated this on both long edges.
Step 3: Make the Loops
For the loops, I folded the short edges. Considering my ribbon width, I made sure my loop was wide enough to easily thread the ribbon through. After pressing and pinning the folds, I sewed along the edge to secure the loop.
Step 4: Thread the Ribbon
Using a safety pin attached to one end of the ribbon, I threaded it through the loops I maked on each short side of the hammock. Ensuring the ribbon was evenly distributed, I then tied knots at each end to prevent slipping.
Hanging the Hammock:
Here comes the creative part! There are several methods to hang the hammock, depending on your needs:
- Command Hooks: Ideal for light collections and rental properties where you can't make holes in the walls.
- Wall Anchors or Nails: Perfect for a more permanent solution, ensuring the hammock can hold more weight.
- Bed Posts: If the hammock's length matches the distance between bed posts, it can make a cute and accessible spot for stuffies right by the bed.
- Pegboards: Using hooks on a pegboard provides a flexible and sturdy method, ideal for rooms already equipped with them.
I opted for heavy-duty Command hooks, as our rental agreement limits wall modifications. Placing them in a corner not only saved space but also became an instant focal point, adding to the room's decor.
Customization Tips for Your Stuffed Animal Hammock
Making a stuffed animal hammock isn't just functional; it's also a chance to personalize your space. Here are some easy tips to customize it:
- Choose Your Theme: Think about the room where the hammock will be. Is it bright and colorful, or more subdued? Select fabrics and colors that complement the room's decor. For a child's room, you might choose vibrant, patterned materials, while a neutral-toned room might benefit from subtle hues.
- Pick the Perfect Fabric: The fabric you choose should be strong enough to hold your stuffed animals but also soft to the touch. Mesh and tulle are great for seeing the toys easily, while cotton or canvas can provide a solid background for patterns and colors.
- Add Some Flair: Personalize your hammock with embellishments. Sew on patches, iron-on decals, or even hand-paint designs onto the fabric. This is a great way to showcase creativity and make the hammock truly unique.
- Functional Decor: Consider adding pockets or additional loops to the hammock. Pockets can hold smaller toys or accessories, and loops can be used to hang the hammock in different ways or attach small items.
- Safety First: Always ensure that any additions to the hammock, like beads or buttons, are securely attached to prevent choking hazards, especially in a child's room.
- Involve the Kids: If the hammock is for a child, get them involved in the customization process. They can pick out colors, help with simple sewing tasks, or decide on the placement of decorative elements.
- Keep It Simple: Remember, less is often more. Don't overcomplicate the design. The main goal is to make a cozy spot for stuffed friends that also adds charm to the room.
By following these tips, you'll make a hammock that's not only practical but also a reflection of your personality and style.
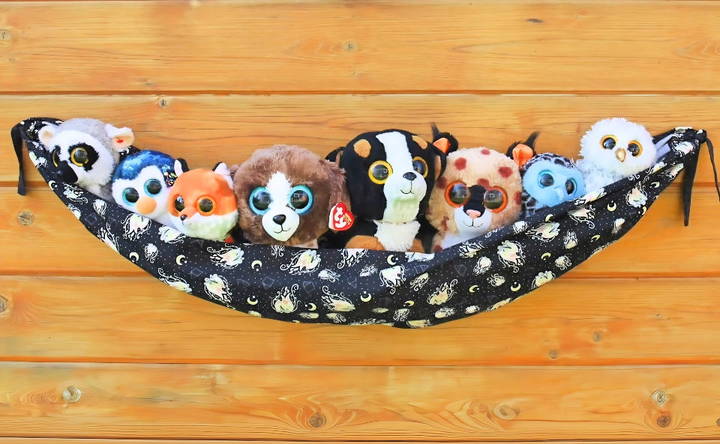
Maintenance and Care for Your Stuffed Animal Hammock
Keeping your stuffed animal hammock in top condition is important for ensuring it remains a safe and attractive place for your plush friends. Here's how to care for your hammock:
- Regular Cleaning: Dust and dirt can accumulate on the hammock, especially if it's in a child's play area. Gently vacuum the hammock with an upholstery attachment to remove surface dirt. For mesh or tulle hammocks, use a lint roller to pick up dust and lint.
- Wash with Care: If the hammock needs a deeper clean, hand wash it in warm, soapy water. Avoid harsh detergents that can damage the fabric. Rinse thoroughly and air dry. For cotton or canvas hammocks, you may use a washing machine on a gentle cycle.
- Check for Wear and Tear: Periodically inspect the hammock for any signs of wear, such as frayed fabric or loose threads. Repair any small tears immediately to prevent them from getting bigger.
- Secure Attachments: Make sure the hooks or anchors used to hang the hammock are secure. Tighten any that have become loose over time to ensure the hammock doesn't fall.
- Avoid Overloading: Don't put more stuffed animals in the hammock than it can hold. Overloading can stretch the fabric and cause the hammock to sag or tear.
- Rotate Toys: To prevent the hammock from stretching out in one spot, rotate the toys periodically. This will also give all your stuffed animals a chance to be on display.
- Keep It Dry: Moisture can lead to mold and mildew. If the hammock gets wet, dry it completely before putting toys back in.
To keep your stuffed animal hammock clean and lasting, follow these care tips. Regular maintenance is essential for durability.
Troubleshooting Common Issues
When crafting a stuffed animal hammock, you might encounter a few hiccups along the way. Here's how to troubleshoot common issues with simple, clear solutions:
Hammock is Sagging
- Solution: If the hammock begins to sag, check if it's overloaded. Remove some toys to lighten the load. Ensure that the hammock is hung at the correct angle and the wall hooks are spaced properly.
Fabric is Fraying
- Solution: Fraying fabric edges can be prevented by using a zigzag stitch or fabric glue on the edges. If fraying occurs after sewing, trim the loose threads and apply clear nail polish or fray check solution to seal the edges.
Difficulty Hanging the Hammock
- Solution: Use a stud finder to locate the studs in the wall for a secure anchor. If you're using drywall anchors, make sure they're the right size and installed correctly. Always follow the manufacturer's instructions.
Toys Keep Falling Out
- Solution: If toys are slipping out, the hammock may be too slippery or steep. Choose a fabric with more grip, like cotton, and adjust the hammock's tension and angle to be more horizontal.
Hammock is Too Small
- Solution: Measure the space and the number of stuffed animals before starting your project. If you need a larger hammock, consider sewing two pieces of fabric together or making a multi-tier hammock.
Hooks are Coming Out of the Wall
- Solution: This could be due to the weight of the hammock or improper installation. Use heavier-duty hooks and ensure they're screwed into a stud or use appropriate wall anchors.
Stains on the Hammock
- Solution: Treat stains immediately with a stain remover suitable for the fabric type. For washable fabrics, spot clean or wash the entire hammock according to the care instructions.
By anticipating these common issues and knowing how to fix them, you'll ensure your stuffed animal hammock remains a durable and cherished part of the room.
FAQs About DIY Stuffed Animal Hammock
Find answers to FAQs about making a stuffed animal hammock. Then, get DIY tips, material lists, and step-by-step instructions to make your own hammock.
A stuffed animal hammock is a clever storage solution for those adorable plush toys that tend to multiply and take over your child's room. It's a simple net or fabric hammock that hangs in a corner, keeping stuffed animals off the floor and making a cute room decoration.
Here's a step-by-step guide:
Measure and Cut: Measure the space where you want to hang the hammock. Cut your fabric or netting to the desired size.
Hem or Bind Edges: Fold and sew or bind the edges to prevent fraying.
Make Anchor Points: Attach loops or ties to each corner of the fabric.
Hang It Up: Use hooks or screws to hang the hammock in a corner of the room.
Absolutely! If you don’t have sewing tools, try these no-sew options:
Fitted Sheet Hammock: Use an old fitted bedsheet with elastic edges. Hang it on three screws in a corner.
Net Fabric Hammock: Cut a large piece of netting fabric, add adhesive wall hooks, and hang it on two points.
Get creative! Add bows, colorful tulle, or even crochet details. Remember, it’s not just functional—it’s also a cute room accent!
Safety is crucial when hanging your stuffed animal hammock. Follow these steps:
Choose a Secure Location: Pick a corner away from windows, doors, or any other potential hazards.
Find Studs or Beams: Use a stud finder or gently tap the wall to locate wooden studs or ceiling beams. These provide sturdy support.
Use Proper Hardware: If you're attaching the hammock to drywall, use wall anchors or toggle bolts. For wooden surfaces, screws work well.
Weight Distribution: Spread the weight evenly across the anchor points. Avoid overloading the hammock.
Check Regularly: Inspect the hammock periodically to ensure it's secure and hasn't loosened over time.
Conclusion:
In the end, I felt so proud when I finished my DIY stuffed animal hammock. Seeing my toys in a neat space warmed my heart. I encourage you to try it, too. It's rewarding to make something that adds joy and tidiness to your room!


