Starting such ventures is exciting. I remember the first time I built a DIY stump grinder. I felt both eager and unsure. Luckily, I found solid instructions and helpful tips. With a bit of patience and determination, the process turned out simpler than I imagined. Now, I want to share my experience and knowledge to help others looking to tackle similar projects.
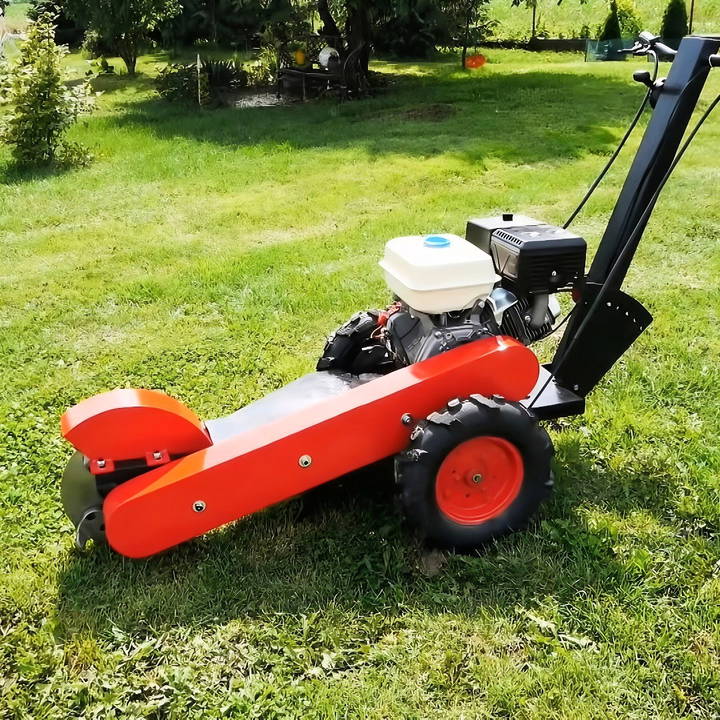
Building a homemade stump grinder was empowering. I learned about the necessary tools, materials, and steps involved. Knowing what to do made it much safer and more manageable. I am glad to provide detailed guidance on this, allowing you to gain confidence in your DIY endeavors. These steps can lead to successful results, and you'll feel proud of managing a task yourself.
Materials Needed
Before diving into the steps, let's discuss the materials and why they are essential.
- Engine (420cc 15HP): The core of our grinder. Initially, I considered a 200cc engine but realized it wouldn't have enough power for the job.
- Wheels (from a garden tiller cultivator): These provide mobility to the grinder.
- Drum Brake and Hubs (from a 150cc quad bike): Essential for stopping the machine during operation, acting as both a working and emergency brake.
- Sheet Metal (for the frame): Strong and durable base structure for all components.
- Shredding Blades: The cutting part of the grinder that actually grinds the stumps.
- Screws (hardness class 12.9 DIN912): High-strength screws to attach components securely.
- Bearings (UCP207): Ensure smooth and efficient movement of the grinder's components.
- Pulley (120mm and 80mm diameter): These help in transferring engine power to the blades.
- Safety Button: For instant engine stop in case of emergencies.
Step by Step Instructions
Learn how to build your own stump grinder with our step-by-step DIY guide. From preparing the engine to testing, we cover everything you need.
Step 1: Preparing the Engine
- 420cc 15HP Engine Selection: I started by selecting a 420cc 15HP engine. Given the heavy-duty task, a strong and reliable engine is crucial. A smaller 200cc engine will likely underperform and struggle with larger stumps.
- Mounting the Engine: I mounted the engine securely on a robust frame. Ensuring the engine is stable reduces vibrations and improves safety.
Step 2: Building the Frame
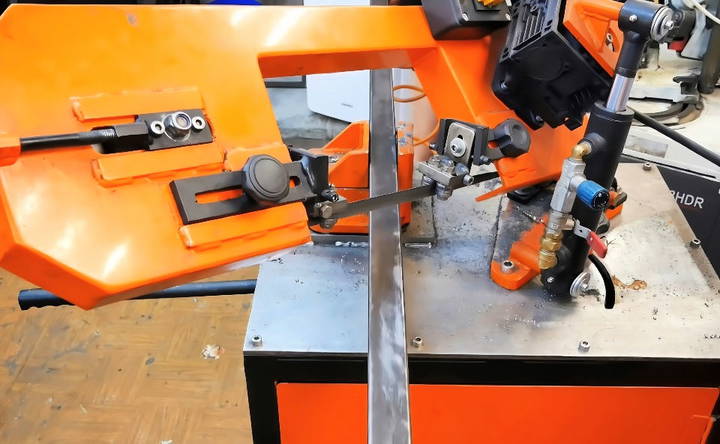
- Using Sheet Metal: I marked the dimensions on a square piece of sheet metal before cutting it. A strong, well-measured frame ensures the structural integrity of the grinder.
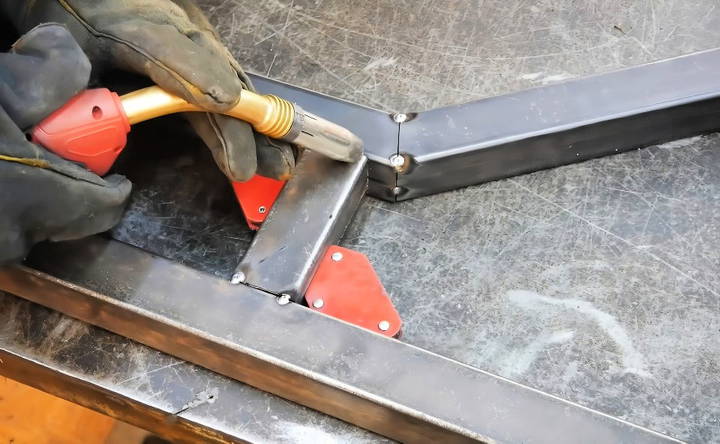
- Assembling the Frame: I used screws with a hardness class of 12.9 DIN912 to assemble the frame. These screws are extremely durable and can handle the heavy stresses exerted during grinding.
Step 3: Adding Mobility with Wheels
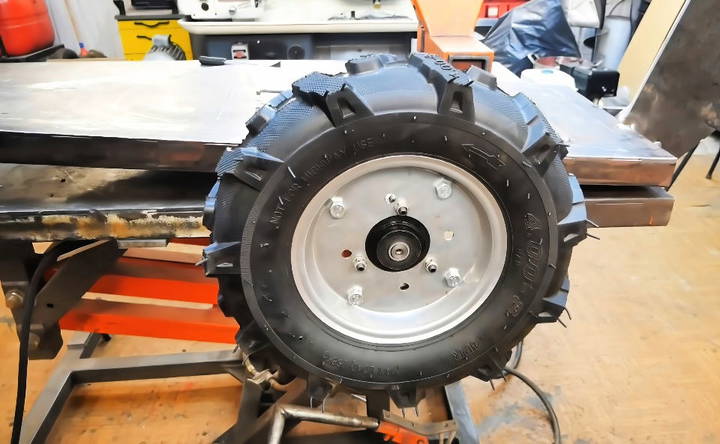
- Wheels from a Garden Tiller Cultivator: I attached wheels from a garden tiller cultivator to the frame. These wheels are sturdy and provide the necessary mobility to move the grinder easily.
Step 4: Installing the Drum Brake and Hubs
- Sourced from a 150cc Quad Bike: I used a drum brake and hubs from a 150cc quad bike. These brakes serve dual purposes:
- Work Operation Brake: Always active when the grinder is operational.
- Emergency Brake: Can quickly stop the machine in case of an emergency.
Step 5: Setting Up the Pulley System
- Connecting the Pulleys: I connected a pulley with a diameter of 120mm to the grinder and another pulley with 80mm diameter to the engine. This setup ensures optimal power transfer from the engine to the grinding blades.
Step 6: Attaching the Shredding Blades
- Selecting the Right Blades: The shredding blades are the heart of the grinder. They need to be extremely sharp and durable to cut through tough stumps effectively.
- Mounting the Blades: Securely attach the blades to the frame using high-strength screws. Ensuring the blades are firmly in place is essential to prevent accidents.
Step 7: Installing Bearings
- Using UCP207 Bearings: I installed UCP207 bearings to facilitate smooth rotation of the blades. These bearings are known for their durability and efficiency in high-stress environments.
Step 8: Integrating the Safety Button
- Safety First: Safety is paramount in any DIY project. I integrated a safety button that immediately stops the engine when pressed. This feature ensures that the machine can be quickly deactivated in case of an emergency.
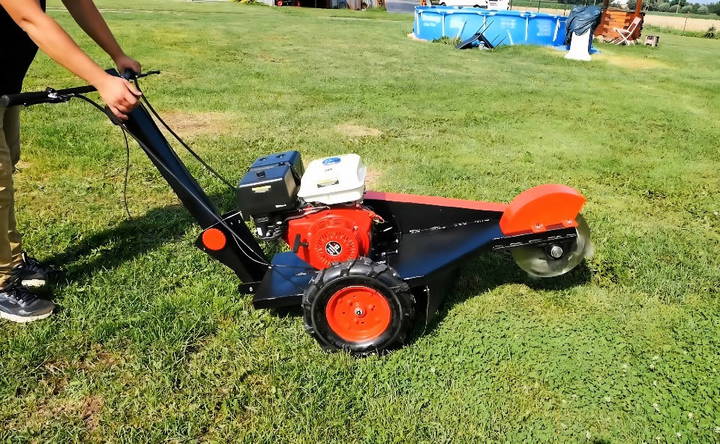
Testing the Stump Grinder
Once all components were assembled, I conducted a series of tests to ensure everything worked perfectly. Here's how I did it:
Initial Test Runs
- Low-Power Testing: I started the engine and tested the grinder on small, soft stumps to gauge its performance. This helps in identifying any potential issues before moving to bigger tasks.
- Full-Power Testing: After successful low-power tests, I increased the power and tested it on larger stumps. The 15HP engine proved to be a game-changer, handling even the toughest stumps with ease.
Maintenance Tips
- Regular Inspection: Check all screws, blades, and bearings for wear and tear regularly.
- Blade Sharpening: Keep the blades sharp for efficient stump grinding.
- Engine Maintenance: Regularly change the oil and check the engine for optimal performance.
Troubleshooting Your DIY Stump Grinder
When working with a DIY stump grinder, you might encounter some common issues. Here's a troubleshooting guide to help you resolve them quickly and safely.
The Grinder Won't Start
- Check the power source: Ensure that your grinder is properly plugged in or that the battery is fully charged.
- Inspect the switch: Test the on/off switch for any signs of malfunction or damage.
The Grinder is Vibrating Excessively
- Secure loose parts: Tighten any bolts or screws that may have come loose during operation.
- Balance the cutting wheel: Make sure the cutting wheel is evenly attached and not causing imbalance.
The Cutting Wheel is Not Spinning
- Examine the belt: If your grinder uses a belt drive, check for wear and tear and replace it if necessary.
- Lubricate moving parts: Apply lubricant to any moving parts that may be stuck or rusted.
The Grinder is Not Removing the Stump Effectively
- Sharpen the teeth: Dull teeth can make the grinding process inefficient. Sharpen them with a suitable file.
- Adjust the depth: Set the cutting depth to an appropriate level for the size of the stump.
The Grinder Stops Suddenly During Use
- Check for overheating: Allow the grinder to cool down before inspecting it for other issues.
- Reset the circuit breaker: If your model has a circuit breaker, reset it according to the manufacturer's instructions.
There's Smoke Coming from the Grinder
- Stop immediately: Turn off the grinder and unplug it.
- Inspect for damage: Look for signs of burning or melted components and seek professional repair.
Regular maintenance can prevent many of these issues. Keep your DIY stump grinder clean, and inspect it for wear and tear before and after each use.
Safety Guidelines
When undertaking a DIY project like installing a shiplap fireplace, safety is paramount. Here's a comprehensive guide to ensure you stay safe while making a cozy addition to your home:
Workspace Preparation:
- Clear the Area: Ensure your workspace is free of clutter and flammable materials.
- Adequate Ventilation: Work in a well-ventilated area to avoid inhaling dust or fumes.
Personal Protective Equipment (PPE):
- Eye Protection: Always wear safety goggles to protect your eyes from dust and debris.
- Respiratory Protection: Use a dust mask or respirator when sanding or sawing.
- Hand Protection: Wear gloves to protect your hands from splinters and sharp tools.
Tool Safety:
- Read Manuals: Before using any power tools, read the manufacturer's instructions.
- Inspect Tools: Check tools for damage before use, and do not use damaged tools.
- Proper Use: Use each tool for its intended purpose and follow safety guidelines.
Fire Safety:
- Keep Extinguisher Handy: Have a fire extinguisher nearby in case of an emergency.
- Electrical Safety: Ensure all electrical tools are properly grounded, and cords are intact.
Material Handling:
- Lifting Techniques: Lift heavy materials using your legs, not your back, to prevent injury.
- Material Storage: Store materials flat and secured to prevent tripping hazards.
Chemical Safety:
- Material Safety Data Sheets (MSDS): Review the MSDS for any chemicals you use.
- Proper Disposal: Dispose of chemicals and any waste materials according to local regulations.
Follow these tips to safely enjoy your DIY shiplap fireplace project. Proper preparation prevents accidents and ensures success.
FAQs About DIY Stump Grinder
Discover essential FAQs about DIY stump grinders, including safety tips and usage instructions, for effective and safe stump removal.
A DIY stump grinder is a homemade version of a commercial stump grinder, which is a machine used to remove tree stumps by grinding them into wood chips. It typically involves modifying a walk-behind gas edger by attaching a circular saw blade. The blade is then used to chip away at the stump, moving side to side until the stump is sufficiently ground down.
Safety is paramount when operating any kind of machinery, especially one that involves cutting blades. Always wear protective gear, including safety goggles, gloves, and ear protection. Ensure that the blades are securely attached and that the stump grinder is in good working condition. Keep bystanders at a safe distance, and never operate the grinder without the blade guard in place.
Yes, you can convert a walk-behind gas edger into a stump grinder by removing the edger blade and replacing it with a circular saw blade. This DIY stump grinder can be effective for small to medium-sized stumps. For larger stumps, it may be less efficient and more time-consuming compared to a commercial stump grinder.
Pros:
Cost-effective, as it avoids the rental or purchase costs of a commercial grinder.
Good for small, easy-to-reach stumps.
Cons:
Time-consuming for larger stumps.
Potentially less safe due to the makeshift nature of the equipment.
Requires a certain level of mechanical skill to assemble and operate.
After grinding a stump, you can use the wood chips as mulch for your garden beds, which can help retain moisture and suppress weeds. Alternatively, you can compost them or dispose of them according to your local waste management regulations. If you have a large quantity of wood chips, you might consider offering them to neighbors or local community gardens.
Conclusion
Giving it a try, following these instructions will surely make your project smoother. Let these pointers guide you through the DIY stump grinder process, making it efficient and safe.


