Building my DIY subwoofer for the first time was an exciting project. I loved tweaking and customizing electronics, and building a subwoofer for my home theater sounded like a fun challenge. I started by researching the materials and tools needed, ensuring I had everything ready. My workspace became a haven for creativity, sparking new ideas every step of the way.
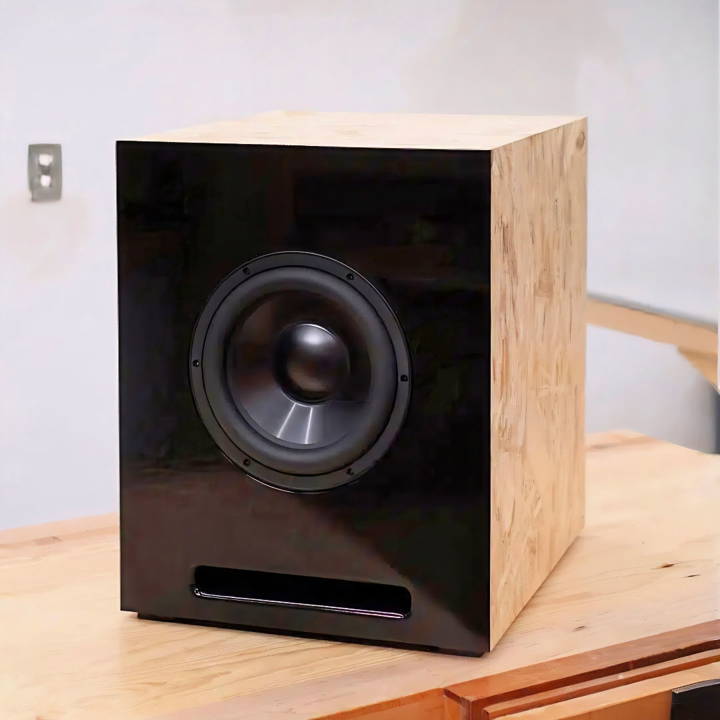
The step-by-step process was quite detailed, but I learned so much and gained confidence with each task. From building the enclosure to wiring everything correctly, I followed the instructions closely. By the end, I had a fully functioning DIY powered sub that enriched my movie-watching experience. Now, I want to share this process with you. DIY home theater subwoofer projects can be fun and rewarding.
If you follow these steps, I hope you'll enjoy making your own subwoofer as much as I did. Let's get started with the content below; it'll guide you and make your project enjoyable. With these steps, you'll have a new subwoofer in no time.
What is a Subwoofer?
A subwoofer is a loudspeaker that covers the lower end of the audible spectrum, typically from around 20 Hz to 200 Hz. This range includes the deepest notes in music, the rumble of thunder, and the roar of a jet engine.
Why Use a Subwoofer?
Subwoofers bring out the fullness of sound by delivering bass that small speakers can't produce. They add depth to music, make movie soundtracks more thrilling, and give video games a more immersive feel.
Types of Subwoofers:
- Passive Subwoofers: These require an external amplifier to power them.
- Active Subwoofers: Also known as powered subwoofers, they have a built-in amplifier.
Subwoofer Enclosures:
The enclosure or box that a subwoofer sits in is crucial to its performance. There are two main types:
- Sealed Enclosures: Provide tight and accurate bass.
- Ported Enclosures: Offer more volume and efficiency with bass output.
Placement Matters:
Where you place your subwoofer can greatly affect how it sounds. Corner placement can amplify the bass, but it might not be the best spot for clarity. Experiment with different locations to find the best sound for your room.
Connecting Your Subwoofer:
Most subwoofers connect to an audio receiver or amplifier through a standard RCA cable. Some models offer additional connectivity options like wireless Bluetooth.
Tuning Your Subwoofer:
Adjusting the volume, crossover frequency, and phase settings on your subwoofer can help blend its sound with your main speakers for a seamless audio experience.
Grasping these basics helps you choose, place, and use a subwoofer to better your audio experience. Aim to complement, not overpower, your system.
What You'll Need
- 10-inch Subwoofer Driver: I chose the Dayton Audio 10-inch reference series for its robust performance and optimal bass reproduction.
- Wood (MDF or Plywood): For making the enclosure. I opted for MDF because of its consistency and excellent acoustic properties.
- Veneer: For aesthetics. I chose a wood veneer to wrap around the enclosure, complementing my room's interior.
- Amplifier: A 300-watt RMS Class D amplifier matching the subwoofer driver's specifications.
- Other Materials: Screws, wood glue, sealant, acoustic foam, and wiring.
Tools Required
- Circular Saw
- Router with circle jig and bits
- Sandpaper (Various Grits)
- Paintbrush or sprayer
- Clamps
Step by Step Instructions
Learn how to build your own DIY subwoofer with our detailed, step-by-step instructions. Perfect for DIY enthusiasts and audio lovers!
Design and Planning
- Dimensions: Starting with the appearance, I wanted the subwoofer to echo the deep, narrow profile of my existing speakers. Functionality-wise, I adhered to the recommended cabinet volume of 1.68 cubic feet for the chosen driver, ensuring optimal sound output.
Building the Enclosure
- Cutting MDF Pieces: After calculating the dimensions, I had my MDF cut into manageable pieces at the hardware store and then further cut them into precise sizes at my workshop – for the top, bottom, sides, and front baffle.
- Routing and Cutting: Using a circular saw and router, I meticulously cut out the spaces for the driver and amplifier on the front baffle and back panel.
- Assembling the Box: I glued and screwed the panels together, starting with the bottom and working my way up. Internal bracing and acoustic foam were added for stability and sound dampening.
Finishing Touches
- Veneering: I applied a wood veneer for a sleek look, carefully cutting, gluing, and trimming it to fit.
- Sanding and Painting: Both the front baffle and veneered surfaces underwent rigorous sanding before receiving multiple coats of paint and varnish for a smooth, professional finish.
- Installing the Driver and Amplifier: With the enclosure complete, I installed the components, connecting them with high-quality audio cables.
Trials, Tribulations, and Triumphs
Building this subwoofer was not without its challenges. Determining the perfect port size for my desired frequency response involved a bit of trial and error, as did mastering the art of veneering. However, each step was a learning experience, contributing to my growing expertise in DIY audio.
The Result
The end product was nothing short of astounding. My subwoofer managed to produce deep, room-shaking bass while maintaining a balanced and clear sound across various music genres. It paired fantastically with my existing speakers, making a cohesive and powerful audio system.
Design Considerations
When you're ready to dive into the world of DIY subwoofers, the design phase is critical. It's where you lay the groundwork for a subwoofer that meets your specific needs. Let's break down the key factors to consider in a way that's easy to understand and apply.
- Choosing the Right Driver The driver is the heart of your subwoofer. It's important to pick one that fits your space and sound preferences. Think about the size of your room and how much bass you want. Larger drivers generally produce deeper bass, but they also need bigger enclosures.
- Sealed vs. Ported Enclosures Enclosures come in two main types: sealed and ported. Sealed enclosures are compact and produce tight, accurate bass. Ported enclosures are larger and build more volume but can be trickier to design because the port needs to be tuned correctly.
- Material Matters The material you choose for your enclosure affects the sound quality. Medium-density fiberboard (MDF) is a popular choice because it's dense and has good acoustic properties. Make sure the material is thick enough to avoid vibrations that can distort the sound.
- Calculating Volume and Port Tuning The volume of your enclosure should match the specifications of your driver for the best sound. If you're going with a ported design, you'll also need to calculate the right port size and length to tune the bass to your desired frequency.
- Assembly and Sealing Precision is key when assembling your enclosure. Joints should be tight and well-sealed to prevent air leaks. Use a good-quality wood glue and consider adding internal bracing to reinforce the structure.
- Finishing Touches The finish of your subwoofer isn't just about looks—it can also protect the enclosure. Paint, laminate, or veneer can all be used to build a durable and attractive finish that matches your style.
Consider these design elements to build a DIY subwoofer that sounds great and reflects your personal touch. Enjoy the process and the bass!
Customization Tips
Building a DIY subwoofer gives you the freedom to personalize not just the sound but also the look and feel of your device. Here are some tips to help you customize your subwoofer, making it a unique piece that stands out.
- Choose Your Style Think about where your subwoofer will live. Will it be part of a home theater, a car audio system, or a standalone piece? Your subwoofer's design should complement its surroundings. Sleek, minimalist designs work well in modern settings, while a vintage look might suit classic interiors.
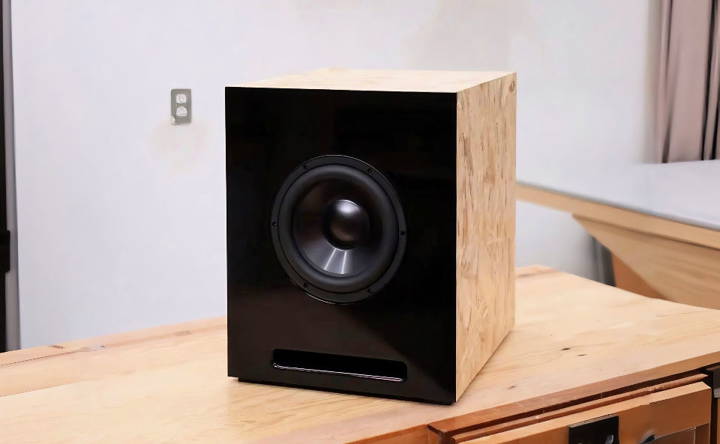
- Color and Finish The color and finish of your subwoofer can transform its appearance. You can paint it to match your room's decor or use wood stains for a natural look. High-gloss finishes add a touch of elegance, whereas matte finishes provide a more subdued and professional appearance.
- Grilles and Covers Grilles aren't just protective; they're also an opportunity for customization. You can choose a fabric that matches your style or go with a metal grille for a more industrial look. Some enthusiasts even design their own grilles for a completely unique touch.
- LED Lighting Adding LED lights can give your subwoofer a modern and high-tech feel. You can install them inside the enclosure for a subtle glow or around the edges for a more dramatic effect. With RGB LEDs, you can even change colors to suit your mood or the music.
- Personal Touches Consider adding personal touches like decals, patterns, or artwork. These can be as simple as a vinyl wrap or as intricate as hand-painted designs. It's your chance to put your personal stamp on your creation.
- Functionality Meets Design Remember that customization isn't just about aesthetics. If you add elements like handles for portability or feet to reduce vibration, you're enhancing both the form and function of your subwoofer.
By following these tips, you'll build a subwoofer that not only sounds great but also reflects your personal style. It's all about making it yours, so have fun with the process and let your creativity shine!
Troubleshooting Common Issues
When you're enjoying the deep bass from your DIY subwoofer and suddenly encounter a problem, it can be frustrating. But don't worry; many issues have simple fixes. Here's a guide to troubleshooting common subwoofer problems in plain language.
- No Sound? Check Connections First, ensure all cables are securely connected. Loose wires can often be the culprit. Check the connection at both the subwoofer and the amplifier or receiver.
- Is the Power On? It might seem obvious, but make sure your subwoofer is turned on. Also, check if the outlet is working by plugging it into another device.
- Inspect the fuse subwoofers to ensure they have fuses to protect against power surges. If there's no sound, the fuse might have blown. Locate the fuse, usually at the back of the subwoofer, and see if it needs replacing.
- Buzzing or Humming Sounds: If you hear a buzz, it could be a ground loop. This happens when your subwoofer and other devices aren't grounded properly. Try plugging your system into a different outlet or use a ground loop isolator.
- Distortion or Rattling: When the bass sounds distorted, or you hear a rattle, the issue might be with the subwoofer's placement. Make sure it's on a solid surface. Also, check for loose parts inside the enclosure.
- Subwoofer Cuts Out at High Volume If your subwoofer stops working at high volumes, it might be overheating. Give it a break to cool down. Also, ensure it's not pushed beyond its power limits.
- Still Not Working? If you've tried these steps and your subwoofer still isn't working, it might be time to look inside. Check the speaker cone and voice coil for damage. If you're not comfortable doing this, consider seeking help from a professional.
Most issues with DIY subwoofers are fixable. With a little patience and troubleshooting, you can get back to enjoying your favorite tunes with all the bass you love.
Safety and Maintenance
Ensuring the safety and longevity of your DIY subwoofer involves regular maintenance and adhering to safety guidelines during construction and use. Here's a comprehensive section on how to keep your subwoofer in top shape while staying safe:
Safety First
- Wear Protective Gear: Always use safety goggles and gloves when working with tools and materials to protect your eyes and hands from potential hazards.
- Secure Materials: Use clamps to hold wood panels or other parts firmly in place while cutting or drilling to prevent slips and accidents.
- Follow Tool Instructions: Read and understand the manufacturer's instructions for each tool you use. This ensures you're using them correctly and safely.
Maintenance Tips
- Regular Inspections: Check your subwoofer periodically for any signs of wear and tear, especially on the cables and connections.
- Clean Gently: Use a soft, dry cloth to dust your subwoofer. Avoid using water or cleaning solutions that can seep into the electronics.
- Tighten Connections: Make sure all screws and fasteners are tight. Loose parts can cause rattling and potentially damage the subwoofer.
- Check the Surround: The rubber or foam surround on the subwoofer can degrade over time. Inspect it for cracks or deterioration, which can affect sound quality.
Prevent Overheating
- Adequate Ventilation: Ensure your subwoofer has enough space around it for air to circulate and prevent overheating.
- Avoid Overdriving: Don't push your subwoofer beyond its limits. Playing audio too loudly for extended periods can overheat and damage the components.
Electrical Safety
- Surge Protection: Use a surge protector to safeguard your subwoofer from power spikes and electrical surges.
- Proper Wiring: Ensure all wiring is done correctly and that there are no exposed wires that could cause a short circuit.
Following these safety tips ensures your DIY subwoofer remains safe and performs optimally. Caring for your subwoofer is as crucial as enjoying its bass.
FAQs About DIY Subwoofer
Discover everything you need to know with faqs about DIY subwoofer projects. Get expert advice, tips, and detailed answers to your questions.
A DIY subwoofer is a speaker system that you can build at home to enhance the bass frequencies in your audio setup. Building your own subwoofer allows you to customize the design to fit your space and preferences, often resulting in better performance and satisfaction than store-bought options.
Choosing the right subwoofer driver depends on the size of your room and the type of sound you want. Look for drivers with good sensitivity, power handling, and frequency response. It’s also important to ensure the driver matches the enclosure type you plan to build.
Not all amplifiers are suitable for subwoofers. You need an amplifier that can handle the low-frequency signals and provide enough power for the subwoofer driver. Look for an amplifier with a subwoofer or low-pass filter to ensure it only amplifies bass frequencies.
To ensure the best sound quality:
Positioning your subwoofer correctly in the room can greatly affect performance. Try placing it in different spots to find where it sounds best.
Sealing the enclosure properly to prevent air leaks which can distort the sound.
Use high-quality components for wiring and connectors to maintain signal integrity.
Common mistakes include:
Underestimating the importance of enclosure design. The size and shape significantly affect the sound, so follow the driver's specifications closely.
Skipping the break-in period for the subwoofer driver. New drivers may need some time to perform optimally, so play music at moderate volumes for the first few hours.
Final Thoughts
Building a DIY subwoofer was one of the most fulfilling projects I've undertaken. Now, I hope to inspire you to dive into this exciting endeavor. Don't hesitate—give it a try and experience the joy of making your very own powerful sound system.


