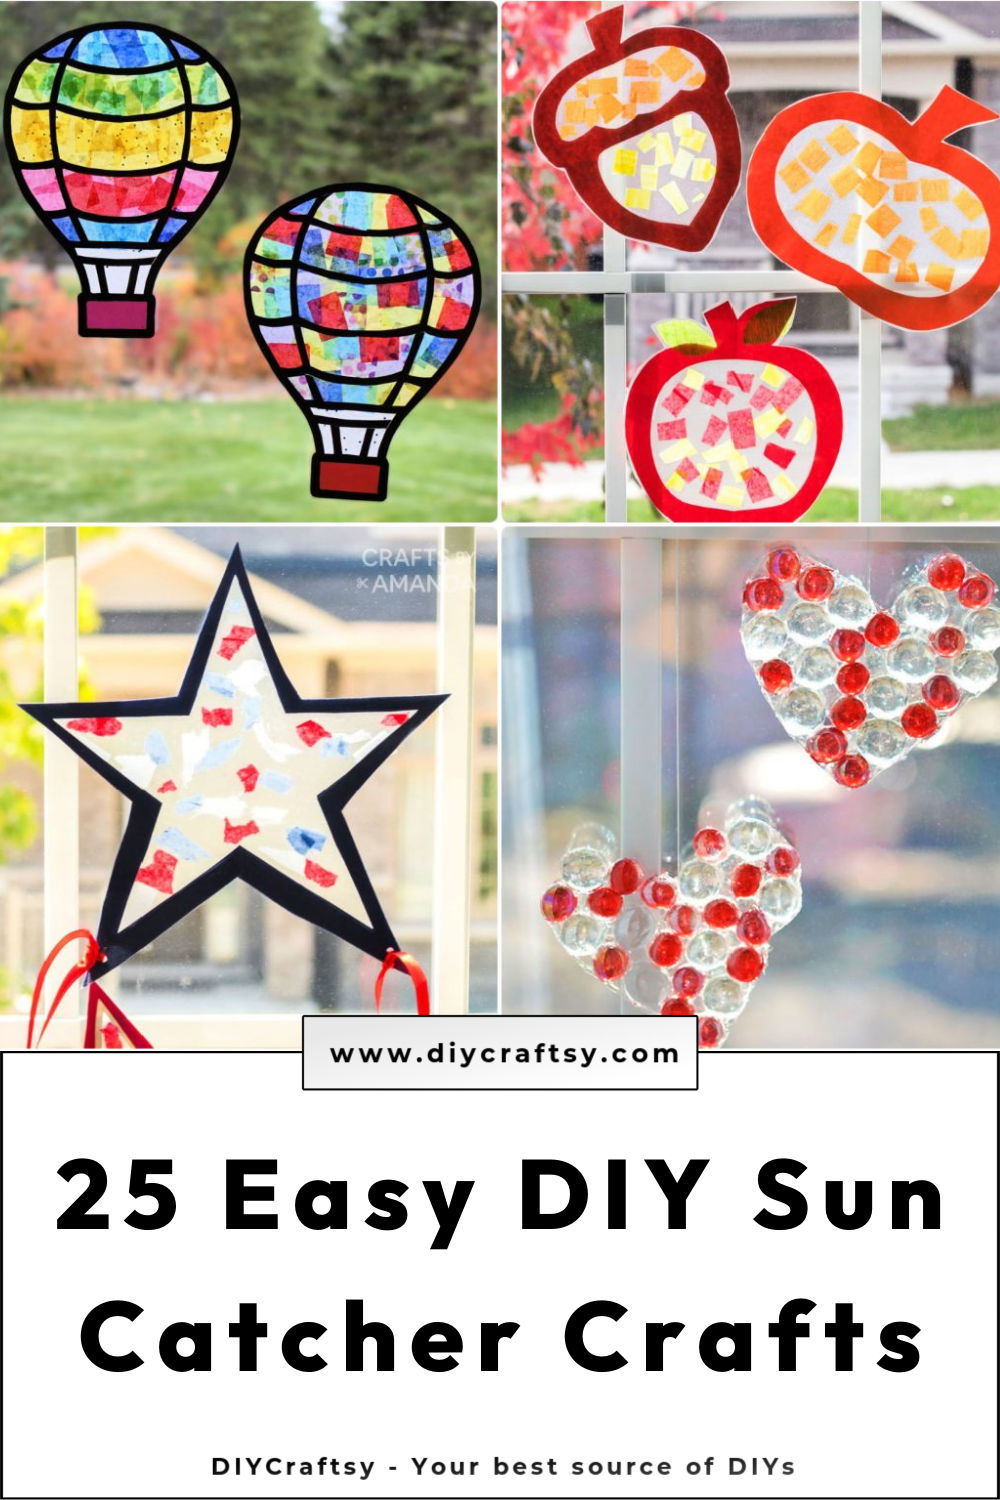
Making beautiful DIY suncatchers is a delightful way to add color and vibrancy to your windows. Discover 25 engaging and easy DIY suncatcher crafts for kids and adults turning simple materials into stunning displays. From the rich history of glass to the modern do-it-yourself (DIY) approaches, crafting suncatchers combines tradition with personal creativity. This guide will introduce you to the basics, from choosing designs to gathering your supplies.
Suncatchers serve as a perfect blend of art and tradition, offering a canvas for expressing personal style and cultural significance. Whether you're planning to make a nature-inspired piece or incorporate personal symbols, understanding the process of making suncatchers is the first step.
This introduction aims to set you on a path to crafting your own beautiful, light-catching decorations. Let's move on to explore how you can get started with your first suncatcher project.
The Art and History of DIY Suncatchers
Suncatchers, ornamental pieces that capture and reflect sunlight, trace their origins to the accidental discovery of glass by ancient civilizations. They have evolved from simple light-catchers to elaborate art pieces with profound cultural significance.
The craft of glassmaking has matured over millennia, from the Phoenicians' initial discovery to the intricate stained glass used during the Middle Ages, leading to the creation of suncatchers by Southwest American Indians.
These vibrant ornaments not only enhance spaces with their colorful reflections but also symbolize positive energy and spiritual harmony. Today, suncatchers vary in design and complexity, embodying a rich tradition that connects artisans to an ancient heritage of crafting light.
DIY Crystal Suncatchers Tutorial
Making a crystal suncatcher adorned with moons and stars is a delightful project that combines creativity with simplicity. This guide walks you through each step, ensuring clarity and ease. Whether you're a beginner or an experienced crafter, this tutorial will help you make a beautiful suncatcher to brighten any space.
Materials Needed
- Crystal Suncatcher Kit (available online; link in the video description)
- Scissors
- Ruler
- Thin wire in gold (1 meter)
- Two metal hoops of different sizes
- Crystal beads (gold, clear, and blue chip crystals)
- Jump rings (double jump loops recommended for added security)
- Prism for the center
- Chain (50 cm for hanging)
- Jewelry pliers (optional but helpful)
Step 1: Prepare the Hoops
Start by placing the two metal hoops together, aligning the points where they are welded. Using the gold wire, wrap it tightly around the hoops to join them, ensuring they are close together. Wrap the wire around 22 times for a secure fit.
Step 2: Create the Zigzag Pattern
After securing the hoops, begin to wrap the wire in a zigzag pattern around both hoops. Start tighter at the center and allow the gaps to widen as you move outward, creating a sun-like shape. If needed, the wire can be unwound and rewrapped to correct any mistakes.
Step 3: Add the Beads
Unwind your next meter of wire and thread the crystal beads onto it, following a pattern: one gold, one clear, one blue chip crystal, another clear, and repeat. After stringing the beads, wrap the wire around the hoops, leaving one bead at the front after each wrap. Gradually increase the number of beads left at the front as the space widens, creating a beautiful, detailed pattern.
Step 4: Secure and Finish the Wrapping
Once all the beads are in place, continue wrapping the wire around the hoops. Adjust the tension to avoid any gaps between wraps for a neat appearance. When you reach the end, cut off the excess wire and tuck the end securely.
Step 5: Attach the Prism and Decorative Elements
Open a jump ring and thread it through the prism, then attach it to the center of your suncatcher. Add additional decorative elements like octagons or a heart-shaped crystal at the bottom, using jump rings to connect each piece. Ensure the decorations are centered and evenly spaced for a harmonious look.
Step 6: Hang Your Suncatcher
Finally, attach a 50 cm chain to the top of the suncatcher with a jump ring. This allows you to hang your suncatcher at the desired length, either short or long, to best catch the light and display its beauty.
Video Tutorial
For a step-by-step video tutorial on creating a crystal suncatcher with moons and stars, watch our YouTube video.
It pairs well with this written guide, offering a visual complement to the techniques described here, making it easier to follow along and ensure success in your crafting endeavor.
This guide, alongside the video tutorial, provides you with all the information needed to create a stunning crystal suncatcher. Enjoy the process and the beautiful outcome of your crafting!
How to Get Started with DIY Suncatcher Crafts
Making your own DIY suncatchers is a rewarding project that adds a touch of beauty and color to your living space. Whether you're crafting with kids or looking for a simple yet creative hobby, making suncatchers is an enjoyable activity that anyone can do. Here's how to get started on this vibrant journey.
Choosing Your Suncatcher Design
The first step in making a suncatcher is to decide on a design. You might be inspired by nature, seasonal themes, or simply abstract patterns. Consider what appeals to you or what might complement the area where you plan to display your suncatcher. From simple shapes like hearts and stars to more complex designs like butterflies or flowers, the possibilities are endless.
Gathering Supplies
Most suncatcher projects require basic crafting materials, many of which you may already have at home. Here's a quick list of commonly needed items:
- Transparent Materials: Contact paper, clear plastic sheets, or old CDs can serve as the base for your suncatcher.
- Colorful Media: Tissue paper, glass paints, beads, or colored cellophane will add vibrant colors to your design.
- Adhesives: Depending on your project, you might need craft glue, double-sided tape, or a hot glue gun.
- Templates and Tools: Scissors, markers, and printable templates (if following a specific design) will be essential. Craft stores and online resources offer a variety of templates.
Making Your Suncatcher
Step 1: Prepare Your Workspace
Clear a space on a table or desk and gather all your supplies. Cover the area with newspaper or a craft mat to protect surfaces from spills or cuts.
Step 2: Cut and Arrange
If using a template, trace your design onto your transparent material and carefully cut it out. For a freestyle project, cut shapes from your colorful media and arrange them on the transparent base until you're happy with the design.
Step 3: Assemble
Use glue or double-sided tape to secure your colorful pieces to the transparent base. For projects involving melting beads or crayons, follow safety guidelines and use appropriate tools.
Step 4: Final Touches
Once your design is set and any adhesives or melted materials have cooled and dried, add any finishing touches. This might include outlining shapes with marker or adding a hanging mechanism, like a string or suction cup.
Displaying Your Suncatcher
The best part of making a suncatcher is seeing it catch the light. Hang your finished suncatcher in a sunny window or glass door. Consider making several suncatchers to make a stunning display that will catch the eye and brighten your space.
Sharing and Expanding Your Skills
Don't hesitate to share your creations with friends and family or on social media. You might inspire others to start their own suncatcher projects. As you gain confidence, experiment with new materials and techniques to make more complex and personalized designs.
Starting your DIY suncatcher project is as simple as choosing a design, gathering supplies, and letting your creativity shine. Whether you're a beginner or an experienced crafter, the process of making a suncatcher offers a fun and satisfying way to enhance your home décor with personalized touches of color and light.
Customization Tips for Suncatcher Crafts
Making a suncatcher is not just about following a set of instructions; it's about putting a piece of yourself into the craft. Personalizing your suncatcher makes it uniquely yours and adds a special touch to your home or as a gift. Here are some tips to help you customize your suncatchers:
Choose a Theme
Start by deciding on a theme that resonates with you. It could be anything from nature, such as flowers or animals, to abstract patterns or even a personal hobby. Your theme will guide the colors and shapes you use.
Select Your Colors
Colors can set the mood of your suncatcher. Warm colors like reds and oranges can make a sense of warmth and energy, while cool colors like blues and greens can be calming. Choose colors that reflect your personality or the ambiance you want to create.
Incorporate Personal Symbols
If there are symbols that hold personal significance to you, such as a peace sign, a heart, or a religious icon, consider incorporating them into your design. This adds a layer of meaning to your suncatcher.
Add Initials or Names
For a more personalized touch, add your initials, your name, or the name of someone you're gifting the suncatcher to. This can be done with beads, painted on, or even etched into the glass.
Play with Textures
Mixing different textures can add depth to your suncatcher. Consider using smooth glass pieces alongside rougher, translucent beads or incorporating metal elements for a varied tactile experience.
Experiment with Light
Remember that suncatchers interact with light. Use materials that will make interesting light patterns on your walls when the sun shines through. Translucent and iridescent materials can produce a beautiful spectrum of colors.
Make It Interactive
Consider adding elements that move or make noise, like small chimes or dangling pieces that can sway in the breeze. This brings your suncatcher to life and engages more senses.
Keep It Eco-Friendly
Where possible, use recycled materials or upcycled items. Not only is this good for the environment, but it also adds a story to your suncatcher. Old jewelry, shards of glass, or even bits of metal can be repurposed into something beautiful.
Involve Others
If the suncatcher is a gift, involve the recipient in the design process. This can make the craft more meaningful and ensure that the final product is something they will cherish.
Reflect on the Process
As you craft, take the time to reflect on what the suncatcher means to you. The process of making can be just as important as the finished product.
By following these tips, you can make a meaningful and eye-catching suncatcher that reflects your creativity and individuality.
Design Ideas and Inspiration for Suncatcher Crafts
Embarking on the journey of making suncatchers is an adventure in color, light, and creativity. Whether you're a seasoned artist or a beginner, the world of suncatcher crafts offers endless possibilities to express your artistic flair. Here are some design ideas and inspiration to spark your imagination:
Nature-Inspired Designs
Nature is a treasure trove of inspiration for suncatcher crafts. Consider making suncatchers that reflect the beauty of the seasons:
- Spring: Blossoming flowers, buzzing bees, and delicate butterflies.
- Summer: Lush green leaves, vibrant sunsets, and ocean waves.
- Autumn: Falling leaves, acorns, and warm autumnal hues.
- Winter: Snowflakes, icicles, and the stark beauty of bare branches.
Abstract and Geometric Patterns
If you prefer a more modern aesthetic, explore abstract and geometric designs. Use bold shapes and lines to make eye-catching patterns that play with light and shadow.
Personal Interests and Hobbies
Your hobbies and interests can be a great source of inspiration. Make suncatchers that reflect your passions, such as musical instruments, books, or sports symbols.
Cultural Motifs
Celebrate your heritage or explore other cultures by incorporating traditional motifs into your suncatchers. This can include Celtic knots, mandalas, or tribal patterns.
Inspirational Quotes and Words
Words have power, and incorporating them into your suncatchers can add a meaningful touch. Choose your favorite quotes, affirmations, or single words that resonate with you.
Upcycling with a Purpose
Look around your home for materials that can be repurposed into suncatchers. Old CDs, bottle caps, and even broken glass can be transformed into stunning pieces.
Color Therapy
Colors can influence mood and emotions. Use the principles of color therapy to make suncatchers that evoke specific feelings, such as calmness, joy, or energy.
Interactive Elements
Add elements that move or make sound to your suncatchers, like dangling crystals or beads that will catch the breeze and make a dynamic display.
Seasonal Celebrations
Make suncatchers for specific holidays or celebrations. Think of pumpkins for Halloween, stars for Christmas, or hearts for Valentine's Day.
For the Little Ones
Design suncatchers that are kid-friendly with bright colors and simple shapes. These can be fun projects to do together and a great way to introduce children to the art of crafting.
Craft your own unique suncatcher using different materials and techniques. Let sunlight be your canvas and glass be your paint. Make joy for yourself and others.
Safety Tips for Suncatcher Crafts
Crafting suncatchers is a delightful activity that can brighten any space, but it's important to prioritize safety, especially when working with children or using certain materials. Here are some safety tips to ensure a secure and enjoyable crafting experience:
Use Safe Materials
Always choose materials that are non-toxic and safe for all ages. Avoid using lead-based products or sharp glass pieces, especially if children are involved in the crafting process.
Supervise Children
When crafting with children, provide constant supervision. Teach them how to handle materials safely and guide them through each step of the process.
Wear Protective Gear
If you're cutting glass or working with any materials that could cause injury, wear protective gear such as safety glasses and gloves.
Work in a Well-Ventilated Area
Some suncatcher crafts may involve materials that emit fumes, such as certain adhesives or paints. Always work in a well-ventilated area to avoid inhaling any harmful substances.
Keep a Clean Workspace
Maintain a clean and organized workspace. This not only helps prevent accidents but also makes the crafting process more enjoyable.
Store Materials Properly
After crafting, store all materials out of reach of children and pets. Ensure that all containers are properly sealed and labeled.
Dispose of Waste Responsibly
Dispose of any waste materials, such as glass shards or excess adhesives, in a safe and responsible manner to prevent injury and environmental harm.
Read Instructions Carefully
Before using any new materials or tools, read the instructions carefully. Understanding the proper usage can prevent accidents and ensure the best results.
Be Mindful of Allergies
Be aware of any allergies that you or the craft participants may have. Some materials, like certain glues or paints, may trigger allergic reactions.
First Aid Kit
Keep a first aid kit nearby in case of minor injuries. It should include items like band-aids, antiseptic wipes, and tweezers for removing splinters.
By following these safety tips, you can make beautiful suncatchers while keeping yourself and others safe. Remember, safety is the foundation of a fun and successful crafting experience.
Maintenance and Care for Suncatcher Crafts
Suncatchers bring a splash of color and joy to any space, but like all beautiful things, they require a bit of care to keep them shining bright. Here's how you can maintain your suncatchers so they continue to capture the light beautifully:
Regular Cleaning
Dust and dirt can accumulate on your suncatcher, diminishing its sparkle. To clean it, gently wipe the surface with a soft, lint-free cloth. If your suncatcher is especially dirty, you can use a mild soap and water solution to help remove grime. Be sure to dry it thoroughly with a clean cloth.
Avoid Harsh Chemicals
Harsh cleaning chemicals can damage the materials of your suncatcher. Stick to gentle cleaning solutions and avoid abrasive materials that could scratch the glass or fade the colors.
Proper Display
Display your suncatcher in a spot where it can do its job—catching light! However, be mindful of extreme temperatures and direct sunlight, which can affect certain materials over time. If your suncatcher has elements that could fade, consider placing it in an area that gets indirect light.
Storage
If you need to store your suncatcher, wrap it in a soft cloth or bubble wrap to protect it from scratches. Store it in a cool, dry place to prevent any damage from moisture or heat.
Handling with Care
When moving your suncatcher, hold it securely and avoid dropping it. Some suncatchers can be delicate, and even a short fall can cause chips or cracks.
Check for Damage
Periodically inspect your suncatcher for any signs of damage, such as cracks or loose parts. If you find any issues, you may be able to repair them yourself or take them to a professional for restoration.
Enjoy Your Craft
Most importantly, enjoy the beauty your suncatcher adds to your environment. Its vibrant colors and patterns are meant to be enjoyed, so find a special place for it where it can be appreciated by all.
By following these simple care instructions, your suncatcher will continue to brighten your days for years to come.
Environmental Impact of Crafting Materials
In the world of crafting, every choice we make—from the materials we select to the way we dispose of leftovers—has an impact on our planet. As crafters, it's our responsibility to be mindful of this impact and strive for sustainability in our creative pursuits. Here's how you can make environmentally conscious decisions in your crafting:
Understanding the Impact
Crafting materials can vary widely in their environmental footprint. Some materials may require significant resources to produce, while others can be sourced sustainably. It's important to understand the lifecycle of the materials you use, from production to disposal.
Choosing Sustainable Materials
Opt for materials that are renewable, recycled, or upcycled. Natural fibers like wool, cotton, and bamboo are great choices, as they biodegrade more easily than synthetic alternatives. Consider the source of your materials and prioritize those with a lower carbon footprint.
Reducing Waste
Be mindful of waste when crafting. Plan your projects to use materials efficiently, and find ways to repurpose scraps. For example, fabric offcuts can be used to make patchwork items, and leftover yarn can be knitted into smaller accessories.
Eco-Friendly Practices
Incorporate eco-friendly practices into your crafting routine. Use non-toxic glues, paints, and dyes, and look for products with minimal packaging. If you're involved in activities like pottery or jewelry-making, consider the energy consumption of kilns and other equipment.
Educating and Sharing
Share your knowledge and practices with the crafting community. By educating others about sustainable crafting, you can help spread awareness and encourage more people to make environmentally friendly choices.
Supporting Local and Ethical Suppliers
Whenever possible, buy from local suppliers to reduce transportation emissions. Also, support businesses that adhere to ethical practices and have a commitment to sustainability.
Longevity and Quality
Invest in high-quality tools and materials that will last longer, reducing the need for frequent replacements. This not only saves resources but also ensures that your finished crafts will stand the test of time.
By taking these steps, you can minimize the environmental impact of your crafting and contribute to a more sustainable future. Remember, every small action counts, and together, we can make a difference.
FAQs About Suncatcher Crafts
Learn all about Suncatcher Crafts with FAQs covering materials, techniques, and inspiration. Find everything you need to make beautiful sun-catching art.
What is a suncatcher?
A suncatcher is a decorative piece that is designed to be hung in front of a window to catch and reflect sunlight, making beautiful patterns of light in a room.
How do you make a simple suncatcher?
To make a simple suncatcher, you can use clear adhesive paper and colorful tissue paper. Cut the tissue paper into shapes, peel the adhesive paper, and stick the tissue paper pieces onto it. Seal with another layer of adhesive paper and trim to shape.
Can I make suncatchers with kids?
Absolutely! Suncatcher crafts are perfect for kids as they are fun, easy, and a great way to teach about colors and light. Just ensure to supervise and use safe materials.
What materials do I need for suncatcher crafts?
Common materials include transparent adhesive paper or contact paper, tissue paper, beads, ribbons, and sometimes wire or metal frames. You can also use glass paint on clear plastic sheets.
How can I hang my suncatcher?
You can hang your suncatcher using a suction cup hook on a window. If it's a lightweight suncatcher, clear fishing line or a thin ribbon will work well.
Are there any eco-friendly options for making suncatchers?
Yes, you can use recycled materials like old CDs, glass pieces, or beads. You can also look for biodegradable or recyclable materials for your craft.
How do I clean my suncatcher?
Gently wipe your suncatcher with a damp cloth. If it's made of glass, you can use a bit of glass cleaner. Avoid using abrasive materials that could scratch the surface.
Can suncatchers be used outdoors?
Some suncatchers are designed to be weather-resistant and can be used outdoors. Make sure the materials you choose can withstand the elements if you plan to display your suncatcher outside.
How long does it take to make a suncatcher?
The time it takes to make a suncatcher can vary depending on the complexity of the design. Simple designs can take as little as 30 minutes, while more intricate ones may take several hours.
Can I make a suncatcher without glass?
Yes, you can use clear plastic sheets or even laminating pouches as a substitute for glass. These materials are safer, especially for projects involving children.
Do suncatchers serve any purpose other than decoration?
While primarily decorative, suncatchers can also serve as educational tools for children, helping them learn about light and colors. They can also be therapeutic, providing a relaxing crafting activity.
25 Easy Suncatcher Crafts
Discover 25 easy suncatcher crafts and learn how to make stunning suncatchers with this helpful guide. Perfect for all crafting levels!
1. DIY Hot Air Balloon Suncatchers
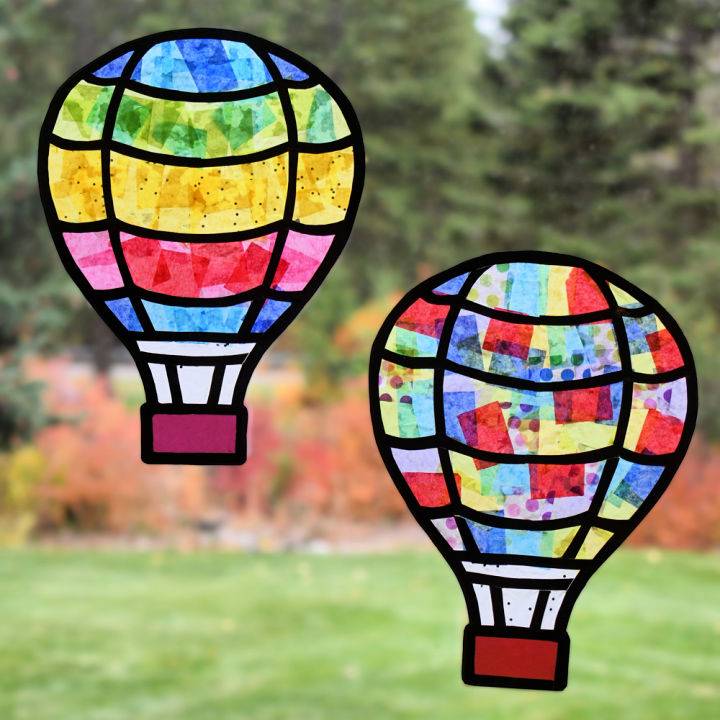
These lovely DIY hot air balloon suncatchers introduce a vibrant touch to your windows. Children will enjoy selecting their favorite tissue paper colors to make unique designs. Easily download the printable hot air balloon template provided and let your creativity soar with this fun and engaging craft activity for kids.
Gather materials such as white cardstock, scissors, a black marker, craft glue, colored tissue paper, and colored cardstock for the basket.
The finished hot air balloon suncatchers make beautiful decorations for birthday parties, playrooms, or school rooms. Let your imagination take flight and make stunning hot air balloon suncatchers. createplaytravel
2. Making a Fused Bead Rainbow Suncatcher
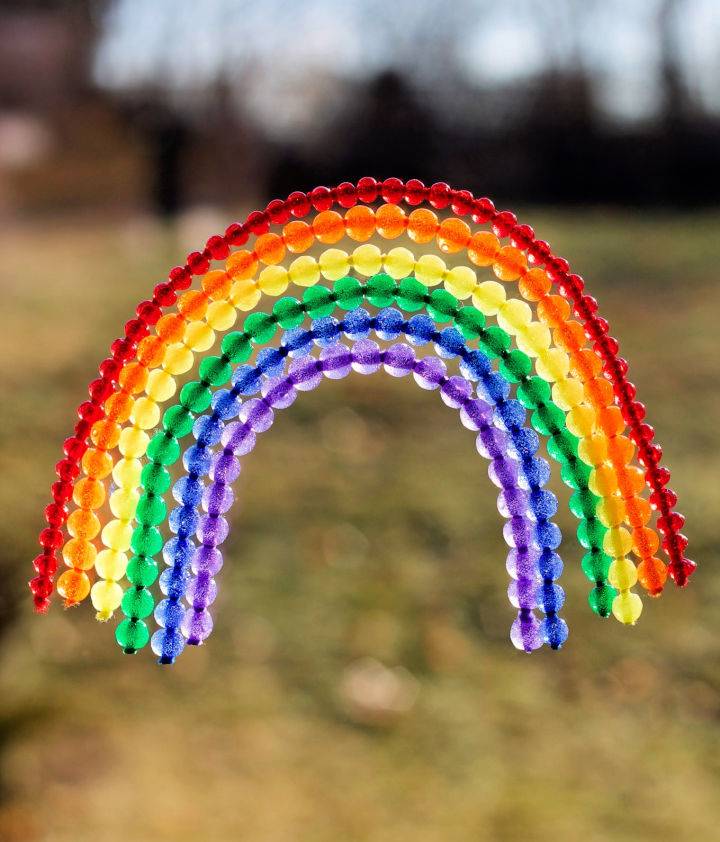
Brighten your home and celebrate spring with these DIY, vibrant fused bead rainbow suncatchers! This fine-motor craft is perfect for teaching preschoolers colors while engaging their creativity. You can make a stunning rainbow suncatcher using rainbow chenille stems, faceted plastic beads, and simple tools like scissors and fishing lines.
String the beads onto the chenille stems, bend them into an arc, and arrange them on a parchment paper-lined cookie sheet. The beads melt and fuse after baking in the oven, making a beautiful rainbow. Hang the suncatcher in a window and enjoy the colorful display. This delightful craft is a wonderful way to add a touch of cheerfulness to your home decor. firefliesandmud
3. Homemade Apple, Acorn, and Pumpkin Fall Suncatchers
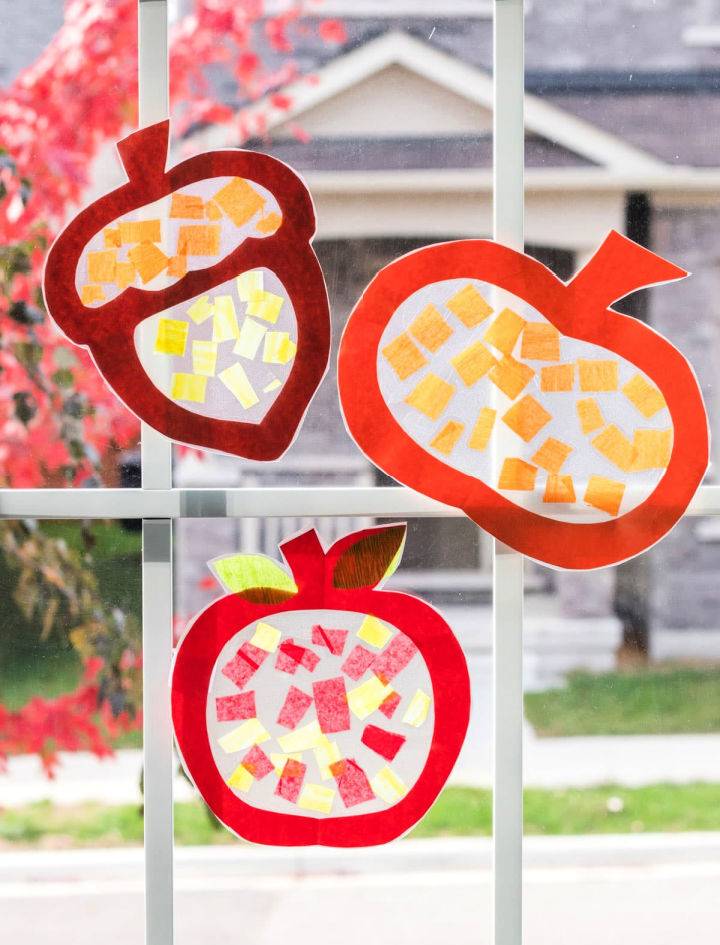
Get charming DIY fall suncatchers using tissue, construction, and contact paper! This fun craft project is perfect for kids, especially with Halloween and Thanksgiving just around the corner. With the changing colors of the leaves and the cooler air, fall is a season full of transformation.
Following the step-by-step instructions, children can make their own pumpkin, apple, and acorn suncatchers to decorate windows and add a touch of brightness to the shorter days.
The materials needed are easily accessible, and the estimated cost is minimal, making it a budget-friendly activity. Let your kids explore their creativity and learn more about the season by engaging in this enjoyable craft project. craftsbyamanda
4. Free Printable Leaf Suncatchers Template
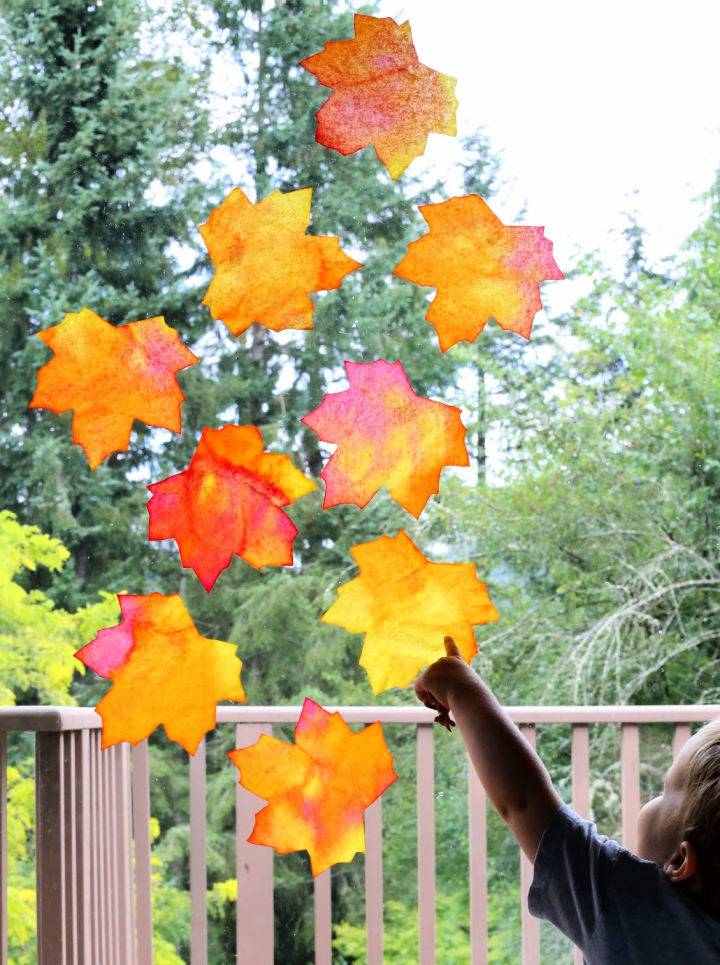
Get charming DIY fall suncatchers using tissue, construction, and contact paper! This fun craft project is perfect for kids, especially with Halloween and Thanksgiving just around the corner. With the changing colors of the leaves and the cooler air, fall is a season full of transformation.
Following the step-by-step instructions, children can make their own pumpkin, apple, and acorn suncatchers to decorate windows and add a touch of brightness to the shorter days.
The materials needed are easily accessible, and the estimated cost is minimal, making it a budget-friendly activity. Let your kids explore their creativity and learn more about the season by engaging in this enjoyable craft project. funathomewithkids
5. Cool DIY Pressed Flower Suncatcher
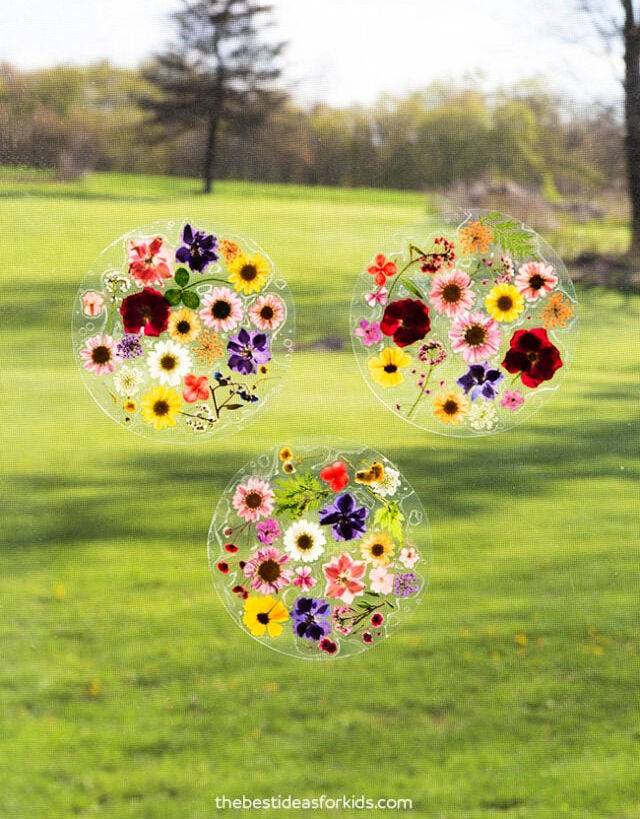
Let the beauty of nature grace your window with this unique DIY suncatcher! These suncatchers look beautiful on windows or in classrooms, perfect as a gift or for adding a touch of spring to your home.
Start by collecting and pressing wildflowers or fallen flowers from your garden. Once the flowers are pressed, trace a small plate or bowl onto a self-laminating sheet, then arrange the pressed flowers on the sticky side.
Add another laminating sheet on top and press firmly to seal. Cut out the suncatcher and hang it on your window using double-sided tape or glue dots. Enjoy the enchanting beauty of this suncatcher. bestideasforkids
6. Handmade Springtime Suncatchers
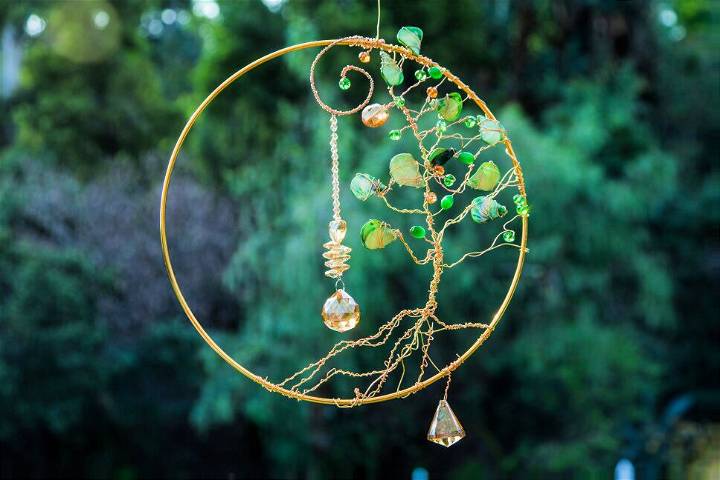
Explore the beauty of nature with your DIY springtime suncatchers! Using materials like a metal hoop, copper wire, bicone crystals, bigger crystals, and jewelry pliers, you can craft a bright and colorful suncatcher that will add an energetic touch to your space.
Begin by designing the hanging point for your large crystal within the hoop. Then, make a tree shape by wrapping wire around the bottom and working your way up, adding branches and layers for texture.
String crystals onto the wire, and for those without holes, securely wrap the wire around them. Take the beauty of spring indoors with this fun and artistic suncatcher project. hallmarkchannel
7. Upcycled Plastic Earth Day Suncatchers
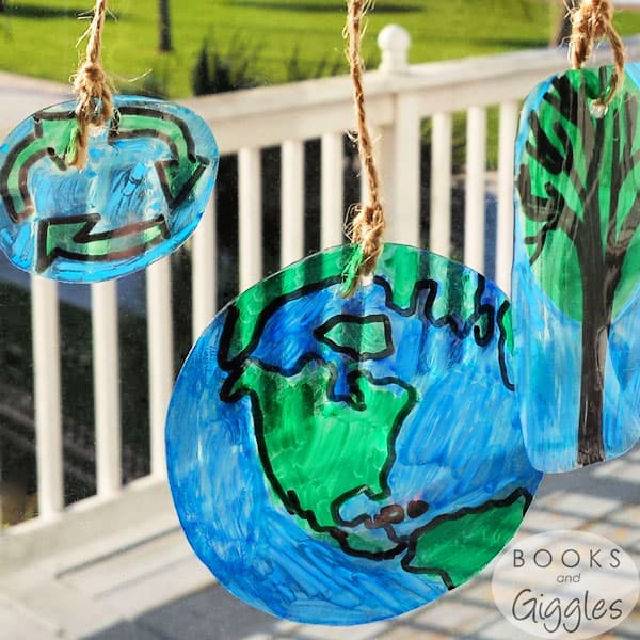
Celebrate Earth Day with a creative and educational craft for kids using recycled plastic! With this easy project, you can repurpose clear plastic berry boxes or takeout box lids to make beautiful DIY suncatchers. Cut out small circles from the plastic, color them with permanent markers, punch holes in each circle, and attach them to a small twig using twine.
Hang up your finished suncatcher and let it remind you to reduce, reuse, and recycle. This Earth Day activity is fun and engaging and teaches children about the importance of environmental sustainability. Explore more upcycling ideas for kids and enhance their creativity while positively impacting the planet!s booksandgiggles
8. Colorful Apple Suncatchers Craft for Toddler
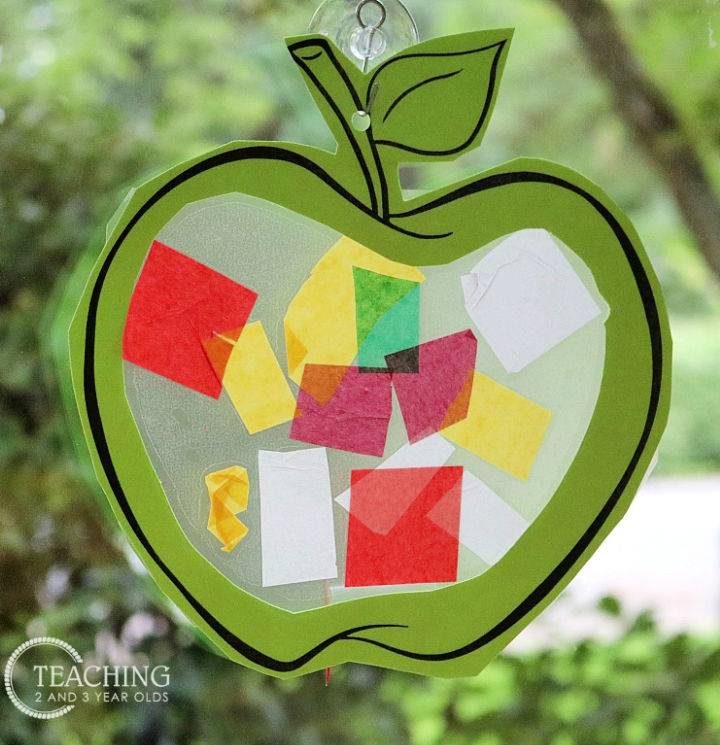
With just a few simple materials, these colorful DIY apple suncatchers are the perfect craft for your toddler to make! This vibrant and engaging toddler apple craft can be doubled as a stunning suncatcher for your window! This easy project is perfect for little ones and helps develop fine motor skills. Using a free Apple printable template, you'll need colorful tissue paper, ConTact (sticky) paper, and red or green paper for printing.
Cut out the apple shapes, remove the center, and cover the negative space with ConTact paper. Then let your toddler explore the sticky surface by pressing on tissue paper squares, making a beautiful mosaic of colors.
Once finished, add another layer of contact paper to secure the design and punch a hole for hanging. Display these cheerful apple suncatchers in your classroom or home, bringing a touch of autumn charm to any space. teaching2and3
9. How to Make a Suncatcher With Glass Beads
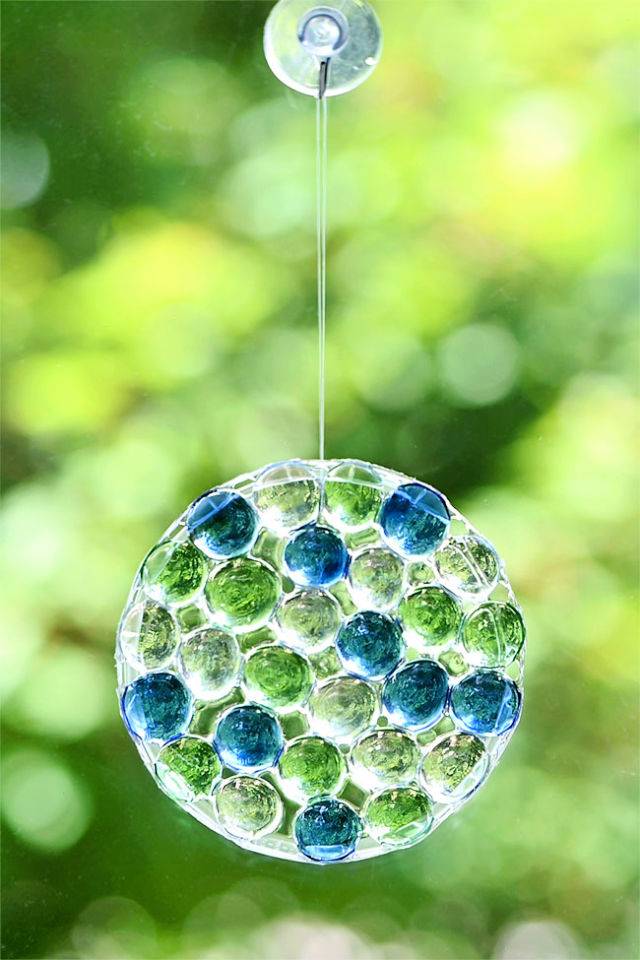
Hang up a rainbow of colors in your window with this stunning DIY suncatcher with glass beads! Press the glass beads into patterns using clear glue and a plastic lid, or make a random design. Hang these colorful suncatchers in your window to bring a cheerful ambiance to any room.
This craft is simple and affordable, with materials readily available at the dollar store. Customize your suncatchers for different occasions or as homemade gifts by choosing specific colors or adding additional types of beads. Follow the step-by-step instructions to make your stunning glass bead suncatcher and enjoy the beautiful play of light. onelittleproject
10. Ocean Animal Coffee Filter Suncatcher for Kids
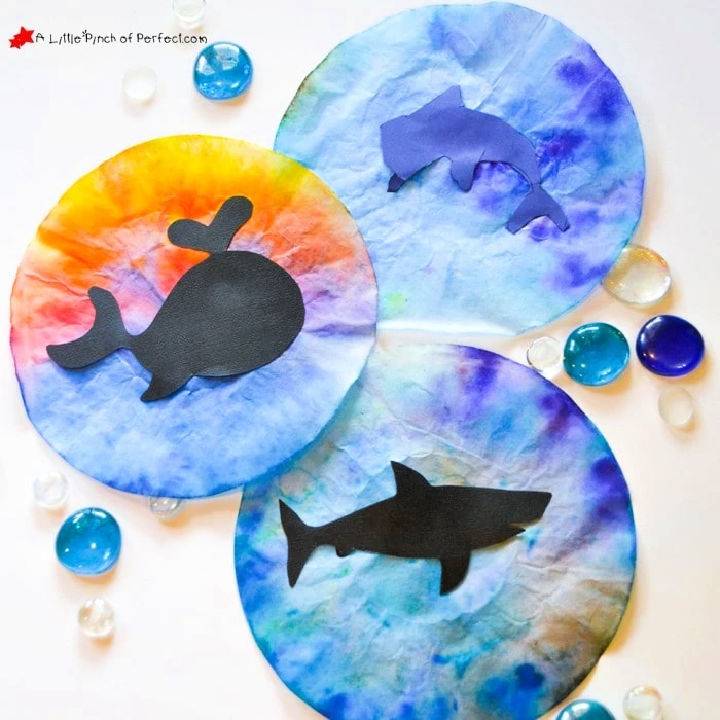
Let your children's imaginations soar with this colorful DIY ocean animal coffee filter suncatcher! You can make this vibrant and engaging craft with your kids using the free template and simple instructions. This fun craft project captures the essence of the ocean and is perfect for adorning your windows.
Using coffee filters and cut-out animal silhouettes such as a dolphin, shark, whale, and fish, you can make colorful suncatchers that will brighten any room. This guide has included a free pattern to make it easy for you to join in the fun. Get creative and explore the wonders of the sea with your little ones! alittlepinchofperfect
11. How to Make Heart Suncatcher

Sparkle up your space with this DIY heart suncatcher - it's sure to capture some sunshine and love! You can make a stunning decoration for your windows using just a few supplies like cardstock, tissue paper, clear contact paper, and scissors. Cut out a heart outline from cardstock and apply contact paper to one side.
Then, stick tissue paper squares to the contact paper and seal it with another piece on the back. This mess-free craft is perfect for kids and requires no preparation. It's an ideal activity for Valentine's Day parties or as a surprise gift for parents. Let your creativity shine with this simple and enjoyable craft project! kidsactivityzone
12. Nature Paper Plate Suncatcher Tutorial
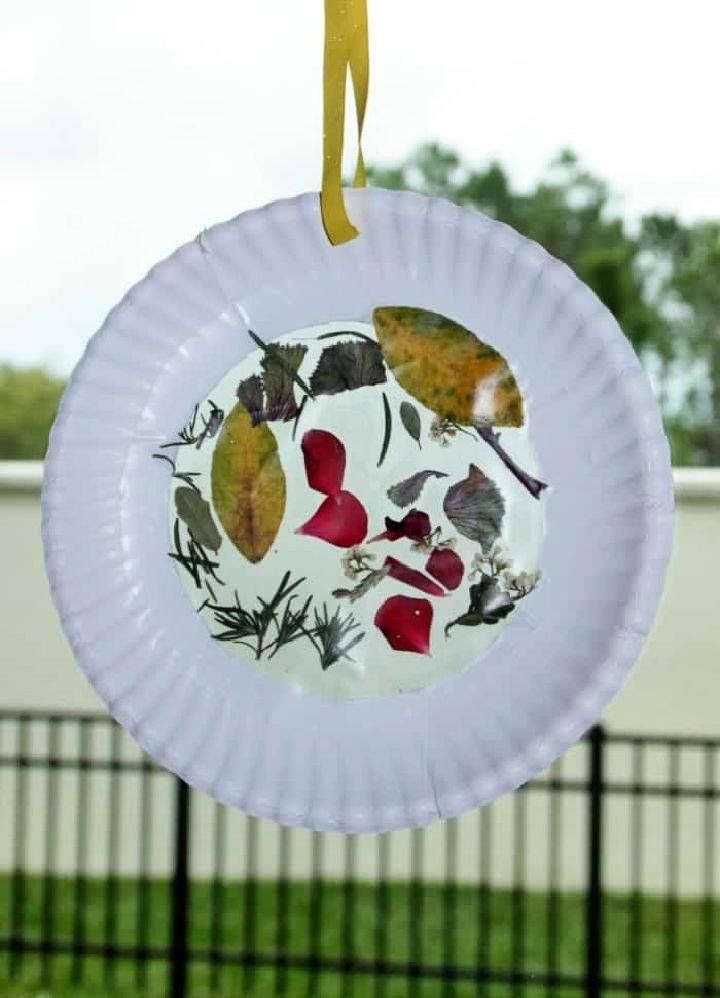
Experience the joy of making beautiful DIY nature suncatchers with your family! With this delightful guide, discover how to make stunning suncatchers using flowers, leaves, and herbs your kids can collect on a nature walk.
You can embark on a creative adventure with just a few materials like a paper plate, contact paper, ribbon, and scissors. Follow the step-by-step instructions to make these multi-sensory suncatchers that add magic to any room.
Adapt the craft to match the seasons and holidays, making it a versatile and engaging activity year-round. With this easy guide, start celebrating and connecting with your family through art and crafts. coffeecups
13. Glass Bead Heart Suncatcher Idea
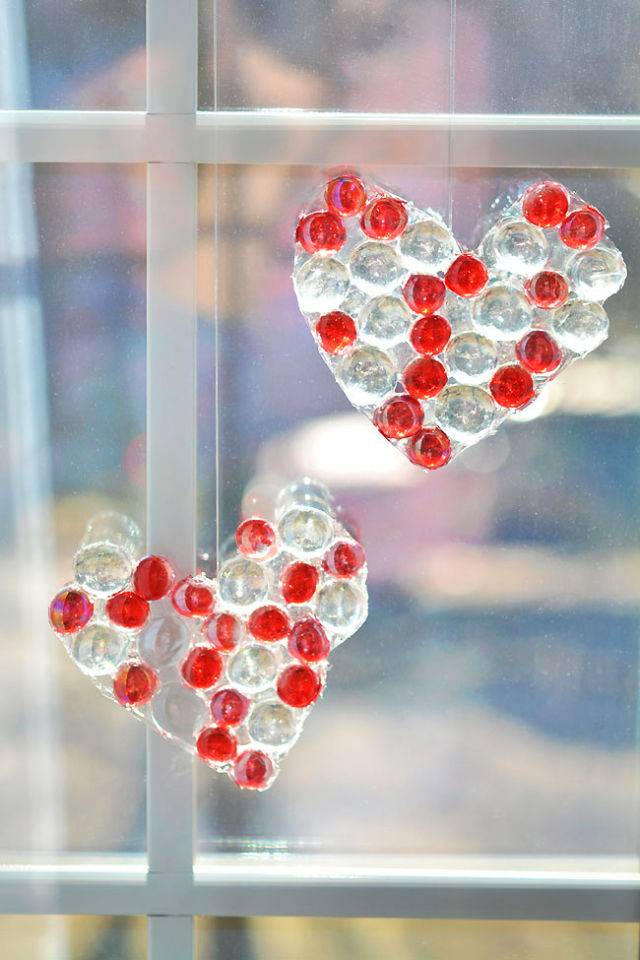
Bring a beautiful sparkle of love to your home with this DIY glass bead heart suncatcher idea! This fun project is perfect for occasions like Valentine's Day, Mother's Day, or Father's Day, making it an ideal gift to express love and appreciation.
Craft a heart-shaped mold using simple materials like tin foil, clear glue, and flat glass beads. Use a thin layer of glue to the mold and carefully press the glass beads into it, making a pattern or arranging them randomly. After allowing it to dry for a few days:
- Remove the suncatcher from the mold.
- Trim any excess glue.
- Attach a fishing line for hanging.
The finished glass bead heart suncatcher will captivate with its radiant colors when sunlight filters through it. Get creative and brighten up your living space with this affordable and enjoyable craft project. onelittleproject
14. How to Make Your Own Ladybug and Leaves Suncatchers
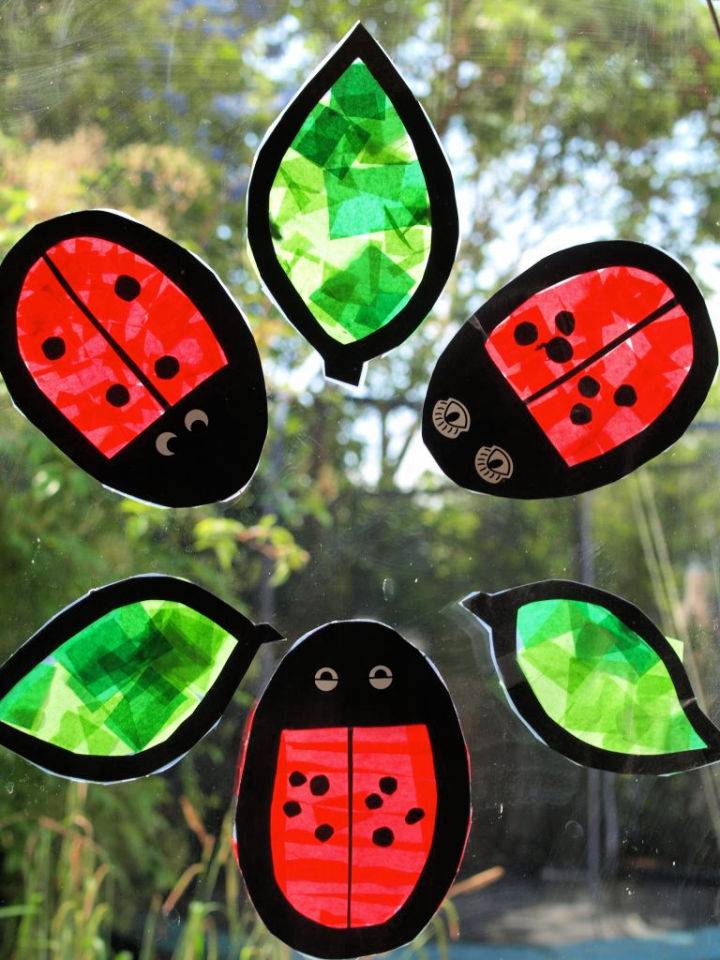
Craft your way to summer fun with this beautiful DIY ladybug and leaves suncatchers! These suncatchers are perfect for children and add charm to any window. To make them, you'll need contact paper, black and red cardstock, red and green tissue paper, and eyes.
Cut out ladybug and leaf shapes from the black cardstock, then attach them to the contact paper. Next, cover the shapes with tissue paper, ensuring no gaps. Cut out the shapes and stick them to a window using blu tack.
The result is a delightful display of ladybugs that can also serve as a fun number display for kids. Check out more ladybug-themed crafts and activities for further inspiration. Let your creativity shine with these lovely ladybug sun catchers! herecomethegirls
15. Homemade Raindrop Suncatcher
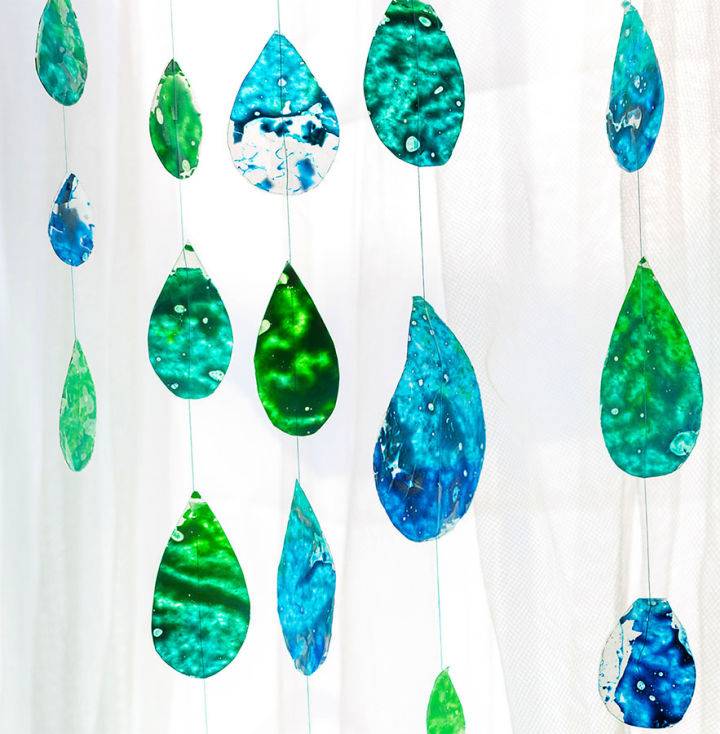
Catch rainbows with a homemade suncatcher; it's the best way to bring sunshine into your home! Make a vibrant and colorful suncatcher with the crayon melting technique! This fun and engaging craft project is perfect for celebrating spring and embracing April showers. Gather your supplies, including Crayola crayons, scissors, duct tape, a wooden dowel, wax paper, a hairdryer, and string.
Start by unwrapping 4-6 crayons and sharpening them to make shavings. Lay a wax paper on a protected surface and sprinkle the shavings evenly. Cover with another wax paper and seal the edges with duct tape. With adult supervision, use a hairdryer to melt the crayon shavings.
Allow it to cool for 15 minutes. Cut raindrop shapes from the melted wax paper and attach them to a string tied to a wooden dowel. Repeat this step until your suncatcher is complete. Hang it up and enjoy the beauty of catching a sun shower with your unique creation! crayola
16. DIY CD Suncatchers for Adults
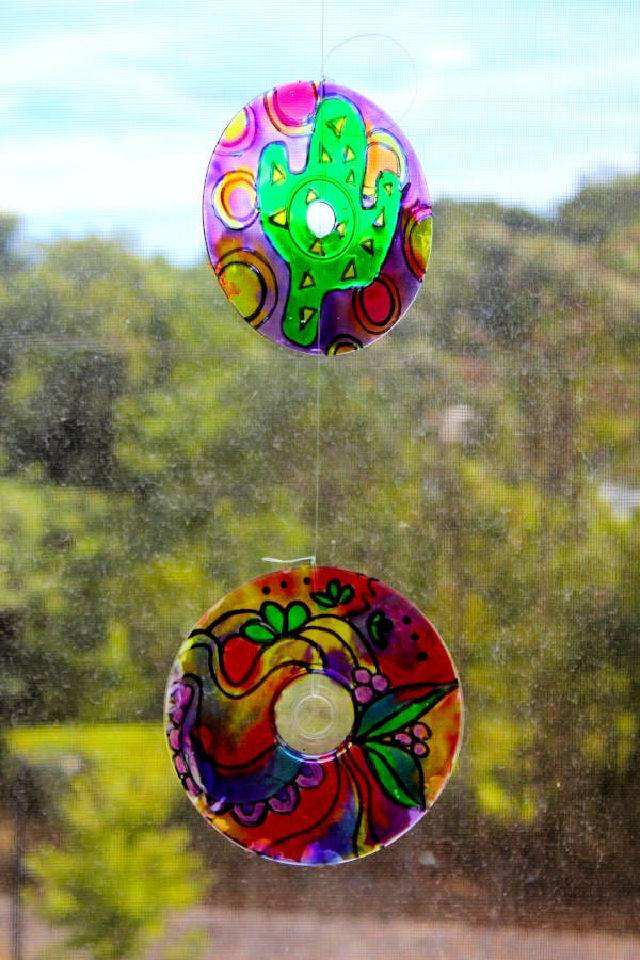
Bring some extra light and joy into your home with this easy DIY suncatcher craft using recycled CDs. This project is a fun and affordable way to explore your creativity, perfect for adults and kids alike.
Learn how to remove the painted side of CDs and repurpose them into beautiful suncatchers. With just a few supplies like tape, scissors, markers or paint pens, suncatcher paint, and fishing line, you can make unique designs and hang them in your windows to catch the sunlight. Get ready to relax, unwind, and make mini masterpieces with this therapeutic and enjoyable craft project. soapdelinews
17. DIY Black Glue and Sharpies Butterfly Suncatcher
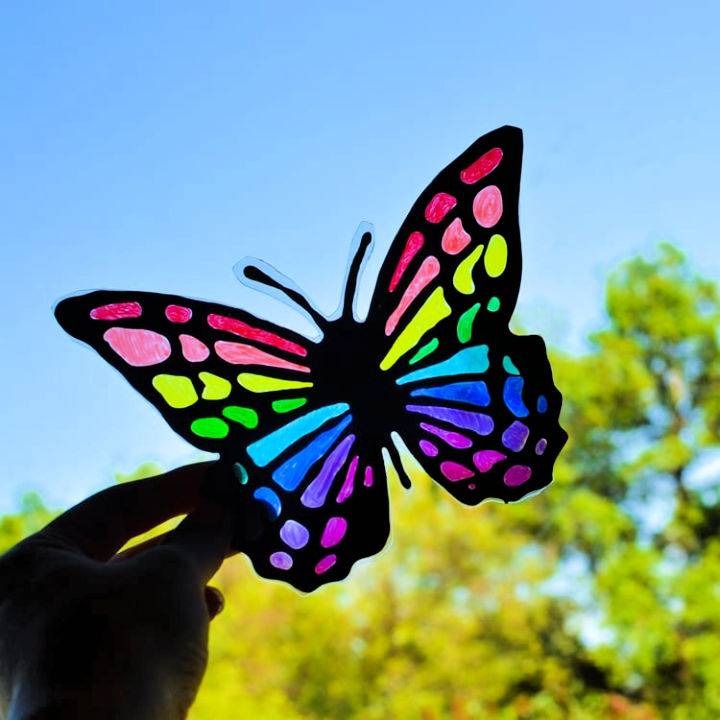
A beautiful way to brighten up your day - crafting a DIY butterfly suncatcher with black glue and Sharpies! Discover the beauty of this easy and affordable project that resembles stained glass. Make black glue by mixing black acrylic paint with white Elmer's glue. Simply pour the excess glue into a container for future use.
Apply the black glue mixture onto clear plastic surfaces and let your creativity flow as you draw butterfly outlines. The slightly raised lines of the black glue make a stunning effect.
After drying overnight, color the butterflies using Sharpie markers for vibrant and consistent results. Finally, cut out the butterflies, leaving some plastic around the edges, and enjoy your personalized suncatchers. Download the butterfly template to get started on this beautiful craft! adventure in a box
18. DIY Stained Glass Style Owl Sun Catcher
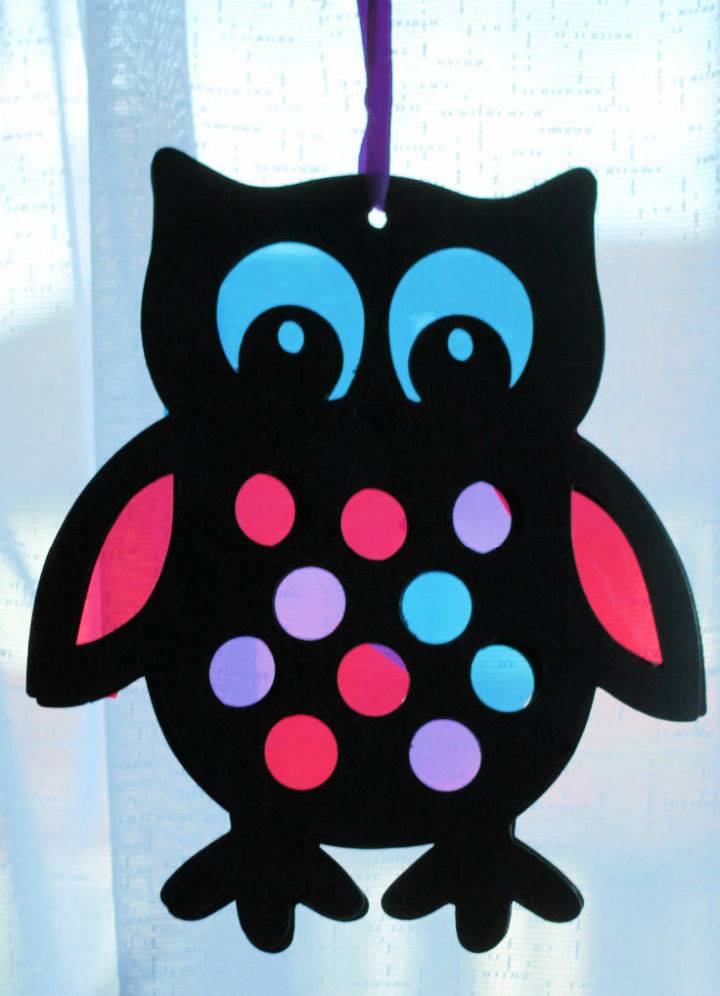
Sparkle and shine in the sunlight with this DIY stained glass-style owl suncatcher! This stunning and vibrant owl sun catcher will bring color and light to your home decor. Using black card templates and an array of colorful cellophane, this project is both easy and visually captivating. While a kit from Baker Ross simplifies the process, you can easily replicate the idea with readily available materials.
Cut the cellophane into small pieces and place them over the holes in the owl template, allowing the colors to shine through. To seal the sun catcher, apply glue to one side of a second owl template and press it down on the cellophane-covered template.
Hang it in a sunny window to admire the radiant beauty of your handmade creation. This owl sun catcher is perfect for autumn or any time of year and adds a whimsical and enchanting touch to your living space. intheplayroom
19. Make Your Own Melted Crayon Suncatchers
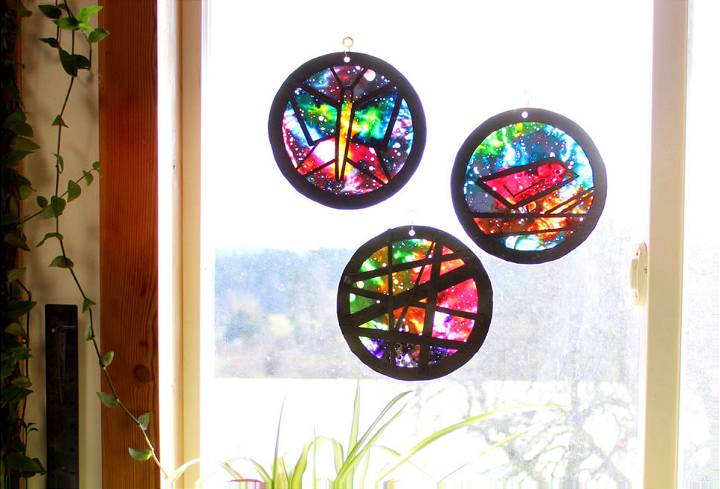
Make a vibrant and colorful suncatcher to capture the essence of summer with this fun DIY craft project. Using simple materials like waxed paper, crayons, and black cardstock, you can make a stunning stained glass effect that radiates beautiful hues when the sunlight shines through.
Follow the step-by-step instructions to trace and cut the cardstock ring, melt crayon shavings between sheets of waxed paper, and frame the suncatcher with black cardstock.
For added creativity, plan out a picture or use strips of cardstock to form geometric shapes. Hang your finished creation in a sunny window and let it illuminate your space with its vibrant colors. Perfect for all ages, this craft is a fun way to embrace the summer season. supersimple
20. Easy DIY Snowflake Suncatcher
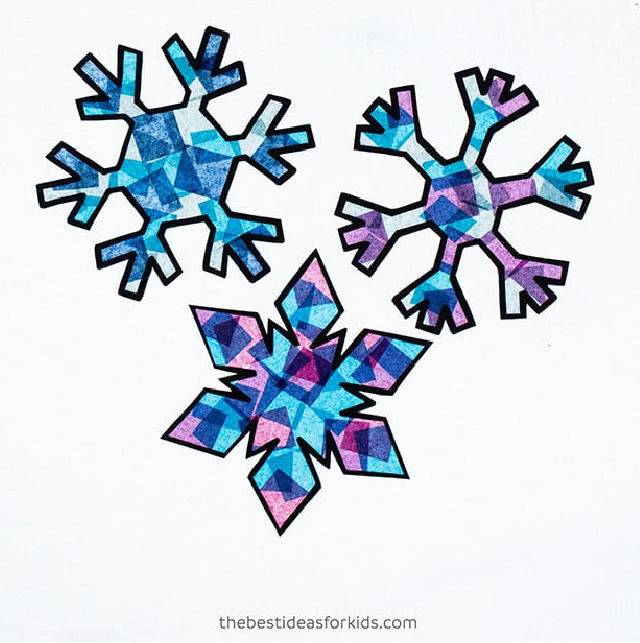
This easy DIY snowflake suncatcher makes your windows sparkle like a winter night sky! Using the free printable templates or drawing your designs, you can easily make these beautiful suncatchers with construction paper and tissue paper. This guide provides step-by-step instructions and a video tutorial to guide you through the process.
All you need are supplies like clear contact paper, tissue paper, white cardstock, scissors, and adhesive dots for hanging. Cut out the snowflake templates, place the tissue paper on sticky laminating paper, and cover it with another sheet to make the suncatchers. Hang them on windows using double-sided tape for a stunning winter display! bestideasforkids
21. Simple DIY Star Suncatcher for the 4th of July
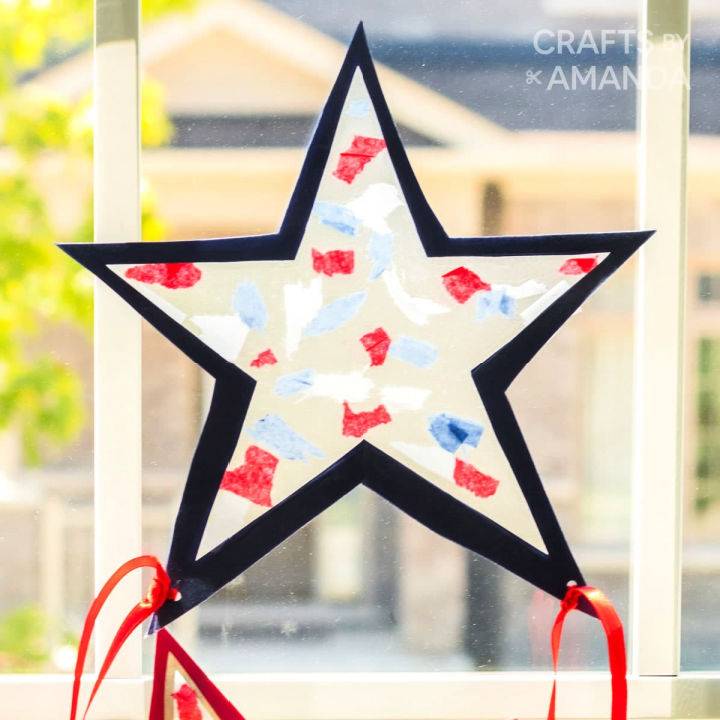
Turn your Fourth of July celebrations into a star-studded affair with this simple DIY star suncatcher! This craft is fantastic for making a festive atmosphere for your 4th of July celebration. Perfect for kids, this patriotic-themed craft is easy to make using simple supplies like construction paper, contact paper, and tissue paper in red, white, and blue.
The step-by-step instructions guide you through the process, and you can even add a ribbon to make a shooting star effect. Hang these suncatchers on your windows to add a festive touch to your holiday decor. Whether for the 4th of July, Memorial Day, or Patriot Day, these star suncatchers are a fun and engaging way to celebrate and keep the kids busy during the summertime. craftsbyamanda
22. How Do You Make a Pumpkin Sun Catcher
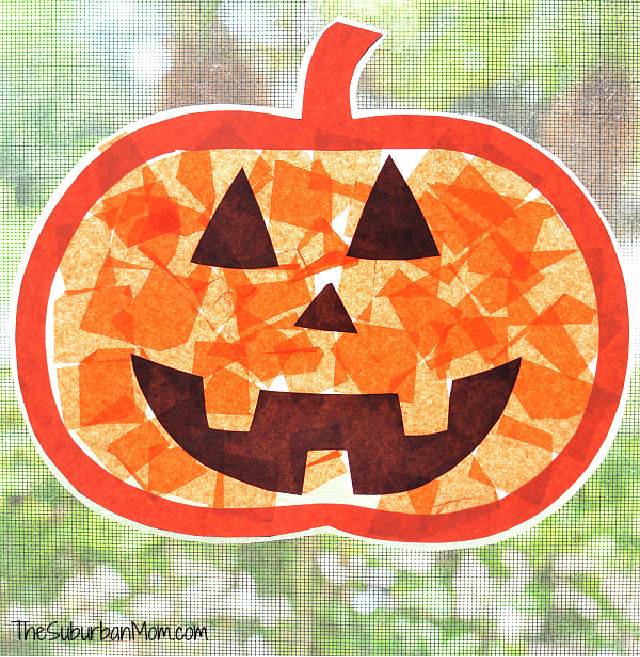
Let the light of autumn shine through a beautiful, DIY pumpkin suncatcher! Make a festive and engaging activity for your little ones with this project. Perfect for fall or Halloween, this craft is mess-free and helps children practice their scissor skills.
With just a few materials like orange construction paper, printable pumpkin templates, tissue paper, contact paper, and scissors, you can easily make a durable decoration that can be enjoyed year after year.
Download the free template, cut out the pumpkin outline, and let your child get creative by placing the face parts and sticking tissue paper squares over the contact paper. Hang the complete sun catcher in a window or use a string for a delightful touch. Discover more Halloween kid's crafts to add to your festive collection! thesuburbanmom
23. Make Jellyfish Sun Catcher With Free Template
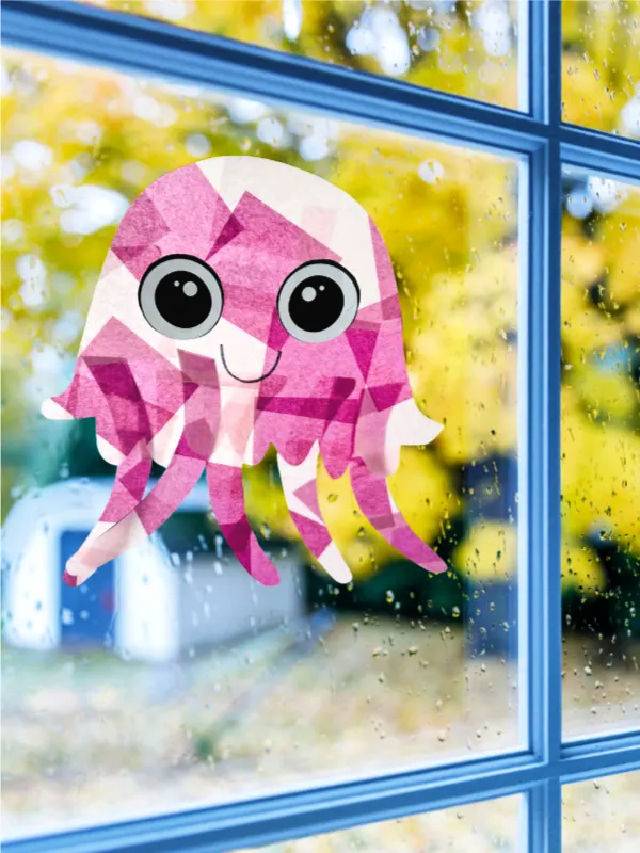
Add a touch of the ocean to your home with this delightful DIY jellyfish sun catcher craft. Perfect for summertime, this easy and fun project allows kids to make colorful jellyfish to hang in the windows. You only need basic supplies like contact paper, tissue paper squares, white cardstock, and other materials.
Download the jellyfish template, cut out the pieces, and follow the instructions to assemble your sun catcher. It's a great way to keep kids engaged and entertained while unleashing their creativity. Hang these vibrant jellyfish sun catchers in your windows and bring the beauty of the ocean indoors. simpleeverydaymom
24. Making Your Own Flower Mandala Suncatchers
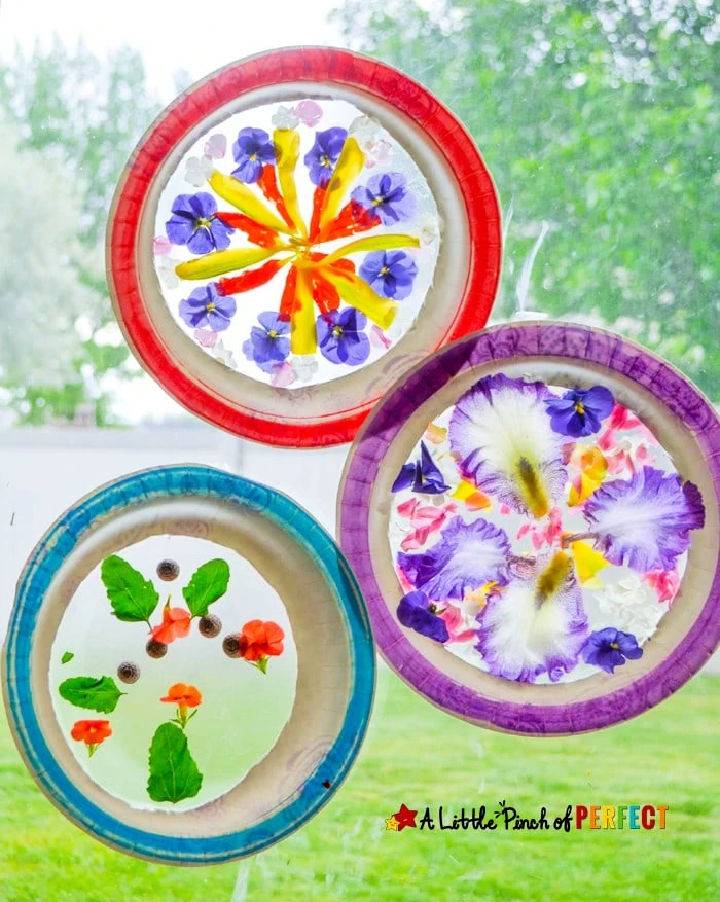
Unlock your inner artist and make beautiful suncatchers with a unique touch - your flower mandala! With this easy and engaging project, you can make a beautiful mandala nature craft with your kids. Take your children outside to explore and collect natural treasures like flowers, petals, and leaves.
Using paper plates and clear contact paper, you can make symmetrical circles and provide a template for your kids to follow. They can then decorate their mandalas, counting and placing nature pieces in each section.
Cover the artwork with a second sheet of contact paper to ensure it sticks well. Hang the finished mandalas in the window and let the sunlight shine through. This fun activity promotes creativity, learning about symmetry, and appreciating nature's beauty. alittlepinchofperfect
25. Make a Bird Shape Suncatcher
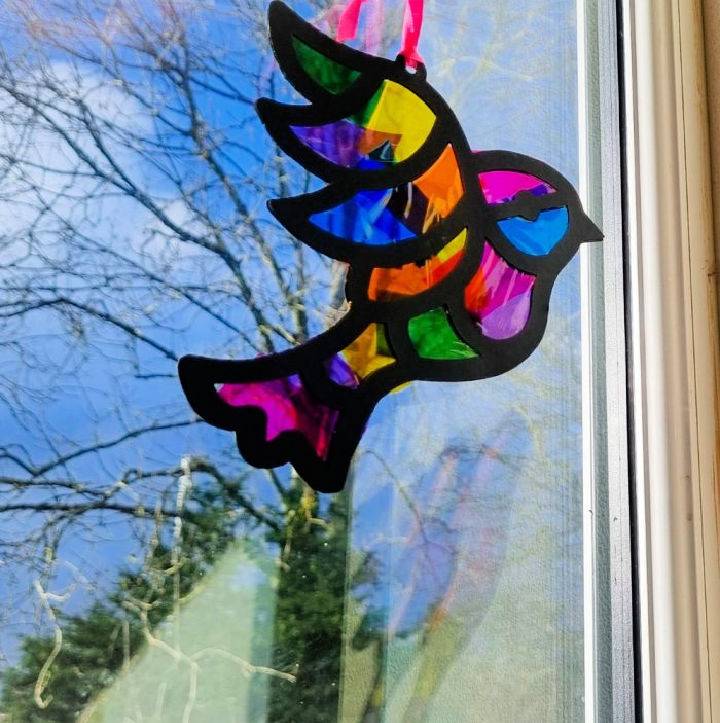
Glorify your windows with a sparkly suncatcher shaped like a bird - the perfect addition to any home or garden! Build a magical and colorful atmosphere in your home with this craft. Suncatchers are beautiful decorations that reflect rainbow colors and patterns when sunlight shines through them.
Perfect for crafting with kids, this stained glass effect suncatcher is both easy to make and mesmerizing to watch. You can use various materials, such as stained glass, beads, or crystals, to make your suncatcher.
This craft requires black cardstock, transparent cellophane sheets, ribbon, scissors, a pencil, and a glue stick. Hang your finished suncatcher in a sunlit window and enjoy the beautiful display of colors. Get creative with different shapes, colors, and materials to make unique suncatchers and delightful gifts. nymelrosefamily
Conclusion:
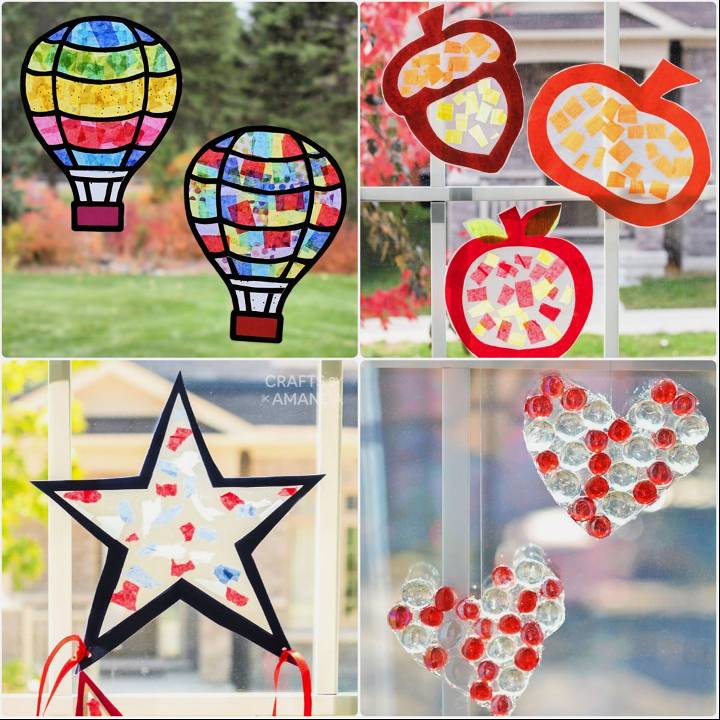
Wrapping up our journey through the vibrant and artistic world of suncatcher crafts, this article has illuminated not only how to make suncatchers but also their rich history, significance, and the endless possibilities for customization and creativity they offer.
From selecting the perfect design and supplies to putting the finishing touches on your creation, and even ensuring their eco-friendly impact, we've covered the essential steps to help you bring a little more light and color into your home. As you venture into your own suncatcher projects, remember the joy is as much in the making as it is in the displaying.
Related DIY Crafts to Make
Discover fun and creative DIY craft ideas to make in your spare time. Get inspired and unleash your inner artist with these easy and exciting projects.
- DIY Wire Crafts: Explore your creativity with these pretty DIY wire crafts that are both fun to make and functional.
- DIY Stress Balls: Relieve stress and anxiety with these lovely DIY stress ball ideas to help you make your own personalized stress-relief tools.
- Nature Crafts and Art Ideas: Engage in eco-friendly activities with these fun nature crafts and art ideas suitable for kids and adults alike.
- Creative Straw Crafts: Repurpose plastic or paper straws with these cute DIY straw crafts that are both enjoyable and environmentally friendly.
- Crafts for Kindergarten: Have fun with these easy kindergarten crafts! Spark creativity and learning with simple, engaging activities.
- Cookie Decorating Ideas: Add a touch of creativity to your baking with these satisfying cookie decorating ideas that you'll surely love.
- Styrofoam Crafts: Transform foam balls into unique creations with these entertaining Styrofoam crafts and fun crafts with foam balls.
- Cricut Crafts: Discover the world of Cricut crafting with these gorgeous DIY Cricut crafts and projects tailored for beginners.
- DIY Balloon Crafts: Elevate your party decorations with these simple balloon decoration ideas and perfect DIY balloon crafts.
- Easy Ribbon Crafts: Unleash your artistic side with these beautiful ribbon crafts, featuring various things to make with ribbon.
- Glue Gun Crafts: Make stunning and durable projects with these elegant DIY hot glue gun crafts and projects that are both functional and decorative.
- Popsicle Stick Crafts: Encourage creativity and fine motor skills with these entertaining popsicle stick crafts for kids.


