Starting a new project always sparks joy. One day, I decided to make my own DIY tablet stand. I gathered some simple tools and a few pieces of wood lying around the garage. I didn't know much about woodworking, but I was determined to build something useful. The process turned out to be simpler than I thought and very fulfilling.
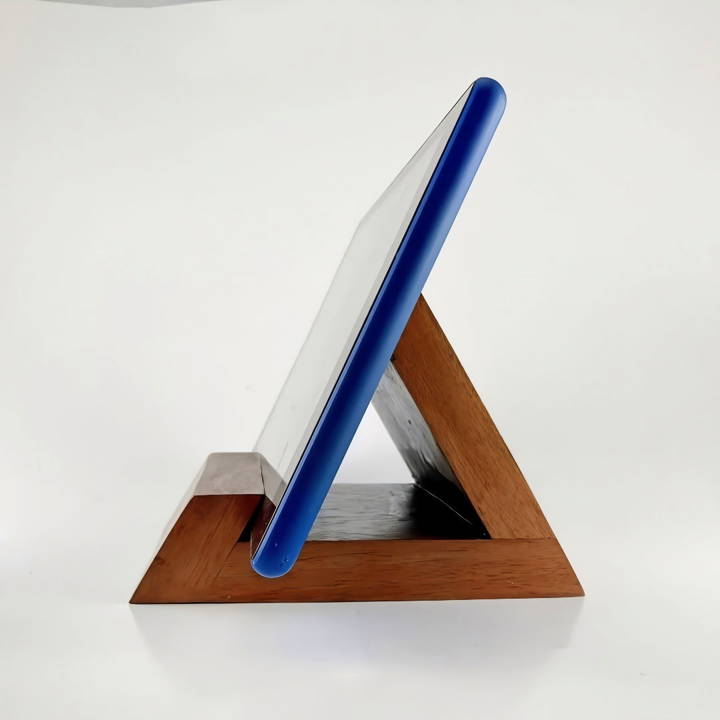
The best part was customizing the stand for my tablet's size. With a few cuts and some glue, my wood tablet holder started taking shape. It felt great seeing a useful object come to life from just a plain piece of wood.
This DIY project not only saved me money but also gave me a sense of accomplishment. I encourage you to try this DIY tablet holder for your device.
Step by Step Instructions
Learn how to make your own tablet stand with step-by-step DIY instructions. Perfect for any device, budget-friendly, and easy to build!
1. The Simplified Stand
Discover how to build "the simplified stand" with essential materials. Learn why they're crucial and follow a step-by-step guide for effortless assembly.
Materials Needed
- A single piece of wood (7x7 inches for a larger tablet, 6x6 inches for a smaller one)
- Stain and polyurethane for finishing
- Tools: table saw with a dado blade, chamfer tool
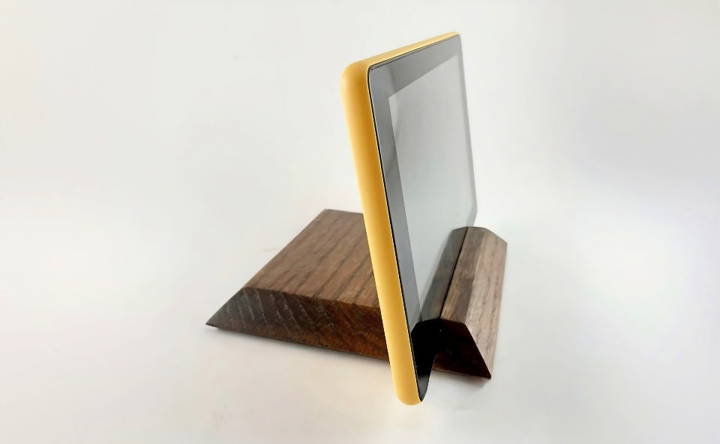
Choosing a single, solid piece of wood ensures stability and ease of crafting. The stain and polyurethane not only enhance the appearance but also protect the wood from wear and tear. Using a table saw with a dado blade allows precise cuts, while the chamfer tool adds a subtle, decorative edge that enhances the floating effect of the stand.
Step-by-Step Guide
- Preparation: Measure and mark your wood according to the size needed for your tablet.
- Cutting: Set your table saw blade to a 10-degree angle for the dado where the tablet will rest. Position the dado about an inch from the edge.
- Finishing Touches: Apply a chamfer along the edges for a sleek, floating look.
- Staining and Sealing: Apply your choice of stain, followed by a couple of coats of polyurethane for durability.
2. The Dual-Piece Stand
Find the dual-piece stand: a detailed guide on materials and their benefits with a step-by-step assembly process. Perfect for DIY enthusiasts!
Materials
- Two pieces of half-inch plywood, each 7x4 inches
- A scrap piece of wood for the tablet lip
- Tools: saw, sandpaper, wood glue
Plywood is a sturdy, affordable material that's easy to work with. The additional piece for the lip prevents your tablet from sliding off. Wood glue offers a strong bond without the need for nails or screws.
Step-by-Step Guide
- Notching: Measure and cut a notch one inch from the end of each board, ensuring they fit together at a right angle.
- Assembling: Attach the scrap piece of wood to one board to act as a lip. Glue the two boards together at the notch.
- Adjusting: Trim the bottom board to achieve the desired angle for viewing.
- Finishing: Sand any rough edges and finish with paint or stain as desired.
3. The Adjustable Stand
Optimize your workspace with the adjustable stand. Discover the best materials and follow our step-by-step guide for assembly.
Materials
- A single, five-inch-wide board
- Wood glue
- Tools: table saw set to 30 degrees
The choice of a wider board allows for a sturdier base and more flexibility in cutting angles. Using wood glue for assembly is quick and efficient, perfect for this more intricate design.
Step-by-Step Guide
- Cutting Angles: Use your table saw to cut the board into pieces at a 30-degree angle, according to the design.
- Assembly: Glue together only two of the joints, leaving one joint unglued for adjustability.
- Final Cuts: After the glue dries, make any final adjustments with additional cuts to perfect the design.
Additional Tips for Success
- Always wear safety gear when operating power tools.
- Take your time measuring and cutting to ensure precision.
- Don't rush the glue drying process; it's vital for stability.
- Experiment with different woods and finishes to find what you like best.
Design Customization Ideas
When it comes to making a DIY tablet stand, personalization is key. Not only does it allow you to tailor the stand to your specific needs, but it also adds a touch of personality to your creation. Here are some design customization ideas that are both practical and stylish:
Choose Your Material Wisely:
- Wood: Classic and sturdy, wood can be painted or stained to match your decor.
- Metal: Sleek and modern, metal can be bent into unique shapes for a minimalist look.
- PVC Pipes: Lightweight and inexpensive, PVC pipes can be cut and combined in various ways.
Add a Personal Touch:
- Paint: A splash of color can brighten up any stand. Go for patterns or solid hues.
- Decals: Stickers or decals can add character—think of themes like nature, technology, or art.
- Engraving: If you're using wood, engraving a name or a quote can make it uniquely yours.
Functionality Meets Style:
- Adjustable Angles: Incorporate hinges or rotating parts to adjust the viewing angle.
- Built-in Charger: Add a slot or a hole to integrate a charging cable seamlessly.
- Sound Amplifier: Carve a space that enhances the tablet's audio without electronic parts.
Ergonomics for Comfort:
- Height Adjustment: Make your stand height-adjustable to reduce neck strain.
- Non-slip Surface: Attach rubber or silicone pads to prevent the tablet from sliding.
Think Outside the Box:
- Multipurpose Stand: Design it to hold not just a tablet but also a phone or a book.
- Foldable Design: Build a stand that can be folded and tucked away when not in use.
Incorporate these ideas to build a functional and stylish stand that meets your needs and reflects your style.
Tech Integration
Incorporating technology into your DIY tablet stand can significantly enhance its functionality. Here's how you can integrate tech features in a user-friendly way:
Charging Capabilities
- Built-in USB Ports: Install a USB port into the stand for easy charging. Ensure the port is accessible and the wiring is neatly tucked away.
- Wireless Charging Pad: If you're skilled with electronics, embed a wireless charging pad into the base of the stand.
Sound Enhancement
- Passive Amplifiers: Carve a channel or a horn-shaped extension in the stand to amplify sound naturally, without the need for electronic components.
- Speaker Integration: For a more advanced project, integrate mini speakers into the design, connecting them to the tablet via Bluetooth or a headphone jack.
Smart Features
- LED Indicators: Add LED lights to indicate the charging status or to add ambient lighting.
- Touch Controls: If you're adept with touch sensors, incorporate them to control volume or play and pause media directly from the stand.
Stability and Security
- Weighted Base: Add weight to the base to ensure the stand remains stable while interacting with the touchscreen.
- Tablet Grips: Use materials like silicone or foam to build grips that hold the tablet securely in place.
Accessibility
- Adjustable Height: Include a mechanism to adjust the height of the stand, making it ergonomic for different users.
- Rotating Mount: A rotating mount can allow the tablet to be viewed in both portrait and landscape orientations.
Prioritize safety when working with electronics. Insulate wires and avoid overheating or stressing the tablet's hardware. Your DIY tablet stand will be a multifunctional accessory for your tech needs.
Troubleshooting Common Issues
When crafting a DIY tablet stand, you might encounter a few hiccups along the way. Here's a guide to troubleshooting some common issues, ensuring your project is successful and your stand is sturdy and functional.
The Stand is Unstable
- Solution: Check the base of your stand; it should be wide enough to support the tablet's weight. Consider adding a heavier material like wood or metal to the bottom to lower the center of gravity and increase stability.
The Tablet Slips Off
- Solution: Attach non-slip materials such as silicone pads or rubber strips where the tablet rests. Ensure the ledge is deep enough to hold the tablet securely.
Difficulty in Adjusting Angles
- Solution: If your stand has adjustable angles that are hard to maneuver, lubricate any hinges or moving parts. If it's a friction-based adjustment, ensure the materials provide enough resistance to hold the tablet in place.
The Stand is Too Bulky
- Solution: Reassess the design for any unnecessary bulk. Use slimmer materials or build a foldable design that maintains strength without the extra weight.
Materials are Damaging the Tablet
- Solution: Line any areas that come into contact with the tablet with soft materials like felt or foam to prevent scratches or other damage.
Difficulty Incorporating Tech Features
- Solution: If you're struggling to add tech features like charging ports, start with simple modifications. For example, drill a hole to thread the charging cable through, ensuring it's smooth to prevent cable damage.
The Stand Doesn't Fit Different Tablet Sizes
- Solution: Design your stand with adjustable width or height to accommodate various tablet sizes. Use sliding components or elastic materials that can expand and contract as needed.
Fixing these issues will enhance your DIY tablet stand. Patience and adaptability are key to success.
FAQs About DIY Tablet Stand
Discover the top FAQs about DIY tablet stands. Get insights, tips, and solutions for crafting your own tablet stand at home—easy and creative ideas!
Don't worry if you're not a woodworking expert! There are plenty of DIY tablet stand designs that require minimal skills. For example, you can bend a wire coat hanger to build a stand or use a pair of wine corks and a screw to make a base. These methods are straightforward and don't require special tools.
Absolutely! If you’re looking for a creative solution, consider repurposing household items. For instance, you can convert an old book into a stand or use a cutting board with a slot for the tablet. These ideas are not only functional but also add a unique touch to your space.
Yes, you can make an adjustable tablet stand that allows you to change the viewing angle. This might involve making a stand with movable parts or using materials like LEGO blocks that let you adjust the height and angle easily. An adjustable stand is especially useful if you use your tablet for various tasks throughout the day.
For a quick fix, look around your home for items that can prop up your tablet. A stack of books, a sturdy box, or even a kitchen rack can serve as an impromptu stand. You can also use office supplies like binder clips or bookends to support your tablet at a comfortable viewing angle.
Yes, you can design a tablet stand that's both portable and easy to store. One popular idea is to build a foldable stand using cardboard or thin wood, which can be unfolded when in use and folded flat to tuck away when not needed. Another option is to use a picture frame, where the stand can be retracted into the frame for easy transport. These designs are especially handy if you like to move around with your tablet or have limited space.
Conclusion
Building your own DIY tablet stand can be rewarding and practical. This guide will help you build a sturdy and useful wood tablet holder. Get started today—I'm sure you'll find it as satisfying as I did!


