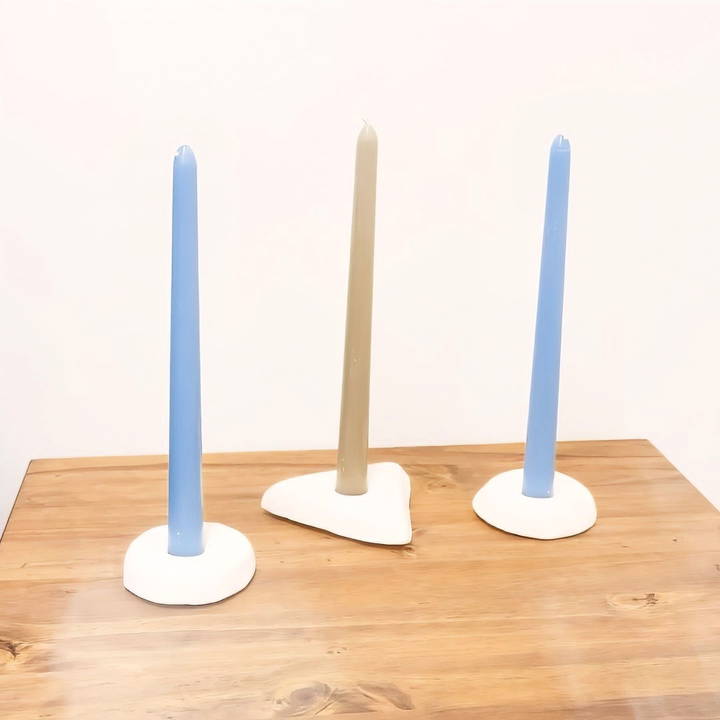
Taper candles are making a stylish comeback in home décor, bringing warmth and elegance to various settings. If you've ever wanted to make your own unique candle holders, this DIY project is perfect for you. Not only does it let you customize designs to match your space, but it's also a fun and rewarding craft. Here's everything you need to know about making your own DIY taper candle holders using clay.
Materials Needed
Before you get started, gather the following materials:
- Clay: A good air-dry clay like Crayola Model Magic is ideal for this project. It's easy to work with, dries quickly, and is lightweight.
- Taper Candles: You can find affordable taper candles at stores like Walmart or online. Be sure to select colors that match your home décor.
- Rolling Pin (or a similar tool): Helps in flattening the clay evenly.
- Dowel Rod: Useful for shaping and making holes.
- Cookie Cutters: Optional, but they help in cutting out perfect circles or other shapes.
- Knife or Cutting Tool: To trim and shape the clay.
- Sandpaper (optional): To smooth the edges after drying.
- Paint and Brushes: For adding a pop of color or a finished look to your candle holders.
Step by Step Instructions
Learn how to make DIY taper candle holders with our detailed guide. Follow step-by-step instructions from crafting to decorating your perfect holder.
1. Prepare Your Workspace
- Find a flat, clean surface to work on. Lay down a protective cover or parchment paper to prevent any clay residue from sticking to your table.
- Have all your tools within reach so that you can easily switch between shaping, cutting, and measuring.
2. Roll Out the Clay
- Start by kneading the clay to make it pliable and easier to work with.
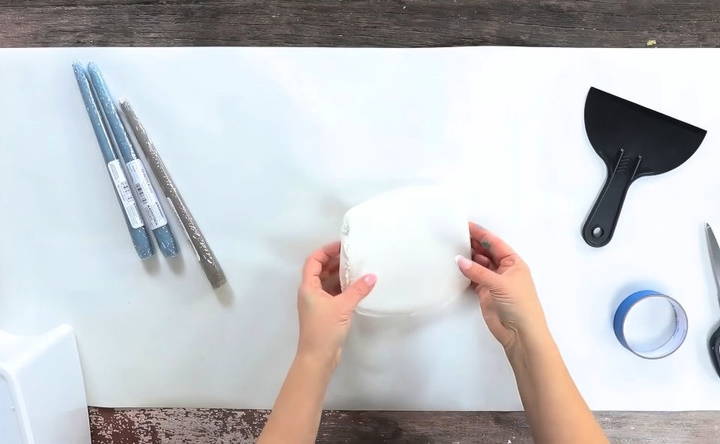
- Roll out the clay using a rolling pin until it's about 1 inch thick. The thickness ensures that your candle holder will be sturdy and can support the weight of the candle.
- If you don't have a rolling pin, a dowel rod or even a sturdy glass bottle can work as a substitute.
3. Cut Out Shapes
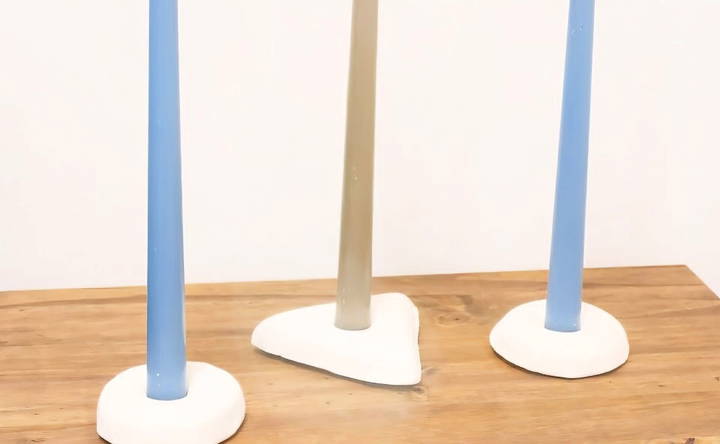
- Decide on the shapes for your candle holders. Common choices are circles and triangles, but you can get creative with any shape you like.
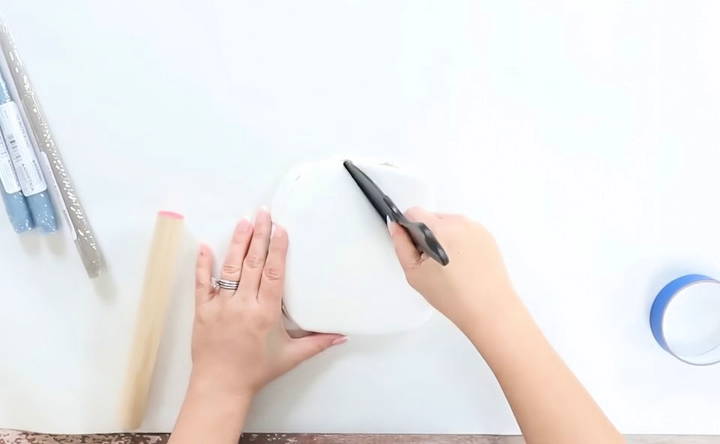
- Use a knife or cookie cutter to cut out the desired shapes. If using a cookie cutter, press it firmly into the clay for a clean cut. For freeform shapes like triangles, use a knife or any straight-edged tool.
- Smooth out any rough edges with your fingers or a small tool to ensure a clean finish.
4. Make the Candle Slot
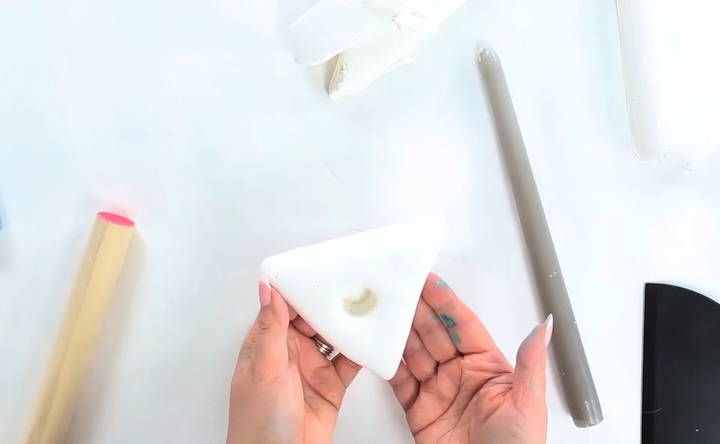
- Position your taper candle in the center of your clay shape. Gently press the candle into the clay to make an indentation that will hold the candle.
- Be careful not to press too hard, as you want to avoid cracking the clay. The goal is to make a snug fit for the base of the candle.
- If the hole is too shallow, use the dowel rod to deepen it slightly.
5. Let the Clay Dry
- Allow the clay holders to dry overnight. Air-dry clay typically becomes dry to the touch within 24 hours, but it may take up to 72 hours to fully harden, depending on the thickness and the brand of clay used.
- Place the holders in a well-ventilated area to speed up the drying process. Avoid touching or moving them too much during this time to prevent deforming their shape.
6. Sand and Smooth (Optional)
- If there are any rough edges or imperfections after the clay has dried, use fine-grit sandpaper to smooth them out.
- Be gentle while sanding to avoid damaging the structure of the holder.
7. Paint and Decorate
- Once your candle holders are fully dry, you can paint them to match your home décor. Use acrylic paint for best results.
- Apply a base coat and let it dry before adding any additional designs or details.
- You can go for a minimalist look with solid colors or add intricate patterns using fine brushes for a more artistic finish.
- For a glossy look, seal your painted holders with a clear acrylic spray or varnish.
Tips for a Successful DIY Taper Candle Holder
- Test Fit the Candle: Before letting the clay dry, ensure that your candle fits snugly in the holder. If it's too loose, the candle may wobble, and if it's too tight, you risk cracking the clay when inserting the candle.
- Choose the Right Clay: Not all clays are the same. Air-dry clays like Crayola Model Magic are user-friendly and do not require baking, making them ideal for beginners.
- Get Creative with Shapes: Beyond simple circles and triangles, try experimenting with organic shapes or even abstract forms. These can add a unique touch to your candle holders.
- Add Texture: You can press various items into the clay to make interesting textures. For example, use lace, leaves, or even textured fabric to press patterns into the surface of the clay before it dries.
Common Issues and How to Fix Them
Discover solutions for common candle-making issues like cracking during drying, unstable holders, and difficulty removing shaped candles.
1. Cracking During Drying
- If your clay cracks as it dries, it might be due to uneven thickness or the drying environment being too dry.
- To prevent this, keep the clay at a consistent thickness and place a damp cloth over the top for the first few hours of drying to slow down the process.
- For small cracks, use a bit of fresh clay mixed with water to fill them in before painting.
2. Candle Holder is Unstable
- An unstable base can cause your candle to tilt. Make sure the bottom of your holder is flat and even before leaving it to dry.
- If it's too late and the base is already dry, you can sand it down to make a more level surface.
3. Difficulty Removing Candle After Shaping
- If your candle is stuck in the clay after shaping, gently twist and wiggle it to loosen it. Avoid pulling straight up as this may damage the shape of the holder.
- Next time, apply a small amount of cornstarch or flour to the bottom of the candle before pressing it into the clay. This will make a barrier and make removal easier.
Styling Your Taper Candle Holders
Now that you have your custom candle holders, here are a few ideas on how to style them:
- Dining Table Centerpiece: Arrange a few holders of varying shapes and heights in the center of your dining table. Add fresh flowers or greenery to complete the look.
- Mantel Display: Place the candle holders along with some framed photos or small decorative items on your mantel for a cozy, warm vibe.
- Outdoor Decor: If you're having an outdoor gathering, use these candle holders to light up your patio table. Be sure to use weather-resistant paint if you plan to leave them outside.
- Gift Idea: Handmade candle holders make thoughtful gifts. Customize the colors and shapes to suit the recipient's taste, and pair them with a set of taper candles for a complete package.
Final Thoughts
Making your own DIY taper candle holders is a fun and creative way to add a personal touch to your home décor. With just a few materials and a bit of time, you can craft unique pieces that reflect your style and creativity. Whether you're looking to spruce up your living space or make custom gifts for friends and family, this project offers endless possibilities.
So gather your supplies, set aside a few hours, and enjoy the process of making your very own taper candle holders. Happy crafting!
FAQs DIY Taper Candle Holders
Discover answers to common questions about DIY taper candle holders, including materials, techniques, and creative design ideas.
Use a wide-mouth jar, an empty tuna can, or a drinking glass as a template for cutting out circles. These everyday items can help achieve smoother, more even shapes than freehand cutting.
Air-dry clay like Crayola Model Magic is ideal because it is easy to work with and dries without baking. Avoid using traditional clay unless you have access to a kiln for proper firing.
Cover the drying clay with a damp cloth for the first few hours to slow down drying and minimize cracks. Small cracks can be filled with a mixture of fresh clay and water.
Use painter's tape or a ruler as a guide while cutting the sides. This helps maintain straight, uniform lines for a more polished look.
Yes, you can paint taper candles with acrylic paint to match your holder's colors or themes. Just make sure the paint is fully dry before lighting the candles.
Twist the candle gently while pulling it out to avoid damaging the clay holder. Applying a small amount of cornstarch to the candle base before inserting can prevent sticking.
You can use any cylindrical object like a glass bottle or a sturdy dowel rod to roll out the clay evenly.
Air-dry clay typically dries to the touch within 24 hours but may take up to 72 hours to harden fully, depending on thickness and humidity.
Yes, but it's best to use weather-resistant paint or sealant on the holders to protect them from moisture and temperature changes.
With one container, you can make about two to three holders, depending on their size and thickness.


