If you love tea, chances are your kitchen drawer is full of tea bags in various flavors and brands, all tossed together in a chaotic mess. Finding the right tea bag can be frustrating when you have to sift through a jumbled pile. Thankfully, there's a simple and effective solution to keep your tea collection organized and easy to access: a DIY tea bag organizer. With just a few materials and minimal effort, you can transform your cluttered tea drawer into a neat and tidy space where every tea bag has its place.
This guide will help you make a tea bag organizer that's both functional and tailored to your style and space. Let's jump right in!
Why Make a DIY Tea Bag Organizer?
Before diving into the steps, let's quickly discuss why this project is worth your time:
- Convenience: Having a designated spot for each type of tea makes it easier to find the flavor you're craving without rummaging through a pile.
- Space-saving: This method helps declutter your drawer or cupboard, maximizing the space available for other kitchen essentials.
- Cost-effective: Instead of buying a pricey tea organizer, you can make your own using items you likely already have at home.
- Customization: You can make your organizer as simple or elaborate as you like, matching it to your kitchen decor or personal preferences.
Now that you're convinced, let's move on to what you'll need.
Materials Needed
This project is extremely budget-friendly, and you might already have most of the supplies on hand:
- Tea box (from which you'll remove the tea bags)
- Duct tape (in any color or pattern you prefer)
- Scissors
That's it! These basic materials will get you started on your DIY tea bag organizer. If you want to get creative, you can also use other decorative materials like wrapping paper or stickers to customize your box.
Step by Step Instructions
Learn how to make a DIY tea bag organizer with simple step-by-step instructions. Perfect for keeping your tea collection neat and accessible.
Step 1: Prepare Your Tea Box
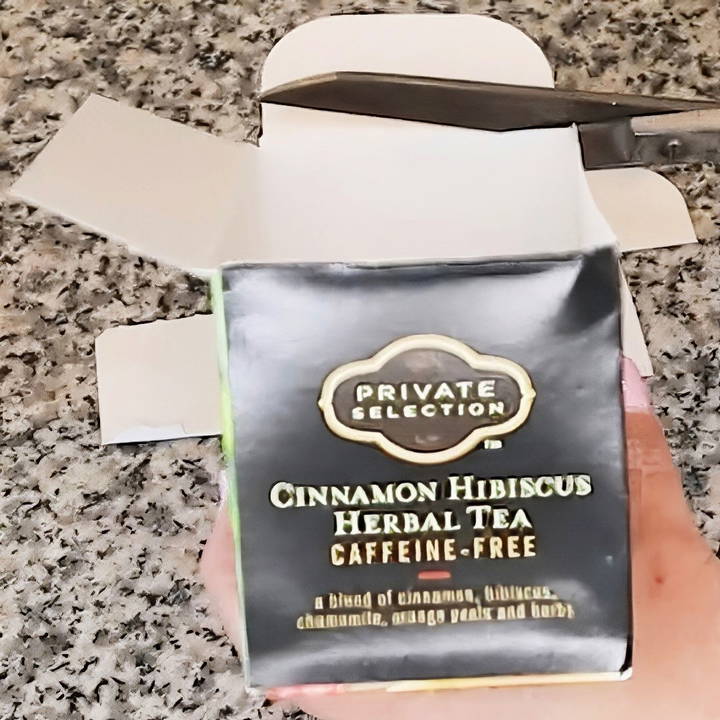
The first thing you need is an empty tea box. Don't worry—you won't have to throw away your tea bags! You're simply going to temporarily remove the tea bags from the box to modify it into an organizer.
- Open the box and take out the tea bags, setting them aside for later use. Be sure to keep the tea bags safe from moisture or dirt while you work on the project.
- Once the box is empty, cut off the top flap of the box using your scissors. This will leave you with just the sides and bottom of the box, which will serve as the base of your organizer.
Step 2: Reinforce the Box with Duct Tape
Next, you'll want to make your tea box a bit sturdier and more visually appealing. This is where the duct tape comes in.
- Start by covering the bottom of the box with duct tape. It's a good idea to use long strips to ensure there are no gaps or exposed cardboard. Smooth out the tape to avoid wrinkles.
- Work your way up the sides of the box, continuing to cover it with duct tape. Be sure to wrap the tape neatly around the edges to give it a clean and polished look.
- You can also add an extra layer of duct tape around the corners or edges if you want to give the box extra strength and durability.
Using patterned or colorful duct tape can also add a fun touch to your organizer, so don't be afraid to get creative!
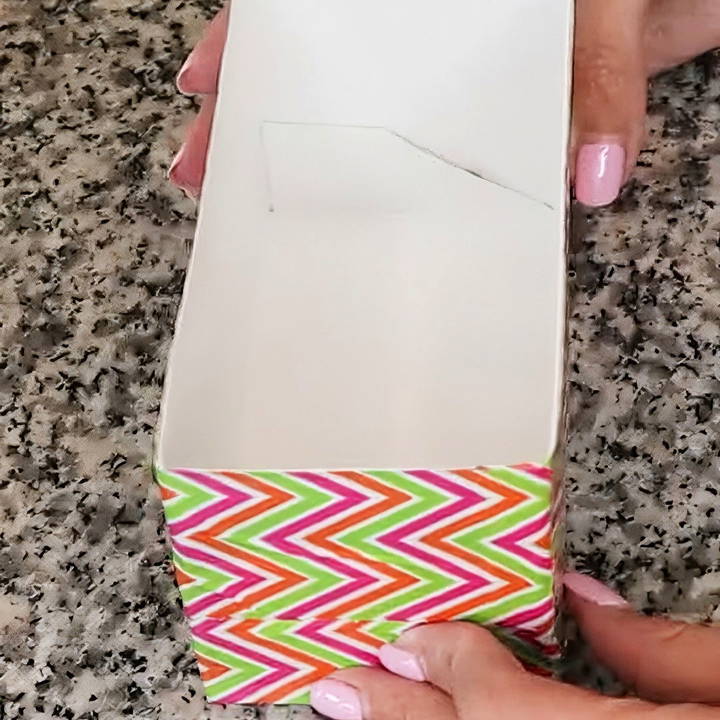
Step 3: Refill the Organizer with Tea Bags
Once your box is fully covered and reinforced with duct tape, it's time to place your tea bags back in.
- Sort your tea bags by flavor or brand, depending on how you prefer to organize them. You might want to separate herbal teas from caffeinated teas, for instance.
- Place the tea bags upright inside the box so they are easy to see and grab. If you have a lot of tea, you may need to make multiple organizers to fit them all.
You can make as many boxes as you need to hold your entire tea collection. Just repeat the process for each new organizer.
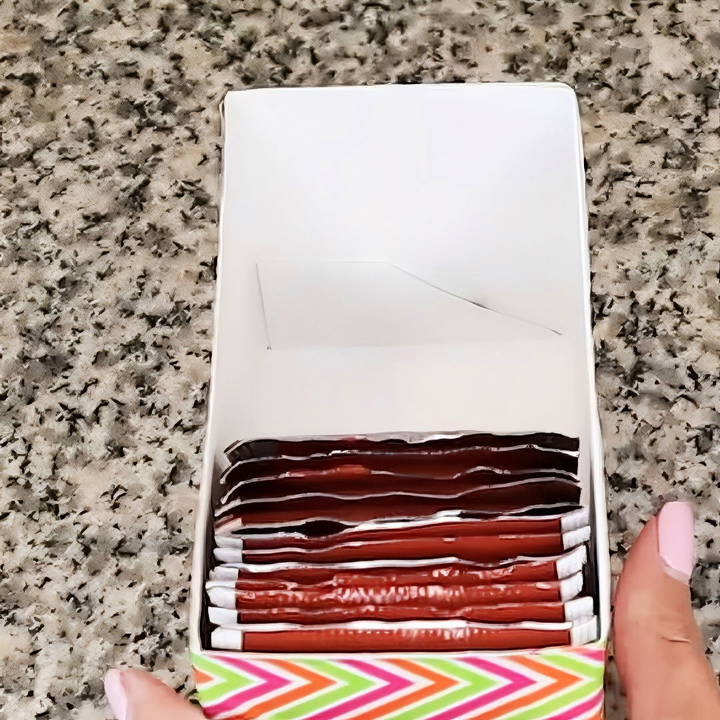
Step 4: Place the Organizer in Your Drawer or Cupboard
With your tea bags now neatly stored in your DIY organizer, you can place the box in your drawer, cupboard, or pantry.
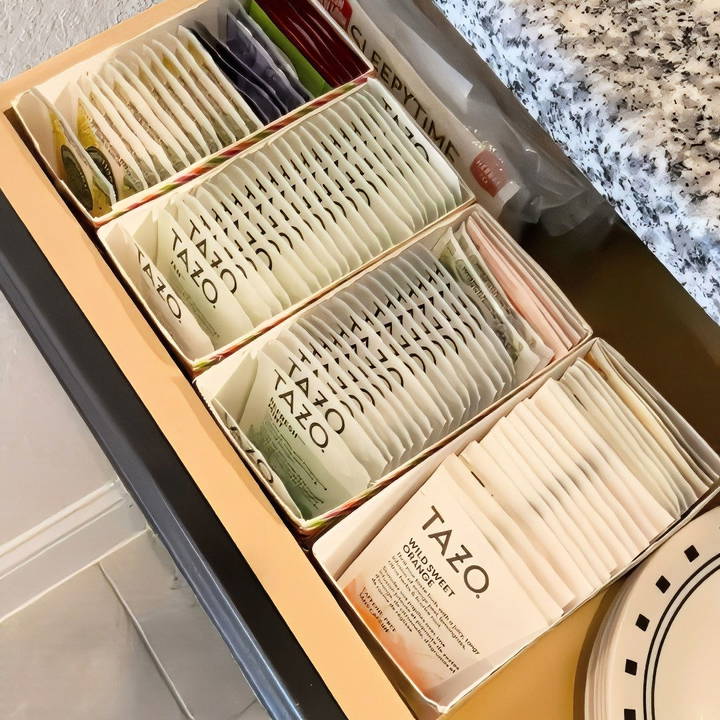
- In a drawer: This method works particularly well in a kitchen drawer, where you can line up multiple tea bag organizers next to one another. Every tea bag will be easily accessible when you open the drawer.
- In a cupboard: If you prefer, you can store your tea organizer on a shelf in your cupboard. Just make sure it's within easy reach when you're preparing your tea.
Bonus Tip: Labeling for Extra Organization
If you want to take your organization to the next level, consider adding labels to your tea bag organizer. You can either write directly on the duct tape or use a label maker for a clean, professional look.
- Flavor Labels: Label each box with the type of tea inside, such as “Green Tea,” “Herbal Tea,” or “Chai.” This makes it even easier to find the tea you want, especially if you have a large variety.
- Expiration Date Labels: If you like to keep track of how long your tea has been sitting, you can also add small labels with the expiration date of each type of tea.
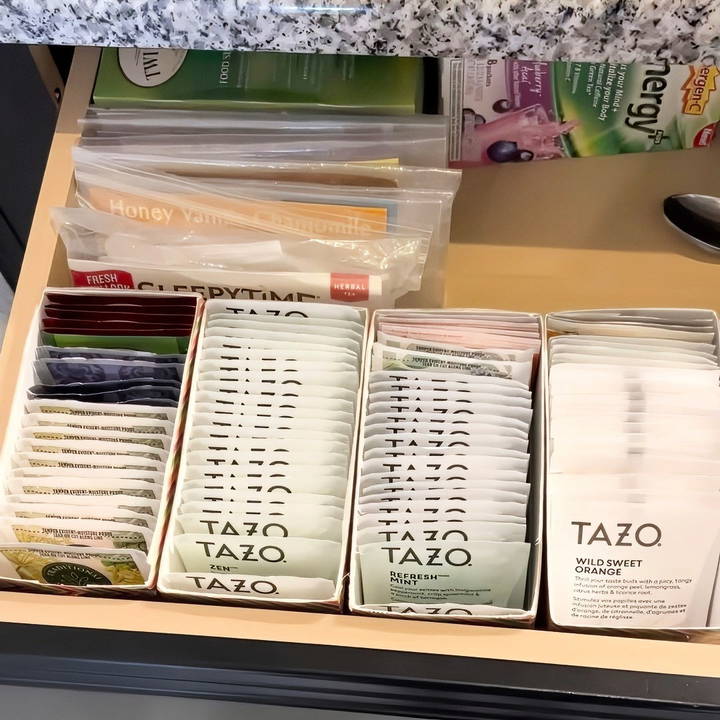
Customization Ideas for Your Tea Bag Organizer
One of the great things about this project is that you can easily customize it to match your personal style or kitchen decor. Here are a few ideas to make your tea bag organizer stand out:
- Use wrapping paper: Instead of duct tape, you can cover the box with decorative wrapping paper to give it a unique and stylish look. Simply cut the paper to size and glue it to the box, then cover with a protective layer of clear tape or mod podge.
- Add dividers: If you have a lot of different types of tea, you can make dividers within the box to separate the flavors. Cut pieces of cardboard or cardstock to size and tape them inside the box to make sections.
- Decorate with stickers: If you want to add a fun, personal touch, use stickers to decorate the outside of your organizer. Choose stickers that reflect your personality or tea-related designs for a themed look.
Maintenance and Care
Once your tea bags are neatly organized, you'll want to keep everything tidy. Here are a few tips to maintain your tea bag organizer:
- Restock regularly: Keep an eye on your tea supply and restock when you start running low. This way, you'll always have your favorite flavors on hand.
- Wipe down the organizer: If your kitchen is prone to dust or crumbs, give your organizer a quick wipe-down every now and then to keep it clean.
- Swap out seasonal flavors: If you enjoy seasonal teas like holiday blends, rotate them in and out of your organizer based on the time of year to keep your collection fresh and exciting.
Conclusion
A DIY tea bag organizer is a simple yet effective way to declutter your kitchen and make it easier to find your favorite teas. With just a few basic materials, you can make a functional, cost-effective solution that keeps your tea collection tidy and within easy reach. Whether you prefer a minimalist design or want to get creative with customization, this project is completely adaptable to your needs.
So, grab your duct tape, scissors, and an empty tea box, and start organizing your tea collection today! Your future self will thank you every time you open that neat and organized drawer.
FAQs About DIY Tea Bag Organizer
Discover the best FAQs about DIY tea bag organizers to streamline your tea collection and enhance your kitchen organization efficiently.
No, duct tape isn’t required. You can use any sturdy adhesive or covering material, like decorative paper, fabric, or clear packing tape, to reinforce and decorate the box. Choose an option that suits your style and provides the durability you need.
Yes, you can use any small box that fits your drawer or cupboard. While tea boxes are ideal because they are the perfect size, other options like shoe boxes or small gift boxes can also work.
If you have limited space, consider stacking organizers vertically or using a single large box with dividers inside. You can also rotate your tea selection, keeping only a few types on hand and storing the rest elsewhere.
To avoid mixing, you can add cardboard or paper dividers inside the box. Alternatively, use small, separate boxes for different flavors, ensuring each one is neatly organized and easy to access.
Yes! Feel free to add labels, decorate with stickers, or use colored tape or fabric to make your organizer unique. Personalizing the organizer can also help you quickly identify different tea varieties.


