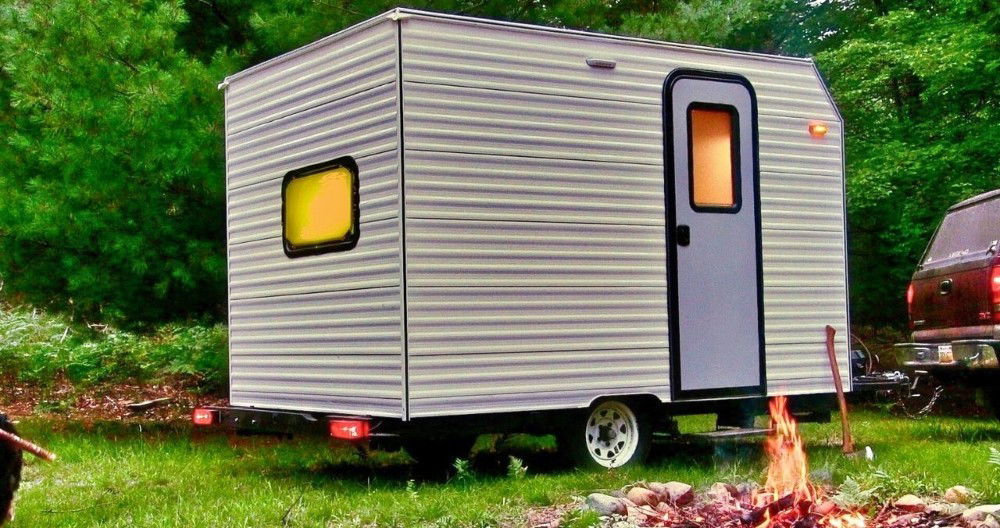
Building your own DIY teardrop trailer can be a rewarding and cost-effective project. These teardrop camper plans are simple and easy to follow, making it feasible for almost anyone to construct a teardrop trailer. The plans involve straightforward materials and tools that are readily available, making this venture not only affordable but also accessible. With careful planning and a hands-on approach, building your own homemade teardrop camper might be easier than you think.
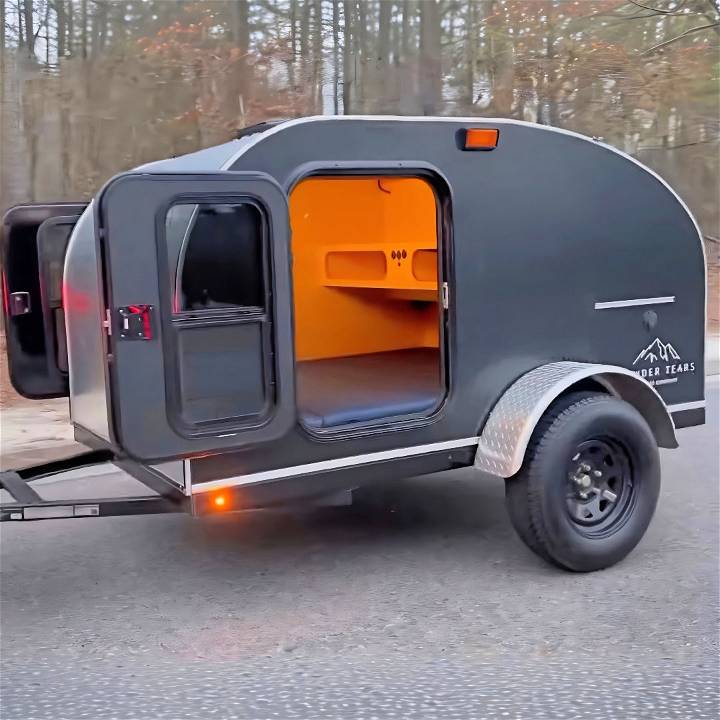
The excitement of camping is heightened when you realize you’ve built your DIY teardrop trailer from scratch. These teardrop camper plans provide all the details you need, from the initial steps of construction to the final touches. It’s not just about assembly; it’s about building a personal, cozy space with your own hands.
Introduction to Teardrop Trailers
Teardrop trailers are a compact and streamlined caravan that has been around since the 1930s. They are known for their distinctive shape, which resembles a teardrop when viewed from the side. This design is not just for looks; it helps make the trailer easier to tow and improves fuel efficiency due to its aerodynamic form.
Why Choose a Teardrop Trailer?
Teardrop trailers are perfect for those who love to travel light and enjoy the simplicity of nature. They are small enough to be towed by most cars and are an excellent choice for weekend getaways or cross-country road trips. Despite their size, they are surprisingly spacious inside and can be customized to fit your needs.
The Benefits of Going Small
One of the biggest advantages of a teardrop trailer is its cost-effectiveness. Not only are they more affordable than larger caravans, but they also cost less to maintain. Their small size means you can park them in regular parking spots, saving on campsite fees. Additionally, their simplicity translates to fewer things that can go wrong, making them a reliable companion on the road.
Customization and Community
The teardrop trailer community is a vibrant and resourceful bunch. Many owners take pride in customizing their trailers, adding unique touches that reflect their personality and needs. There are numerous forums and social media groups where enthusiasts share tips, designs, and experiences, making it easy to get help and inspiration for your own project.
A Step Towards Sustainable Travel
In today’s world, where sustainability is increasingly important, teardrop trailers offer a way to travel responsibly. Their lightweight nature means less fuel consumption, and many models can be equipped with solar panels and other eco-friendly features.
Choosing a teardrop trailer means valuing freedom, simplicity, and the outdoors. For seasoned campers or newcomers, it opens the door to many adventures and memories.
Choosing the Right Materials
The choice of materials was crucial for the success of my project. Each component played a pivotal role, serving a specific purpose that ensured durability, safety, and comfort. Here's why I selected these materials:
- Aluminum Sheets (SAF.com): Aluminum was selected for its lightweight and corrosion-resistant properties, making it perfect for the exterior.
- Hurricane Hinge, Edge Trim, and Offset T-molding (Amazon): These components were essential for securing the trailer's parts together, ensuring a watertight seal around the doors and hatch.
- Electrical Components (Amazon): Selecting high-quality electrical components for safety and convenience was paramount for everything from lighting to charging stations.
- Trailer Frame (Harbor Freight 5x8 Ironton trailer frame): I chose this for its reliability and affordability, although modifications were needed to match my design.
Step by Step Instructions
Discover easy step-by-step instructions for DIY teardrop trailer plans, from building the floor to adding the hatch and finishing with aluminum.
Step 1: Laying the Foundation - Building the Floor
The foundation of any teardrop trailer is its floor. I started with the Ironton trailer frame, adding 2” spacers for extra clearance and 15” wheels to accommodate the added weight. Ensuring the floor was level and securely attached to the frame was crucial. This provides stability and is the first step in building a sturdy structure for your teardrop trailer.
Step 2: Assembling the Cabinets
Before piecing together the main cabin, I pre-assembled the cabinets. This allowed me to plan the layout more effectively, ensuring that space was maximized for storage while maintaining a comfortable living area. Precise measurements and careful cutting were necessary to fit everything snugly within the trailer's compact space.
Step 3: Building the Cabin
The cabin's assembly followed the cabinets. Using the floor as a base, I constructed the walls and ceiling frame, making sure every angle was accurate to avoid gaps. Insulation was added between the framing to keep the interior temperature regulated. This step required patience and attention to detail to ensure the structural integrity of the cabin.
Step 4: Installing the Roof
The roof installation was perhaps the most challenging part. It had to be both sturdy and perfectly sealed to prevent leaks. After framing the roof, I covered it with aluminum sheets for durability and weather resistance. The sheets were carefully measured, cut, and secured in place, ensuring they overlapped correctly to facilitate water runoff.
Step 5: Adding the Hatch
The hatch was next, designed to provide easy access to the trailer's rear storage area. It needed to be secure yet easy to open and close. I installed the hurricane hinge for a smooth operation and used weather stripping around the edges to keep the contents dry and safe.
Step 6: Finishing Touches with Aluminum
In the final major construction step, I applied aluminum trim around the edges for extra protection and a clean look. This also helped in reinforcing the trailer's structure, adding to its durability. Attention to detail was vital in this step to ensure all pieces were aligned and secured properly.
Powering Up: Electrical Installation
Equipping the trailer with electrical wiring was a complex but rewarding part of the build. I installed a 12v fuse block, master battery switch, and a charging station, among other components. Proper insulation and routing of the wires were essential to avoid any hazards. Each electrical component was tested before moving on to ensure everything was in working order.
Exterior Features and Customization
When it comes to personalizing your teardrop trailer, the exterior is where you can really let your creativity shine. Not only do these features make your trailer stand out, but they also add functionality and convenience to your camping experience.
Paint and Decals
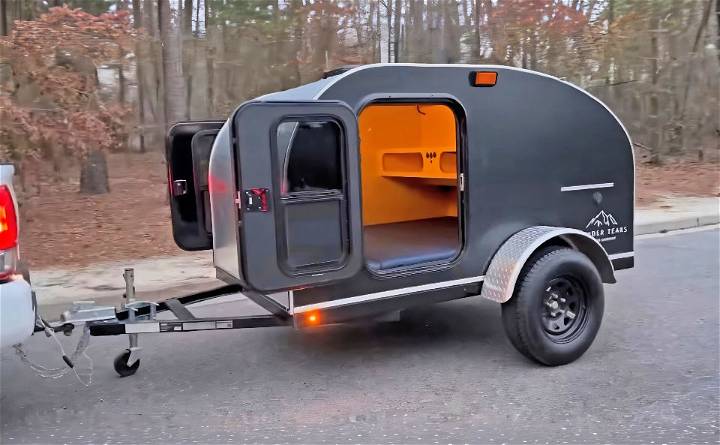
The outer shell of your teardrop trailer is like a blank canvas. You can choose a paint color that suits your style or even go for a two-tone design that harks back to the classic trailers of the past. Adding decals can also give your trailer a personal touch. Whether it’s a mountain range silhouette or a whimsical pattern, decals are an easy way to make your trailer uniquely yours.
Storage Solutions
Space is at a premium in a teardrop trailer, so smart exterior storage solutions are essential. Consider installing a roof rack for extra gear or a rear hitch basket for things you don’t want inside the trailer, like dirty boots or a portable generator. Some campers even add a side-mounted fold-down table for outdoor cooking and dining.
Lighting and Security
Good exterior lighting not only adds to the safety of your trailer but can also build a cozy ambiance at your campsite. LED strip lights under the awning or around the door frame are both practical and inviting. For security, consider adding motion-sensor lights and a sturdy lock for the door to keep your belongings safe.
Weather Protection
An awning or canopy can be a game-changer for comfort, providing shade on sunny days and shelter from rain. Retractable models are convenient and can be set up in minutes. For those who camp in colder climates, external insulation panels can be added to the windows and doors to help retain heat.
Eco-Friendly Additions
If you’re environmentally conscious, you can outfit your trailer with solar panels to power your electronics and lights. A rainwater collection system can also be installed to gather water for washing dishes or showering, reducing your reliance on campsite resources.
Focus on exterior features and customization to build a teardrop trailer reflecting your personality and enhancing your camping experience with comfort and functionality. Balance aesthetics with practicality for the best outdoor adventures.
Advanced DIY Tips and Tricks
Building a teardrop trailer can be a complex project, but with the right approach and some advanced tips, you can build a durable and comfortable space that’s uniquely yours. Here are some advanced DIY tips and tricks to help you along the way.
Frame Considerations
The frame is the foundation of your trailer, so it’s crucial to get it right. You have several options:
- Repurposed materials can save money but require skill to ensure safety.
- Bolt-together kits are quick but may lack quality.
- Welded utility trailers offer a solid base but might need modifications.
- Custom welded frames provide the most freedom and durability.
Insulation and Ventilation
Proper insulation is key for comfort in varying climates. Use high-quality materials and ensure there’s no thermal bridging where the frame conducts heat or cold. Ventilation is equally important to prevent condensation, so consider installing vents or a small fan.
Electrical Mastery
A reliable electrical system is essential. Use marine-grade wiring and components for durability. Plan your system carefully, considering both 12V for off-grid and 110V for hookups. Label all your wiring and use a fuse box to protect your circuits.
Space-Saving Solutions
In a compact space, every inch counts. Look for multi-functional furniture, like beds that convert into seating. Use vertical space with hanging storage and magnetic strips for utensils. Consider slide-out features for extra counter space when needed.
Personal Touches
This is your chance to make the trailer truly yours. Choose a color scheme that reflects your personality. Add custom cabinetry or unique hardware. Consider installing dimmable LED lights for ambiance and energy efficiency.
Off-Grid Capabilities
If you plan to go off-grid, prepare your trailer accordingly:
- Install solar panels for power.
- Set up a rainwater collection system for water needs.
- Consider a composting toilet to avoid the need for a black water tank.
Safety First
Never compromise on safety. Make sure your trailer is roadworthy with proper lighting, tires, and brakes. Regularly check all systems, from gas lines for leaks to tire pressure for wear. Always have a fire extinguisher and first-aid kit on hand.
Apply these advanced tips and tricks to build a delightful teardrop trailer. The effort in planning and building ensures enjoyable travels.
Troubleshooting Common Issues
Building a teardrop trailer can be a rewarding DIY project, but like any construction endeavor, you might encounter some hiccups along the way. Here’s a guide to troubleshooting common issues that you may face, ensuring your build goes as smoothly as possible.
Dealing with Leaks
Leaks are a common issue in teardrop trailers, especially around windows and doors. To prevent leaks:
- Seal all edges and joints meticulously during construction.
- Use quality sealants designed for RVs and trailers.
- Test for leaks by spraying water on the exterior and checking for drips inside.
Electrical System Errors
Electrical problems can range from a blown fuse to wiring issues. To troubleshoot:
- Always disconnect the power source before working on the electrical system.
- Use a multimeter to check for continuity and ensure all connections are secure.
- Label your wiring during installation to make future troubleshooting easier.
Structural Integrity
The frame is the backbone of your trailer, so it needs to be strong. If you notice any structural weaknesses:
- Reinforce the frame with additional supports or welding if necessary.
- Use corrosion-resistant materials to prevent rust and degradation.
- Regularly inspect the frame for cracks or bends, especially after long trips.
Tire and Axle Issues
Tires and axles bear the brunt of the load, so keep an eye on them. For maintenance:
- Check tire pressure regularly and keep them inflated to the manufacturer’s recommended level.
- Inspect the axles for any signs of wear and tear.
- Lubricate moving parts periodically to ensure smooth operation.
Insulation and Condensation
Proper insulation is key to comfort. To address insulation issues:
- Use high-quality insulation materials that are suitable for the climate you’ll be traveling in.
- Ensure there’s adequate ventilation to prevent condensation buildup.
- Check for gaps or thin spots in the insulation and patch them up.
Finishing Touches
Sometimes, the final touches can be the most troublesome. To perfect your trailer:
- Sand and paint the exterior with precision, applying multiple thin coats for the best finish.
- Install trim and moldings carefully to avoid gaps and uneven lines.
- Double-check all fixtures and hardware to ensure they’re secure and functional.
Keep these troubleshooting tips in mind to handle common issues during the building process. Patience and attention to detail are key for DIY projects like building a teardrop trailer.
Maintenance and Upkeep
Keeping your teardrop trailer in top condition is crucial for ensuring many years of adventure and enjoyment. Here’s a comprehensive guide to maintaining your teardrop trailer, with simple language and clear steps.
Regular Cleaning
Your trailer’s exterior is exposed to the elements, so regular cleaning is essential. Use gentle, non-abrasive cleaners to protect the paint and finish. Address any signs of wear, like dents or chipping paint, promptly to prevent rust.
Hitch Care
The hitch is vital for safely towing your trailer. Inspect it before and after trips for wear or rust. Clean off any dirt and apply a rust inhibitor or grease every six months to keep it functioning smoothly.
Battery Maintenance
If your trailer has a battery, keep it charged to extend its lifespan. Store it on a trickle charger or battery tender when not in use. For lead-acid batteries, check and top up the electrolyte solution as needed.
Tire Checks
Tires should be inflated to the manufacturer’s recommended level. Regularly check for wear and ensure they’re in good condition. Don’t forget to inspect the axles and lubricate moving parts to prevent issues.
Seasonal Storage
When not in use, store your trailer in a covered, dry area to protect it from weather damage. If a garage isn’t available, consider a custom-fit cover to shield it from dust and debris.
Winterizing
If you live in a place with freezing temperatures, prepare your plumbing system for the cold. Keep batteries in a warm place and clean the cabin and galley to prevent mildew.
Roof and Seal Inspection
Check the roof regularly for any cracks or leaks. Maintain the seals around windows and doors to ensure they’re watertight.
By following these maintenance tips, you’ll keep your teardrop trailer ready for the road and extend its life, ensuring it remains a cozy, reliable home away from home for all your travels.
Safety and Legal Requirements
Ensuring that your teardrop trailer meets safety and legal standards is not just about compliance; it’s about peace of mind. Here’s what you need to know to keep your trailer roadworthy and within the law.
Registration and Documentation
Before you hit the road, your trailer must be registered with the local authorities. This process involves obtaining a Vehicle Identification Number (VIN), which is a unique code for your trailer. You’ll also need a title and a license plate, which serve as proof of ownership and allow you to tow your trailer on public roads legally.
Weight and Towing Regulations
Understanding the weight limits for your trailer is crucial. Ensure your vehicle can safely tow the trailer and that you adhere to the weight restrictions. This includes the weight of the trailer itself and any cargo you carry. Proper weight distribution is key to maintaining control while driving.
Lighting and Braking Systems
Your trailer must have the correct lighting and braking systems in place. This includes tail lights, brake lights, and turn signals. These systems should be regularly checked to ensure they are functioning properly. In some areas, additional reflectors or side lights may be required.
Roadworthiness
Regular inspections can help catch any potential issues before they become serious. Check the tires for wear and pressure, the frame for any signs of damage or rust, and the hitch system for secure connections. Keeping up with these checks will help you avoid breakdowns or accidents.
Insurance
Having the right insurance for your teardrop trailer is essential. It protects you against liability in case of an accident and covers any damage to the trailer. Check with your insurance provider to ensure you have adequate coverage for your needs.
By following these guidelines, you can enjoy your travels knowing that your teardrop trailer is safe and meets all the necessary legal requirements. Remember, regulations can vary by location, so always check the specific laws in your area before setting out.
FAQs About DIY Teardrop Trailer
Discover the top faqs about DIY teardrop trailer. Learn about design, building tips, materials, costs, and more for your custom travel trailer project.
A DIY teardrop trailer is a small, towable caravan with a distinctive teardrop shape. It’s designed for simplicity and efficiency, often featuring just enough space for sleeping and a basic kitchenette in the rear. Building your own allows for customization and can be more budget-friendly than purchasing a pre-built model.
Absolutely! Customization is one of the main benefits of a DIY build. You can design the interior layout to suit your needs, choose unique materials and colors, and add personal touches like custom cabinetry or creative storage solutions. Your trailer can be as simple or as luxurious as you desire.
Yes, it’s important to be aware of legal requirements like vehicle registration, roadworthiness, and towing regulations. Safety considerations include proper weight distribution, secure attachment to your towing vehicle, and ensuring all electrical and gas installations meet safety standards.
Waterproofing your teardrop trailer is crucial to protect it from the elements. Start by sealing all exterior wood with a waterproof sealant or paint. Use silicone caulk to seal around windows, doors, and any other openings. The roof should be covered with a durable, waterproof material like aluminum or fiberglass, and ensure all seams are sealed tightly. Regular maintenance checks are important to fix any leaks promptly.
The time it takes to build a DIY teardrop trailer can vary greatly depending on your skill level, the complexity of your design, and the amount of time you can dedicate to the project. On average, it can take anywhere from 100 to 200 hours of work. If you’re working on it part-time, it could take several months to complete. It’s important to take your time and not rush the process to ensure safety and quality.
Final Thoughts
In conclusion, these DIY teardrop trailer plans (simple & affordable) offer an exciting way to build your own camper. By following DIY teardrop trailer and teardrop camper plans, you can build a cozy and affordable home on wheels. Enjoy the freedom and flexibility of a homemade teardrop camper tailored to your needs. Get started on your adventure today with these fantastic plans!


