Last month, I realized my video presentations could be smoother with a DIY teleprompter. I wanted to keep eye contact with the camera while reading my script. So, I decided to build one myself at home. It was a fun project that didn't require expensive materials.
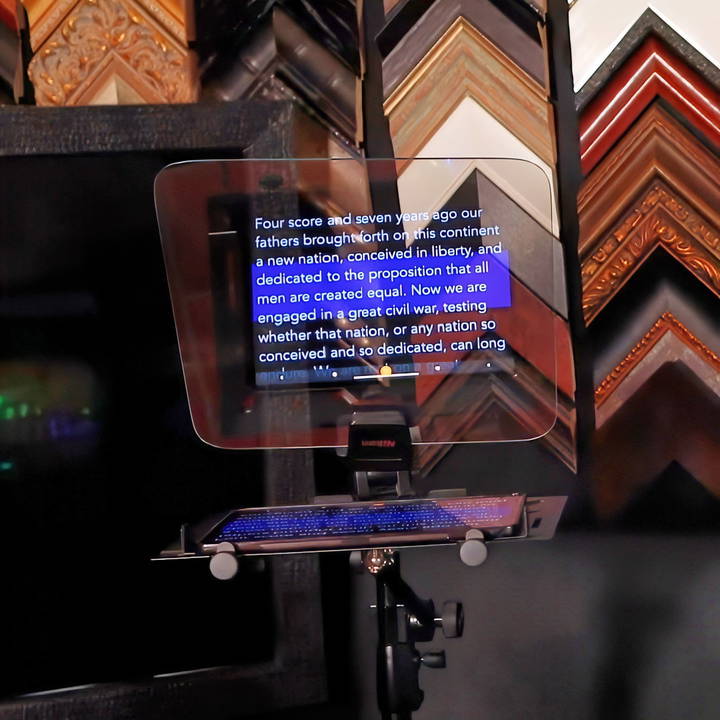
Following simple steps, I assembled my own teleprompter. The result was impressive and improved my videos significantly. I'm excited to share how to make a teleprompter with you.
Let's get started on building your own teleprompter at home; it's easier than you might think!
Essential Materials and Their Significance
Before diving into the building process, let's talk about the materials you'll need and why each is crucial for this project:
- Heavy Duty Light Stand: Serves as the base of your teleprompter. It's important because it provides stability to the setup, ensuring it doesn't tip over during use.
- Beam Splitter Glass: This is the heart of the teleprompter. Opt for one with rounded corners to prevent accidents and ensure it's at least the size of your display for clear visibility. The glass's special coating allows for a crisp script reflection while minimizing tint.
- DSLR, Phone, or Recording Device: Your choice of camera will sit behind the beam splitter glass, capturing your video without the reflection of the script.
- Black Cloth and Binder Clips: To prevent any reflections from hitting the camera, drape this cloth over it. Binder clips keep the setup intact.
- Window Mount (Nikon 7070 or similar): This acts as a clamp for holding your beam splitter glass in place, allowing easy adjustment.
- Side Mount Microphone Boom and Laptop Tray: These will hold your display device, such as an iPad or a small monitor, securely at an optimal viewing angle.
- Optional Pyle Projector Stand: For those using a larger display, this stand provides additional support.
Step by Step Instructions
Learn how to build a DIY teleprompter with our step-by-step instructions. From setting up the light stand to the final touches, get all the details here!
Setting the Foundation with the Light Stand
- Assemble Your Light Stand: Make sure it's anchored securely. If you're outdoors, consider using stakes or weighted bags for extra stability.
Installing the Beam Splitter Glass
- Attach the Window Mount: Turn it upside down to attach it to the stand. This will hold your beam splitter glass. Adjust it to about 45 degrees, ensuring it's at eye level when you're standing or seated in front of it.
Setting Up Your Recording Device
- Cover Your Camera: Place your DSLR, phone, or another recording device behind the beam splitter glass. Use the black cloth to drape over the camera, preventing reflections. Secure everything with binder clips.
Mounting Your Display Device
- Assemble the Microphone Boom and Laptop Tray: These components will hold your display device. Adjust the tray to ensure the display aligns with the center of the beam splitter glass for easy reading.
- Adjusting for Visibility: If you're using an iPad, you may utilize various teleprompting apps with voice recognition for scrolling. For larger displays, ensure your TV or monitor is mirror-flipped for accurate script reflection.
Final Touches
- Double-Check All Connections: Make sure everything is tightened and securely in place to prevent any mid-recording mishaps.
- Test Your Setup: Do a trial run to adjust the text size on your display for optimal visibility and make sure your recording device captures clear video without any script reflection.
Building this teleprompter was simpler than I initially thought. The most critical part was ensuring the stability of the whole setup and getting the right angle for the beam splitter glass, which makes your script visible to you but invisible to the camera capturing your video. I highly recommend practicing a few times before your actual recording to get comfortable with reading off the teleprompter.
Advanced Customizations for Your DIY Teleprompter
After mastering teleprompter basics, consider advanced customizations to improve functionality and ease of use and add a professional feel. Here's how to elevate your DIY teleprompter:
Remote Control Integration
Adding a remote control allows you to manage the scroll speed and pause the text without needing to touch the screen or device. You can use a Bluetooth remote or even turn your smartphone into a controller with the right app.
Adjustable Text Size and Color
Customize the text size and color to suit your eyesight and lighting conditions. Larger text and high-contrast colors can make it easier to read your script from a distance.
Multi-Camera Compatibility
If you use multiple cameras, set up your teleprompter to be easily adjustable for different lens sizes and positions. This might involve making a versatile mounting system or adjustable glass angle.
Adding a Timer
Incorporate a countdown timer to keep track of your speaking duration. This is particularly useful if you have time constraints for your presentations or recordings.
Software Custom Scripts
If you're tech-savvy, consider writing custom scripts for your teleprompter software. This could automate certain functions or integrate with other systems you use.
Portability Features
Make your teleprompter easy to transport by adding features like foldability, lightweight materials, or a carrying case. This is ideal for on-the-go presentations.
Enhanced Durability
Upgrade materials for better durability, especially if you'll be using your teleprompter frequently. Sturdier construction can protect against wear and tear.
Enhancing your DIY teleprompter makes it more efficient and professional while maintaining simplicity and ease of use.
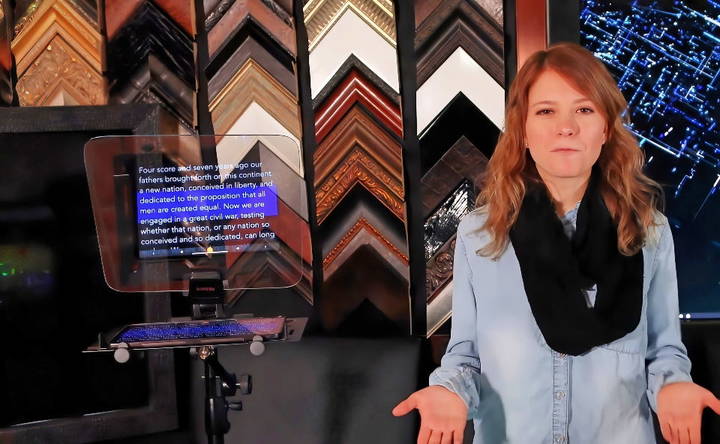
Software Recommendations for Your DIY Teleprompter
The right software can transform your DIY teleprompter into a powerful speech tool. Here's a guide to the best 2024 teleprompter software, user-friendly and effective.
Riverside
Riverside is a versatile option that's great for both Windows and Mac users. It offers a clean interface and reliable performance, making it a top choice for professionals.
Virtual Teleprompter
For those who need a simple and straightforward solution, Virtual Teleprompter offers a free version that's perfect for getting started without any investment.
Teleprompter Mirror
Teleprompter Mirror is ideal if you're looking for software that can mimic professional teleprompter hardware. It's a solid choice for those who want a more traditional teleprompting experience.
EasyPrompter
EasyPrompter is a free option that provides basic functionality with an easy-to-use interface. It's a good starting point for beginners.
Speakflow
Speakflow is known for its budget-friendly pricing while still offering a robust set of features. It's a good balance between affordability and functionality.
PromptSmart
PromptSmart is a professional-grade teleprompter software that comes with auto-scrolling capabilities, making it a favorite among news anchors and speakers.
PromptDog
PromptDog offers a one-time payment option, which can be more economical in the long run. It's a practical choice for those who use teleprompters regularly.
When picking teleprompter software, consider your presentations, devices, and budget. The right one boosts clarity and confidence.
Troubleshooting Common Issues with DIY Teleprompters
When you're working with a DIY teleprompter, you might encounter a few hiccups along the way. Here's a helpful guide to troubleshooting common issues so you can get back to smooth presentations.
Reflective Glass Problems
If the text isn't displaying clearly on the reflective glass, check if the glass is clean and properly positioned at a 45-degree angle. Smudges or incorrect angles can distort the text.
Software Glitches
Teleprompter software can sometimes freeze or crash. Make sure your software is up-to-date and that your device has sufficient memory and processing power to run smoothly.
Scrolling Issues
If the text isn't scrolling at the right speed, adjust the settings in your teleprompter app. Most apps allow you to control the speed to match your reading pace.
Assembly Difficulties
If parts aren't fitting together well, double-check the instructions and make sure you're using the right pieces. Sometimes, a simple reassembly can fix the issue.
Compatibility with Cameras
Ensure that your teleprompter is compatible with the camera you're using. Adjust the teleprompter's position so that the camera lens is directly behind the reflective glass.
Visibility in Different Lighting
If you're having trouble seeing the text due to lighting conditions, try increasing the brightness of your display or using a higher contrast color for the text.
By addressing these common issues, you can ensure that your DIY teleprompter works effectively for all your recording needs.
FAQs About DIY Teleprompter
Discover detailed FAQs about DIY teleprompters, including setup, materials, and benefits. Learn how to build your own teleprompter easily.
A DIY teleprompter is a homemade version of a professional teleprompter. It typically uses common materials like a smartphone or tablet to display text, a piece of glass or acrylic to reflect the text, and some form of frame to hold everything in place. It helps speakers or presenters to read their script while maintaining eye contact with the camera.
The main benefits of a DIY teleprompter are cost savings and customization. Building your own teleprompter can be significantly cheaper than buying a professional one. Additionally, you can customize the size and shape to fit your specific needs and equipment.
One challenge with DIY teleprompters is the potential for double reflections caused by the glass or acrylic. This can make the text hard to read. To minimize this, you can adjust the text size and font or invest in beam splitter glass if you’re using the teleprompter frequently.
While you can use any clear piece, beam splitter glass is often recommended for its clarity and lack of double reflections. However, it is more expensive. Regular glass or acrylic can work well, too, especially if you're on a budget. Just be aware of the potential for reflection issues and be prepared to make adjustments as needed.
Clear visibility of your script is crucial for a smooth presentation. To achieve this, make sure the text size and font are easily readable from your speaking distance. Use a high-contrast color scheme, such as white text on a black background, to enhance readability. Also, position your device at an optimal distance from the reflective surface to prevent blurring or distortion of the text. If you encounter issues with double reflections, consider using a teleprompter app that allows you to adjust the text scroll speed and size for better control.
Concluding Thoughts
Building a DIY teleprompter at home was a rewarding experience for me. I encourage you to give it a try. You'll not only save money but also learn a new skill that can take your presentations to the next level.


