Are you looking for an exciting outdoor activity that will keep your kids entertained for hours? Building a DIY tetherball setup is a perfect solution! Tetherball is a classic game that combines physical activity with fun, and it's easy to make with just a few materials and tools. This project is simple enough for beginners, making it an excellent family activity, and customizable for all ages.
In this comprehensive guide, you will learn how to make your own DIY tetherball setup. By the end of this article, you'll have all the knowledge needed to build a tetherball set that's both durable and safe for your children. Let's dive in!
Materials You'll Need
To get started, gather the following materials:
- Two 90 lbs bags of concrete – This will build the stable base needed to hold the tetherball pole upright.
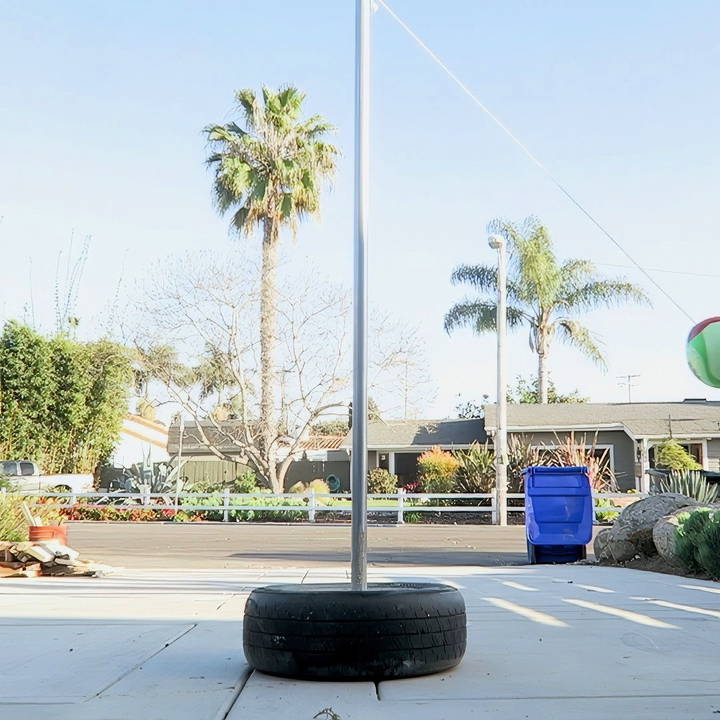
- An 8-foot galvanized fence post (about 2 inches in diameter) – The pole for tetherball should be strong and rust-resistant.
- An old tire – Tires can often be obtained for free from local tire shops.
- Two 12-inch pieces of 3/8 rebar – Rebar helps reinforce the concrete and stabilizes the base.
- Eye hook bolt, washer, and nut – The tetherball will be attached to this.
- Snap hook – Used to connect the ball to the pole.
- Tetherball – You can purchase a standard tetherball online or from a local sports store.
You may also need some basic tools such as:
- Drill and bits for making holes.
- Impact driver (optional) for easier assembly.
- Measuring tape to ensure accurate placement of the pole and eye hook.
- Buckets or shovels for mixing concrete.
- Safety gear such as gloves, eye protection, and closed-toe shoes. Always prioritize safety when working with concrete and power tools.
Step by Step Instructions
Learn how to make a DIY tetherball set with clear, step-by-step instructions. Build and enjoy your own backyard game with ease and safety.
Step 1: Preparing the Tire Base
The tire serves as the base for the tetherball pole, providing the weight and stability needed to prevent the pole from tipping over during play.
- Get a tire: Visit a local tire shop and ask for an old tire. Often, they will have used tires they are happy to give away for free.
- Place the tire on flat ground: This will help keep the concrete level as it sets.
- Cut two pieces of rebar: Each piece should be about 12 inches long. These pieces will help reinforce the concrete and ensure the pole stays stable in the tire.
Step 2: Setting Up the Pole
The pole is the core structure of your tetherball set. You'll be using an 8-foot galvanized pipe for this, which provides the necessary height and durability.
- Place the rebar in the tire: Arrange the two 12-inch pieces of rebar in the tire, forming a criss-cross pattern. This will prevent the pole from moving within the concrete once it sets.
- Center the pole: Position the galvanized fence post (8 feet tall and 2 inches in diameter) in the middle of the tire. Make sure it's standing upright and straight. You can use a level to ensure it's perfectly vertical.
- Secure the pole with duct tape or wire: Before pouring the concrete, temporarily secure the pole in place so it doesn't move while you're working.
Step 3: Pouring the Concrete
Concrete is essential for keeping the tetherball pole upright and secure. Here's how to prepare and pour it properly:
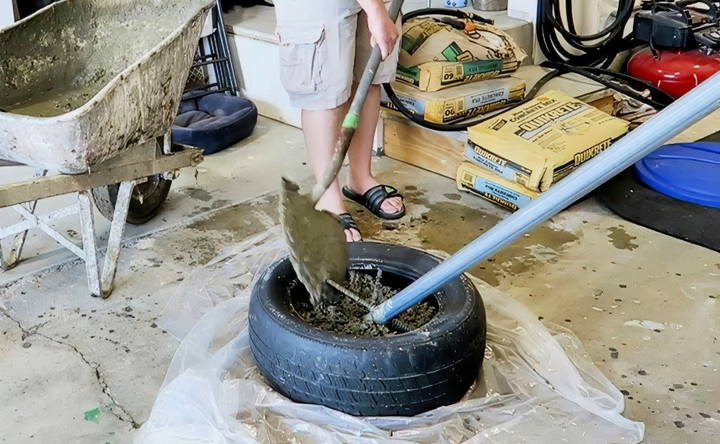
- Mix the concrete: In a large container or wheelbarrow, mix the two 90 lbs bags of concrete with water according to the package instructions. You want the consistency to be thick, but still pourable.
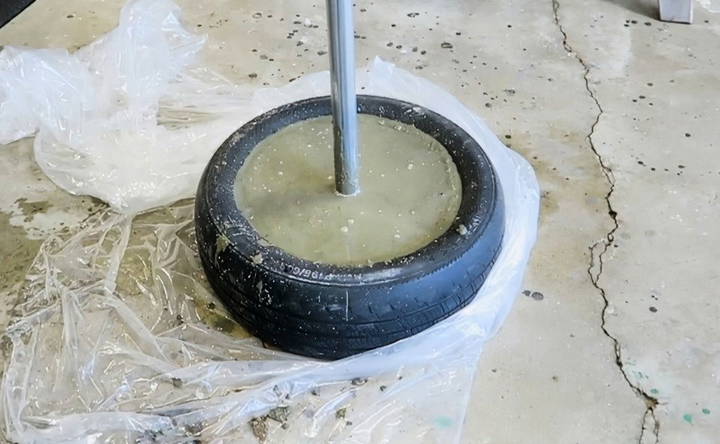
- Pour the concrete into the tire: Carefully fill the tire with the concrete mixture, making sure the pole remains centered and straight. Fill the tire completely so that the concrete reaches the edges.
- Insert the rebar into the concrete: Once the tire is full of concrete, push the two pieces of rebar into the concrete for additional support. This step ensures the pole is locked securely into the base.
- Let it dry: Allow the concrete to dry for at least 24 hours. However, for a more durable setup, it's recommended to wait 3-4 days to let the concrete fully cure.
Step 4: Attaching the Eye Hook and Snap Hook
The next step is to set up the mechanism that will hold the tetherball in place.
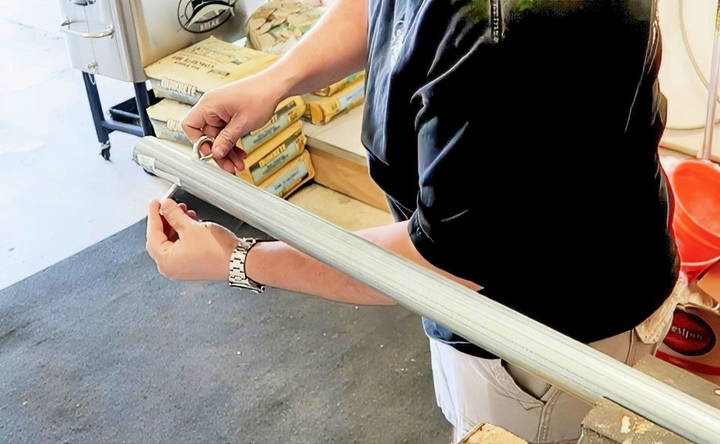
- Drill a hole near the top of the pole: Use a drill to build a hole about 6 inches from the top of the pole. The hole should be large enough to fit the eye hook bolt.
- Insert the eye hook: Thread the eye hook through the hole, and secure it with a washer and nut on the opposite side. This hook will hold the tetherball in place.
- Attach the snap hook: Use a snap hook to connect the tetherball to the eye hook. This way, you can easily remove and replace the ball if needed.
Step 5: Adjusting the Tetherball Height
It's important to adjust the height of the tetherball depending on who will be using it.
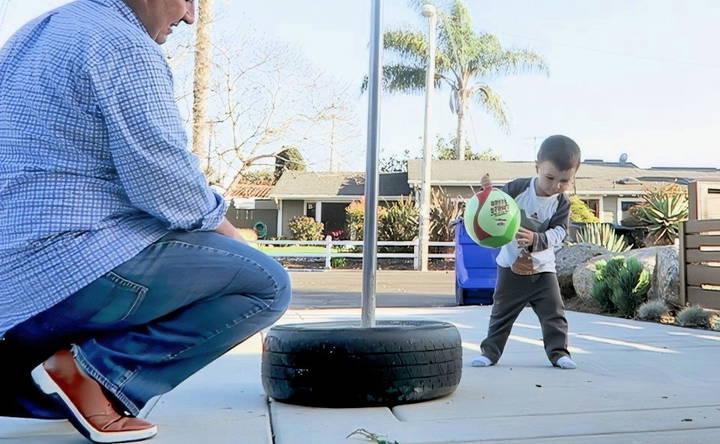
- Adjust for younger kids: Lower the tetherball for smaller children, ensuring it's within their reach. A good rule of thumb is to place the ball at head height.
- Adjust for older kids or adults: As children grow, or if adults want to join the game, you can adjust the height of the tetherball by raising it. The adjustable design makes the tetherball set versatile and suitable for all ages.
Safety Considerations
Safety is a top priority when building any outdoor play equipment. Here are a few tips to ensure your DIY tetherball set is both safe and durable:
- Use safety gear: When working with concrete and power tools, always wear protective gear such as gloves, eye protection, and closed-toe shoes.
- Stable base: Make sure the tire base is heavy enough to prevent the pole from tipping over. If you have concerns, consider adding more weight by increasing the amount of concrete.
- Monitor children during play: While tetherball is a safe game, children should always be supervised to avoid rough play or accidents, especially with younger players.
Tips and Tricks for a Successful Build
Here are a few additional tips to help you get the most out of your DIY tetherball project:
- Consider the size of the tire: A smaller tire can reduce the overall weight of the tetherball setup, making it easier to move around. However, a larger tire with more concrete will provide better stability. Choose the tire size that best fits your needs.
- Mix concrete properly: For a solid base, ensure the concrete is mixed thoroughly and that the rebar is placed before the concrete begins to set.
- Customize your tetherball: You can paint the pole or the tire to make it more colorful and appealing for kids. Let them help decorate the tetherball set to give it a personal touch.
- Make it portable: If you need the tetherball set to be portable, use a smaller tire and consider adding handles on the tire so it can be easily moved.
Benefits of Building Your Own Tetherball Set
Building a DIY tetherball set is not only cost-effective, but it also has many benefits for kids and families alike:
- Physical exercise: Tetherball is a fun way for kids to stay active, improving their hand-eye coordination and promoting physical activity.
- Outdoor fun: With more time spent outdoors, children can get fresh air and reduce screen time.
- Family bonding: This project is a great way for families to spend time together, whether building the tetherball set or playing the game.
- Customizable: You can adjust the setup as needed, making it perfect for kids of all ages and even adults.
Conclusion
Building a DIY tetherball set is a fun and rewarding project that will provide hours of entertainment for your family. By following the steps outlined in this guide, you'll have a sturdy, long-lasting tetherball set that can be enjoyed by kids and adults alike. Don't forget to customize it with paint or decorations to make it uniquely yours.
Now that you know how to build your own tetherball set, it's time to gather your materials, get outside, and start building!
FAQs About DIY Tetherball Project
Discover answers to common questions about your DIY tetherball project, including setup tips, materials needed, and maintenance advice.
You can reduce the weight by using a smaller tire or mixing the concrete with sand. This will decrease the overall amount of concrete needed, making the base lighter but still stable enough for play.
Always wear eye protection, gloves, and closed-toe shoes when using tools like drills and when handling concrete. Be mindful of safety around kids while the setup is drying and during construction.
It's best to let the concrete dry for at least 24 hours, but for a more solid base, let it cure for 3 to 4 days before use. This ensures maximum stability and strength.
Yes! The tetherball can be adjusted by lowering or raising the ball to fit the height of the player. This makes it suitable for different ages, from toddlers to older kids and even adults.
If you can't find an old tire, you can use a sturdy plastic bucket or a large planter as the base. Just ensure that the container is wide and deep enough to hold concrete and provide adequate support for the pole.
If the pole feels wobbly, check that the rebar was properly inserted to reinforce the concrete. You can also add more concrete around the base or use thicker rebar to improve stability.
Tetherball may be too intense for toddlers. For children under 3, supervise closely and consider softer balls or shorter play sessions to ensure safety. The adjustable height feature can help make it safer as it grows.


