Making DIY textured wall art for your home can add a unique and personal touch to your space. With just a few materials, you can design artworks that reflect your style and fit perfectly into any room. This guide will show you step-by-step instructions to make stunning pieces. This textured wall art not only enhances your décor but also offers a fulfilling, creative activity.
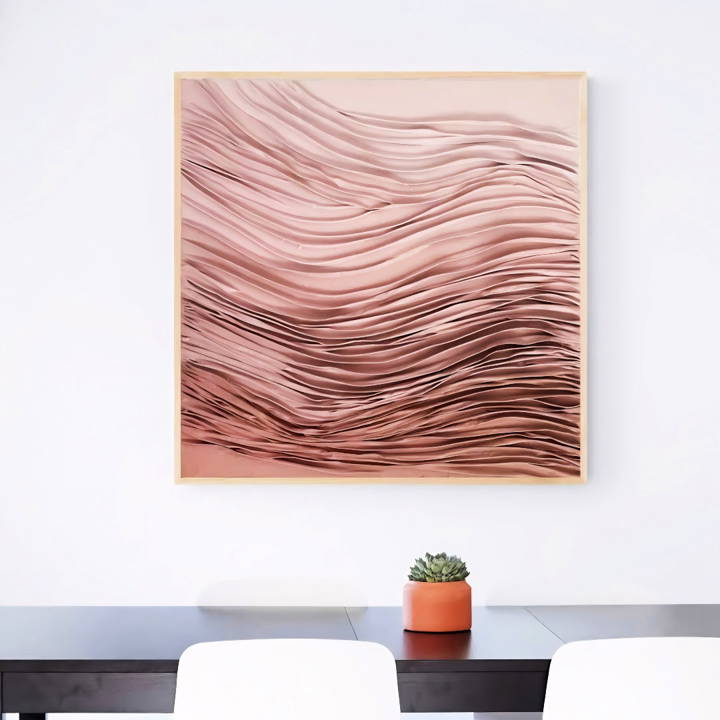
Learn how to make textured art that stands out. By experimenting with different techniques and supplies, you can achieve various effects to suit your taste. From simple patterns to intricate designs, the possibilities are endless.
Continue reading to discover detailed tips and tricks, ensuring your projects turn out beautifully and complement your home perfectly.
Gathering Materials
First, we need to talk about what materials you will need and why each is essential.
- Canvas: This will be the base of your artwork. The size is up to you, depending on how much wall space you want to cover.
- Wood Glue: Opt for a thick wood glue typically used in constructions since it gives the texture we desire.
- Fabric: Any fabric will work, but something a bit sturdier can easily withstand the manipulation process.
- Acrylic Paint: Chosen for its durability and vibrant color options, it is perfect for making that eye-catching piece.
- Paint Brushes: These are necessary for mixing glue and painting your artwork.
- Scissors: To cut the fabric to the right size.
- Staple Gun: For securing the fabric to the canvas. Alternatively, if you don't have a staple gun, adhesive could work.
- Wall Primer: This helps prepare the fabric surface, ensuring the paint sticks and stands out.
- Spray Bottle: Filled with water, it helps in manipulating the fabric while applying the wood glue.
Each material plays a pivotal role in the creation process, ensuring professional and long-lasting results.
Step by Step Instructions
Learn how to make pretty DIY textured wall art with our step-by-step instructions. Perfect for adding a unique touch to your home decor!
Preparing the Workspace
Start by laying down newspapers or a plastic sheet to protect your working area. This is a somewhat messy project, so it's best to prepare in advance.
Crafting the Canvas Base
Insert wedges into the corners of your canvas to provide tension, making the surface firm and easier to work on. If wedges are tight, a gentle tap with a hammer can ensure they're securely in place.
Mixing the Wood Glue
The wood glue I've chosen is thick and needs dilution for a smoother consistency. Mix it with a little water until you've got a workable paste. This mixture will act as the main component in adding texture to your art piece.
Fabric Manipulation and Attachment
Cut your fabric to a size slightly larger than your canvas, allowing enough excess to staple onto the back. Start by stapling one side, then progressively move to the opposite side, stretching it slightly to eliminate any wrinkles. The goal is to have a tight and smooth surface.
Adding Texture with Wood Glue
With the fabric secured, begin applying your wood glue mixture to the canvas with a brush. You can start imagining the shapes or waves you want to make; this is where your creativity really shines.
As you model the fabric, keep spraying water on it to ensure flexibility. Once satisfied with the texture, cover the entire surface with a generous layer of wood glue. Remember, your fabric needs to be wet enough to absorb the glue but not too drenched.
Letting It Dry
Patience is key here. Let your masterpiece dry for at least 24 hours. After drying, trim any excess fabric from the back and secure the remaining pieces to the canvas frame.
Priming and Painting
Spray a wall primer over your dried fabric to prepare it for painting. This step is crucial for vibrant and long-lasting colors. After letting the primer dry for about eight hours, start painting with your chosen acrylic paints. I went for a gradient effect, which involved mixing primary colors and gradually adding white to lighten the shades. Layer your paint, allowing each layer to dry for around five hours to achieve that smooth, shiny texture.
Upcycling Ideas for Textured Wall Art
Upcycling is a creative and eco-friendly way to transform old or unused items into beautiful pieces of textured wall art. Here are some ideas to get you started:
- Old T-Shirts: Cut them into strips and braid or twist them to make interesting textures. Stretch the braids across a canvas for a unique piece.
- Cardboard: Instead of throwing away cardboard boxes, cut them into shapes and glue them onto a canvas. Paint over them for a 3D effect.
- Magazines and Newspapers: Roll magazine pages into tubes or fold newspaper into shapes. Arrange them on a backing board and seal them with a clear coat.
- Broken Ceramics: Use pieces of broken dishes or tiles to make mosaic-style textured art. It's a great way to repurpose something that would otherwise be wasted.
- Old Books: Take pages from books that are falling apart and use them to make a layered texture. You can form shapes or abstract designs.
- Fabric Scraps: Gather scraps of fabric with different textures and colors. Arrange and glue them onto a canvas for a tactile piece of art.
- Nature Finds: Collect leaves, twigs, or pine cones during a walk. Attach them to a canvas or board for a natural, rustic look.
- Plastic Bags: Iron plastic bags between sheets of parchment paper to fuse them together. Cut and layer them for a lightweight, textured creation.
- Old Jewelry: Use broken or outdated jewelry pieces to add sparkle and dimension to your artwork.
- Wine Corks: Slice corks and attach them to a surface in patterns or randomly for an interesting texture.
The key to upcycling is finding new uses for old items. Get creative to repurpose them as home decor.
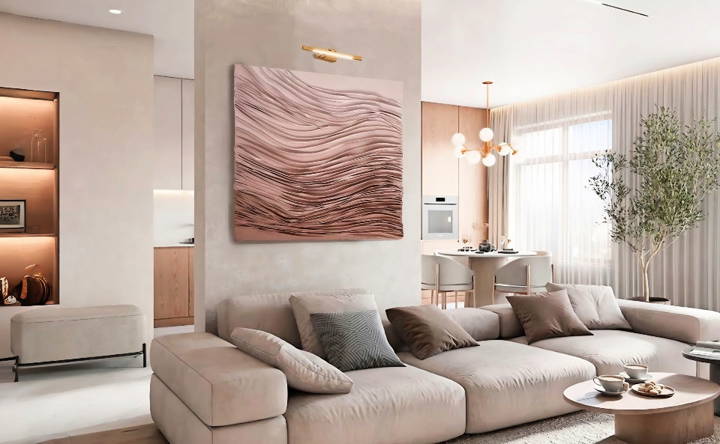
Troubleshooting Common Issues in DIY Textured Wall Art
Making textured wall art is a rewarding DIY project, but sometimes you might encounter a few hiccups along the way. Here's a helpful guide to troubleshoot common issues:
Uneven Texture
If your texture isn't uniform, it could be due to inconsistent application.
- Solution: Use even pressure and consistent strokes when applying your texturing medium. Practice on a scrap piece first to get the hang of it.
Paint Not Adhering
Paint might not stick if the surface is too smooth or oily.
- Solution: Lightly sand the area to make a rougher surface for better adhesion. Make sure the surface is clean and free from dust or grease before painting.
Texture Medium Cracking
This can happen if the medium is too thick or dries too quickly.
- Solution: Apply thinner layers and let them dry completely before adding more. Avoid direct sunlight or hot air drafts during drying.
Bubbles in Texture
Bubbles can form if the medium is overworked or shaken before use.
- Solution: Gently stir the medium before use and apply with smooth, deliberate strokes. If bubbles appear, pop them with a pin and smooth over the area.
Difficulty in Making Patterns
Struggling to make a specific pattern can be frustrating.
- Solution: Use stencils or homemade templates to imprint patterns onto the texture. Practice your technique on cardboard first.
Texture Falling Off
If pieces of texture fall off after drying, the bond might be weak.
- Solution: Ensure the base surface is primed properly to enhance adhesion. Use a suitable glue or medium as per the material you're working with.
Color Mismatch
Sometimes the color doesn't turn out as expected.
- Solution: Always test your paint on a small, inconspicuous area first. Let it dry to see the true color before proceeding.
Difficulty in Blending Colors
Blending can be tricky, especially for beginners.
- Solution: Work quickly while the paint is wet, and use a damp sponge to gently blend the edges of different colors.
Patience and practice are key to mastering the art of DIY textured wall art. Don't be discouraged by these common issues; with each project, you'll gain more experience and confidence.
Maintenance and Care for Textured Wall Art
Taking care of your textured wall art is essential to ensure it remains as striking as the day you made it. Here's a straightforward guide to help you maintain and care for your artwork:
- Regular Dusting: Use a soft, dry brush or a microfiber cloth to gently remove dust from the surface. Avoid using wet cloths, as moisture can damage the texture.
- Avoid Direct Sunlight: Keep your textured art away from direct sunlight to prevent fading and heat damage. If you must place it near a window, consider using UV-protective glass.
- Humidity Control: High humidity can affect the materials used in textured art. Try to maintain a consistent indoor climate to protect your piece.
- Cleaning Spills: If something spills on the artwork, blot it gently with a dry cloth. Do not rub, as this can embed the substance into the texture.
- Touch-ups: Over time, some textures may need a little refreshing. Use the same materials and techniques you originally used to repair any areas that might have worn down.
- Handling with Care: When moving your artwork, always lift it from the sides. Avoid touching the textured surface directly to keep oils from your hands from damaging it.
- Professional Advice: If your artwork is valuable or uses delicate materials, consult a professional conservator for specific care instructions.
By following these simple steps, you can keep your textured wall art looking beautiful for years to come.
FAQs About DIY Textured Wall Art
Discover answers to common questions about DIY textured wall art. get tips, techniques, and inspiration to make your unique textured wall masterpiece!
Preparing your canvas is a crucial step. Here’s a simple guide:
Clean the Canvas: Ensure the canvas surface is clean and free of dust.
Apply a Base Coat: Use acrylic paint to apply a base coat. This will help the joint compound adhere better.
Mix Your Textured Paste: Combine the joint compound with acrylic paint until you achieve a creamy consistency.
Applying texture is where you can get creative. Follow these steps:
Spread the Compound: Use a palette knife or scraper to spread the joint compound over the canvas.
Make Patterns: While the compound is still wet, use your tools to create patterns and textures.
Let it Dry: Allow your artwork to dry completely, which can take several hours to overnight, depending on the thickness of the application.
Absolutely! Here’s how to add color:
Paint Over the Texture: Once your texture is dry, you can paint over it with acrylics to add color and dimension.
Use Interior Wall Paint: For larger areas or a more cohesive look with your room, you can use interior wall paint.
To protect your artwork and keep it looking its best, consider these tips:
Seal the Artwork: Apply a clear sealant over the dried texture to protect it from dust and damage.
Regular Dusting: Use a soft brush or cloth to gently dust your textured wall art.
Avoid Moisture: Keep your artwork in a dry environment to prevent any warping or mold growth.
To ensure your textured wall art withstands the test of time and remains a vibrant part of your décor, consider the following tips:
Use High-Quality Materials: Opt for a high-quality joint compound and acrylic paints to ensure better adhesion and color retention.
Apply a Primer: Before adding texture, apply a primer to the canvas to make a more adhesive surface for your materials.
Varnish Your Finished Piece: After your artwork is complete and dry, apply a varnish to protect it from UV rays and dust.
Avoid Direct Sunlight: Hang your artwork in a place where it won't be exposed to direct sunlight, which can cause colors to fade over time.
Handle with Care: When moving or cleaning your artwork, handle it gently to avoid chipping or damaging the textured surface.
The Finale
In conclusion, this DIY textured wall art for your home can add a unique and personal touch to your living space. By following the steps on how to make textured art, you'll make a stunning piece that reflects your style. Experimenting with various materials and techniques will bring out the best in your creativity. Enjoy making your DIY textured wall art and transforming your home into a gallery of personal expression.


