I've always had a passion for taking old furniture and transforming it into something spectacular. One day, I looked at an old rocking chair and thought, why not turn this into something more regal? So, I decided to make a DIY throne chair out of it—one that would look elegant and luxurious, but without breaking the bank.

Let me take you through my process of transforming a simple old chair into a throne. I'll share what worked, what I learned, and a few tips to help you make your own throne chair, even if you're on a budget.
Step by Step Instructions
Learn how to make a DIY throne chair with our step-by-step instructions. From finding the right chair to adding plush, we've got you covered!
Finding the Right Chair
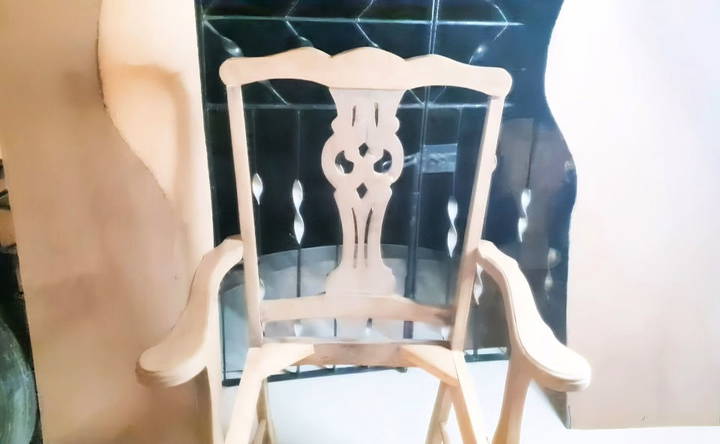
The journey started with an old rocking chair. You can really use any sturdy chair with a good structure for this project. The key is to envision what it can become. For my project, I asked a woodworker to remove the rockers at the bottom and extend the legs of the chair. This gave it a taller and more regal look. Once the legs were adjusted, the chair was sanded to smooth out any rough surfaces.
This step is important as it sets the foundation for the rest of the project. Extending the legs gave the chair a sense of height, which is essential for achieving that “throne” look.
Adding the Foam for Comfort
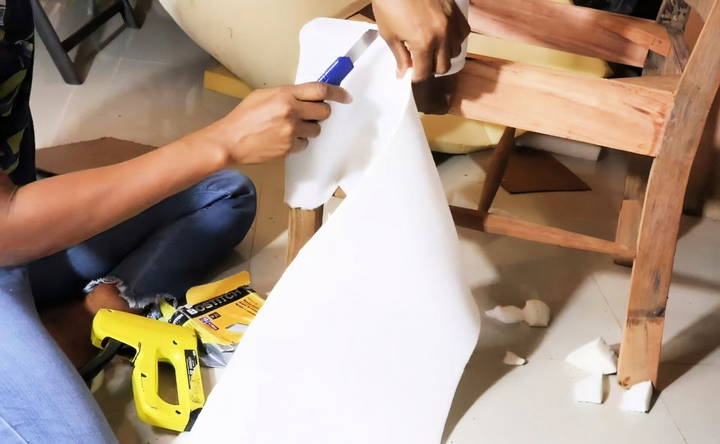
The next step was to add foam. I used one-inch thick foam for the chair's arms and a quarter-inch foam for the front. This padding not only makes the chair more comfortable but also gives it a plush, luxurious feel.
Here's a tip I discovered: when covering the arms and front of the chair, ensure you only leave the legs uncovered, as you want the wooden legs to show for contrast. I made sure that all visible wood on the upper part of the chair was covered, giving it a seamless appearance.
Choosing the Right Fabric
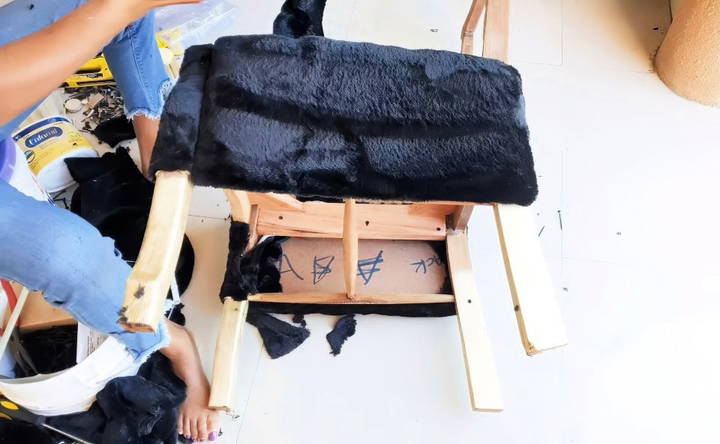
Choosing the right fabric can make or break the project. I went with a black faux velvet fabric because it has a pile texture that feels rich and looks expensive. I wanted the chair to look elegant, and the fabric made all the difference.
Here's something I learned about working with fabric: when cutting the fabric, always leave extra material so you can properly wrap it around the edges and secure it tightly. This ensures there are no wrinkles and everything looks neat.
I used adhesive spray to attach the foam to the wood. It's a quick and effective way to ensure everything stays in place. For the sides, I used a lightweight board called Solitex. This material is perfect because it's sturdy but doesn't add much weight to the chair. I didn't want the final product to be too heavy, so this material worked perfectly for the side panels.
Making the Back Design
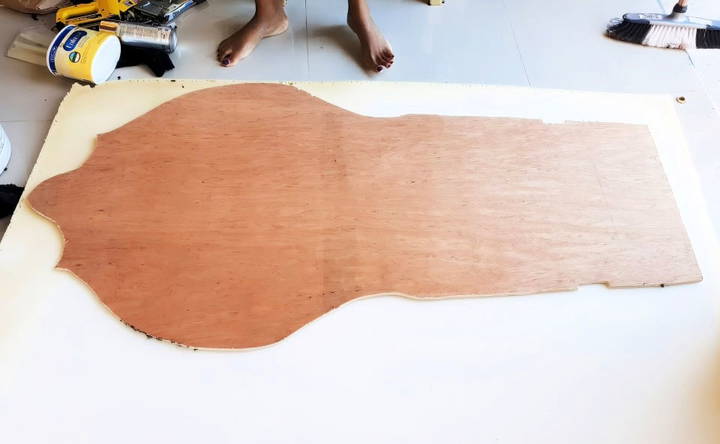
For the back of the throne, I wanted a custom design that would stand out. First, I drew the design on a piece of solitex, but here's the trick: instead of drawing the full design, I only drew one-half of it. Once I cut it out, I flipped it over to the other side and traced it to ensure the design was perfectly symmetrical.
After that, I transferred the design to a thicker piece of plywood—about a half-inch thick—because the back needed to be sturdy enough to hold the tufting and upholstery I had planned.
The Art of Tufting
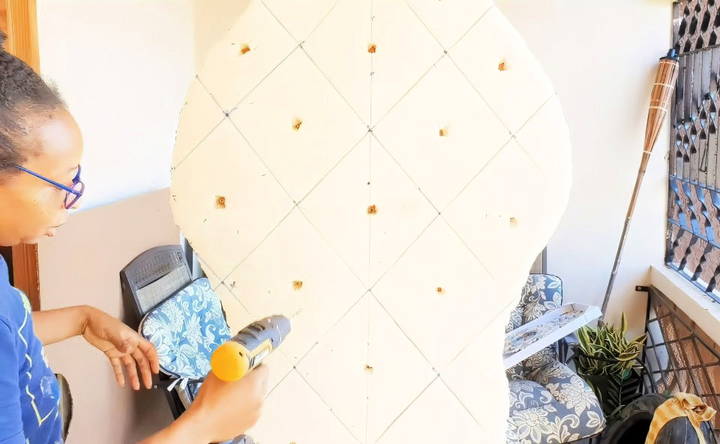
Now, onto tufting—the process that gives the throne chair its plush, cushioned look. I began by measuring and marking the spots where the buttons would go. Then, I drilled holes into the wood to allow the cords that would hold the buttons in place.
Tufting can be done in several ways, but I decided to thread the buttons through the fabric and foam, securing them in place from the back using zigzag patterns with the cords. Stapling the cords in a criss-cross pattern ensures that the buttons don't move.
The trick with tufting is to keep the fabric tight and aligned, ensuring that the folds between the buttons look even and elegant. If you've never tufted before, it may take some practice, but once you get the hang of it, it becomes easier.
Adding the Plush Front
For the front of the chair, I added a thick sponge to give it a really full and elegant look. This extra padding makes the chair look like a true throne—something big and bold, which is exactly what I wanted.
Crafting the Crown Molding
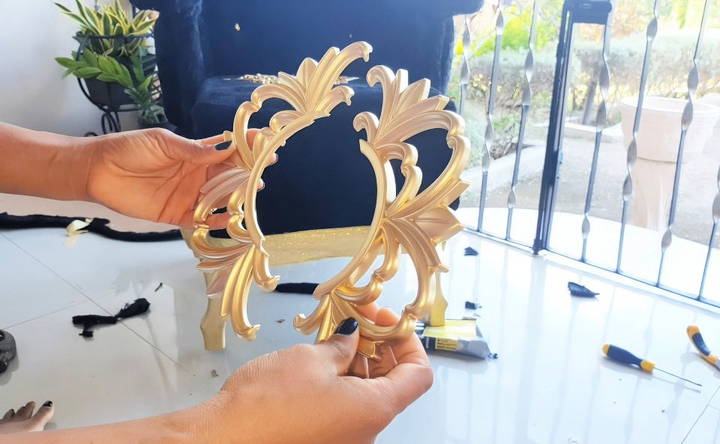
Now, what's a throne without some regal touches? For the crown molding, I wanted something special, but I didn't want to spend a lot. After searching various shops, I came across a plastic clock with a design that reminded me of a crown. I cut the pieces I needed, spray-painted them gold, and attached them to the chair using a hot glue gun.
This was one of those moments where creativity really saved me money. I couldn't believe how well it worked, and the gold trim gave the chair that royal touch.
Final Touches
After attaching all the foam, fabric, and trim, I upholstered the seat cushion and cleaned all the seams. I also gave the legs a fresh coat of spray paint to match the trim, which brought the entire look together.
Standing Back to Admire
Once everything was done, I stepped back and looked at my creation. With its tufted back, plush padding, and gold embellishments, the chair looked like a true throne.
- One final tip: don't be afraid to add your own personal touches. For example, I added some extra trim around the edges to cover where the fabric joined. Small details like this make a huge difference in the final look.
Customization Ideas
Customizing your DIY throne chair can make it truly unique and personal. Here are some easy-to-follow ideas to help you add your own touch to the project.
Design Variations
- Modern Look: Use sleek, straight lines and minimalistic designs. Opt for neutral colors like black, white, or grey. Choose materials like metal or polished wood for a contemporary feel.
- Vintage Style: Incorporate ornate carvings and curved lines. Use distressed paint techniques to give it an aged look. Select fabrics with floral or damask patterns for upholstery.
- Themed Chairs: Make a fantasy-themed chair with elements like dragon scales or medieval motifs. Design a royal-themed chair with rich colors like deep red or royal blue and gold accents. Make a nature-inspired chair using earthy tones and natural materials like bamboo or rattan.
Personal Touches
- Monograms and Initials: Add your initials or a monogram to the backrest using paint, embroidery, or decals. Use contrasting colors to make the monogram stand out.
- Unique Fabrics: Choose fabrics that reflect your personality or interests, such as bold prints, soft velvets, or quirky patterns. Mix and match different fabrics for a patchwork effect.
- Paint Finishes: Experiment with different paint finishes like matte, glossy, or metallic. Use stencils to add patterns or designs to the chair. Try a gradient or ombre effect for a modern twist.
Additional Features
- Built-in Storage: Add a hidden compartment under the seat for storing small items. Incorporate side pockets or pouches for books, magazines, or remote controls.
- Comfort Enhancements: Add extra padding to the seat and backrest for increased comfort. Use memory foam or high-density foam for better support.
- Decorative Elements: Attach decorative trim, tassels, or fringe to the edges of the chair. Add buttons or tufting to the upholstery for a classic look.
Tips for Customization
- Plan Ahead: Sketch your design ideas before starting to ensure everything fits together. Gather all materials and tools needed for the customization.
- Test First: Test paint colors and fabric swatches before applying them to the chair. Make small samples to see how different elements look together.
- Take Your Time: Don't rush the customization process. Take your time to ensure each step is done correctly. Pay attention to details to achieve a polished and professional finish.
By incorporating these customization ideas, you can build a throne chair that is not only functional but also a reflection of your personal style.

Common Mistakes and How to Avoid Them
Building a DIY throne chair can be a rewarding project, but it's easy to make mistakes along the way. Here are some common pitfalls and tips on how to avoid them.
1. Incorrect Measurements
Mistake: Not measuring materials accurately can lead to parts not fitting together properly.
Solution:
- Double-check measurements: Measure twice before cutting any material.
- Use a ruler or measuring tape: Ensure all measurements are precise.
- Mark clearly: Use a pencil or chalk to mark where cuts need to be made.
2. Using the Wrong Tools
Mistake: Using inappropriate or dull tools can make the job harder and result in poor craftsmanship.
Solution:
- Select the right tools: Use tools that are suitable for the materials you're working with.
- Keep tools sharp: Regularly sharpen blades and bits to ensure clean cuts.
- Follow instructions: Refer to tool manuals or online guides for proper usage.
3. Poor Material Selection
Mistake: Choosing low-quality or unsuitable materials can affect the durability and appearance of the chair.
Solution:
- Research materials: Select materials that are strong and suitable for furniture.
- Consider alternatives: If budget is a concern, look for cost-effective yet durable options.
- Test samples: Before committing, test small samples to see how they hold up.
4. Skipping Sanding and Priming
Mistake: Neglecting sand and prime surfaces can produce a rough finish and poor paint adhesion.
Solution:
- Sand thoroughly: Use sandpaper to smooth all surfaces before painting or staining.
- Prime surfaces: Apply a primer to ensure the paint adheres well and lasts longer.
- Clean dust: Wipe away dust after sanding to avoid imperfections in the finish.
5. Rushing the Assembly
Mistake: Assembling parts too quickly can lead to misalignment and weak joints.
Solution:
- Take your time: Follow assembly instructions carefully, and don't rush.
- Align parts properly: Ensure all parts are aligned before securing them.
- Use clamps: Clamps can help hold parts in place while you work.
6. Ignoring Safety Precautions
Mistake: Failing to follow safety guidelines can result in injuries.
Solution:
- Wear safety gear: Always wear safety glasses, gloves, and a dust mask.
- Work in a safe area: Ensure your workspace is well-lit and free of hazards.
- Follow tool safety: Use tools according to their safety instructions.
7. Overlooking Structural Integrity
Mistake: Not reinforcing joints and connections can make the chair unstable.
Solution:
- Reinforce joints: Use screws, brackets, or wood glue to strengthen connections.
- Check stability: Test the chair for stability before using it.
- Add supports: If needed, add extra supports to ensure the chair is sturdy.
8. Neglecting Finishing Touches
Mistake: Skipping final touches can leave the chair looking unfinished.
Solution:
- Inspect for flaws: Check for any rough edges, gaps, or imperfections.
- Apply finish: Use paint, stain, or varnish to protect and enhance the chair.
- Add cushions: Consider adding cushions or upholstery for comfort and style.
By being aware of these common mistakes and following these tips, you can build a beautiful and sturdy DIY throne chair. Take your time, plan carefully, and enjoy the process!
FAQs About DIY Throne Chairs
Discover everything you need to know about DIY throne chairs with our FAQs. Get answers on materials, techniques, and more for your project.
A DIY throne chair is a custom-made, regal-looking chair that you can build yourself. It often features elaborate designs and luxurious materials, making it a standout piece for events or home decor.
The time required varies based on the complexity of the design and your skill level. On average, it can take anywhere from a few hours to a couple of days.
Yes, many DIY throne chair projects are beginner-friendly. Start with a simple design and basic materials. As you gain confidence, you can try more intricate designs.
Absolutely! One of the benefits of a DIY project is the ability to tailor the chair to your specific needs and preferences. You can adjust the height, width, and decorative elements.
Use decorative trims, buttons, and paint to enhance the chair's appearance. You can also add tufting to the backrest for a more luxurious look. Be creative with your choices to make the chair unique.
A Throne Fit for a Queen
I even used this chair for a birthday photoshoot, and it was a hit. Sitting in the chair made me feel regal, and I loved knowing that I had buildd it myself from scratch.
If you're looking to make your own DIY throne chair, don't be afraid to get creative. This project taught me that with a little imagination and some handy DIY tricks, you can turn almost anything into a masterpiece.
Happy crafting, and may your throne chair be as fabulous as you are!


