Making a DIY tiara inspired by Queen Victoria's iconic emerald crown is a fascinating project that combines historical flair with intricate crafting. In this guide, we'll show you how to make a beautiful tiara by mixing classic techniques with modern, easy-to-find materials. It's all about making that timeless look! Whether you're an experienced DIY enthusiast or a beginner, this step-by-step tutorial will help you craft a tiara fit for royalty.

A Glimpse into Queen Victoria's Emerald Tiara
Queen Victoria's emerald tiara, designed by her beloved husband Prince Albert in 1845, is a cherished piece of British history. Originally encrusted with diamonds and emeralds, this tiara epitomizes Victorian elegance. Today, the tiara is displayed in the Victoria and Albert Museum in London, attracting admiration from historians and fashion enthusiasts alike. Its design features delicate swirls, teardrop emeralds, and rectangular accents, making it both bold and intricate.
Inspired by this piece, we can remake a modern DIY version using affordable materials like glass stones, silver-plated copper wire, and superglue. Let's delve into the detailed process.
Materials Needed
Before beginning, gather all the materials. Here's what you'll need to build the tiara base, decorate it with faux gemstones, and remake the tiara's signature emerald look.
Essential Supplies
- Plain Wire Headbands: Forms the foundation.
- 0.8mm Silver-Plated Copper Wire: For structure and durability.
- 0.3mm Thin Wire: To secure various elements to the base.
- Green Glass Stones: Rectangular, square, and teardrop shapes for the emerald effect.
- 3mm Glass Chain Stones: Imitate the diamond rows.
- Superglue & Fast-Drying Glue: Essential for adhering to non-threadable stones.
- Filigree Caps: To cap teardrop stones.
- Basic Tools: Wire cutters, pliers, a cutting board, and a template for consistent shapes.
Preparing Your Workspace
Ensure you have a clean, well-lit workspace with enough ventilation, especially for gluing. This project involves fiddly elements, so patience is key. Setting up a template can also help with achieving uniform shapes and sizes.
Step by Step Instructions
Learn how to make a stunning DIY tiara with step-by-step instructions, from crafting the base to adding diamonds and emeralds for a perfect finish.
Step 1: Crafting the Tiara Base
Making the structural foundation of the tiara is essential. The base supports all other elements and ensures durability.
- Headband Base: Start with a plain wire headband as your base. This will provide the overall shape and wearability.
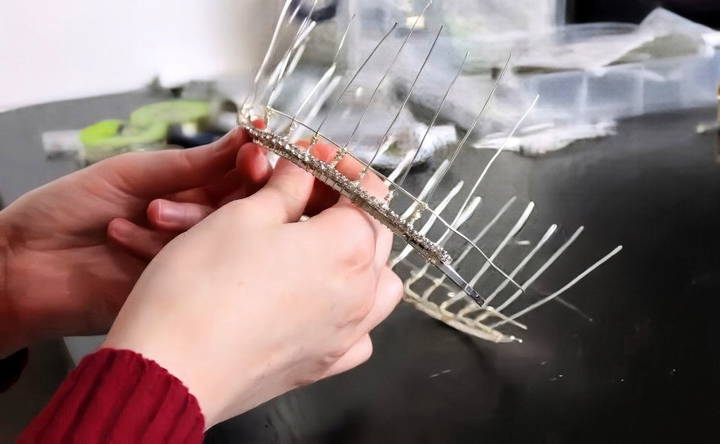
- Horseshoe Structures: To emulate the tiara's distinctive arches, use 0.8mm copper wire to make horseshoe shapes. Measure and shape these carefully against a template to maintain consistency.
- Add an Extra Band for Support: To hold the diamonds and emerald rows, add another band slightly above the base using thin wire. This adds stability and extra design space.
While working on the base, test against the stones to ensure everything aligns. This might reveal issues with measurements, so adjust as needed.
Step 2: Attaching the Diamonds and Emeralds
Once the base is in place, we'll move on to adding the decorative glass stones to remake the elegant detailing of Queen Victoria's tiara.
Attaching the Diamond Rows
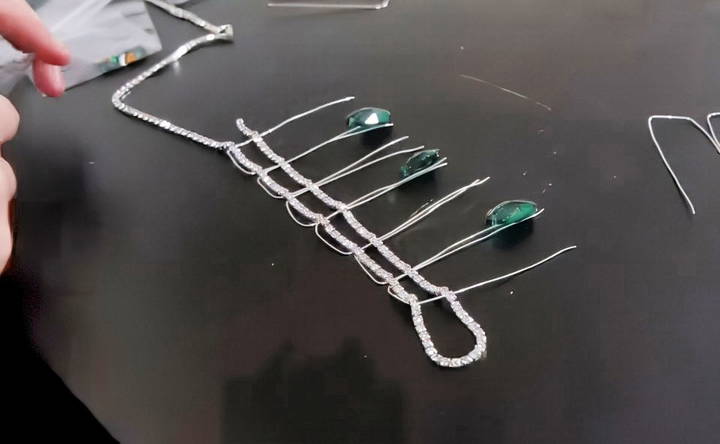
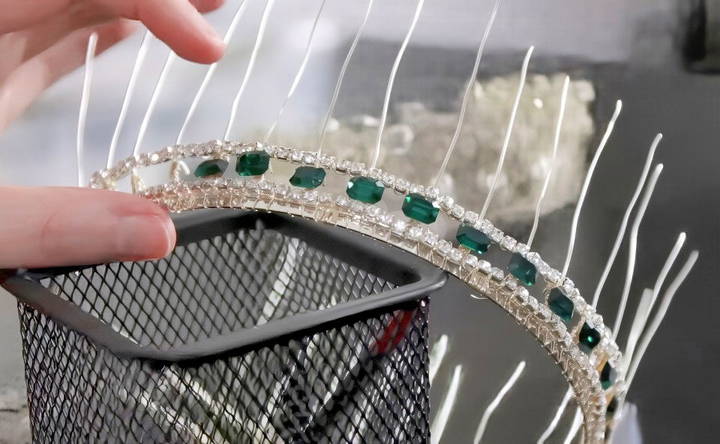
- Chain Stones for Diamond Rows: Begin with the bottom row of diamonds using 3mm glass chain stones. Cut two lengths and carefully wrap them around the base with thin wire.
- Secure the Chains: Use thin wire to attach the chains tightly. This might be a delicate task, but it helps prevent any looseness in the stones, especially with frequent handling.
Incorporating Green Glass Stones
The tiara's standout feature is its green gemstones, mimicking the original emeralds.
- Rectangular Stones: After completing the diamond rows, add the rectangular green stones above them. Since these stones can't be threaded, use fast-drying glue to secure them.
- Square Stones: Alternate square green stones just above the rectangular ones, maintaining uniformity by referring to your template.
- Add the Teardrop Stones: At the top, place teardrop-shaped green glass stones in filigree caps. These caps not only add elegance but also secure the stones in place. Attach them using glue or wire as needed.
With each piece, patience is essential as the glue dries. Double-check the arrangement before moving to the next phase to avoid misalignment.
Step 3: Enhancing with Additional Gem Clusters
To make the tiara truly shine, we'll make small clusters of stones to add depth and sparkle. This step involves arranging gems into small, glue-secured clusters, which will later be attached to the tiara.
- Make Gem Templates: Draw small shapes on a board as templates for the clusters. This ensures uniform size and shape.
- Glue the Gems: Use fast-drying glue to arrange the stones into clusters according to your template. Repeat this process for each cluster, making around 13 for full coverage.
- Allow the Clusters to Dry: Leave the clusters on a cling film-covered board for 24 hours to solidify. Once dry, they'll be sturdy enough for attachment.
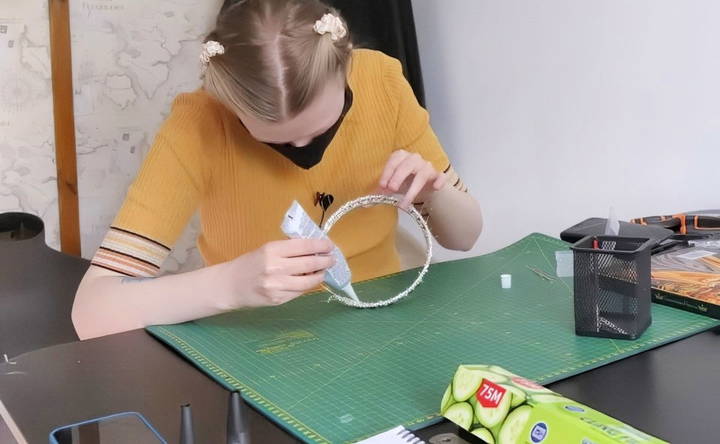
The gem clusters may take time, but they add dimension to the tiara and enhance the overall aesthetic.
Step 4: Final Assembly
With all individual elements prepared, it's time to assemble the tiara. This part requires precision, as you'll attach each gem cluster and finish the overall design.
- Attach Gem Clusters to the Tiara: Place each cluster underneath the teardrop emeralds, securing them with glue. This adds a layered, ornate effect.
- Adjust the Spikes: Measure the spikes on top to align with the height of each cluster, then trim them for uniformity. This makes a cohesive look.
- Secure with Extra Glue: Since the structure needs to hold all elements firmly, apply additional glue along the back of the tiara to reinforce stability.
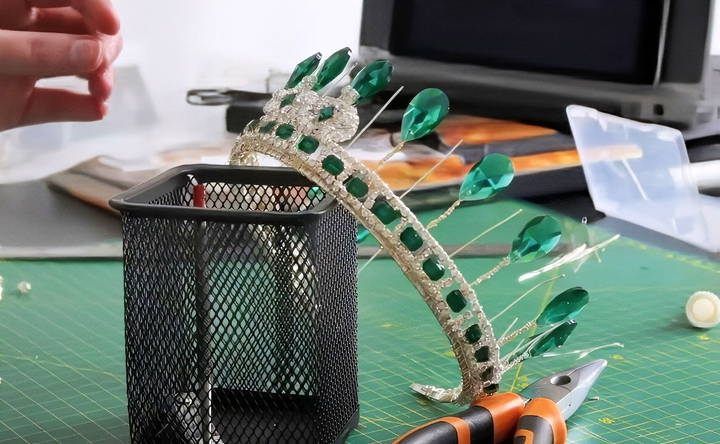
Each glued section should set for several hours to prevent any gems from detaching during wear or handling.
Step 5: Adding the Final Touches
With the main structure and gemstones in place, we're almost finished. Now, we'll refine the tiara's overall look and secure everything for long-lasting beauty.
Securing Loose Areas and Finishing with Wire
- Exposed Wire Edges: Check for any exposed wire on the base or the top. If visible, consider covering them with thin wire or small gems for a seamless look. This step can add a polished finish, especially if you're planning to wear the tiara for an extended time.
- Additional Glue: Add an extra layer of glue to the back of each gemstone cluster for extra security. This will ensure that stones won't shift or detach.
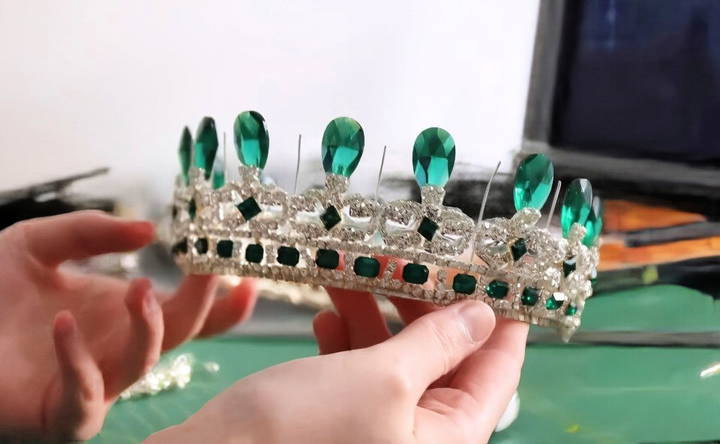
- Inspect for Balance: Once everything is in place, hold the tiara and check for balance. Adjust any sections that appear uneven or misaligned. A balanced tiara sits more comfortably on the head and enhances the overall aesthetic.
Optional Filigree Caps and Embellishments
Filigree caps add a classic, detailed touch but can be skipped if you prefer a sleeker look. Here's how to add them if desired:
- Position the Caps: Place the caps around the teardrop stones, securing them with thin wire or glue.
- Final Adjustments: Arrange the filigree so it sits symmetrically around each teardrop, providing a frame for the stones.
This finishing touch adds a vintage feel that echoes the original tiara's Victorian heritage.
Step 6: Testing and Making Final Adjustments
Before officially completing your DIY tiara, it's crucial to test the fit and durability.
- Trial Fit: Place the tiara on your head and check for comfort. Adjust any sections that feel too tight or loose.
- Reinforce as Needed: During the fitting, you may notice areas that need more glue or additional wire wrapping. Make these final adjustments to ensure the tiara holds its shape.
- Polish and Clean: Gently polish the stones and wire with a soft cloth to remove any fingerprints or glue residue, giving the tiara a finished, sparkling look.
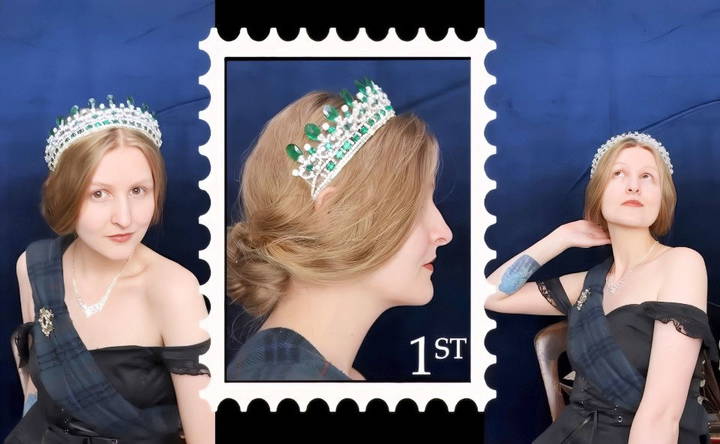
Display and Care Tips
To preserve your tiara, consider these tips for storage and display:
- Safe Storage: Store your tiara in a cool, dry place, preferably in a soft cloth bag or lined box to prevent scratches.
- Avoid Moisture: Moisture can affect the glue and glass stones, so keep the tiara away from humid areas.
- Display Idea: If you'd like to showcase your tiara, consider placing it on a padded display stand. This keeps it secure and serves as a beautiful piece of decor.
Troubleshooting Common Issues
Every DIY project can come with a few challenges. Here are some common issues and tips on handling them:
- Stones Not Sticking Well: Use fast-drying glue designed for non-porous surfaces. Ensure the stones and the surface are clean before applying the glue.
- The Tiara Feels Unstable: Reinforce with an extra wire band or additional glue on loose areas. Double-check the balance to ensure it sits properly.
- Exposed Wires: Cover exposed wires with decorative beads or a small amount of thin wire wrapping. Alternatively, use small adhesive jewels to disguise any visible wire.
Styling and Wearing Your DIY Tiara
Once complete, your tiara is ready for its grand debut! Here are a few tips for styling it:
- Hair Styles: For an elegant look, pair the tiara with an updo or braided hairstyle. This keeps the focus on the tiara and allows it to sit securely.
- Attire: Match the tiara with formal attire like a gown or Victorian-inspired dress for an authentic look.
- Makeup Tips: Consider a classic makeup style with a bold lip or dramatic eyeliner to complement the regal look of the tiara.
Final Thoughts
Crafting a tiara might be a bit fiddly and requires patience, but the end result is worth it. Whether you're making this for a costume, an event, or simply as a personal project, wearing something handmade brings a sense of accomplishment and pride. Plus, this tiara will surely stand out as a memorable accessory in any setting.
Happy crafting! Enjoy your royal masterpiece, and don't forget to share it with others – perhaps you'll inspire someone else to make a crown of their own.
FAQs DIY Tiara
Discover how to make stunning DIY tiaras with our FAQs guide. Get inspired with tips and tricks for your perfect handmade tiara!
Using a template beneath cling film can help align the stones. Printing or drawing the template and placing it under the cling film gives consistent shapes, and pressing stones lightly into the glue before it sets helps them stay upright.
Consider using UV resin instead of standard superglue. UV resin is more durable, dries faster with UV light, and remains clear. Many crafters recommend it for added stability and a cleaner look than superglue alone.
Adding a velvet ribbon to the base is a great option. This can match your hair color and reduce friction. Secure the ribbon with glue or stitching, keeping the tiara comfortable for long wear.
If wire is tricky to work with, try using an electric drill to straighten it before crafting. This method removes bends and twists, making the wire smoother and easier to handle.
Silicone finger guards can help protect your fingers from glue. If glue does stick to your skin, use acetone-based nail polish remover to loosen it gently. Silicone guards are reusable, so they're practical for multiple projects.
If you want to avoid glue, try wire wrapping or using jewelry settings. Copper tape and soldering can also secure stones in place, offering a more durable solution for future projects.
Costs vary, but materials for this tiara ranged between £40 and £85, depending on the stones and wire available. Using leftover materials from previous projects or buying in bulk can help save costs.
Consider adding thin velvet ribbon along the base or using additional small stones or beads to cover exposed areas. This can give the tiara a more polished look and add a touch of detail.


