There’s something about tiki torches that adds a magical touch to any backyard or garden. They provide a warm, flickering light that can transform an ordinary evening into an enchanting experience. Recently, I decided to try my hand at making my own DIY tiki torches using recycled bottles and let me tell you, it was an adventure filled with creativity, a little bit of trial and error, and, ultimately, a whole lot of satisfaction.
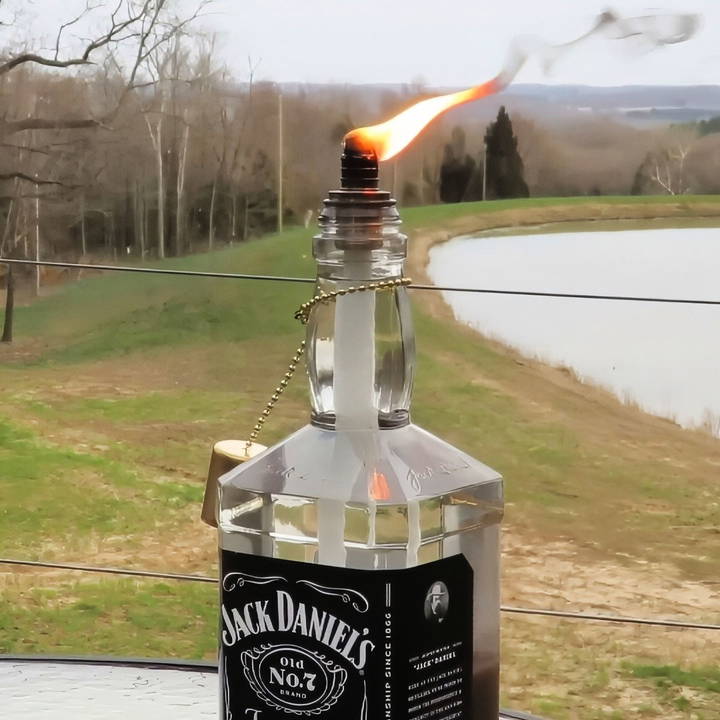
I'm excited to share my step-by-step guide with you so you can create your own beautiful and sustainable tiki torches.
Why Recycled Bottles for Tiki Torches?
Before diving into the steps, let’s talk about why I chose recycled bottles for this project. Not only does this approach help reduce waste, but it also allows for a lot of personalization. Each bottle has its own shape, color, and character, which means every tiki torch you make will be unique. Plus, there's a certain charm in repurposing something that might otherwise end up in a landfill.
Materials You'll Need
Gathering the right materials is crucial for the success of this project. Here's what you’ll need:
- Empty Glass Bottles: Any glass bottle will work, but I’ve found that wine bottles and spirit bottles with unique shapes add a special touch. Ensure the bottles are thoroughly cleaned and dried.
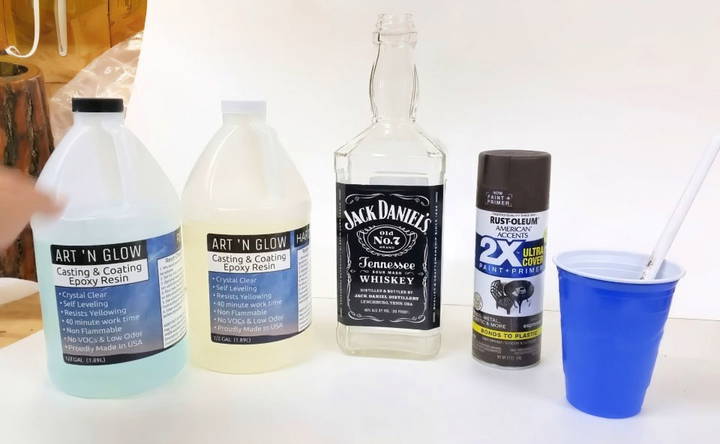
- Casting Resin and Hardener: The resin adds weight to the bottom of the bottle, ensuring the tiki torch doesn’t tip over easily. Make sure to follow the correct ratio for mixing resin and hardener as specified by the product. This is where I learned my first lesson: not all resins are created equal, so reading the instructions carefully is key.
- Spray Paint (Optional): If you want to give your bottle a different color or add an extra layer of protection, consider using spray paint. I opted for a brown color to give my bottles a rustic look.
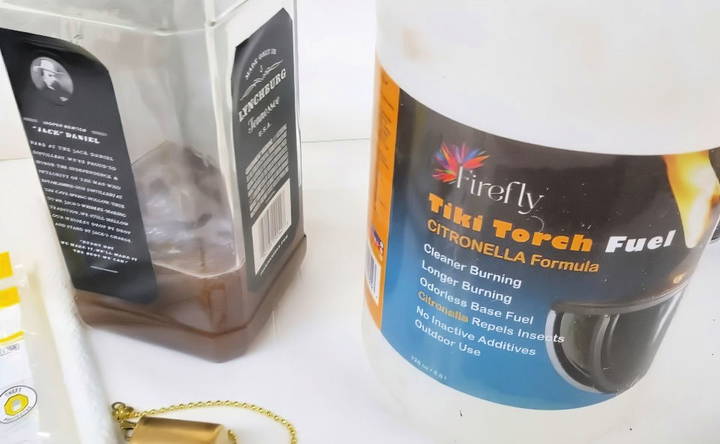
- Tiki Torch Fuel: You can find this in most home improvement stores or online. Be sure to choose a fuel that is designed for outdoor use and burns cleanly.
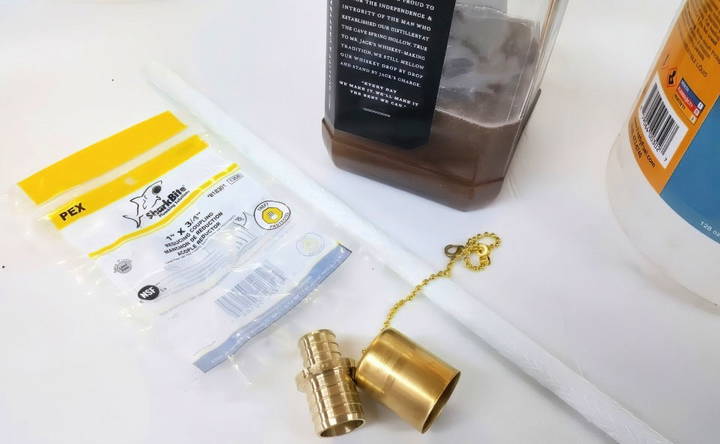
- Coupling Fitting: This is what holds the wick in place at the top of the bottle. I had to get creative here because most couplings are designed for wine bottles, and some of my chosen bottles had larger openings.
- Wicks: These are the heart of your tiki torch. Cotton wicks are readily available and work perfectly.
- Snuffer Cap: This is an important safety tool that allows you to easily extinguish the torch. I found a set on Amazon that included both the coupling and snuffer cap.
Step by Step Instructions
Learn how to make your own DIY tiki torches with our easy step-by-step instructions. Perfect for summer nights in the backyard. Add ambiance today!
Step 1: Preparing the Bottles
The first step is to prepare your bottles. Start by thoroughly washing them to remove any labels, glue, or residue. You can use hot water and soap, but for stubborn labels, I recommend soaking the bottles in warm, soapy water for about 30 minutes and then scraping them off with a knife or scraper.
- Tip: Use a little rubbing alcohol to remove any remaining glue. It works like magic!
Step 2: Adding Color with Spray Paint (Optional)
Next, I decided to give my bottles a uniform look using brown spray paint. This step is entirely optional, but I found that it added a rustic charm to the final product. If you choose to paint your bottles, ensure they are completely dry from the previous step. Apply the paint in thin, even coats, allowing each coat to dry fully before applying the next one.
- Safety Note: Always spray paint in a well-ventilated area, preferably outside, to avoid inhaling fumes.
Step 3: Mixing and Pouring the Resin
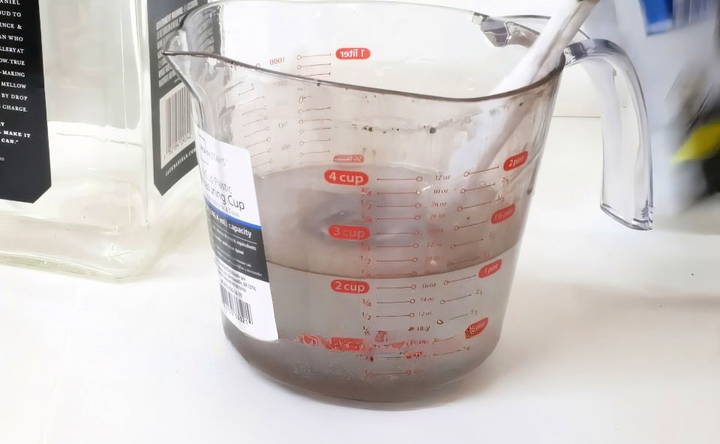
This is where things start getting exciting! The resin adds weight to the bottom of the bottle, which is important for stability. Follow the instructions on your resin kit carefully. The ratio of resin to hardener can vary, so measuring precisely is critical. For my project, I used a ratio of 1:1, but yours may differ.
I poured the resin mixture into each bottle until it was about one-third full. This gave the impression that the bottle was still partially filled, adding a nice touch to the overall look.
- Pro Tip: Use a small funnel to avoid making a mess while pouring the resin. Trust me; I learned this the hard way!
Step 4: Preparing the Coupling and Wick
While waiting for the resin to set (this can take anywhere from a few hours to overnight, depending on the type), it’s time to prepare the coupling and wick. The coupling is what holds the wick in place and keeps it from falling into the bottle. I found that the couplings designed for wine bottles were too small for some of my bottles, so I had to adjust. Using some Teflon tape, I was able to make a snug fit for each bottle.
Thread the wick through the coupling, leaving about half an inch protruding from the top. This ensures an even burn and makes lighting easier.
Step 5: Filling the Bottle with Tiki Torch Fuel
Once the resin has fully cured, it’s time to fill the bottle with tiki torch fuel. Make sure to leave some space at the top to avoid any spillage when inserting the wick and coupling. This part is pretty straightforward, but it's always a good idea to have a funnel handy to prevent any accidents.
- Safety Tip: Be cautious when handling the fuel, and avoid overfilling the bottles to reduce the risk of fire hazards.
Step 6: Inserting the Wick and Coupling
Now, gently insert the wick and coupling into the bottle. If you’ve done the preparation right, it should fit snugly and securely. Make sure the wick is well-saturated with fuel before lighting it.
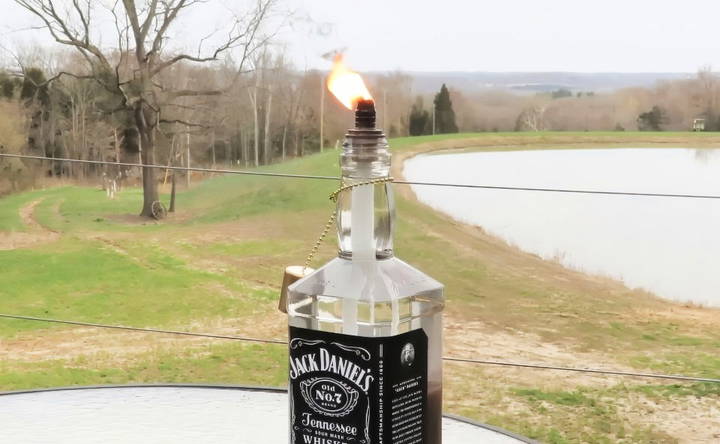
Step 7: Lighting and Enjoying Your DIY Tiki Torches
The moment of truth! Light your tiki torch using a long lighter or match, and enjoy the ambiance it brings to your outdoor space. I found that having a few tiki torches scattered around my patio created a cozy and inviting atmosphere for friends and family.
Troubleshooting Common Issues
When using DIY tiki torches, you might encounter some common problems. Here are practical solutions to help you keep your torches burning brightly and safely.
Wick Problems
- Wick Not Staying Lit: Ensure the wick is properly soaked in fuel before lighting. If it still doesn’t stay lit, trim the wick to about 1/4 inch. A wick that’s too long can cause uneven burning.
- Wick Burning Too Quickly: Check the quality of the wick. Cotton wicks are ideal as they burn steadily. Avoid synthetic materials that can burn too fast. Also, make sure the wick is not exposed to too much wind.
Fuel Issues
- Fuel Not Burning Properly: Use high-quality tiki torch fuel. Cheap or old fuel can cause poor burning. Shake the fuel container before use to mix any settled components.
- Excessive Smoke: Excessive smoke usually means the fuel is not burning cleanly. Switch to a cleaner-burning fuel like citronella oil. Also, ensure the wick is not too long, as this can cause incomplete combustion.
Flame Issues
- Flame Too Small: Adjust the wick height. A wick that’s too short won’t produce a large enough flame. Gradually increase the wick length until you get a steady, visible flame.
- Flame Too Large: If the flame is too large, it can be dangerous. Trim the wick to reduce the flame size. Ensure the torch is placed in a wind-protected area to prevent the flame from flaring up.
Structural Problems
- Torch Leaning or Falling Over: Make sure the torch is securely anchored in the ground. Use a sturdy base or stake to keep it upright. For added stability, place the torch in a bucket filled with sand or gravel.
- Leaks in the Torch: Inspect the torch for any cracks or holes. Seal any leaks with a heat-resistant sealant. Regularly check for wear and tear to prevent fuel from leaking.
General Maintenance
- Difficulty in Lighting: Clean the wick and the torch head regularly to remove any soot or debris. This ensures a clean burn and makes lighting easier.
- Torch Not Lasting Long: Regularly refill the fuel and replace the wick as needed. Store the torches in a dry place when not in use to prevent rust and damage.
Solve these issues to enjoy your DIY tiki torches safely. Maintain them well and use quality materials for durability and performance.
Safety Tips for DIY Tiki Torches
Making your own tiki torches can be a fun and rewarding project, but safety should always come first. Here are some essential safety tips to ensure your DIY tiki torches are both beautiful and safe to use.
Materials to Avoid
- Avoid Flammable Materials: Do not use materials like plastic or thin glass that can easily catch fire or break. Stick to sturdy, non-flammable materials like metal or thick glass.
- No Improvised Fuels: Only use fuels specifically designed for tiki torches, such as citronella oil or paraffin oil. Avoid using gasoline, kerosene, or other highly flammable liquids.
Proper Handling of Fuel
- Safe Fuel Storage: Store tiki torch fuel in a cool, dry place away from direct sunlight and heat sources. Keep it out of reach of children and pets.
- Fuel Filling Precautions: Always fill the torch with fuel outdoors and away from any open flames or heat sources. Use a funnel to avoid spills and wipe off any excess fuel from the torch before lighting.
Fire Safety Measures
- Lighting the Torch: Use a long lighter or match to light the torch to keep your hands at a safe distance. Never use a lighter or match that requires you to get too close to the flame.
- Extinguishing the Torch: To extinguish the flame, use a snuffer cap or a damp cloth. Never blow out the flame, as this can spread sparks and fuel.
Placement and Usage
- Safe Placement: Place tiki torches at least 6 feet away from any flammable materials, including trees, bushes, and buildings. Ensure they are on stable ground to prevent tipping over.
- Wind Considerations: Avoid placing torches in areas with strong winds. Wind can cause the flame to flicker and potentially spread to nearby flammable objects.
Emergency Preparedness
- Have a Fire Extinguisher Handy: Always have a fire extinguisher or a bucket of sand nearby when using tiki torches. This can help quickly put out any accidental fires.
- First Aid Kit: Keep a first aid kit nearby in case of minor burns or injuries. Know basic first aid procedures for treating burns.
Regular Maintenance
- Inspect for Damage: Regularly check your tiki torches for any signs of damage, such as cracks or leaks. Replace any damaged parts immediately to prevent accidents.
- Clean the Torches: Clean the torches regularly to remove soot and debris. This ensures a clean burn and reduces the risk of fire hazards.
By following these safety tips, you can enjoy your DIY tiki torches with peace of mind, knowing that you have taken the necessary precautions to keep yourself and others safe.
FAQs About DIY Tiki Torches
Discover quick answers to common questions about DIY tiki torches, from materials and safety tips to design ideas and maintenance advice.
DIY tiki torches are generally safe if used correctly. Here are some safety tips:
Placement: Keep torches away from flammable materials and ensure they are stable.
Supervision: Never leave a lit torch unattended.
Extinguishing: Use a snuffer cap to put out the flame safely.
Handling fuel: Be cautious when handling and storing fuel to avoid spills and accidents.
To extend the life of your tiki torch:
Use high-quality materials: Opt for durable containers and wicks.
Protect from elements: Store torches indoors when not in use to prevent weather damage.
Regular maintenance: Check and replace wicks as needed, and clean the container periodically.
Absolutely! Here are some ideas:
Decorate the container: Paint or wrap the container with decorative materials.
Add scents: Mix essential oils with the fuel for a pleasant aroma.
Creative mounts: Use unique holders or stands to display your torches creatively.
While citronella oil is the most popular choice due to its insect-repelling properties, there are other options:
Paraffin oil: Burns cleanly and is widely available.
Kerosene: A more affordable option, but it has a stronger odor.
Bioethanol: An eco-friendly alternative that burns cleanly. Always ensure the fuel you choose is suitable for outdoor use and follow safety guidelines.
Proper maintenance and storage can extend the life of your tiki torch:
Regular cleaning: Clean the container and wick regularly to prevent buildup.
Fuel management: Avoid overfilling the container and store fuel in a cool, dry place.
Weather protection: Store torches indoors during harsh weather to prevent damage.
Wick care: Trim the wick regularly to ensure a steady flame.
Final Thoughts
Making your own tiki torches is not only a fun and creative project but also a great way to repurpose old bottles and add a personal touch to your outdoor decor. By following these steps and tips, you can avoid common pitfalls and enjoy a beautiful, handmade addition to your garden or patio. This project taught me that a little bit of effort and creativity can go a long way in transforming everyday objects into something special.


