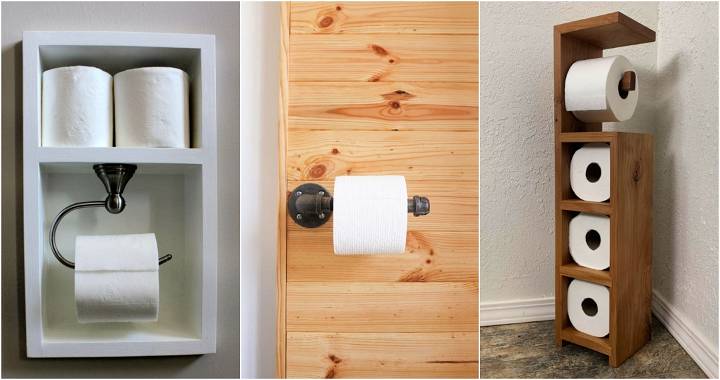
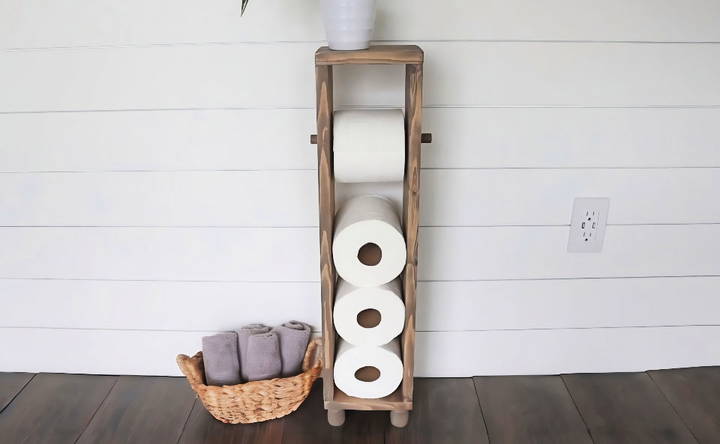
Building my own DIY toilet paper holder was a satisfying project. I used simple materials like wood and metal hooks. It took me just a few hours on a weekend to assemble it. The design was straightforward but practical, making it a great addition to my bathroom. Plus, it felt good to build something useful with my own hands.
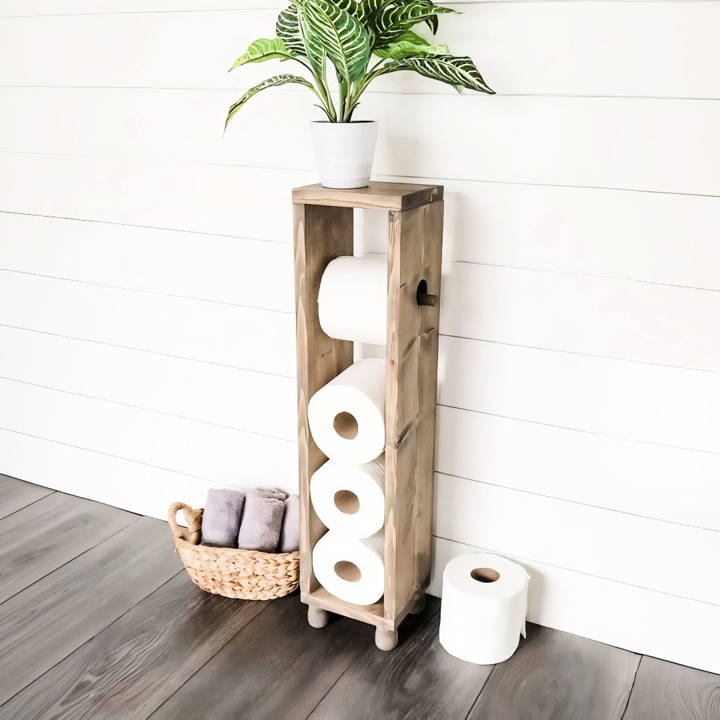
If you enjoy crafty projects, making a homemade toilet paper holder is a perfect choice. Not only does it save money, but it also allows for customization to fit your style. I'm sharing this to help you get started and succeed in your DIY project.
These simple steps will guide you to build a functional and stylish toilet paper rack.
Materials Needed and Their Purpose
- 1 by 6 by 6-foot long pine board: I chose pine because it's affordable and easy to work with. This board served as the main structure of the holder.
- Toilet paper rolls: These were crucial for ensuring the holder would be functionally sized to accommodate the rolls.
- 5/8 inch size dowel rod: This rod was used to hold the toilet paper roll in place.
- Candle cups (1 a 3/8 by one in 9/16 inch size): Originally meant for candles, I repurposed these as feet for the holder, adding a decorative touch.
- Orbital sander and 80-grit sandpaper: These were used to smooth out all the wood pieces.
- Wood screws (1 and 5/8 inch): To assemble the pieces securely together.
- Water-based wood stain (color briar smoke): I wanted a rustic look, and this stain provided a beautiful gray and brownish hue. Plus, it dries quickly.
- Nitrile gloves and staining cloth: These are used to apply the stain without making a mess.
Step by Step Instructions
Learn to make a DIY toilet paper holder with our step-by-step instructions. From cutting to staining, get easy tips for a polished finish.
Cutting and Sanding the Pieces
- Measuring and Cutting: I started by squaring off one end of the pine board, then cutting two 24-inch pieces for the sides and two 6.5-inch pieces for the top and bottom.
- Sanding: With my orbital sander and 80 grit sandpaper, I smoothed all sides of the newly cut pieces, preparing them for assembly and staining.
Drilling and Assembling
- Marking for the Dowel Rod: By stacking toilet paper rolls between the side pieces and measuring, I determined the placement for the dowel rod. I marked the spots and used a hole saw to drill through, even though it was larger than I needed. I recommend using a smaller bit if available.
- Assembly: I drilled pilot holes and then used wood screws to attach the sides to the top and bottom pieces. This process was straightforward but required attention to ensure everything aligned nicely before tightening the screws.
Sanding, Staining, and Finishing
- More Sanding: After drilling, I went over the holes with the sander again to ensure they were smooth.
- Staining: I chose a water-based wood stain for its quick drying time and applied it with gloves and a cloth, following the grain of the wood.
- Adding Feet: The candle cups, repurposed as feet, were attached with super glue for a fast and secure hold.
For under $15, I made a stylish and practical toilet paper holder. It showed that even beginners can create something useful and affordable. The project was both educational and very satisfying.
Customization Ideas for DIY Toilet Paper Holders
When it comes to adding a personal touch to your bathroom, nothing beats a custom DIY toilet paper holder. It's a small detail that can make a big difference in the look and feel of the space. Here are some creative ideas to inspire your next project:
- Choose Your Style: Think about the overall theme of your bathroom. Is it modern, rustic, or perhaps minimalist? Select a design that complements your style. For a rustic look, consider using reclaimed wood or a branch shelf. For a modern touch, sleek lines and industrial materials like metal or acrylic might be the way to go.
- Play with Colors: Don't shy away from adding a splash of color. If your bathroom has a neutral palette, a brightly colored toilet paper holder can serve as an eye-catching accent piece. Alternatively, match the holder to your bathroom's existing color scheme for a cohesive look.
- Incorporate Functionality: Your toilet paper holder can be more than just a holder. Add a small shelf on top for extra storage space, or integrate a magazine rack on the side for reading material. This not only adds character but also increases the holder's utility.
- Repurpose Materials: Look around your home for items you can repurpose. An old vase, a toy, or even a piece of driftwood can be transformed into a unique toilet paper holder. This approach is not only eco-friendly but also ensures your holder is one-of-a-kind.
- Consider Accessibility: Make sure your toilet paper holder is easily accessible. Place it at a comfortable height and ensure it's easy to change the roll. If you have children or seniors at home, consider their reach and ease of use as well.
- Add Decorative Elements: Embellish your holder with decorative elements that reflect your personality. This could be anything from a stenciled pattern to a small plant or even a whimsical figurine.
- Interactive Features: For a fun twist, add interactive features like a roll dispenser that delivers a new roll with a simple pull or a holder that can change its position for convenience.
Incorporate these ideas to build a toilet paper holder that's functional and reflects your style. Aim for something you'll love seeing daily and adds charm to your bathroom.
Troubleshooting Common Issues
Making a DIY toilet paper holder can be a fun and rewarding project, but sometimes you might encounter a few hiccups along the way. Here's a helpful guide to troubleshoot common issues you may face:
Holder is Unstable
- Solution: Ensure that the base of your holder is sturdy. If it's a freestanding model, consider a heavier base or adding non-slip pads. For wall-mounted types, double-check that you've securely fastened it to a stud or used appropriate wall anchors.
Roll Doesn't Fit
- Solution: Toilet paper rolls come in various sizes, so it's important to design your holder with adjustable arms or a spacious platform. This way, it can accommodate different roll sizes comfortably.
Difficulty in Changing Rolls
- Solution: The ease of changing rolls is crucial. Opt for a design that allows you to switch rolls without a struggle, such as a spring-loaded arm or a simple spindle that lifts out.
Material Wear and Tear
- Solution: Choose durable materials that can withstand a humid bathroom environment. If you're using wood, seal it properly. Metals should be rust-resistant, and all materials should be easy to clean.
The Holder Doesn't Match the Decor
- Solution: If your holder doesn't quite fit in with your bathroom's aesthetic, consider painting it or adding decorative elements that tie it into the room's theme.
Roll Unravels Too Easily
- Solution: If the roll tends to unravel, look at the tension in the holder's arm or spindle. Adjusting the tightness can help control the roll's movement.
Installation Issues
- Solution: If you're having trouble installing the holder, review the instructions carefully. Use the right tools for the job, and don't hesitate to ask for help or watch instructional videos for guidance.
Fixing these issues makes your DIY toilet paper holder both stylish and functional. Be patient and open to adjustments. Your perfect holder is within reach!
FAQs About DIY Toilet Paper Holder
Discover essential FAQs about DIY toilet paper holders. Learn tips, materials, and step-by-step guides for crafting your perfect holder.
You can customize your toilet paper holder by choosing materials that match your bathroom’s theme. For a rustic look, use reclaimed wood; for a modern touch, consider using metal pipes or acrylic. Paint or stain the wood to match your color scheme.
Yes, there are several designs that don't require drilling. For example, a freestanding holder can be made from a weighted base and a vertical rod. Another option is a basket holder, where a wooden rod is threaded through the basket handles to hold the rolls.
Absolutely! Many DIY designs include space for multiple rolls. This can be as simple as a longer dowel rod to stack rolls or a shelf design that allows for storage of extra rolls.
Yes, by repurposing materials such as scrap wood, old toys, or unused items, you can build an eco-friendly toilet paper holder. This not only saves materials from ending up in landfills but also gives your bathroom a unique, personalized touch.
For a damage-free installation, consider using adhesive strips or suction cups designed for bathroom accessories. These can securely hold lightweight holders and can be removed without leaving marks. Another option is to use a tension rod between two walls or inside a cabinet. Always ensure the surface is clean and dry before attaching any adhesive product to improve grip.
Final Thoughts
Seeing the finished DIY toilet paper holder was rewarding. It motivated me to try more DIY projects. I hope this guide inspires you to start, too. Making something on your own is fulfilling and fun. Give it a try; you might surprise yourself with what you can achieve.


