Organizing tools efficiently in a small garage workshop can be a daunting task, especially when space is limited. However, with the right design approach, you can make a DIY tool storage unit that not only maximizes space but also keeps everything accessible and organized. This guide will show you how to design and assemble a multi-layer tool storage system, crafted for practicality and innovation in small workshops.
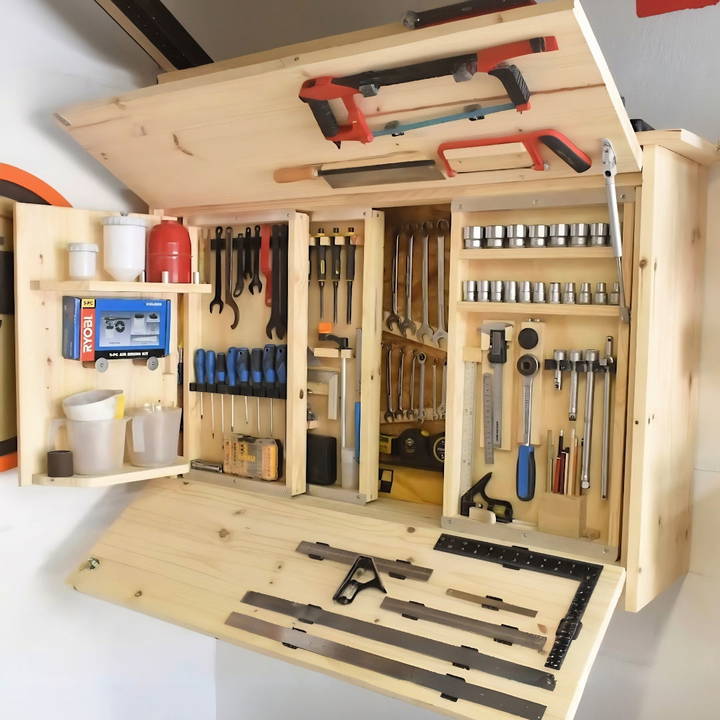
Understanding the Multi-Layer Storage Concept
Unlock the multi-layer storage concept to tackle small space challenges and explore its benefits for efficient organization.
The Challenge of Small Spaces
In small workshops, every square inch counts. Traditional wall-mounted tool storage systems often waste depth, leaving potential storage space unused. This project addresses that issue by making layers of storage backboards that can slide horizontally to reveal tools stored behind them.
Benefits of a Multi-Layer System
- Space Efficiency: Tools of different shapes and sizes are stored in shallow layers, making better use of wall depth.
- Accessibility: The sliding mechanism ensures easy access to tools without requiring significant space for opening doors or panels.
- Scalability: The design can be expanded or modified over time as tool collections grow.
Step by Step Instructions
Build your perfect DIY tool storage with our step-by-step guide. Learn to build, optimize, and organize for ultimate functionality.
Step 1: Building the Main Frame
Discover essential materials and tools for frame construction. Master the art of building frames with our comprehensive guide!
Materials and Tools Needed
- Salvaged plywood for the frame
- Screws for assembly
- Cleat for wall mounting
- Basic carpentry tools (saw, drill, screwdriver)
Frame Construction
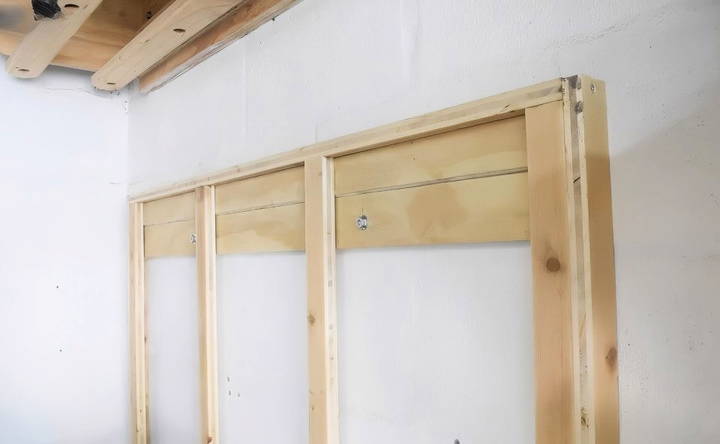
- Assemble the Frame: Start with a basic rectangular frame using salvaged plywood. Since this part of the unit won't be visible, upcycled materials are a cost-effective option.
- Attach to the Wall: Use a cleat to mount the frame securely to the wall. A cleat makes it easier to detach the unit if adjustments are needed during assembly.
- Install a Base: Add a subframe and attach a laminated pine panel to serve as the base. Cut slots in the base panel using a table saw; these will later guide the sliding backboards.
Step 2: Adding the Outer Panels
Learn how to add outer panels for increased structural rigidity and explore essential design tips in our comprehensive guide!
Increasing Structural Rigidity
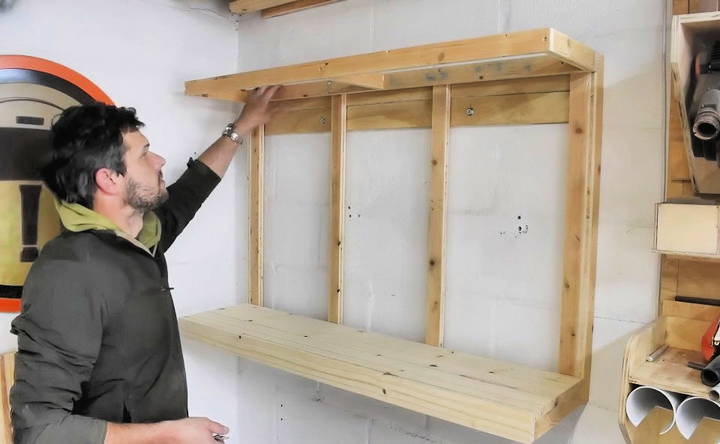
- Side Panels: Attach side panels to the frame for added stability. These panels ensure the unit remains rigid and durable.
- Top Panel: Install a slightly larger top panel with an overhang. This doubles as a shelf for additional storage.
Design Tips
- Use screws for assembly to simplify the process.
- Ensure all panels align perfectly to avoid warping or misalignment later in the project.
Step 3: Building the Rolling Backboards
Discover the benefits of rolling backboards, learn about their construction process, and explore materials for bearings for optimal performance.
Why Rolling Backboards?
Sliding backboards maximize storage space without requiring additional room for opening. Each backboard can house a variety of tools using custom holders.
Construction Process
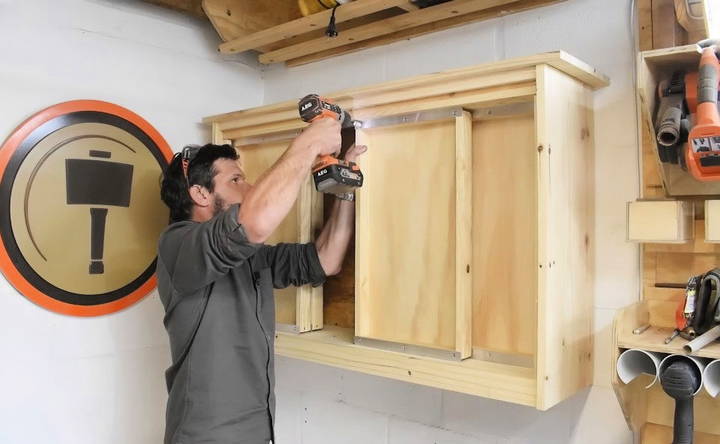
- Build the Backboards: Construct rectangular frames from four planks and attach a quarter-inch plywood backing.
- Install Bearings: For smooth sliding, embed small bearings into the bottom of each backboard. This ensures discreet and efficient movement.
- 3D-Printed Bearing Holders: Use custom-designed 3D-printed bearing holders for precise and secure bearing installation.
Materials for Bearings
- Bearings: Use 636 double-z bearings (6mm ID, 22mm OD, 7mm thick).
- Aluminum Strips: Attach these strips to the backboards for added stability and to guide the sliding mechanism.
Step 4: Fine-Tuning the Sliding Mechanism
Optimize your sliding mechanism with our guide on fine-tuning slots and lubrication for seamless movement testing. Enhance performance today!
Guide Slots and Lubrication
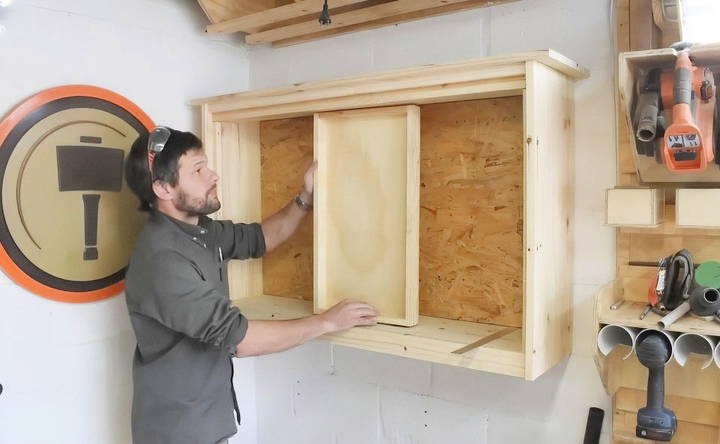
- Cut matching guide slots into the top panel of the frame to mirror the slots in the base panel.
- Apply silicone spray or similar lubricants to the aluminum strips to reduce noise and enhance the smoothness of the sliding mechanism.
Testing the Movement
Before proceeding, test the sliding mechanism to ensure the backboards move freely and without resistance. Adjust or lubricate as necessary.
Step 5: Enhancing Functionality with Doors
Explore how to enhance functionality with doors. Learn to choose the right doors and discover expert installation tips for your project.
Choosing the Right Doors
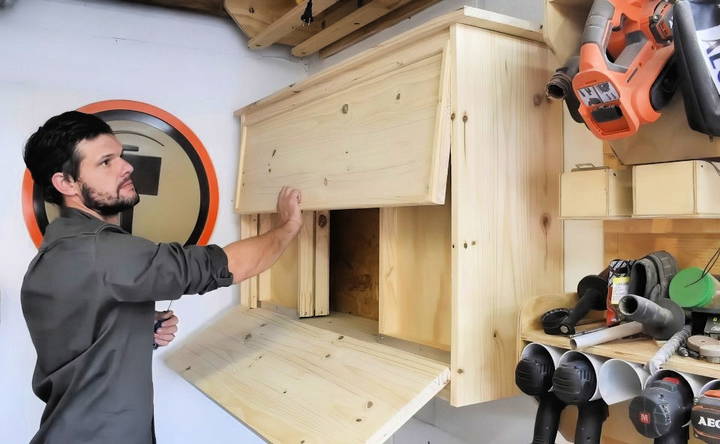
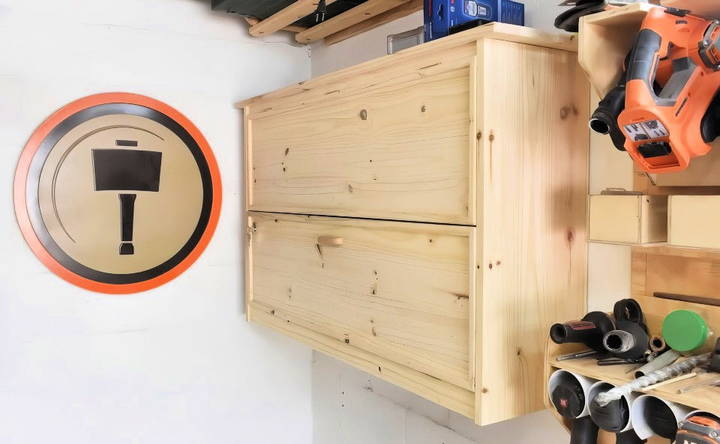
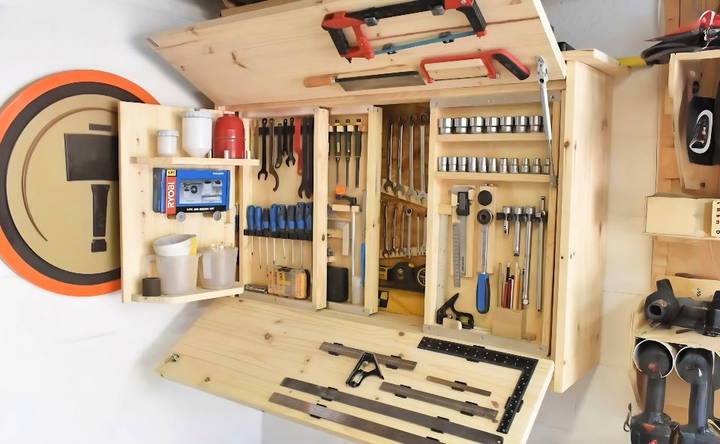
- Horizontal Split Design: Opt for doors that split horizontally. This design minimizes the space required for opening and allows tools to be stored on the doors themselves.
Installation
- Upper and Lower Doors: Attach laminated pine panels for the doors. Add trim pieces to improve the aesthetic.
- Gas Struts: Install small gas struts (e.g., 80N) to hold the upper door open during use. Adjust the strut strength as needed based on the weight of tools stored on the door.
- Handles and Latches: Add a handle to the lower door and retaining plates to ensure the upper door stays secure until the lower door is opened.
Step 6: Optimizing Storage Space
Maximize your storage space by utilizing gaps between layers and making custom tool holders for efficient organization.
Utilizing Gaps Between Layers
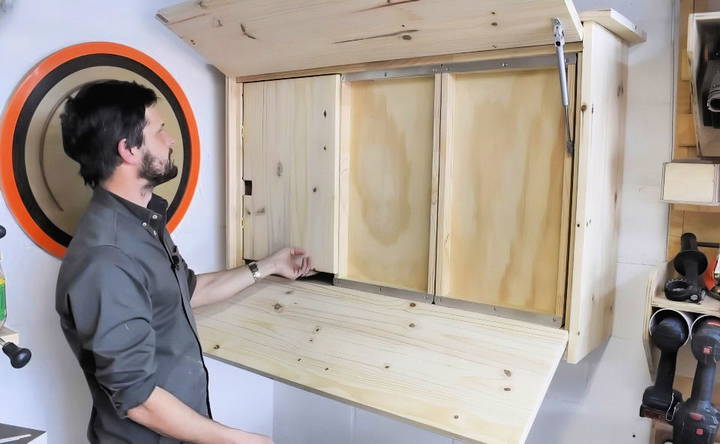
To maximize space further, add an additional hinged backboard in the space between the rolling backboards. This backboard folds discreetly out of the way when accessing deeper layers.
Custom Tool Holders
Design and attach tool holders specific to your collection, such as:
- Racks for wrenches
- Hooks for pliers
- Clips for screwdrivers
Using OSB for the backing allows flexibility in rearranging holders as your toolset evolves.
Step 7: Finalizing the Backboards
Finalize your backboards with additional hinged designs and essential adjustments for tools to optimize your workspace efficiently.
Additional Hinged Backboard
The space between the rolling backboards is often overlooked, but it can be utilized effectively:
- Hinged Backboard Design: Install an extra backboard on hinges that can swing out of the way. This board provides additional storage while still allowing easy access to the sliding backboards behind it.
- Discreet Functionality: Since the hinged backboard only needs to open partially, it doesn't interfere with the overall compact design.
Adjustments for Tools
Ensure that the tool holders on all backboards, including the hinged one, are strategically placed to minimize wasted space. For example:
- Group similar tools together for easy access.
- Use smaller holders for lightweight tools and sturdier options for heavier items.
Step 8: Securing and Locking the Unit
Secure and lock your unit with effective safety enhancements and added security measures for peace of mind and protection.
Adding Security
For workshops with shared access or to prevent accidental spills, consider these locking mechanisms:
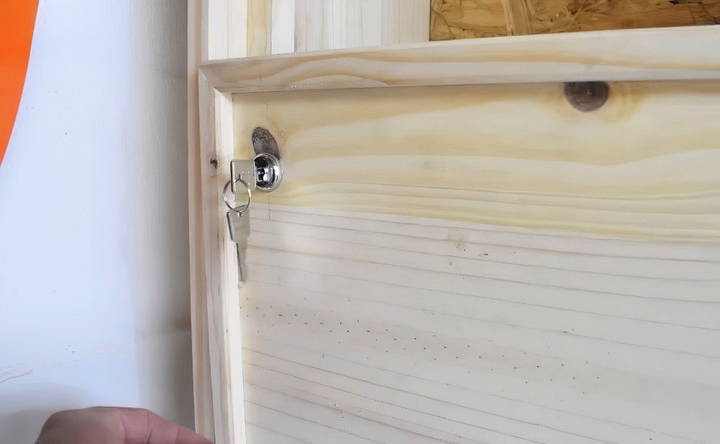
- Lock for Doors: Install a latch or lock on the bottom door to secure both doors in the closed position.
- Locks for Backboards: While not essential, a simple clip or latch for each sliding backboard can keep them from moving unintentionally.
Safety Enhancements
- If the storage unit is installed in an area prone to vibrations (e.g., near heavy machinery), ensure all moving parts are tightened and secured to prevent wear and tear.
Step 9: Filling the Storage Unit
Efficiently fill your storage unit by sorting and storing tools while maximizing space with strategic door utilization.
Sorting and Storing Tools
With the unit complete, it's time to organize your tools. Follow these tips:
- Categorize Tools: Group tools by type or frequency of use.
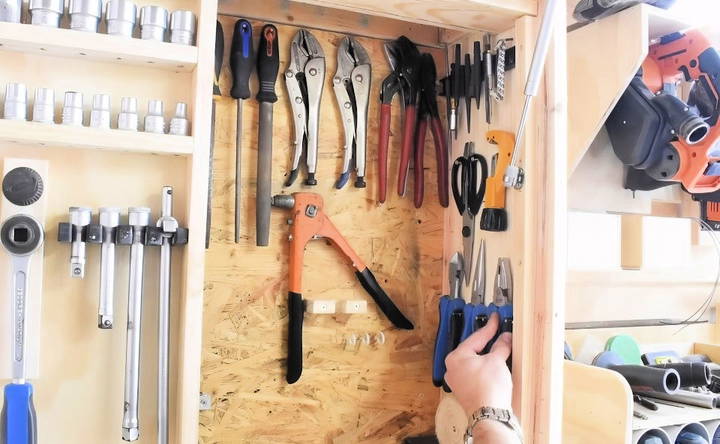
- Hand tools (e.g., wrenches, hammers) on one backboard.
- Specialty tools (e.g., electrical testers) on another.
- Maximize Vertical Space: Use holders that allow tools to hang securely while keeping the backboards compact.
Utilizing the Doors
Since the doors are also storage surfaces:
- Mount frequently used tools or items you want quick access to on the inner side of the doors.
- Ensure the tools on the doors are lightweight to avoid straining the hinges or gas struts.
Step 10: Maintenance and Upgrades
Keep your system functional with essential maintenance and explore upgrade options to enhance performance and longevity.
Keeping the System Functional
Regular maintenance ensures the longevity of your storage unit:
- Lubrication: Periodically lubricate the sliding mechanisms to maintain smooth operation.
- Alignment Checks: Check that the backboards are aligned and the bearings are securely in place.
- Tool Holder Adjustments: As your tool collection changes, swap out or reposition holders as needed.
Upgrade Options
If you outgrow the current design or want to improve functionality, consider:
- Adding another unit next to the existing one for power tools.
- Integrating lighting inside the unit for better visibility.
- Attaching labels or color coding to quickly identify tools.
Step 11: Tips for Small Workshop Organization
Even with a compact and efficient storage unit, keeping your workshop organized requires some additional strategies:
- Build Workflow Zones: Assign specific areas for cutting, assembly, and finishing. Place the tool storage unit near the most used zone.
- Minimize Duplicates: Regularly declutter to ensure you're not storing unnecessary duplicates or broken tools.
- Leverage Overhead Space: Install shelves or hooks above the storage unit for less frequently used items.
Advantages of the Multi-Layer Tool Storage System
By implementing this system, you'll enjoy several key benefits:
- Enhanced Space Utilization: Every inch of wall depth is put to use.
- Improved Efficiency: Tools are easy to access and organize, saving time during projects.
- Customizability: The modular design lets you adapt the storage system as your needs evolve.
Step 12: Reflecting on the Project
This DIY tool storage project is a practical and rewarding solution for anyone looking to optimize a small garage workshop. Not only does it maximize storage capacity, but it also allows for customization and future upgrades.
Key Takeaways
- Plan for Growth: Design with scalability in mind to accommodate future tool acquisitions.
- Embrace Customization: Use materials and configurations that fit your unique needs and budget.
- Stay Organized: Regularly reassess and update your storage to keep it functional and clutter-free.
Final Thoughts
With the completion of your multi-layer tool storage system, you'll have transformed your small garage workshop into a more efficient and organized space. Whether you're a hobbyist or a professional, this design ensures that your tools are easily accessible and neatly stored, allowing you to focus on your projects without the frustration of searching for misplaced tools.
If you enjoyed this project and are inspired to further optimize your workshop, explore additional DIY projects or consider building a complementary unit for power tools, clamps, or hardware storage. The possibilities are endless when you embrace smart design and creative thinking!
FAQs About DIY Tool Storage for Small Garage Workshops
Discover answers to FAQs about DIY tool storage for small garage workshops, optimizing your space efficiently and effectively.
Aluminum strips were used in this build, but UHMW plastic or Teflon strips can be alternatives to reduce wear and friction. Additionally, lubricating with candle wax or paste wax helps maintain smooth operation over time.
Adding chain supports or a hinge mechanism to hold the door in a horizontal position allows it to double as a temporary workspace. This modification also reduces strain on the hinges, enhancing durability.
You can use small caster wheels as a substitute. Adjust the size of the vertical drawer slightly to accommodate these, or carve slots for bearings directly into the wood using traditional woodworking techniques.
Applying wax, such as butcher’s block wax (a mix of beeswax and mineral oil), helps lubricate the slots while preventing dust accumulation. Another method is cutting dust-release holes in the slots to let debris fall through.
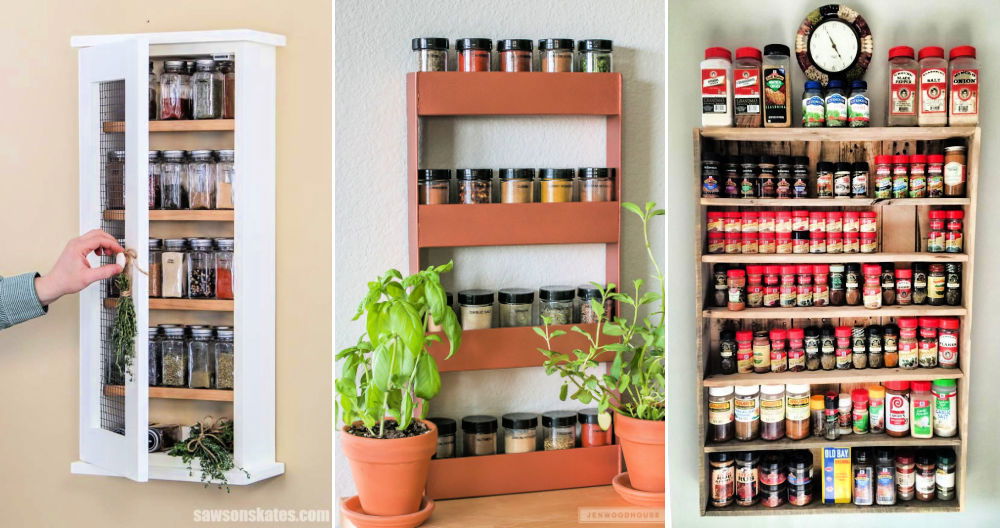
Yes, this multi-layer storage system can be adapted for kitchens, sewing rooms, or offices to store items like spices, utensils, or craft supplies. Customizing the dimensions and tool holders allows it to fit various needs.
When properly secured to studs or masonry, a wall cleat is highly reliable. For additional safety, consider using heavy-duty anchors and supplementing with wall brackets underneath for extra support.
The doors can be omitted if quick access to tools is a priority. Alternatively, tools can be mounted on the outer frame or door panels for added storage.
Using OSB for backboards allows easy rearrangement of tool holders without visible wear. Additionally, maintaining a modular approach to tool holder design supports ongoing updates as your collection evolves.
The dimensions depend on the size of your workspace and the tools to be stored. Ensure enough depth for multiple backboards and consider a height that provides comfortable access to all layers.
Reinforcing the bottom with additional screws or brackets helps distribute the load. Using thicker material for the base also ensures it can support the tools without sagging.


