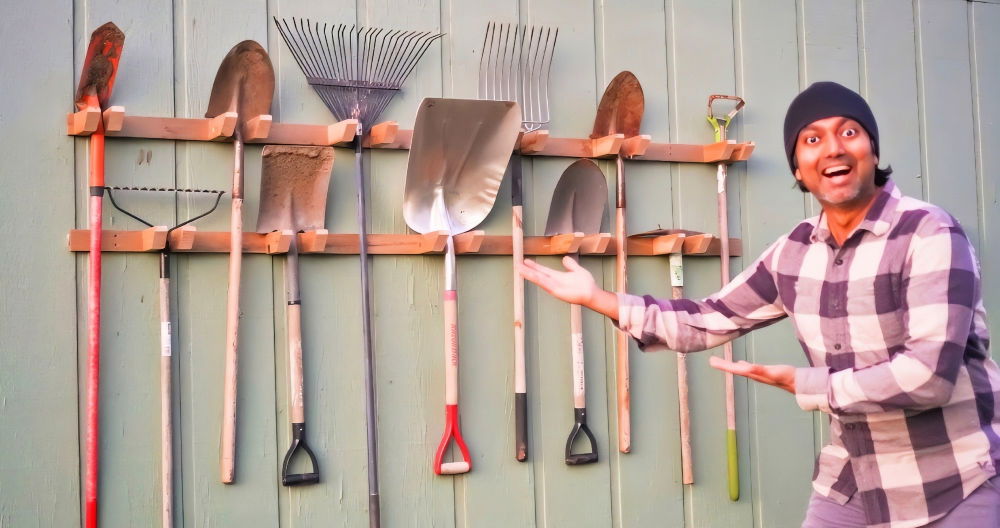
When I first started organizing my tools, I had no idea where to begin. My garage was a mess, and finding the right tool took forever. That's when I discovered DIY tool storage. It changed everything. Using simple materials, I made sturdy and useful storage solutions. Now, I never waste time searching for tools.
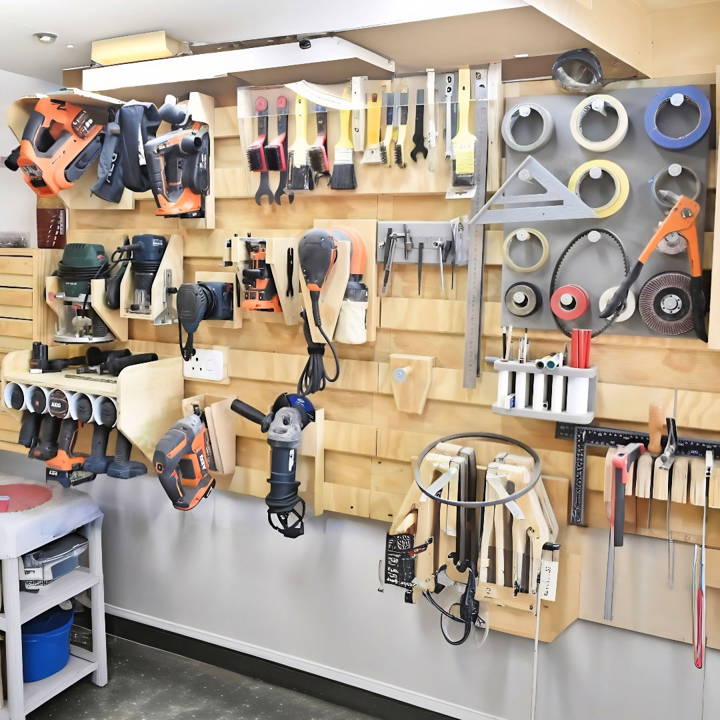
Building a DIY tool storage organizer not only saves time but also keeps your workspace tidy. I used old wooden crates and some hooks to make my own. It's easy and cost-effective. Try making one this weekend, and you'll never look back. Trust me; these tips will help you.
Materials You'll Need
The beauty of this project is its flexibility when it comes to materials. Here's what I primarily used:
- Scrap Wood: Perfect for budget constraints and adds a recycling aspect to the project.
- PVC Pipes: Ideal for making holsters for cordless drills.
- Screws and Brad Nails: For assembling the holders securely.
- MDF Boards: Provides a sturdy base for some of the tool holders.
I chose these materials due to their availability and to ensure the project's affordability. Each material plays a role in making a robust holder that accommodates the specific shape and weight of a power tool.
Step by Step Instructions
Discover how to build a DIY power tool storage rack with our step-by-step guide. Get organized easily with our expert instructions today!
Analyzing Each Tool
The first step is to look at each power tool you own and assess its shape, weight, and how frequently you use it. This analysis helps in designing a holder that's both functional and easily accessible.
Planning Your Holders
While I winged it for the most part, a bit of planning doesn't hurt, especially if you're looking to achieve a cohesive look or working with limited materials. Sketch out simple designs focusing on functionality over aesthetics.
Building the Holders
Find the best guides for making electric hand plane holders, cordless drill holders, and storage solutions for jigsaws and other similar tools.
Electric Hand Plane Holder
- Designing the Base and Hook: Ensure the base supports the tool's weight securely while the top hook or latch keeps it from falling out. Adding sides helps align the tool and accommodates protruding parts.
- Assembly: Utilize screws for a sturdy build, especially where the tool's weight applies pressure.
Cordless Drill Holder
- PVC Pipe Preparation: Cut the PVC pipes to length, ensuring they're long enough to hold each drill comfortably.
- Assembly: Build a simple frame from scrap wood to house the PVC pipes. Secure the pipes tightly to prevent any wobbling.
- Drill Slot: Cut a slot in each pipe to fit the drill handles, allowing easy access and storage.
Jigsaw and Other Similar Tools
- Angle Consideration: For tools like the jigsaw, storing it at an angle using a slide-in mechanism can accommodate the blade and make storage easier without having to remove it.
- Simple Slot Mechanism: Utilize MDF boards to build a slot for the jigsaw to slide in, ensuring the angle keeps it secure.
Finishing Touches
Once you've buildd holders for all your tools, arrange them on your workshop wall according to usage frequency. This organization not only streamlines the workflow but also keeps your most-used tools within easy reach.
Customization Ideas for Your DIY Power Tool Storage Rack
When it comes to organizing your workspace, a one-size-fits-all approach rarely works. That's why customizing your DIY power tool storage rack can be so beneficial. Here are some ideas to help you tailor your storage solution to your specific needs:
Choose Modular Components
Opt for modular shelves and drawers that can be easily rearranged. This flexibility allows you to adapt the storage as your tool collection grows or changes.
Incorporate Adjustable Shelving
Use shelving that can be adjusted in height. This will enable you to store tools of various sizes more efficiently and access them without hassle.
Add Mobility
Consider adding casters to the bottom of your storage rack. This turns it into a mobile unit, making it easy to move around as needed, especially in a shared workspace.
Personalize with Colors and Labels
Personalize your rack with paint or stickers that reflect your style. Use labels to mark where each tool goes, which not only adds a personal touch but also helps in maintaining organization.
Utilize Wall Space
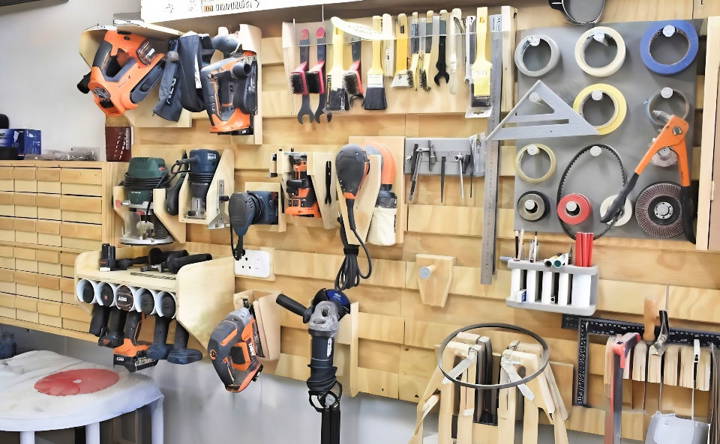
If floor space is limited, design your storage rack to make use of vertical space. Wall-mounted racks can keep tools within reach without cluttering your work area.
Integrate Charging Stations
For battery-operated tools, include built-in charging stations within your storage rack. This ensures your tools are always charged and ready to go.
Consider Safety Locks
For households with children or pets, incorporate safety locks on drawers or cabinets to prevent accidents.
Consider these ideas to build a power tool rack that meets your needs now and adapts for the future.
Advanced Organizational Techniques
Organizing your tools effectively can transform your DIY experience, making it more efficient and enjoyable. Here's how you can apply advanced organizational techniques to your power tool storage rack:
Implement a Zone-Based Layout
Build specific zones for different types of tools. For instance, keep all cutting tools in one area and measuring tools in another. This method saves time and reduces frustration when searching for the right tool.
Use Tool Outlines
Draw outlines of tools on the storage rack or pegboard. This visual aid helps you quickly identify where each tool belongs and ensures every tool is returned to its proper place.
Integrate a Tool Inventory System
Set up a simple inventory system using a spreadsheet or a mobile app. Track what tools you have, their condition, and when they were last used. This can be especially helpful for ensuring maintenance is up to date.
Employ Color Coding
Assign a color to each type of tool or project. Use colored stickers, tapes, or paints on the handles or storage slots. Color coding speeds up the identification process and adds an aesthetic appeal to your workspace.
Incorporate Smart Technology
Consider smart labels or RFID tags for your tools. These can interact with your smartphone to show you the last known location of a tool, which is useful if you frequently move tools between job sites.
Design for Flexibility
Make your storage system adaptable. Use hooks and bins that can be repositioned as your tool collection changes, ensuring your system grows with your needs.
Use these organizational techniques for a neat tool rack and better productivity. Keep it simple and intuitive to save time and enjoy your projects more.
Innovative Storage Solutions
Building a space for your power tools that is both efficient and accessible can make all the difference in your DIY projects. Here are some innovative storage solutions that will help you organize your tools effectively:
Utilize Vertical Space
Maximize your workshop's vertical space by installing wall-mounted racks or pegboards. This keeps your tools off the ground and at eye level, making them easy to find and grab when you need them.
Mobile Tool Carts
Consider building or purchasing a mobile tool cart. This allows you to bring your tools directly to where you're working, saving time and effort. Plus, it's a great way to keep your workspace clear and uncluttered.
Customizable Drawer Systems
Drawer systems with adjustable dividers give you the flexibility to store tools of various sizes. This not only helps in keeping your tools organized but also protects them from damage.
Fold-Away Workbenches
A fold-away workbench can serve as a temporary tool station. When not in use, it can be folded back to free up space. This is especially useful in smaller workshops.
Charging Stations
Set up a dedicated area on your rack for charging batteries. This ensures that your tools are always ready to go, and you won't have to search for a charger or outlet.
Tool Cabinets with Clear Doors
Use cabinets with clear doors to store your power tools. This way, you can see exactly what's inside without having to open each cabinet, saving you time and hassle.
Use innovative storage solutions for a tidy, productive, and enjoyable DIY workshop. The key is accessibility and simplicity.
FAQs About DIY Power Tool Storage Rack
Discover answers to the most common questions about DIY power tool storage racks to organize your tools efficiently and safely in your workspace.
For optimal organization:
Group similar tools together for easy access.
Use labels to identify tool locations.
Install a power strip for charging stations and future power needs.
Consider vertical storage to save space.
Ensure there's enough clearance for each tool to be removed easily.
Yes, you can build a storage rack even in a small space by:
Utilizing wall-mounted systems like French cleats.
Building compact shelves or holders from scrap materials.
Making use of vertical space for hanging tools.
Designing a foldable or modular system that can be reconfigured as needed.
To ensure the safety of your tools:
Securely attach the rack to wall studs or a solid backing.
Use sturdy materials like thick plywood or hardwood.
Provide adequate support for heavier tools.
Keep sharp edges and blades covered or pointed downwards.
Regularly inspect the rack for any loose fittings or damage.
To make your storage rack mobile, consider the following steps:
Attach heavy-duty casters to the base of your rack for easy movement.
Ensure the casters are lockable to keep the rack in place when in use.
Build the rack with a handle or tow bar for convenient maneuvering.
Keep the design compact to navigate through doorways and tight spaces.
Maximize your storage space with these tips:
Use wall-mounted hooks or magnetic strips to hang tools vertically.
Build fold-out panels or swing-out racks that tuck away when not in use.
Implement stackable bins or drawers for small tools and accessories.
Consider a pegboard or slat wall system for flexible arrangement options.
Wrapping Up
In conclusion, organizing your tools with homemade DIY tool storage is a game-changer. Give it a try and see the difference. It's simple, effective, and well worth the effort. If I can do it, so can you!


