Building a DIY tortilla press was one of my most rewarding projects. One weekend, I decided to make tortillas from scratch, but without a press, it was tough to get them just right. This project solved that problem and made cooking more fun.
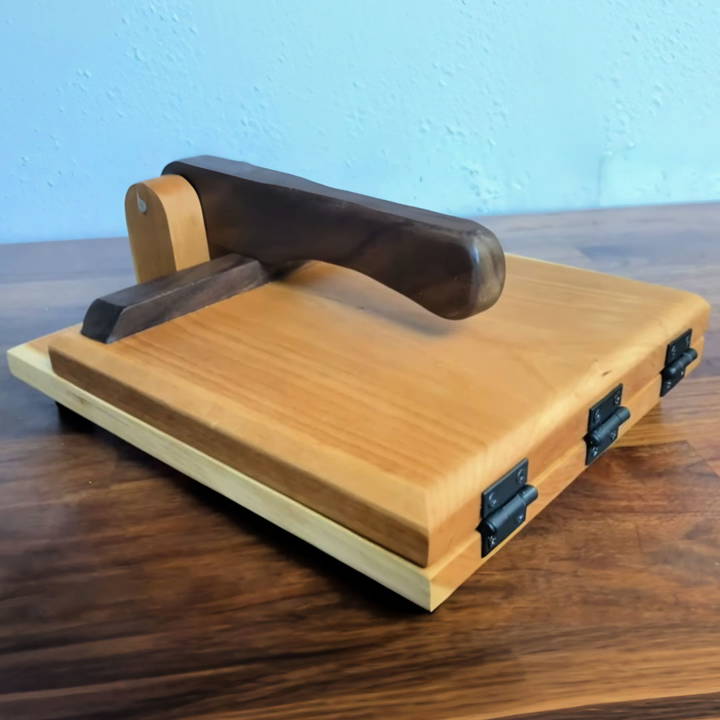
I found some wood and followed easy steps to build my own press. Learning to make a homemade tortilla press felt empowering. Now, I enjoy perfect tortillas every time. Building your press can be a simple and enjoyable project.
I'm here to guide you through crafting your DIY tortilla press. This tool will make your cooking experience smoother and more enjoyable. Let's get started today and see how it enhances your kitchen adventures!
Gathering Materials
Discover why each material is needed for gathering. Get insights into the essential supplies for efficient and effective resource collection.
Why Each Material is Needed:
- Cherry and Walnut Wood: I chose cherry cut-offs for the main body for their durability and walnut scraps for the handle for their aesthetic contrast. The beauty of using hardwood is its resilience and how it elegantly ages with use.
- Bandsaw and Chisel: These are fundamental tools for shaping components in woodworking. The bandsaw offers precision in cutting, whereas the chisel aids in refining and detailing.
- Drill Press: Essential for making holes precisely where you need them, especially for the brackets and handle.
- Bench Sander: A lifesaver for fine-tuning the shapes and ensuring everything fits perfectly without sharp edges.
- Glue and Screws: To assemble the parts securely. The combination offers both immediate and long-term bond strength.
- Finish (Odi's Oil): To protect the wood and highlight its natural grain, making the press not just functional but a visual delight.
- Aluminum Dowel and Hinges: These mechanical components are crucial for the press's functionality, allowing it to pivot and press effectively.
Step by Step Instructions
Learn how to make your own tortilla press with our step-by-step DIY tortilla press instructions. Perfect for fresh, homemade tortillas!
Step 1: Cutting and Shaping
The initial step involved cutting the cherry and walnut wood into the required shapes. Using a bandsaw made this process straightforward, although a mishap with the bandsaw's blade tensioning mechanism was a palpable reminder to always check your tools before starting. Subsequently, I refined these shapes with a chisel and a bench sander, focusing on achieving smooth surfaces and edges.
Step 2: Drilling and Assembling
With all pieces shaped, I moved onto drilling holes for the brackets and handle using a drill press for precision. Careful alignment was key here to avoid future annoyances. Then came the assembly: gluing the wood pieces together, reinforcing them with screws, and ensuring everything aligned correctly as it dried.
Step 3: Finishing Touches
Once the glue set, I applied a lush coat of Odi's Oil to protect the wood and bring out its natural beauty. The addition of an aluminum dowel served as the pivot point for the handle, and I chose hinges that complemented the press's thickness. Lastly, a few rubber feet on the bottom prevented any slippage during use.
The Challenges and Resolutions
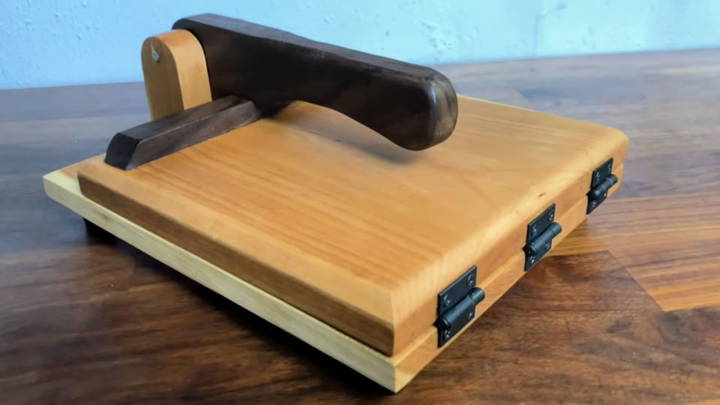
- The Chamfer: In hindsight, the chamfer around the edges, while aesthetically pleasing, limited my options for hinge sizes. A lesson for the future: a smaller chamfer or thicker wood to accommodate larger hinges could be a design improvement.
- Bracket Alignment: Misalignment of the brackets was a tiny hiccup that taught me the importance of precision. A simple fix of using spacers during gluing could prevent such an issue, ensuring everything remains parallel.
Customization Ideas
When it comes to making a DIY tortilla press, personalization is key. Not only does it allow you to tailor the press to your specific needs, but it also adds a touch of personality to your kitchen tool. Here are some customization ideas that can make your tortilla press uniquely yours:
- Choose Your Wood Wisely: Start by selecting a type of wood that resonates with you. Whether it's the sturdiness of oak, the lightness of pine, or the rich color of walnut, the wood you choose will set the foundation for your press.
- Engraving and Carvings: Add a personal touch by engraving your name, a special date, or a simple design onto the press. If you're skilled in woodwork, you might even carve intricate patterns or symbols that reflect your heritage or personal style.
- Color It Up: While wood stains are common, consider using food-safe paint to add a splash of color. Go for a classic look with one solid color, or get creative with patterns and multi-colored designs.
- Handle with Flair: The handle is one of the most handled parts of the press, so why not make it stand out? Wrap it in colorful twine or attach custom knobs that feel comfortable in your hand and look great.
- Functional Add-ons: Think about adding features that increase the press's functionality. This could include non-slip feet for stability, a pull-out tray for easy cleaning, or adjustable thickness settings for different types of tortillas.
- Eco-Friendly Finishes: In line with sustainable practices, use natural oils and waxes to finish your press. These not only protect the wood but also are safer for you and the environment.
- Mix and Match Materials: Don't be afraid to mix materials. Incorporate metal or ceramic elements for a modern twist or use reclaimed wood for a rustic vibe.
- Make It Multi-Purpose: Consider designing your press to be multi-functional. Perhaps it could double as a sandwich press or a flatbread maker, adding versatility to your kitchen arsenal.
By incorporating these customization ideas, you'll end up with a tortilla press that's not just a tool, but a reflection of your creativity and individuality.
Troubleshooting Common Issues
Building a DIY tortilla press can be a rewarding project, but sometimes you might encounter a few hiccups along the way. Here's a helpful guide to troubleshoot common issues, ensuring your tortilla press works smoothly:
- Sticking Dough: If your tortilla dough sticks to the press, try lining both surfaces with parchment paper or a plastic bag cut to size. This builds a non-stick barrier that also makes clean-up easier.
- Uneven Pressing: For tortillas that aren't evenly pressed, check that the hinge and pressing surfaces are aligned correctly. Adjust the screws or add shims to balance out any unevenness.
- Difficult to Press: If the press is too hard to operate, it might be due to the handle being too short or the press requiring too much force. Consider extending the handle for more leverage or waxing the moving parts to reduce friction.
- Wood Cracking: Wood can crack if it's not properly sealed or if it's exposed to extreme temperature changes. Make sure to finish your press with a food-safe sealant and store it in a stable environment.
- Loose Hinge: A loose hinge can make the press wobbly and unreliable. Tighten any loose screws, and if necessary, replace the hinge with a sturdier one.
- Mold Growth: To prevent mold, ensure your press is completely dry before storing it. If you live in a humid area, consider storing it with silica gel packets to absorb excess moisture.
- Warping: Wood can warp over time, especially if it gets wet. To avoid this, use a hardwood and apply a waterproof finish. Store the press in a cool, dry place when not in use.
By addressing these common issues, you'll ensure your DIY tortilla press remains a reliable and cherished tool in your kitchen.
FAQs About DIY Tortilla Press
Discover answers to common questions about DIY tortilla presses, including materials, building steps, and usage tips. Make perfect tortillas at home!
Yes, you can use non-porous materials like stainless steel or aluminum for the press plates. These materials are easy to clean and maintain.
Place a ball of dough in the center of the press, or slightly toward the hinges. Press down gently to flatten the dough. Rotate the dough 180 degrees and press again for an even thickness. Cook the tortilla according to your recipe.
Clean your tortilla press regularly with a damp cloth. Avoid using harsh chemicals or submerging it in water, especially if it’s made of wood. If you have a metal press, you can wipe it down with a mild detergent.
A tortilla press allows for quick and uniform tortilla making. It's faster than rolling with a pin and produces evenly round tortillas. A press can also handle different types of dough, including corn and flour tortillas.
When making a DIY tortilla press, it's important to ensure that all materials are food-safe. Use natural wood finishes like beeswax or mineral oil for wooden presses. If you're using metal plates, make sure they are stainless steel or food-grade aluminum. Always avoid toxic chemicals and materials that could contaminate your food.
Conclusion
Making your own homemade tortilla press is not only useful but also enjoyable. You'll find satisfaction in using something you built yourself. Give it a try and enjoy better tortillas.


