Maximize your space and enhance your style with a DIY towel rack. Making a homemade DIY towel rack is a simple and rewarding project that can add both functionality and charm to your bathroom. With easy-to-find materials and straightforward instructions, making your own towel rack can be a fun and fulfilling activity.
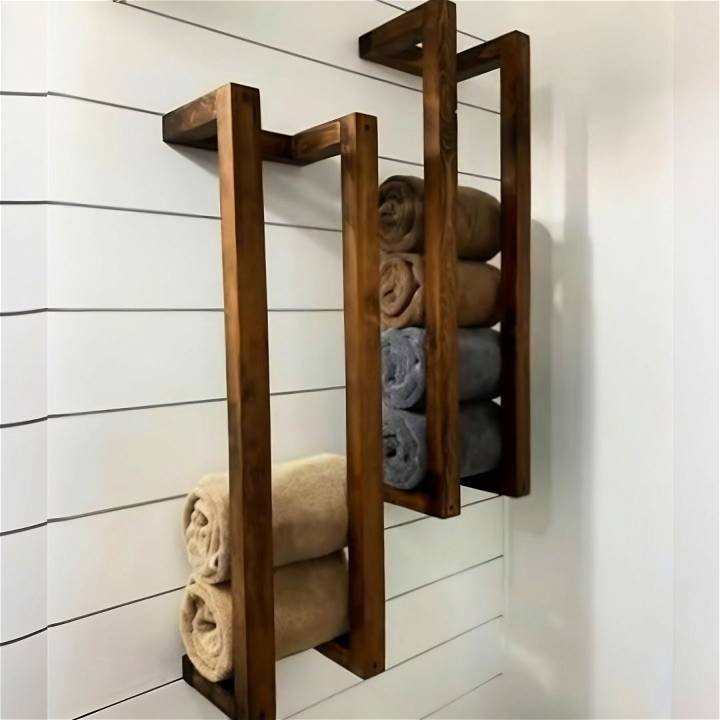
A homemade DIY towel rack not only organizes your towels but also contributes to a tidy and aesthetic space. This project is adaptable, allowing you to customize the rack to fit your decor and needs.
Build a stylish DIY towel rack with our step-by-step guide. Perfect for organizing your bathroom and adding a unique touch.
Materials Needed
- 8-foot 2x4 Pine Board: I chose pine for its affordability and accessibility. It's also easy to work with, which is great for beginners.
- Saw (Chalk Type and Table Saw): Essential for cutting the wood to the desired lengths and widths.
- Drill or Drill Driver: Needed for making pilot holes and driving the screws in.
- Tape Measure and Marker/Pencil: For accurate measurement and marking where to cut.
- Safety Glasses: Safety first! Always protect your eyes when working with wood and machinery.
- Sandpaper or Random Orbital Sander: To smooth out any rough edges or imperfections on the wood.
- Wood Glue and Screws: For assembling the pieces together securely.
- Vinegar, Steel Wool, and Coffee Grounds (Optional): For making a homemade stain that gives the wood an antique look.
Step by Step Instructions
Learn how to build a towel rack with step-by-step instructions: measure, cut, rip, drill, assemble, sand, and finish for a perfect DIY project.
Step 1: Measure and Cut Your Wood
First, I measured and marked several eight-inch pieces on the 2x4 using a marker for visibility (though a pencil works fine too). Using my chalk type saw, I cut the board into six eight-inch pieces. These would eventually form the outside legs and the back piece of the towel holder.
Step 2: Rip the Pieces in Half
Each eight-inch piece needed to be ripped in half to make them thinner and give the towel rack its slender look. For this, the table saw was set to about 1.75 inches. Safety glasses on, I carefully guided each piece through the saw, effectively halving them.
Step 3: Drill Pilot Holes and Countersink
After cutting, I marked where the pilot holes would go. A drill or drill driver was used for this step, helping ensure the screws would hold the pieces together without splitting the wood. The countersink bit was particularly handy here, allowing the screw heads to sit flush with the wood surface.
Step 4: Assemble the Towel Rack
I laid out all the pieces in a dry fit to check the arrangement, then I marked and drilled all necessary pilot holes. A dab of wood glue on each connecting point provided extra stability before I drove in the two and a half-inch construction-grade screws to assemble the towel rack frame.
Step 5: Sand and Finish
Once assembled, I lightly sanded the entire piece to remove any marks and soften edges. For the finish, I opted for a homemade solution. I prepared a mixture of vinegar, steel wool, and coffee grounds that I had been storing for almost a year. This mixture was brushed over the wood, giving it an aged, rustic look that added charm.
The Final Product
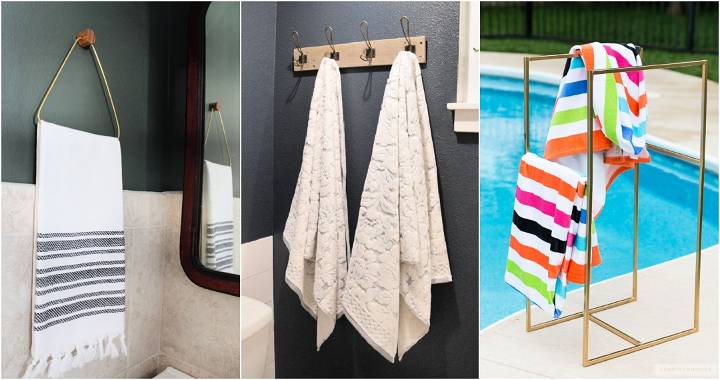
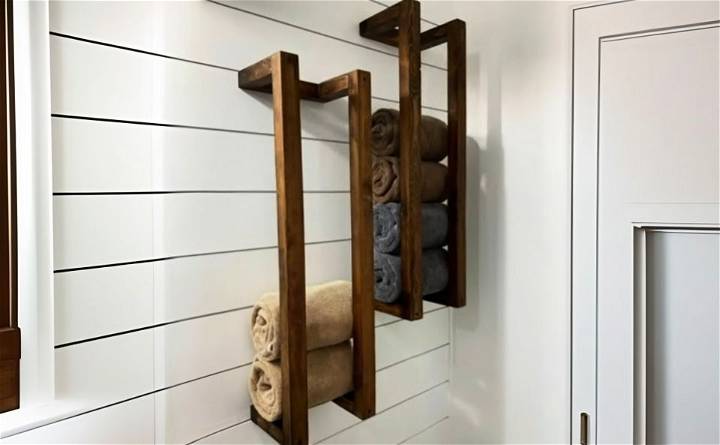
The completed rustic farmhouse towel rack was better than I had imagined. It fit perfectly in my bathroom, offering a sturdy and stylish way to organize towels. The homemade stain provided a unique finish that truly captured the farmhouse aesthetic I was aiming for.
Design Customization Ideas
Building a DIY towel rack is not just about functionality; it’s also an opportunity to add a personal touch to your bathroom decor. Here are some design customization ideas that can help you make a towel rack that’s both practical and stylish:
- Choose Your Material Wisely: Start by selecting the material that best suits your style and bathroom’s environment. Wood is a classic choice that brings warmth and can be painted or stained to match any decor. Metal pipes or fittings offer an industrial look and are highly durable. For a more modern aesthetic, consider using acrylic or repurposed materials like old window frames or ladders.
- Paint and Finish: Once you’ve built your towel rack, consider the finish. A coat of paint can transform the look entirely. Go for a color that complements your bathroom tiles or wall color. If you’re using wood, a stain can enhance the natural grain, while a clear varnish will protect it from moisture.
- Decorative Hooks and Bars: The hooks and bars are not just functional elements; they can also be decorative. Choose hooks in interesting shapes or finishes. If you’re feeling adventurous, you can even make your own hooks from bent spoons or forks for a quirky touch.
- Add a Shelf: A shelf above the towel rack provides extra storage space for bathroom essentials or decorative items. This can be particularly useful in smaller bathrooms where space is at a premium.
- Personalize with Accessories: Personalize your towel rack with accessories. Hang a small plant, a scented diffuser, or decorative charms that reflect your personality or the season.
- Incorporate Art: Integrate art into your towel rack design. Attach a small frame or a canvas print to the rack for an unexpected artistic element.
- Theme It Up: If you have a theme in your bathroom, carry it onto your towel rack. Nautical themes could have rope accents, while a rustic theme might feature a rack made from reclaimed barn wood.
- Functional Add-Ons: For added functionality, consider integrating a heated section to keep towels warm or adding multiple levels for different towel sizes.
By considering these design customization ideas, you can build a towel rack that is not only useful but also a reflection of your personal style. The key is to be creative and have fun with the project!
Advanced Techniques
For those who have mastered the basics of DIY towel rack construction and are looking for a challenge, advanced techniques can elevate your project. Here are some sophisticated methods to enhance your towel rack:
- Integrated Heating: Adding a heated section to your towel rack is a luxurious feature. You can install a low-voltage heating element within the rack bars to keep your towels warm and toasty. Ensure all electrical components are safely installed and waterproofed.
- Adjustable Racks: Build an adjustable towel rack with movable bars. This allows users to modify the space between bars according to the size of their towels or to accommodate other bathroom items.
- Multi-Tiered Design: Construct a multi-tiered towel rack for additional storage. This design is particularly useful for families or those with limited space. Ensure each tier is securely attached and can bear the weight of multiple towels.
- Foldable or Retractable Racks: For small bathrooms, a foldable or retractable towel rack is a space-saving solution. Design a mechanism that allows the rack to fold against the wall when not in use.
- Smart Integration: Incorporate smart home technology by adding sensors that detect humidity levels. The rack could then automatically turn on a built-in fan to ventilate the area and reduce moisture.
- Decorative Inlays: For a touch of elegance, add decorative inlays to the rack’s bars. Use materials like mosaic tiles, metal accents, or even resin with embedded objects for a unique look.
- Eco-Friendly Materials: Use sustainable materials such as bamboo or reclaimed wood. These materials are not only environmentally friendly but also add a natural aesthetic to your bathroom.
Use these techniques to make a functional and stylish bathroom towel rack.
Troubleshooting Common Issues
When embarking on a DIY towel rack project, you might encounter a few hiccups along the way. Here’s a helpful guide to troubleshooting common issues, ensuring your towel rack is both sturdy and stylish:
The Rack is Wobbly
- Solution: Check all connections to ensure they are tight. If you’re using screws, make sure they’re the correct size and fully tightened. For added stability, you can also attach the rack to wall studs instead of just the drywall.
The Wood is Splitting
- Solution: This often happens when screws are too large or driven in without pre-drilling. Always pre-drill holes, especially near the ends of boards, and consider using finer screws or nails.
The Rack Isn’t Level
- Solution: Use a level when installing the rack to ensure it’s perfectly horizontal. Adjust the mounting brackets as needed before finalizing the installation.
The Finish is Uneven
- Solution: Sand the surface evenly before applying any paint or stain. When painting, use even strokes and apply multiple thin coats rather than one thick coat.
The Rack Doesn’t Hold the Weight of Towels
- Solution: Ensure you’re using materials that can support the weight. If the rack is already installed, reinforce it with additional brackets or a thicker base material.
Moisture Damage
- Solution: If you’re using wood, make sure it’s properly sealed with waterproof varnish. Use a rust-resistant finish for metal racks, and ensure good ventilation in the bathroom to reduce humidity for all racks.
Difficulty in Mounting
- Solution: Use proper anchors for your wall type. Drywall anchors are suitable for light to medium loads, but for heavier racks, toggle bolts or direct attachment to studs is necessary.
By anticipating and solving these common issues, you’ll ensure your DIY towel rack is both functional and durable.
FAQs About DIY Towel Rack
Discover answers to the most common questions about DIY towel racks. Learn materials, tools, and step-by-step guidance to build your own towel rack.
Make sure to double-check your measurements before cutting or drilling. Use sturdy materials and wall anchors that can support the weight of the towels you plan to hang. It’s important to consider the weight capacity to prevent any accidents.
Yes, you can add a shelf to your DIY towel rack for extra storage. Some designs incorporate a wooden shelf with leather straps or a long shelf with a round dowel for hanging towels. This can be a stylish and functional addition to your bathroom.
There are many creative ideas out there, such as a rustic towel rack made from driftwood, a modern lucite towel bar, or a towel ladder that can be placed behind the toilet for space-saving storage. Explore various designs to find one that suits your style and bathroom decor.
Personalize your towel rack by choosing materials that match your bathroom’s theme. Consider using different textures like leather or metal, or add a pop of color with paint. Incorporating elements that reflect your personal style will make your towel rack stand out.
Selecting the right spot for your DIY towel rack is crucial for both convenience and aesthetics. Consider placing it near the shower or bathtub for easy access. Ensure there’s enough clearance for the towels to hang freely without touching the ground. If space is limited, opt for a wall-mounted design or a freestanding rack that can be moved as needed.
Conclusion
Wrapping up, building a DIY towel rack to maximize space & style is a fantastic way to blend functionality and aesthetics in your home. With a homemade DIY towel rack, you not only save space but also add a personal touch to your decor. Whether in the bathroom or kitchen, this project can truly transform any space. Enjoy making your unique DIY towel rack and enhancing your home’s style and efficiency!


