Building my own DIY track saw was one of the best decisions for my woodworking. Using a circular saw guide helped me make straight and accurate cuts every time. I no longer worried about wavy lines or uneven edges. This simple project turned my basic circular saw into a powerful and precision tool, saving me money and giving me more control over my projects.
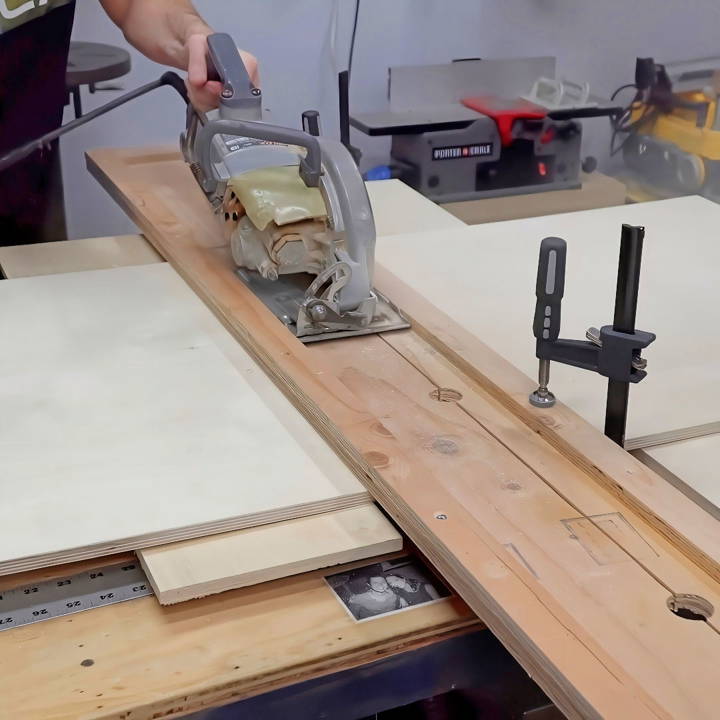
I learned a lot during the process. Measuring and cutting the guide rail to fit perfectly was not difficult. It was satisfying to see my own creation working so effectively. This DIY circular saw guide has transformed my woodworking experience.
I'm confident it can do the same for you. Try it out and enjoy improved precision in your projects!
Why Build a Track Saw?
I'd always wanted a tool that could guide my saw with unerring accuracy for those perfect cuts. The market offered solutions, but they either lacked simplicity or compromised on the depth of cut. My aim was to make a saw track that was not only straightforward to make but also maintained the full capabilities of my circular saw.
What You'll Need
- 3/4 Inch Plywood: For the base and guides. Plywood is durable and ensures your track saw stands the test of time.
- Circular Saw: To cut the plywood to size.
- Wood Glue: For sturdy bonding without the bulkiness of excessive hardware.
- Screws: To secure the guides firmly in place.
- Drill with Pilot Hole and Countersink Bits: These prevent wood splitting and allow screws to sit flush with the plywood.
- Pins or Nails: For initial fastening before adding screws.
- Paper (for Shim): This simple material helps maintain a slight clearance for smooth saw movement.
- Large Drill Bit (at Least 1 Inch Diameter): For drilling sight-holes.
- Clamps: To hold your work in place.
Step by Step Instructions
Learn how to build a DIY track saw with our step-by-step guide. Follow these easy instructions to make precise, clean cuts every time.
1. Preparing the Base and Guides
I started by cutting a few strips from my plywood sheet. Two 2-inch wide strips would serve as the guides for the sides of the saw. The length of your plywood base determines the maximum length of your cuts, so choose accordingly.
2. Attaching the First Guide
Aligning the first guide with the edge of the plywood base was crucial for stability. I used a combination of wood glue, pins, and screws for a robust attachment. Drilling pilot holes and countersinks ensured the screws were flush and the plywood didn't split.
3. Setting the Second Guide with Precision
Removing the circular saw's blade allowed me to lay the saw flat on the base. I applied glue to the second guide, placed it loosely against the first guide, and used a folded piece of paper as a shim. This step ensured just the right amount of clearance for the saw to slide smoothly without wobbling.
I secured the guide with pins, aligning it precisely to the saw's base, then repeated the process along the entire length of the guide. Popping in screws provided the final, enduring hold.
4. Crafting the Sight-holes
Next up were the sight-holes. Cutting the slot for the saw blade before drilling these holes was a misstep on my part. Learn from my experience - drill before you cut the slot. These large holes are essential for aligning your track with markings on the wood.
5. The Test Cut
With everything assembled, it was time for the test. I marked my wood, aligned the sight-holes with the mark, and clamped the track in place. Remembering the blade thickness, I chose the side of the line to cut. Then, I made the cut, supported by scrap plywood to protect my work surface.
Tips for the Best Results
- Always Double-check Alignments: Misalignment, even by a small margin, can lead to imperfect cuts.
- Support Your Workpiece: Ensure the entire length of the material is supported to avoid unnecessary strain on your saw or potential inaccuracies.
- Use Quality Materials: The durability of your track saw depends highly on the materials used. Choose wisely to avoid redoing the project too soon.
Building this track saw transformed my work. Simple yet efficient, it delivered quality cuts and unmatched satisfaction. Whether you're a seasoned woodworker or a beginner, this guide aims to boost your project confidence.
Customization Ideas for Your DIY Track Saw
When it comes to DIY projects, personalization not only adds a unique touch but also enhances functionality. Here are some customization ideas for your DIY track saw that will cater to your specific needs and preferences.
- Choose the Right Base Material: The base of your track saw, often made from plywood, is crucial for stability and precision. Consider using birch plywood for its smooth finish and durability. It's a bit more expensive but worth the investment for a long-lasting tool.
- Adjustable Track Width: Not all projects require the same track width. Build an adjustable track that can accommodate various sizes of wood or other materials. This can be achieved by designing a sliding mechanism on the track, secured with bolts or clamps.
- Foldable Design for Easy Storage: Space can be a premium in many workshops. Design your track saw to fold into a compact size. Hinges and locking mechanisms can be used to ensure it remains secure when in use.
- Dust Collection System: Sawdust can be a nuisance and a health hazard. Integrate a dust collection system into your track saw design. This could be as simple as attaching a vacuum hose near the cutting area.
- Clamping System for Stability: To ensure your material doesn't move during cutting, incorporate a clamping system into your track design. Toggle clamps are an easy-to-use option that can be quickly adjusted.
- Measurement and Alignment Aids: Precision is key in cutting. Add a ruler or a laser guide to your track saw to help with accurate measurements and cuts. This will save time and increase the accuracy of your work.
- Replaceable Track Edges: Over time, the edges of your track may wear down. Design your track with replaceable edges. This way, you don't have to rebuild the entire track—just swap out the edge for a new one.
- Safety Features: Safety should always be a priority. Include features like a blade guard and an emergency stop button. These additions can prevent accidents and give you peace of mind.
The goal of customization is to make your DIY tracksaw suit your specific needs while ensuring safety and efficiency.
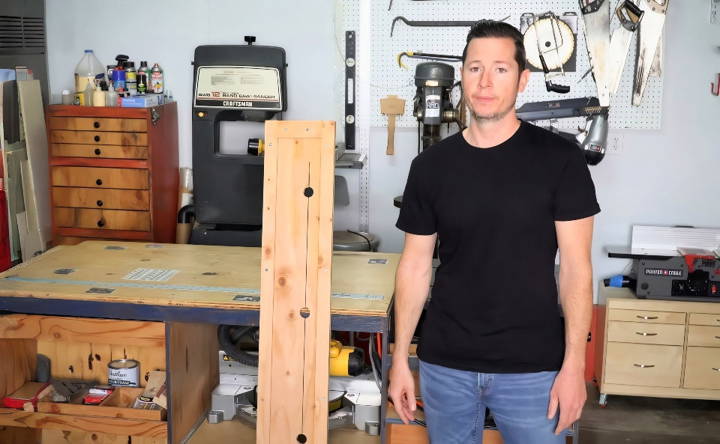
Advanced Techniques and Tips for Your DIY Track Saw
Enhancing your DIY track saw skills can lead to better results and more enjoyable projects. Here are some advanced techniques and tips to help you master the use of your DIY track saw:
- Precision Cutting with a Scoring Pass: For cleaner cuts in laminates or veneers, make a shallow scoring pass before the full-depth cut. This reduces splintering and ensures a smooth edge.
- Making Custom Track Attachments: Build your own attachments for specific tasks. For example, a wider base attachment can provide more stability for long cuts. Use materials like HDPE plastic for a durable and low-friction surface.
- Using Jigs for Repetitive Cuts: If you're making multiple pieces of the same size, make a jig that fits onto your track. This will speed up the process and maintain consistency.
- Angled Cuts and Tapers: Learn to make angled cuts by adjusting the track position. For tapers, set up a tapering jig that runs along the track to guide the saw at the desired angle.
- Improving Dust Collection: If your current dust collection isn't sufficient, consider adding a secondary collection point or upgrading to a more powerful vacuum system.
- Fine-Tuning for Straight Cuts: Regularly check your track alignment with a precision square. Make adjustments as needed to ensure your track is perfectly straight.
- Enhanced Safety Measures: Always use push sticks or blocks when working near the blade. Consider adding a secondary safety switch within easy reach in case of emergencies.
- Sharpening Your Blades: A sharp blade is essential for clean cuts. Learn how to sharpen your saw blades or invest in a blade sharpener to keep them in top condition.
- Experimenting with Blade Types: Different materials may require different blades. Experiment with various blade types to find the best one for each material you cut.
Use advanced techniques to tackle complex projects and improve your work quality. Practice regularly, try new methods, and refine your skills.
Troubleshooting Common Issues with DIY Track Saws
Working with a DIY track saw can sometimes present challenges. Here are some common issues you might encounter and how to resolve them:
The Saw is Not Cutting Straight
- Solution: Check the alignment of your track. Ensure it's clamped down securely and that the saw is snug against the track. Use a square to verify everything is at right angles.
The Blade is Burning the Wood
- Solution: This usually means the blade is dull or the saw is moving too slowly. Replace or sharpen the blade, and try to maintain a consistent feed rate.
The Motor is Overheating
- Solution: Overheating can be caused by a build-up of sawdust or resin. Clean the saw thoroughly and make sure the vents are not blocked. Allow the saw to cool down before restarting.
Difficulty Following the Cut Line
- Solution: Apply a strip of painter's tape along the cut line to increase visibility. Also, consider using a laser guide for more precise cuts.
The Material is Chipping
- Solution: Use a finer-toothed blade and ensure it's sharp. Support the material on both sides of the cut, and consider using a sacrificial backing board to reduce tear-out.
The Saw is Hard to Push
- Solution: If the saw is difficult to push, it might not be properly lubricated. Apply a dry lubricant to the track and the base of the saw. Also, check for any obstructions in the track.
Inaccurate Measurements
- Solution: Double-check your measuring tools for accuracy. Calibrate your rulers and squares, and consider using a digital measuring device for more precision.
The Track Moves During the Cut
- Solution: Secure the track with more clamps or use double-sided tape to hold it in place. Make sure the surface you're working on is flat and stable.
By addressing these common issues, you'll ensure your DIY track saw operates smoothly and efficiently.
FAQs About DIY Track Saw
Discover all you need to know about DIY track saw FAQs. Our comprehensive guide offers expert answers and tips for your woodworking projects.
A DIY track saw is a homemade version of a commercial track saw, which allows for precise, straight cuts using a circular saw. It typically involves a guide rail made from materials like plywood or MDF, which the circular saw follows to ensure a straight cut. The saw rides along the track, which is aligned with the cut line on the workpiece.
The main benefits of a DIY track saw are cost savings and customization. Commercial track saws can be expensive, so building your own can be a budget-friendly alternative. Additionally, you can customize the length and features of your track saw to suit your specific needs and preferences.
As with any power tool, safety is paramount. Always wear safety glasses and hearing protection. Ensure that the track is securely clamped to the workpiece and that the saw is properly attached to the track. Be mindful of kickback, and never force the saw through the cut.
While a DIY track saw is excellent for making long, straight cuts, it may not replace all the functions of a table saw, such as bevel cuts or dadoes. However, for many DIYers, a track saw can be a versatile and valuable addition to their tool collection, especially when space or budget is limited.
Yes, a DIY track saw can be used to cut materials other than wood, such as plastic or aluminum. However, it's crucial to use the appropriate blade for the material you're cutting. For example, when cutting metal, use a blade designed for metal to prevent damage to your saw and ensure a clean cut. Always follow safety guidelines and wear protective gear when cutting different materials.
Conclusion:
Now, with this experience in making a DIY track saw, I hope to inspire you to make your own. It's simple, efficient, and incredibly helpful. I'm excited to see how this handy tool can improve your woodworking projects too. Get started and see the difference it makes!


