Making a DIY truck bed cover is a simple and rewarding project. Last weekend, I decided to make a cover for my truck. I gathered some materials, laid out my tools, and followed a straightforward plan. Not only did I save money, but I also customized the cover to fit my needs perfectly.
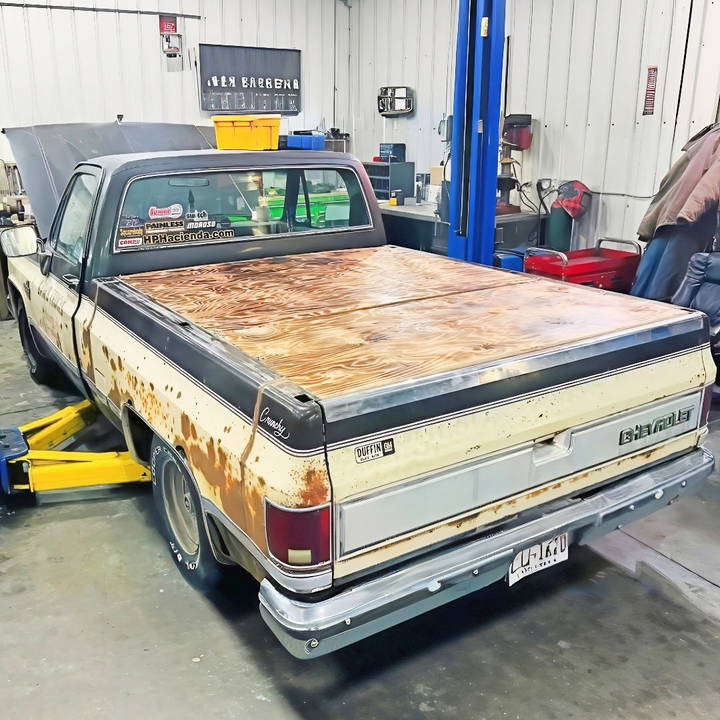
Taking on this project taught me valuable skills. Measuring accurately and using the tools correctly was a great learning experience. In just a few hours, my truck bed had a sturdy, personalized cover that I crafted myself. If you follow my steps, you will achieve the same satisfaction. This guide will help you get started with ease.
I'm helping with this because a DIY tonneau cover can be a satisfying and cost-effective way to enhance your vehicle.
Understanding the Need for a Tonneau Cover
Living in an area where the weather can be unpredictable and occasionally harsh meant my truck's bed was often exposed to elements that could damage its contents. The need for a protective cover became undeniable. However, the market prices for tonneau covers stirred a wave of creativity in me—I was convinced I could build one myself, for less.
Gathering the Materials
The backbone of this project lies in choosing the right materials without compromising on quality. Here's what you'll need:
- Two sheets of 1/2-inch plywood: For robustness and durability. Plywood is cost-effective and can withstand considerable weight and weather conditions.
- 14 ft of 1"x1" angle iron: This serves as the frame, providing structure and support to the plywood sheets.
- Bolts and Wing Nuts: These are essential for securing the plywood to the angle iron framework, ensuring the cover remains intact.
Each material was selected not only for its affordability but also for its capacity to endure and perform. The combination ensures that the tonneau cover stands the test of time, safeguarding against both theft and weather.
Step by Step Instructions
Learn how to make a DIY truck bed cover with our step-by-step instructions. From prepping plywood to adding personal touches, it's easy to get it done!
Prepping the Plywood
- Measure and Scribe: Lay the plywood over the truck's bed to mark the dimensions correctly. It's crucial to scribe the lines carefully for precise cutting, ensuring the plywood fits perfectly within the truck's bed.
- Cutting to Size: Once marked, cut the plywood along the scribed lines. This step requires attention to detail to avoid any misalignment.
Setting the Angle Iron Frame
- Measure and Cut: The angle iron needs to be cut to match the sides of the truck bed's perimeter. I cut mine at 75 inches to fit my truck perfectly.
- Drilling and Fastening: Instead of welding, I drilled three holes into each piece of angle iron and used self-tapping screws to secure it to the sides of the truck bed. This method not only provides strength but also the flexibility to remove it if needed.
Assembling the Cover
- Fitting the Plywood: Place the cut plywood onto the framework to ensure a snug fit. Minor adjustments with a saw might be necessary for perfect alignment.
- Securing with Bolts and Wing Nuts: Drill holes through the plywood where it meets the angle iron and insert bolts from the bottom, securing them with wing nuts on top. This step is crucial for the cover's stability and ease of removal.
Adding a Personal Touch
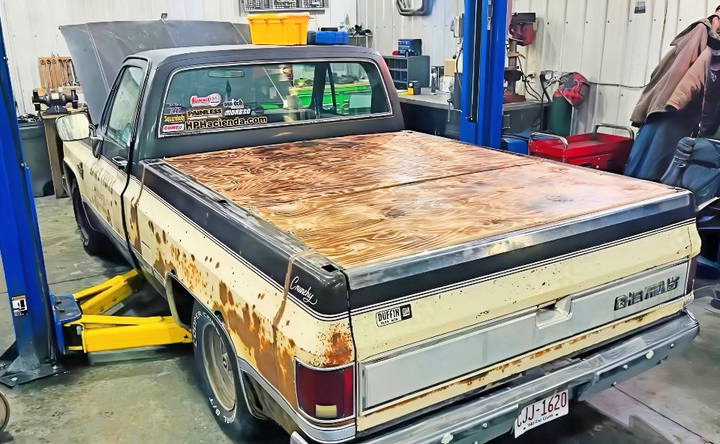
Aiming to match my truck's rustic aesthetic, I opted for a unique finishing touch. By using a torch, I gave the plywood a burnt finish, which not only enhanced its look but also added an extra layer of protection. Sealing it with clear coat further ensured its durability against the elements.
Making a tonneau cover for under $100 was an incredibly fulfilling project. Not only did it save me money, but it also provided a sense of accomplishment and a custom feature for my truck that serves both functional and aesthetic purposes.
Customization Tips for Your DIY Truck Bed Cover
Making a DIY truck bed cover is not just about protection; it's also an opportunity to add a personal touch to your vehicle. Here are some tips to help you customize your truck bed cover:
Choose Your Material Wisely
- Canvas: Durable and flexible, canvas allows for easy customization with paints or patches.
- Vinyl: Offers a sleek look and is easy to clean. You can cut out designs and apply them to build patterns or images.
- Aluminum: Though more challenging to work with, aluminum can be etched or painted for a custom look.
Add Functional Features
- Pockets and Compartments: Sew or attach pockets to the inside of your cover to hold tools or gear.
- Roll-Up Sections: Implement a roll-up mechanism for easy access to different parts of the truck bed.
Personalize with Color and Design
- Paint: Use fabric paint for canvas or special vinyl paint for a vinyl cover to add logos, stripes, or any design that represents you.
- Decals and Stickers: Apply decals for a quick and easy way to personalize your cover.
Ensure Easy Installation and Removal
- Velcro Strips: Use Velcro for an adjustable and removable connection.
- Snaps or Buttons: Install snaps or buttons for a secure and classic look.
Consider the Environment
- Reflective Materials: Add reflective strips or paint to increase visibility at night.
- Eco-Friendly Options: Explore sustainable materials or upcycled fabrics to reduce environmental impact.
Make your DIY project your own. Your truck bed cover should be useful and reflect your style. Keep it simple, focus on what matters, and have fun!
Troubleshooting Common Issues with DIY Truck Bed Covers
When you're working on a DIY truck bed cover, you might encounter some challenges. Here's how to tackle common issues in a straightforward way:
Material Doesn't Fit Properly
- Solution: Measure your truck bed dimensions twice before cutting any material. If you've already cut and it's too small, consider building a patchwork design or adding a border to extend the cover.
Cover Isn't Weatherproof
- Solution: Use waterproof sprays or seam sealers on fabric covers. For more rigid materials, ensure all joints are sealed with weather-resistant tape or caulking.
Difficulty in Securing the Cover
- Solution: Install additional fasteners like snaps or Velcro strips. Make sure they're evenly spaced and firmly attached to both the cover and the truck bed.
Cover Flaps in the Wind
- Solution: Add weight to the edges of the cover, or install tension straps to keep it in place while driving.
Wear and Tear Over Time
- Solution: Regular maintenance is key. Inspect your cover periodically for signs of wear and address them promptly with patches or reinforcements.
Difficulty Accessing Truck Bed Quickly
- Solution: Design your cover with a folding or rolling mechanism for easy access. Consider using lightweight materials that are easy to move.
By anticipating these issues and knowing how to solve them, you'll ensure your DIY truck bed cover is both functional and durable.
Legal and Safety Considerations for DIY Truck Bed Covers
When building a DIY truck bed cover, it's important to consider both legal and safety aspects to ensure that your cover is not only effective but also compliant with regulations and safe for use on the road.
Legal Compliance
- Traffic Laws: Check local traffic laws regarding cargo coverage. Some regions require all cargo to be covered while in transit to prevent items from falling out and causing accidents.
- Visibility: Ensure that your truck bed cover does not obstruct your view or cover any lights and indicators. It's essential to maintain clear visibility for safe driving.
Safety Measures
- Secure Attachment: Your cover must be securely attached to the truck bed to prevent it from flying off while driving, which could be dangerous for other road users.
- Load Access: Design your cover so that it can be easily removed or opened for access to the cargo. This is important for safety in case you need to quickly remove items from the bed.
Material Considerations
- Durability: Choose materials that are strong enough to withstand the elements and the stress of driving at high speeds.
- Non-flammable Materials: Avoid materials that are easily flammable, as they could pose a fire hazard if exposed to heat or an ignition source.
Reflective Markings
- Conspicuity: Add reflective markings to your cover, especially if it's a dark color, to make it more visible to other drivers at night or in poor weather conditions.
Regular Inspections
- Maintenance Checks: Regularly inspect your cover for any signs of wear and tear, such as rips or loose fittings, and repair them promptly to maintain safety.
Follow these guidelines to build a DIY truck bed cover that's customized, safe, and legal. The main goal is to protect your cargo and ensure road safety.
FAQs About DIY Truck Bed Cover
Discover answers to common questions on DIY Truck Bed Cover. Learn about materials, installation, cost, and more in our comprehensive FAQ guide.
The difficulty level varies depending on the design. A basic tarp cover is easy and can be done by beginners, while a wooden tonneau cover has a moderate difficulty level, requiring more tools and materials. The most complex is a custom cover with features like diamond plate aluminum or retractable mechanisms, which are considered hard and require advanced skills.
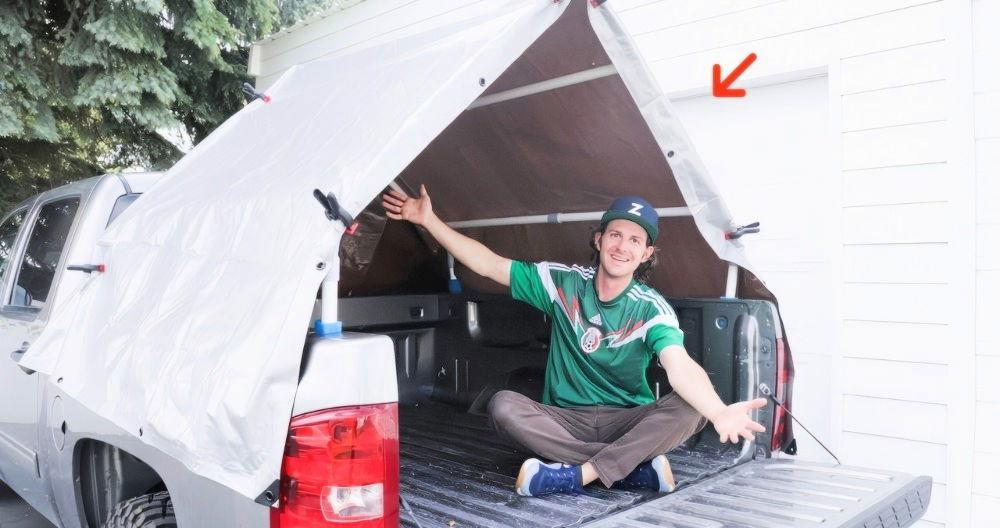
Yes, you can make a waterproof DIY truck bed cover. Using a tarp as your material is an affordable and straightforward way to ensure waterproofing. If you opt for a wooden cover, you can apply waterproof paint and vinyl fabric to protect against rain and bad weather.
The time it takes to build a DIY truck bed cover can range from a couple of hours for a simple tarp cover to about 5 hours for a more complex wooden cover. Projects that involve more intricate designs and features will naturally take longer.
Making your own truck bed cover can save you money compared to buying a pre-made one. It also allows for customization to fit your specific needs and style preferences. Additionally, it can be a rewarding DIY project that enhances the functionality and appearance of your truck.
Maintaining your DIY truck bed cover involves regular cleaning and inspection. For tarp covers, wash with soapy water and check for tears or damage. Wooden covers should be inspected for warping or rot, and reapply waterproof paint or sealant annually. For metal or aluminum covers, clean with a mild detergent and apply a protective coating to prevent rust. Always secure your cover properly to avoid it being torn off by the wind.
Closing Thoughts
Finishing your own DIY tonneau cover can be straightforward and enjoyable. By following these simple steps, you save money and get a cover tailored to your needs.


