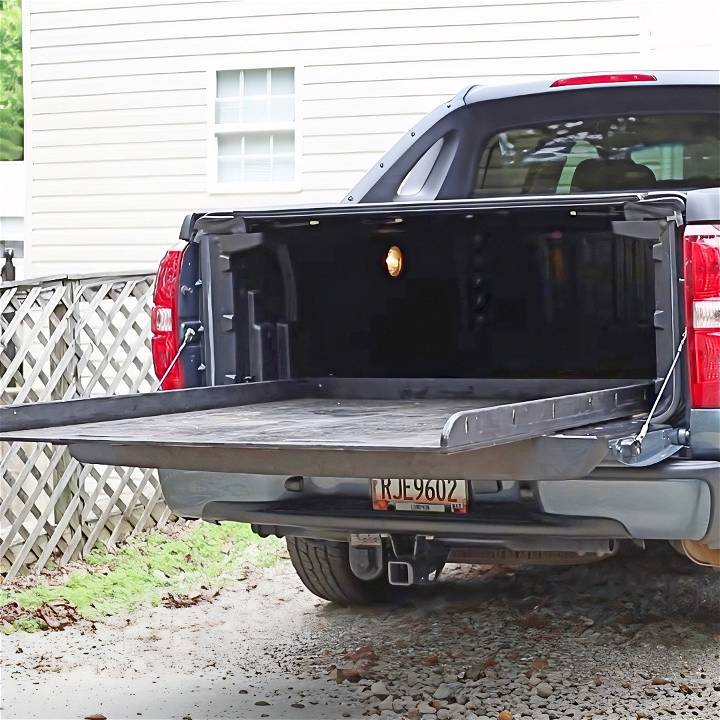
As an avid DIY enthusiast and a proud owner of a Chevy Avalanche, I've always looked for ways to improve my truck's functionality without breaking the bank. That's why when I stumbled upon a creative and efficient way to build a truck bed slide, I knew I had to give it a try. In this article, I'll walk you through my personal journey of building the simplest yet most effective truck bed slide, using practical materials and simple tools.
Materials Needed and Their Purposes:
- Half-inch Plywood: Serves as the base for the bed slide. Plywood is sturdy enough to hold significant weight yet light enough for easy maneuverability.
- 3/4 Inch Plywood: Utilized for the rails on the sides to ensure whatever you're hauling doesn't slip off the side.
- Carboard: Acts as a friction-reducing layer between the bed slide and the truck bed. The slick side of the cardboard allows for easy sliding.
- Pocket Holes/Set Screws: These are used to securely attach the side rails to the bed slide base, ensuring a sturdy and cohesive structure.
- Handles: For easy pulling of the bed slide when needed. I opted to cut these directly into the wood for a more integrated look.
- Cordage: To secure the slide from pulling completely out of the truck bed.
- Felt Pads: These are crucial to reduce friction and prevent wear and tear on the bed slide and the truck bed liner.
- Flex Seal: I used this as a topcoat on the plywood for its rubbery, grippy qualities, ensuring cargo doesn't slide around.
- Carabiners: For easy attachment and removal of the bed slide from the bed tie-downs.
Step-by-Step Guide to DIY Truck Bed Slide:
Learn how to build a DIY Truck Bed Slide with this step-by-step guide. Save time and money by making your own custom slide for your truck bed!
Step 1: Preparing the Bed Slide Base
First, I took the half-inch plywood and cut it to the size of my Chevy Avalanche's bed. The aim was for it to fit snugly but still able to slide in and out with ease.
Step 2: Adding the Rails
Using the 3/4 inch plywood, I cut out two pieces that would serve as rails on either side of the bed slide. These were attached to the base with pocket holes, ensuring they were secure and wouldn't budge under weight.
Step 3: Reducing Friction
To address the friction issue, I placed a sheet of cardboard under the bed slide. The slick side of the cardboard faced down, drastically reducing resistance and making the slide easy to move.
Step 4: Adding Felt Pads
I stuck felt pads on the underside of the bed slide, focusing on areas that would bear most of the load. These pads further reduced friction and protected the bed liner from damage.
Step 5: Securing the Slide
To prevent the bed slide from being pulled out entirely by accident, I used a robust cordage tied to the end of the slide and secured to the truck bed's tie-downs. Carabiners were used for easy detachment when necessary.
Step 6: The Finishing Touches
After assembling the slide, I decided to paint it black to match my truck's aesthetic. Then, I applied Flex Seal as a top coat for its excellent grippy quality, ensuring my cargo wouldn't slide around when moving.
Practical Use and Modifications
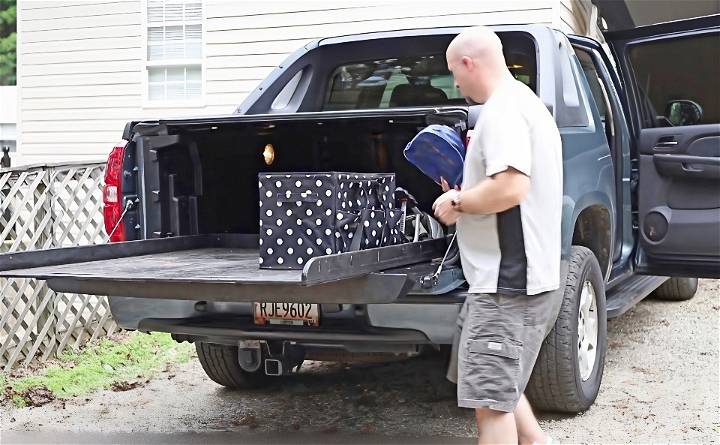
I've been using my DIY truck bed slide for a month now, and it's been incredibly handy. From hauling heavy tools to loading up for a camping trip, the ease of sliding out the bed has saved my back and my time.
One modification I found useful was adding carabiners for easy attachment and removal. Initially, I had the slide tied down permanently, but the carabiners added flexibility, allowing me to remove the slide when not needed.
Customizing Your Truck Bed Slide: Practical Tips
When building your DIY truck bed slide, consider customizing it to suit your specific needs. Here are practical tips for personalizing your project:
1. Compartments and Drawers
Adding compartments or drawers enhances functionality and organization. Here's how:
- Divide and Conquer: Build separate sections for tools, camping gear, or emergency supplies. Use plywood dividers to organize items effectively.
- Sliding Drawers: Install sliding drawers beneath the main platform. These are perfect for stashing smaller items like ropes, bungee cords, or first aid kits.
- Lockable Compartments: If security is a concern, incorporate lockable compartments. Store valuables or sensitive equipment safely.
2. Tie-Down Points
Ensure your truck bed slide accommodates tie-down points for securing cargo. Here's why it matters:
- Stabilize Your Load: When transporting heavy items, secure them using tie-down straps or bungee cords. Attach anchor points to the slide frame.
- Versatility: Whether it's lumber, camping gear, or sports equipment, having tie-down options ensures everything stays in place during transit.
3. Surface Treatment
Consider the surface material for your truck bed slide. Here are some options:
- Paint or Seal the Wood: Protect the plywood from moisture, UV rays, and wear. Choose a weather-resistant paint or sealant.
- Rubber Matting: Line the slide surface with rubber matting. It prevents items from sliding around and provides traction when loading or unloading.
4. Weight Capacity
Understand the weight capacity of your truck bed slide:
- Know Your Limits: Calculate the total weight you plan to load onto the slide. Ensure it doesn't exceed the slide's capacity.
- Consider Material Strength: The type of wood and hardware used affects weight-bearing capabilities. Reinforce critical points if necessary.
5. Accessibility
Think about ease of access:
- Handle Placement: Install handles strategically. They should allow smooth pulling and pushing of the slide.
- Locking Mechanism: Consider adding a locking mechanism to prevent accidental movement during transit.
6. Maintenance Routine
Regular maintenance ensures longevity:
- Lubricate Rollers and Bearings: Keep the slide moving smoothly by applying lubricant to rollers and bearings.
- Inspect for Wear: Check for signs of wear, loose screws, or damaged components. Address any issues promptly.
Remember, customization makes your truck bed slide uniquely yours. Tailor it to fit your lifestyle, whether you're an avid camper, a tradesperson, or simply need efficient storage on the go.
FAQs About DIY Truck Bed Slides
Get answers to common questions about DIY truck bed slides in this comprehensive FAQ guide. Learn how to build your own sliding truck bed solution.
1. What Is a DIY Truck Bed Slide?
A DIY truck bed slide is a custom-built platform that allows you to easily access items stored in your truck bed. It slides out, providing convenient reach and organization for tools, gear, or supplies.
2. Why Should I Build a Truck Bed Slide Instead of Buying One?
- Cost-Effective: Building your own slide can be more budget-friendly than purchasing a commercial option.
- Customization: DIY slides allow you to tailor features, dimensions, and materials to your specific needs.
- Satisfaction: Crafting something with your own hands brings a sense of accomplishment.
3. How Do I Calculate Weight Capacity?
- Determine the maximum weight you plan to load onto the slide.
- Consider the type of wood used and the strength of hardware (rollers, screws).
- Ensure the slide's design accounts for weight distribution.
4. Can I Customize My Truck Bed Slide?
Absolutely! Here are some customization ideas:
- Compartments: Add drawers or sections for organized storage.
- Tie-Down Points: Secure cargo using anchor points.
- Surface Treatment: Paint, seal, or use rubber matting.
- Accessibility: Install handles and a locking mechanism.
5. Any Maintenance Tips?
- Lubricate Regularly: Keep rollers and bearings smooth.
- Inspect for Wear: Check for loose screws or signs of damage.
- Address Issues Promptly: Fix any wear or malfunction promptly.
Remember, your DIY truck bed slide can be as unique as your needs. Happy building!
Conclusion
Making a DIY truck bed slide for my Chevy Avalanche was a rewarding project that significantly enhanced my truck's utility. It's a straightforward build that requires minimal materials but offers maximum convenience. Whether you're an avid DIYer or just looking to make your truck more functional, this project is definitely worth considering. Remember, the key to a successful project is preparation and patience.


