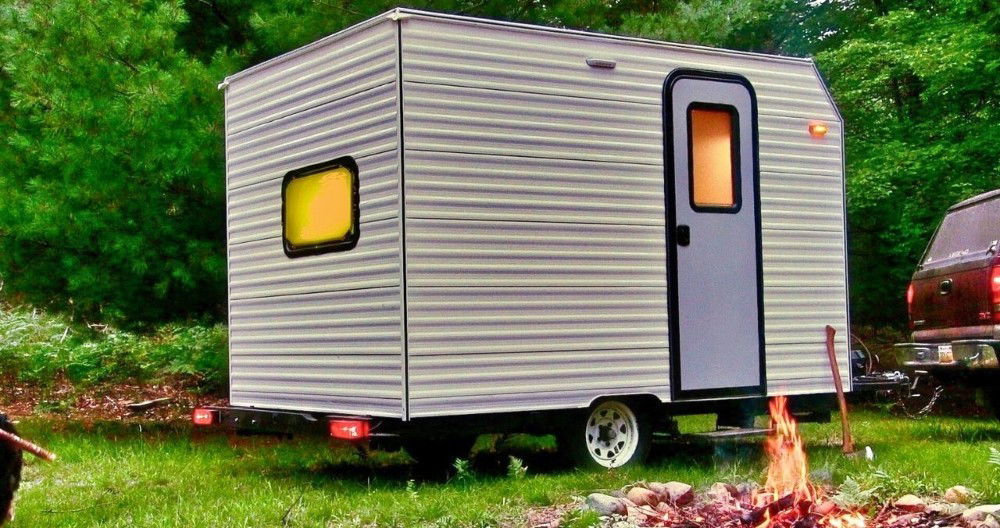
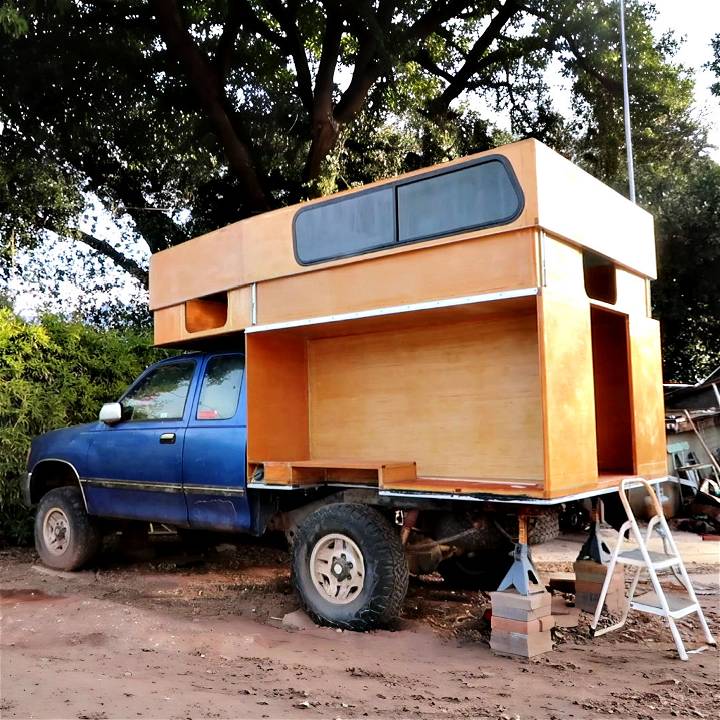
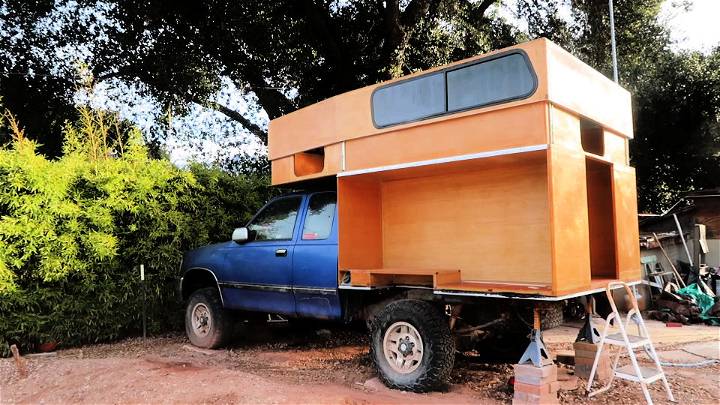
Building a DIY hard-side pop-up camper for my 4x4 truck was an exciting yet challenging project that transformed my vehicle into a cozy, compact home for road trips and camping adventures. From designing the blueprints to assembling the structure and integrating moving components, every step brought its own set of learnings and satisfactions. Through this guide, I aim to share my experience and insights to help fellow DIY enthusiasts embark on their own camper-building journey. Let's dive into the process.
Essential Materials and Why They're Needed
Before starting, it's crucial to gather all the necessary materials:
- Douglas Fir Wood and Plywood - For the camper's frame and skin, offering both durability and a lightweight structure.
- Polyurethane Pour Foam - To insulate your camper walls, keeping the inside temperature comfortable.
- Epoxy resin and fiberglass cloth are used for waterproofing and strengthening the outer layers of the camper walls.
- Drawer Slides - Utilized to guide the pop-up mechanism smoothly.
- Gas Struts - To aid in effortless lifting of the pop-up section.
- Aluminum Flat Bars and Rubber Seal - For making a tight and secure seal between the pop-up and camper body.
- Screws, Wood Glue, and Construction Adhesive - Essential for assembling and securing all components together.
Each material was selected for its specific role in making the camper durable, insulated, and functional.
Step-by-Step Building Process
Learn the step-by-step building process for a DIY truck camper, including constructing the frame, walls, pop-up mechanism, roof, waterproofing, and sealing.
The Frame and Walls
- Constructing the Wall Panels: Initially, I crafted insulated wall panels with a 1x2 Douglas fir frame, glued and screwed together, with a 5mm plywood coating on either side. The addition of polyurethane pour foam provided excellent insulation.
- Adding Fiberglass and Epoxy: Post-assembly, I layered the panels with epoxy resin and six-ounce fiberglass cloth to protect against moisture and reinforce the structure.
The Pop-Up Mechanism
- Designing the Pop-Up: I rounded the rear wall corners and adjusted the front and rear edges to fit my camper's specific angles.
- Making Windows: Utilizing old camper shell windows, I framed them with Douglas fir cut at a 45-degree angle for additional rigidity and ease of glassing.
- Assembling Panels in Place: Using clear packing tape as a barrier, I glued and screwed the sections together directly on the camper to ensure a perfect fit.
The Roof and Sealing Mechanism
- Constructing the Roof: Similar to the walls, I built the roof in sections with a Douglas fir frame and filled it with polyurethane pour foam for insulation.
- Mounting Drawer Slides and Gas Struts: To facilitate smooth and easy lifting, drawer slides were mounted with precision, and gas struts were strategically placed to balance the lift.
Final Touches for Waterproofing and Sealing
- Applying Aluminum Edging: I applied a 1.5-inch wide aluminum flat bar around the bottom edge of the pop-up, using construction adhesive for a firm hold, followed by a D-shaped rubber seal for weatherproofing.
- Finishing with VHB Tape: For attaching the aluminum cap on the inner camper wall, VHB tape offered a clean, strong bond without the mess of excess adhesive.
Lessons Learned and Tips
- Always Measure Twice: Precision is key, especially when building moving components like the pop-up mechanism.
- Invest in Quality Materials: The durability and longevity of your camper depend greatly on the materials used. Don't compromise.
- Be Patient: Some steps require waiting for adhesives or fiberglass to cure. Plan your project timeline accordingly.
Customization Tips for Your DIY Truck Camper
Making a DIY truck camper is not just about building a functional space; it's about tailoring it to your personal needs and style. Here's how you can add those unique touches that make the camper truly yours.
Interior Design Ideas
- Think Theme: Start with a theme that reflects your personality. Whether it's a rustic look, a modern minimalist design, or a cozy cottage feel, let your theme guide your choices.
- Color Your World: Colors can dramatically alter the mood inside your camper. Choose a palette that relaxes you and makes the space feel larger. Soft blues and greens can have a calming effect, while warm yellows and reds can make it feel more inviting.
- Fabric Fun: Use fabrics to add texture and comfort. Curtains, cushions, and bedding are easy ways to introduce patterns and colors.
Space Optimization
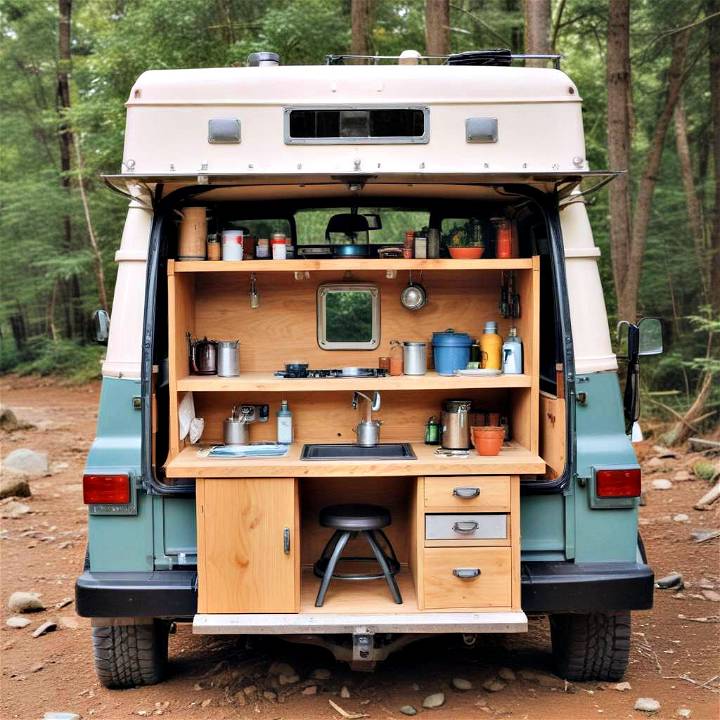
- Smart Storage: Every inch counts in a small space. Build vertical storage and use hidden compartments under seats and beds. Magnetic strips can hold utensils and tools, saving drawer space.
- Fold and Tuck: Furniture that folds away when not in use can be a game-changer. Consider fold-down tables, retractable bed frames, and convertible seating areas.
- Mirror Magic: Mirrors can make your space feel bigger and brighter. Place them strategically to reflect light and views.
Off-Grid Capabilities
- Solar Power: Install solar panels on the roof to harness the sun's energy. This can power your lights, charge your devices, and run small appliances.
- Battery Bank: Pair your solar panels with a robust battery system to store energy for nighttime use or cloudy days.
- Water Wise: Set up a rainwater collection system and consider a water filtration system for drinking water. This reduces the need for frequent water stops.
Focus on customization tips to make a truck camper that reflects you. Make it feel like home on the road. Keep it simple, make it personal, and enjoy!
Safety and Security in Your DIY Truck Camper
Ensuring your DIY truck camper is safe and secure is paramount. Here's a guide to help you make a secure and structurally sound camper.
Structural Integrity
- Build to Last: Use quality materials and follow best practices to ensure your camper can withstand the rigors of the road.
- Weight Distribution: Balance the weight evenly to maintain stability and handling of the truck.
- Regular Inspections: Check the structure regularly for any signs of wear and tear or damage.
Security Features
- Locks: Install high-quality locks on all doors and windows.
- Alarm System: Consider an alarm system to deter theft and provide peace of mind.
- Fire Safety: Equip your camper with a fire extinguisher, smoke detectors, and carbon monoxide detectors.
By focusing on these safety and security measures, you'll ensure that your DIY truck camper is a safe haven for your travels.
FAQs About DIY Truck Campers
When embarking on the journey of building a DIY truck camper, many questions may arise. Here are answers to some of the most frequently asked questions, presented in a clear and straightforward manner.
What is the best material for building a DIY truck camper?
The best material often depends on your budget and the weight capacity of your truck. Aluminum and fiberglass are lightweight and durable, while wood is cost-effective and easier to work with.
How do I ensure my truck camper is waterproof?
Use quality sealants around windows and doors, and ensure the roof is well-sealed with a durable waterproof coating. Regular maintenance checks are also crucial.
Can I build a DIY truck camper on a small budget?
Yes, it's possible to build on a small budget by sourcing second-hand materials, doing the work yourself, and simplifying the design.
What tools will I need to build my truck camper?
Basic tools include a saw, drill, screws, hammer, and measuring tape. You might also need specialized tools depending on your design.
How can I maximize space in my truck camper?
Utilize multi-functional furniture, overhead storage, and collapsible elements. Also, keep the interior layout simple and clutter-free.
Is it necessary to have electrical knowledge to build a DIY truck camper?
While not necessary, basic electrical knowledge is helpful for installing lighting and power systems. Otherwise, consult a professional.
How do I maintain the structural integrity of my truck camper?
Regular inspections for any structural damage, proper weight distribution, and using quality building materials are key to maintaining integrity.
Conclusion: The Reward of Building Your Own Camper
The sense of achievement from building a DIY hard side pop-up camper is immensely rewarding. Not only did I get a custom camper tailored to my needs, but I also gained invaluable skills and knowledge along the way. For those contemplating this project, I encourage you to go for it. With patience, the right materials, and a bit of elbow grease, you'll be on your way to making your own mobile retreat.


