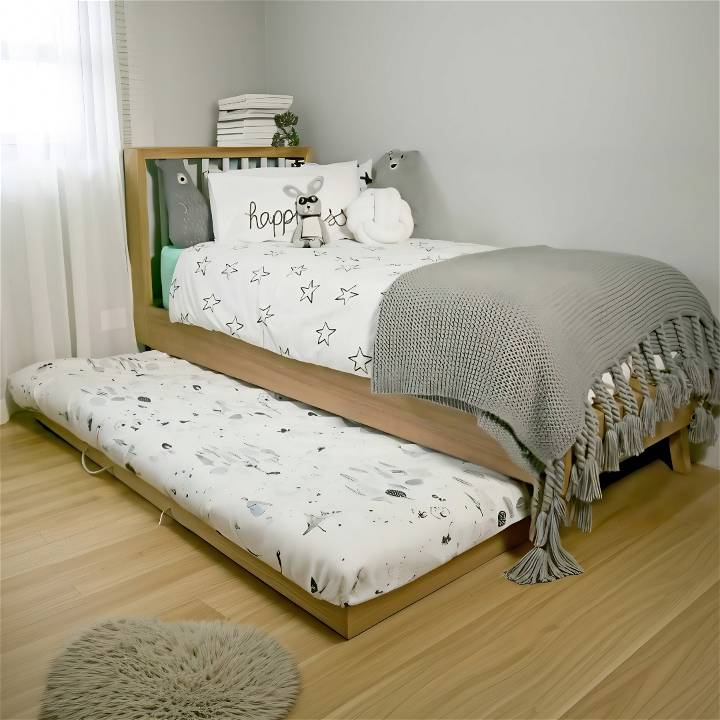
Have you ever found yourself in a pinch during sleepovers, wondering where all the kids will sleep? Well, I encountered that dilemma more times than I could count. That was until I decided to tackle the problem head-on by building a trundle bed on wheels. This handy bed not only solved my sleepover woes but also provided a fun project. Below, I'll walk you through how I did it, step by step, in a way that's simple to understand and easy to replicate.
Materials You'll Need and Why
- Plywood (pre-cut): The foundation of your bed. Having it pre-cut at the store saves time and ensures precision.
- Timber for framing: Provides structure and support for the plywood base.
- PVA Glue: For binding the pieces securely together.
- Nail Gun (or hammer and nails): To fix the frame to the base.
- Window Packers: These will raise the base slightly, so the sides cover the wheels, building a sleek look.
- Casters (Wheels): They make the trundle bed mobile, allowing for easy storage under a regular bed.
- Handles: For easy pulling out and pushing in of the bed.
- Sanding Paper: To smooth out any rough edges or surfaces.
- Varnish: Protects the wood and enhances its appearance.
- Rope for handles: Gives the trundle bed a rustic, yet finished look.
- Masking Tape: A little trick to ease threading the rope through handle holes.
Step by Step Instructions
Learn how to build your own DIY trundle bed with our step-by-step instructions. Save space and money with this practical furniture project.
Building the Frame
First thing I did was to set up my workspace with all the timber I needed for the frame. A miter saw came in handy for cutting the timber at a 45-degree angle, ensuring that when joined, the corners formed perfect 90 degrees, essential for a square, stable frame. Precision in these angles makes all the difference in the end result.
After cutting, I measured and marked the spots for my next cuts, adjusting the miter saw accordingly. This process might seem tedious, but it's crucial for the integrity of the bed's frame.
Assembling the Base and Frame
Using window packers, I raised the base off the ground slightly. This step ensures that when the side panels are attached, they'll neatly cover the wheels, giving a tidy finish. I spread PVA glue along the edges of the frame before positioning it on the plywood base. A nail gun (or hammer and nails) works great to secure these pieces together.
Adding Finishing Touches
Once the bed was assembled, drilling holes for the handles was next. After securing the handles, any imperfections on the wood were covered with putty. The putty step is vital for achieving a smoothly finished product.
The most exciting part was installing the casters. Flipping the bed over, I applied glue to the bases of the casters and positioned them under the bed. It's crucial to allow them to dry as per the glue's instructions.
Sanding and Varnishing
With the structure complete, a comprehensive sanding was in order. Sanding not only prepares the surface for varnishing but also ensures there are no splinters or rough patches. Applying the clear varnish was like the cherry on top, bringing out the wood's natural beauty and providing protection.
Attaching the Rope Handles
A small tip I found extremely useful was wrapping the ends of the rope with masking tape before threading them through the holes for handles. This trick simplified what could have been a frustrating process, making it a breeze.
As I slid the finished trundle bed under our main bed, I couldn't help but marvel at the simplicity and functionality of the design. It's a straightforward build that offers a practical solution to a common problem. The best part? It didn't require an enormous investment of time or money.
It's All About Solving Problems
This project was about more than just providing a place to sleep; it demonstrated how creativity and hard work can result in functional and fashionable solutions.
Sleepovers at our house are ideal now, with kids enjoying a cozy space to sleep. Pulling out the trundle bed brings joy from DIY projects. Try making this DIY trundle bed on wheels for a weekend project to simplify your life.
Decorating Ideas for Trundle Beds
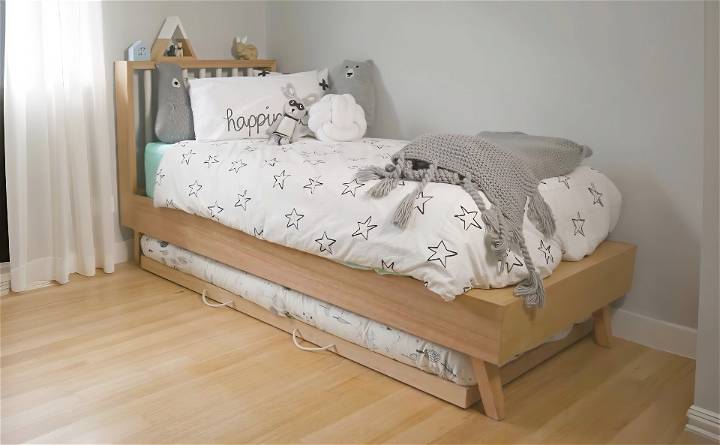
When it comes to decorating your trundle bed, thoughtful choices can transform it from a functional piece of furniture into an inviting and stylish addition to your home. Whether you're setting up a guest room, a child's bedroom, or even your own space, consider the following decorating ideas:
1. Bedding Selection:
- Layered Bedding: Opt for layered bedding to build visual interest. Start with a fitted sheet, add a cozy blanket or quilt, and top it off with a decorative duvet or comforter. Mix and match patterns and textures for a personalized touch.
- Throw Pillows: Arrange decorative throw pillows on the trundle bed. Choose a variety of sizes and colors to complement the room's overall theme. Pillows not only add comfort but also enhance the aesthetics.
- Coordinated Colors: Coordinate the bedding colors with the room's palette. If the walls are neutral, consider adding pops of color through the bedding.
2. Under-Bed Storage Solutions:
- Storage Drawers: Many trundle beds come with built-in storage drawers beneath the lower bed. Use these drawers to store extra bedding, seasonal clothing, or even toys. Keep the space organized and clutter-free.
- Wicker Baskets: If your trundle bed doesn't have storage drawers, consider placing wicker baskets or fabric bins underneath. These provide a rustic touch and are perfect for stashing blankets, books, or magazines.
3. Lighting and Ambiance:
- String Lights: Drape fairy lights or string lights around the trundle bed frame. They build a cozy and magical atmosphere, especially in children's rooms.
- Bedside Lamps: Place small bedside lamps on the trundle bed's headboard or nearby furniture. Adjustable reading lamps are practical for bedtime reading.
4. Bed Skirts and Valances:
- Bed Skirts: Conceal the trundle bed frame with a bed skirt. Choose a fabric that complements the room decor. Bed skirts add a polished look and hide any under-bed clutter.
- Valances: If your trundle bed is against a wall, consider adding a valance or fabric panel to cover the exposed side. This adds a finished appearance and softens the edges.
5. Personal Touches:
- Photos and Artwork: Hang framed photos or artwork above the trundle bed. Family pictures, travel memories, or inspirational quotes can personalize the space.
- Mobiles or Garlands: Hang decorative mobiles or garlands from the trundle bed's ceiling. These whimsical additions are especially delightful in kids' rooms.
Avoid overcrowding the space, and let your creativity shine while keeping comfort and functionality in mind.
FAQs About DIY Trundle Bed
Get answers to commonly asked questions about DIY trundle bed projects. Learn tips, tricks, and step-by-step guides for building your own space-saving bed.
1. What Is a Trundle Bed?
A trundle bed is a clever space-saving solution that consists of two beds stacked together. The main bed (usually a twin or full-size) sits atop a lower bed (the trundle), which can be pulled out when needed. Trundle beds are perfect for accommodating guests, especially in smaller living spaces.
2. Why Should I Consider Building a DIY Trundle Bed?
Building your own trundle bed has several advantages:
- Cost-Effective: Purchasing a trundle bed can be expensive, but DIYing one allows you to save money.
- Customization: You can tailor the design, size, and finish to match your room decor.
- Satisfaction: Crafting your own furniture provides a sense of accomplishment.
3. Can I Make a Kid-Friendly Trundle Bed?
Absolutely! Follow these steps:
- Use plywood for the frame.
- Add casters for mobility.
- Paint it in fun colors to appeal to kids.
- Now they'll have a cozy spot for sleepovers.
4. How Do I Build a Trundle Bed on Wheels?
For a mobile trundle bed:
- Choose hardwood for the frame.
- Attach caster wheels to the bottom.
- Ensure it fits under an existing bed.
- Slide it out when needed—perfect for guests!
Whether you're hosting friends or need an extra bed for family, building your own trundle bed is a rewarding project!
Conclusion:
Wrapping up the DIY trundle bed article, building your own trundle bed can be a fun and rewarding project. With the step-by-step guide provided, you can build a practical and stylish bed that maximizes space in your home.


