If you're into metalworking, fabricating custom parts, or tackling a project that requires bending tubes, you've probably thought about getting a tube bender. These tools are game-changers for shaping tubes—whether it's for roll cages, exhaust systems, or structural frames. But what if you could build your own DIY tube bender and not only save money but also build a tool perfectly customized for your needs? That's exactly what we're here to show you in this comprehensive guide.
Get ready to dive deep into the world of DIY tube benders! We'll cover everything—from basic concepts and design considerations to step-by-step building instructions and tips for avoiding common mistakes. Whether you're just starting out or you've got some fabrication experience under your belt, this guide will give you the knowledge, confidence, and inspiration to build your own high-performance tube bender.
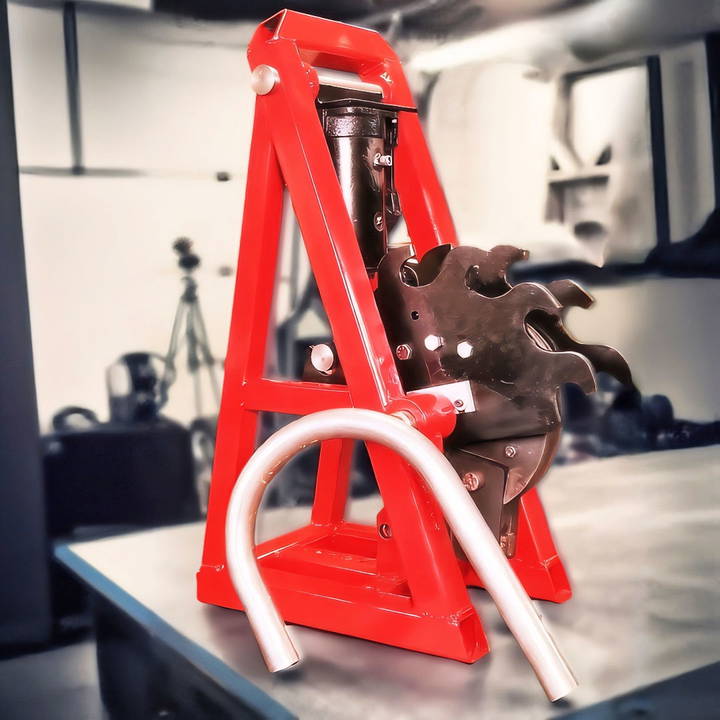
Why Build Your Own Tube Bender?
The market offers a wide variety of tube benders, from hand-operated ones to hydraulic machines. So, why build one yourself? Here are a few compelling reasons:
- Cost Efficiency: Tube benders, especially high-quality hydraulic models, can be expensive, often running into thousands of dollars. Building your own from materials you may already have can save significant money.
- Customization: A DIY tube bender can be tailored to fit your specific needs. You can adjust the dimensions, the degree of bending, and the materials to build something that works precisely how you need it to.
- Learning and Satisfaction: Building your own tool offers invaluable hands-on experience. Plus, there's nothing quite like the satisfaction of using a tool you made yourself, especially one that performs as well (if not better) than commercial options.
Now, let's jump into the process of building a DIY tube bender.
Tools and Materials You Will Need
Before starting, gather all the necessary tools and materials. Depending on the design you choose, the list may vary slightly, but these are the typical components:
Basic Materials:
- Steel Tubing or Plate: For the frame and various components of the bender.
- Bushings: These are necessary for the pivot points in the frame and the die assembly.
- A Bottle Jack: A hydraulic jack is often used to provide the force required to bend the tube. A 20-ton jack is a popular choice for heavy-duty tube bending.
- Die: You'll need a die that fits the size of the tubing you want to bend. You can either buy one or, as demonstrated in the transcript, build it yourself by welding together quarter-inch thick steel blades.
- Miscellaneous Fasteners: Bolts, nuts, washers, etc.
Tools Required:
- Welder: A sturdy frame is essential, and welding the parts together is one of the most reliable ways to achieve this.
- Drill Press or Milling Machine: For making precise holes in the frame to fit bushings and other components.
- Lathe: If you're machining custom parts like bushings, you'll need a lathe.
- Angle Grinder or Plasma Cutter: For cutting the steel tubing or plates to the desired size.
- Measuring Tools: A caliper, tape measure, and square will help you ensure everything is aligned and correctly measured.
- Safety Equipment: Safety glasses, gloves, and welding gear.
Design Considerations
One of the most critical aspects of building a DIY tube bender is the design. There are multiple tube bender designs out there, and you can even combine different design features, as Vinnie B did in the transcript.
Key Features to Consider:
- Frame Sturdiness: Tube bending requires a lot of force, so you want to ensure the frame is rigid and robust enough to withstand the pressure without bending or breaking. Steel is a common choice for its strength.
- Leverage and Pivot Points: Longer levers reduce the amount of force needed to bend the tube. Your pivot points should be strategically placed to maximize leverage while minimizing internal tension on the frame.
- Bending Capacity: Consider what size of tubes you'll be working with. The die and frame must be able to handle the diameter and thickness of the tubing you plan to bend. For example, in the transcript, the builder faced challenges bending thicker DOM tubing due to limitations in his initial design.
- Hydraulic Power: A bottle jack is often used to provide the force for bending. Using an inverted jack can give you more control over the bending process, allowing for precise adjustments and cleaner bends.
- Portability vs. Stationary Setup: Decide if you want your bender to be a permanent fixture in your shop or something you can move around as needed. A larger, heavier bender will typically be more stable but less portable.
Step by Step Instructions
Learn how to build your own tube bender with our step-by-step guide. Perfect your project with expert tips and avoid common pitfalls.
Step 1: Designing the Frame
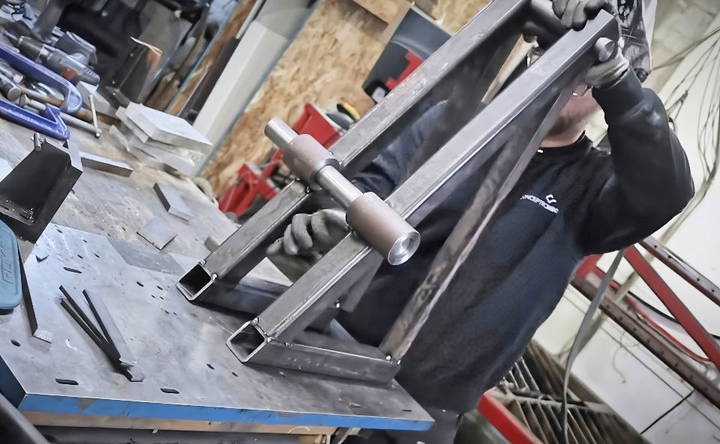
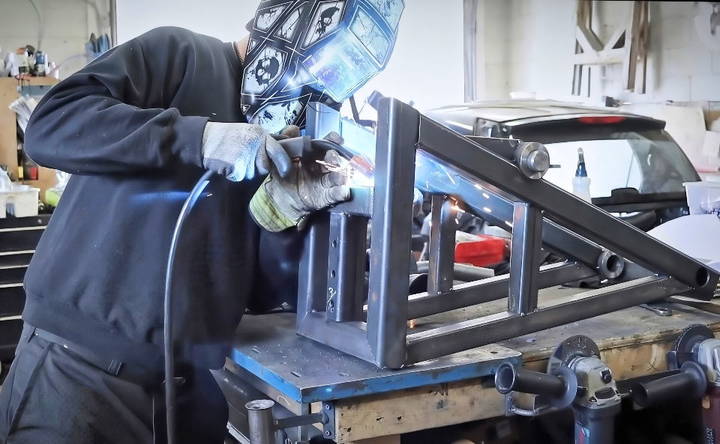
The frame is the foundation of your tube bender. It needs to be strong enough to handle the forces exerted during the bending process. If you're planning to use a hydraulic jack, ensure that the frame can securely hold the jack and the die assembly.
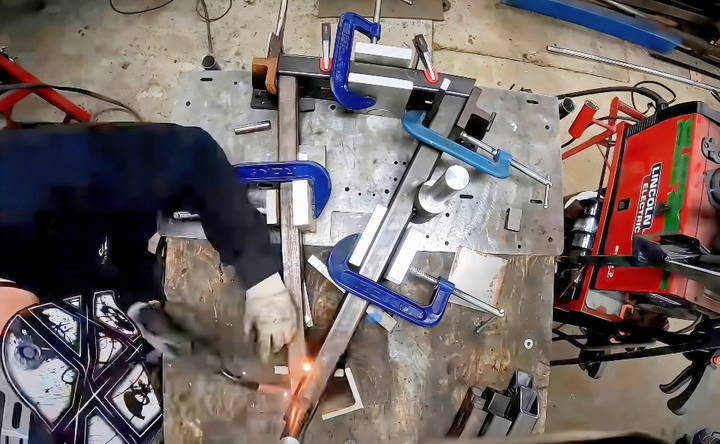
- Measure and Cut the Steel: Using your angle grinder or plasma cutter, cut the steel tubing or plates to the dimensions required for your frame.
- Weld the Frame Together: Once the pieces are cut, weld them together at the appropriate angles. Ensure that everything is square and aligned properly.
Step 2: Machining the Bushings and Pivot Points
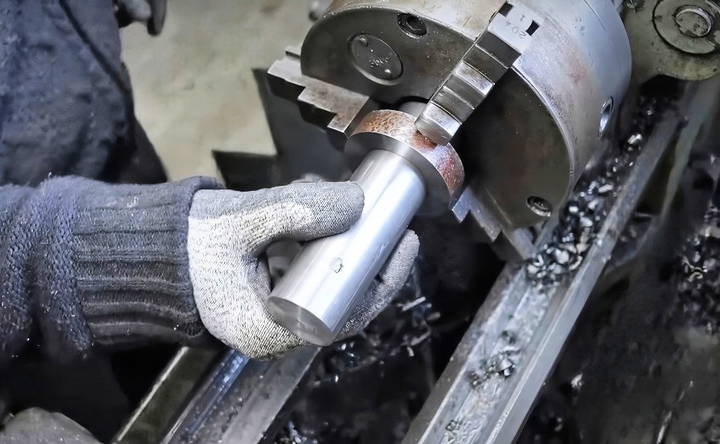
Bushings are critical for smooth movement in your tube bender. In the transcript, Vinnie B mentions machining bushings for the two main pivot points—one for the die and the other for the bottle jack.
- Machine the Bushings: Using a lathe, machine the bushings to the correct dimensions. They need to fit snugly into the pivot holes you'll drill into the frame.
- Drill Holes for Pivot Points: On a drill press or milling machine, drill the holes where the bushings will be placed. These should be perfectly aligned to ensure smooth operation.
Step 3: Attaching the Bottle Jack
The bottle jack is the powerhouse of your tube bender. An inverted bottle jack, as used in the build from the transcript, allows for more precise control and better leverage.
- Position the Jack: Attach the jack to the frame so that it will push against the die when activated. Use fasteners or welding to secure it firmly in place.
- Install the Pivoting Mechanism: This allows the jack to push smoothly against the die without making undue stress on the frame.
Step 4: Constructing the Die
The die is arguably the most critical part of your tube bender, as it shapes the tube during the bending process. In the DIY world, you can either buy a pre-made die or build one yourself.
- Build the Die: As seen in the transcript, you can construct the die by welding multiple steel blades together to build the desired shape.
- Reinforce the Die: Add reinforcement plates to the die to prevent it from deforming or making unwanted flat spots in the tube.
Step 5: Assembly and Testing
Once all the components are ready, it's time to assemble the bender and give it a test run.
- Assemble the Components: Fit the bushings, jack, and die together onto the frame. Ensure that everything moves smoothly and is well-aligned.
- Test Bend: Try bending a sample piece of tubing to see how your bender performs. Pay close attention to any areas where the frame flexes or the tubing deforms in unintended ways.
Step 6: Fine-Tuning
After your first test, you may notice some design flaws or areas that need improvement. In the transcript, the builder found that adding a “bullet” inside the tube helped prevent flattening during bends. Similarly, you may need to tweak your design to get optimal results.
- Make Adjustments: Reinforce any weak points in the frame, adjust the position of the jack, or experiment with different dies to perfect your bender.
I'll continue the rest of the guide in the next message to cover additional aspects and wrap up the article.
Step 7: Adding a Bullet or Internal Mandrel
One of the common issues in tube bending, especially when working with thin-walled tubes, is the tendency for the tube to flatten or wrinkle. To counteract this, builders often use a "bullet" or internal mandrel. In the transcript, the builder implemented this feature with great success.
- What is a Bullet?: A bullet or mandrel is a device that goes inside the tube as you bend it, helping the tube maintain its round shape by providing internal support. In high-end tube benders, these devices are often adjustable to fit different tube sizes.
- Building the Bullet: You can build your own bullet by machining a round insert that fits snugly into the tube you're working with. The bullet should be smooth and durable to prevent any deformation of the tube.
- Testing the Bullet: Once you've built and installed the bullet, conduct a new round of tests to see how well it prevents flattening. In the transcript, the builder was able to achieve near-perfect bends with the bullet installed.
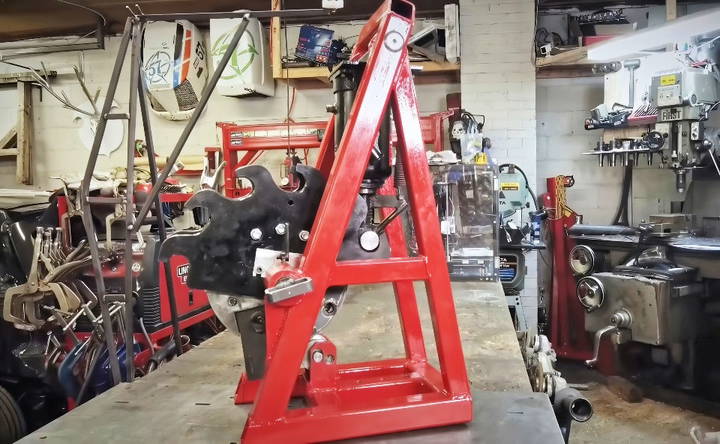
Step 8: Painting and Final Touches
Once your tube bender is fully functional and you've worked out any design flaws, it's time to add some finishing touches. A fresh coat of paint will protect your bender from rust and give it a professional look.
- Prep the Surface: Before painting, make sure all surfaces are clean and free of oil, rust, or debris. You can use a wire brush or sandpaper to prep the surface.
- Apply Paint: Choose a high-durability, industrial-grade paint to ensure that it withstands the wear and tear of regular use. Apply multiple coats if necessary, allowing adequate drying time between each layer.
Tips and Tricks for Optimizing Your DIY Tube Bender
Even after building your tube bender, there are a few techniques and adjustments you can make to ensure it works as efficiently and effectively as possible.
- Leverage Matters: The length of the lever on your tube bender has a significant impact on how much effort is required to bend the tube. A longer lever reduces the amount of force needed, making it easier to achieve precise bends, especially with thicker tubing. If your design allows, consider adding an extension or making the lever adjustable so you can switch between different lengths depending on the tube material.
- Reduce Friction: Friction between the tube and the die can lead to inconsistencies in your bends. To reduce friction, you can apply lubricant to the die and the tube before bending. Common lubricants include machine oil or specialized tube bending gels. This will make the bending process smoother and help prevent unwanted wear on your die and tubing.
- Precision Alignment: When setting up your bender, take the time to ensure that the die and jack are perfectly aligned. Misalignment can cause uneven bending, where one side of the tube might flatten more than the other. Use a caliper and level to make sure everything is square before you begin bending.
- Preheat the Tubing: In some cases, especially when bending thicker or harder materials like DOM tubing, preheating the tube can make the bending process easier. Heating the metal makes it more pliable and reduces the amount of force needed. However, be cautious not to overheat the tube, as this can weaken the material and result in a less durable bend.
- Use a Bending Guide: If you need to make multiple bends at specific angles, a bending guide can be extremely helpful. This is a simple protractor-like device that attaches to your bender and lets you see exactly how far you've bent the tube. You can either buy a commercial guide or make your own by attaching a simple angle finder to the frame of your bender.
- Avoid Over-Bending: One common mistake for beginners is over-bending the tube. Once you go past the desired angle, it's difficult to correct. To prevent this, bend the tube in small increments and check your progress frequently. If you do happen to over-bend, you might be able to salvage the piece by gently applying force in the opposite direction, but be cautious as this can cause the tube to wrinkle.
- Choosing the Right Die: Different tube sizes and materials require different dies. Using the wrong die can result in poor-quality bends, including kinks or flattened sections. Invest in a set of high-quality dies that fit the most common sizes of tubing you'll be working with. You can even machine your own if you have the tools and experience, as Vinnie B did in the transcript.
Common Pitfalls and How to Avoid Them
Learn how to identify and avoid common pitfalls with expert tips. Enhance success and minimize mistakes for improved outcomes.
- Frame Flexing: If your frame isn't strong enough, it will flex during the bending process, which can lead to uneven bends or even breakage. Make sure to use thick steel tubing for the frame and reinforce any weak points. As seen in the transcript, the builder had to go back to the drawing board after the first version of his tube bender failed under pressure.
- Tube Flattening: As mentioned earlier, tube flattening is a common problem in DIY tube benders. Using a bullet or internal mandrel is one way to prevent this, but another tip is to bend the tube more slowly. Rushing the process can cause the metal to deform, especially with thinner-walled tubes.
- Incorrect Die Placement: The position of the die in relation to the tube is crucial. If the tube isn't seated properly in the die, it can result in a poor-quality bend. Always double-check that the tube is aligned correctly before starting the bending process.
- Welding Distortion: If you're welding parts of your bender together, be aware that the heat from welding can cause the metal to warp or distort. This can throw off the alignment of your bender and lead to inaccurate bends. One way to prevent this is by welding in short bursts and allowing the metal to cool between welds.
- Underpowered Hydraulic System: If you're using a bottle jack to power your bender, make sure it has enough force to bend the tubes you're working with. A 20-ton bottle jack is a good starting point for most DIY projects, but for larger tubes, you might need more power. If your jack is underpowered, you'll struggle to get clean, precise bends.
When Should You Consider Buying a Tube Bender?
Building your own tube bender is a rewarding project, but it's not for everyone. Here are a few instances where you might want to consider purchasing a commercial tube bender instead:
- You Need Precision Bending for Professional Work: If you're working on high-end projects that require extreme precision, a commercial tube bender may be the better option. These machines are engineered for consistency and come with features that may be difficult to replicate in a DIY build.
- Time Constraints: Building your own tube bender can take several days or even weeks, depending on your experience level and the tools you have available. If you're on a tight timeline, buying a ready-made bender might be the faster solution.
- No Access to Required Tools: While this guide provides alternatives for many steps, building a tube bender still requires some advanced tools, such as a welder and lathe. If you don't have access to these, purchasing a bender might be more practical.
Conclusion: Build Your Own Tube Bender and Take Control of Your Projects
Building your own DIY tube bender is a practical, cost-effective solution for anyone who frequently works with metal tubing. Not only do you gain a valuable tool, but the process also teaches you a lot about fabrication, mechanics, and engineering.
By following the steps outlined in this guide, you'll be well on your way to making a reliable and effective tube bender that's perfectly suited for your needs. Whether you're bending roll cages, exhaust pipes, or other structural elements, your DIY bender can give you professional-level results at a fraction of the cost.
So, gather your tools, sketch out your design, and start building. With some time, patience, and elbow grease, you'll have a tube bender that's ready to tackle any project you throw at it. And remember: the best tools are often the ones you build yourself.
FAQs About DIY Tube Benders
Discover answers to common questions about DIY tube benders to enhance your projects with efficiency and precision.
The "bullet" is a crucial component used inside the tube during bending to maintain its round shape and prevent flattening. It’s commonly referred to as a mandrel in professional setups. This helps achieve smooth, wrinkle-free bends, especially for thin-walled tubing.
Running a bottle jack inverted in a tube bender maximizes its pushing power while ensuring better leverage and bending precision. This orientation is particularly useful when you need controlled, incremental bends.
The bullet is attached to a threaded rod that holds it in place, preventing it from moving excessively during the bending process. This allows it to support the tube without getting stuck, especially in thicker-walled tubing.
An upright jack doesn’t provide the same level of control for precise bending as an inverted jack. The inverted setup allows for better alignment and efficient force application without compromising the frame or die.
Yes, the design can be adapted to different tube sizes. You may need to adjust the dies or build a “sleeved-die” setup, where inserts are used to fit smaller tube sizes within the same die.
If the tube flattens, consider using a bullet (mandrel) to maintain its shape. Additionally, packing the tube with sand before bending can help prevent deformation. Slow, incremental bending also reduces the risk of flattening.
Yes, it's possible to convert a bottle jack into an air-over-hydraulic or electric-hydraulic system. This modification speeds up the bending process and reduces manual labor. It's recommended for frequent use.
While the builder may have used materials on hand, constructing a DIY tube bender can still incur costs for steel, dies, and tools. However, for those with a well-equipped workshop, the build can be low-cost or even "free" if using scrap materials.
Many builders use CAD software like SolidWorks to design tube benders. This allows for precise planning and adjustments before cutting or assembling any materials.
The builder decided not to sell the plans because the dies used are hard to fabricate. Selling plans for a project that requires expensive or difficult-to-manufacture parts might be seen as impractical or unfair to buyers.


