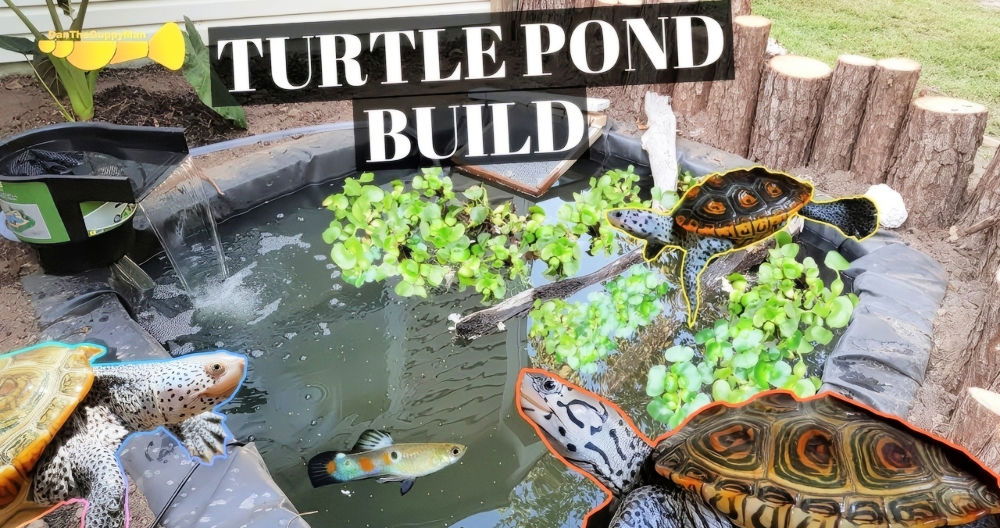
Setting up a DIY turtle tank can be a fun and rewarding project. Start by selecting a suitable tank, ensuring it is spacious enough for your turtle to roam and swim. Install a reliable filtration system to maintain clean water, which is essential for your turtle's health. Make sure to incorporate a basking area using rocks or a floating platform where your turtle can rest and absorb heat.
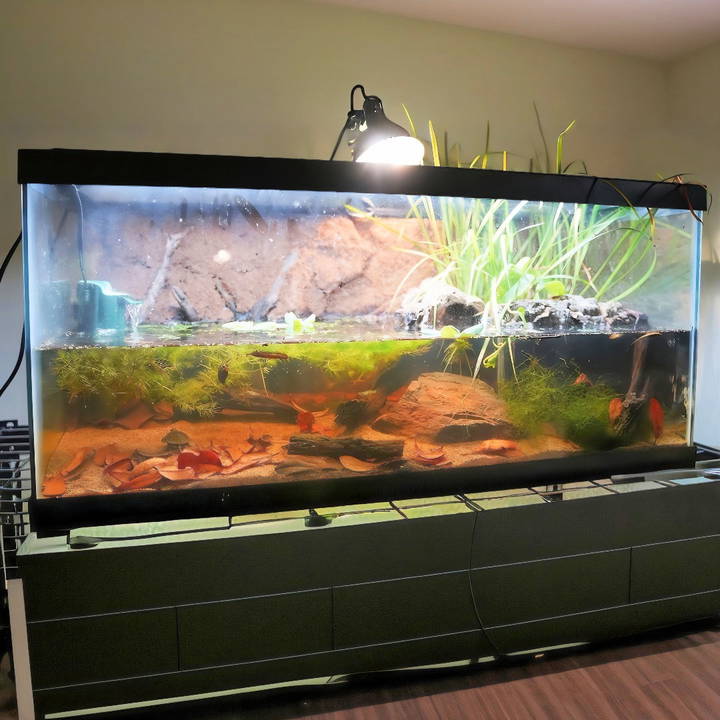
Next, consider the overall environment of the turtle tank. Maintain a temperature gradient using a water heater and UVB lighting to replicate natural sunlight, crucial for shell and bone health. Decorate the tank with aquatic plants and hiding spots to build a stimulating habitat. Regularly check water quality and clean the tank to provide a safe and hygienic home for your turtle.
Explore the next section for detailed steps on assembling and maintaining your DIY turtle tank, ensuring your turtle thrives in its new habitat.
Materials Needed
Before we dive into the process, here's a list of materials you'll need and why each is essential:
- 40-Gallon Breeder Tank: This will be the base of your paludarium.
- Clorox Wipes: For cleaning the tank.
- Silicone (All-Purpose, 100% Waterproof, Clear): To seal all the parts together.
- Egg Crate Light Diffuser: To distribute the weight of the stones.
- Driftwood and Rocks: For decoration and to build hiding spots.
- Great Stuff Pond and Stone Foam: To build landforms and keep things in place.
- Coco Fiber Mat: For the background to add a natural look.
- Substrate Components:
- Sphagnum Moss: Helps retain moisture.
- Eco Earth Coco Fiber: Provides a natural growing medium.
- Orchid Bark: Adds texture to the substrate.
- Activated Charcoal: Helps with drainage and odor control.
- Plants (e.g., Golden Pothos, Water Lettuce): To enhance the look and improve water quality.
- UVB and Full Spectrum Light Fixtures: To provide necessary lighting for your turtles.
- Filter and Filter Media: Keeps the water clean and clear.
Step by Step Instructions
Make a personalized, eco-friendly habitat with our DIY turtle tank guide. Step-by-step instructions from prepping the tank to adding turtles.
Step 1: Prepping the Tank
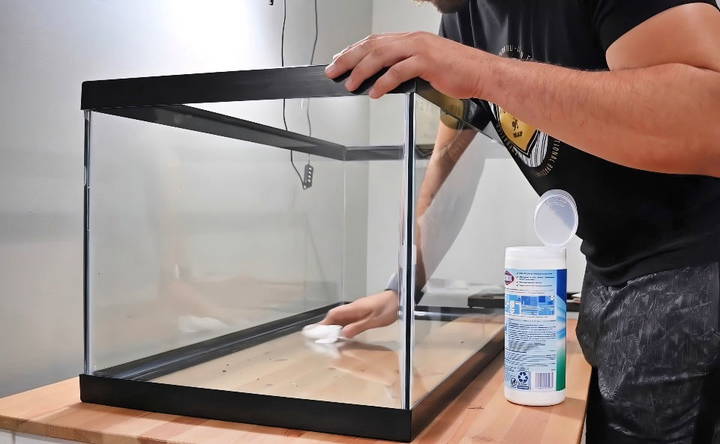
- Clean the Tank Thoroughly: First, I grabbed a 40-gallon breeder tank. I wiped it down meticulously with Clorox wipes to ensure it was free from any contaminants that could harm my turtles.
Step 2: Installing Dividers
- Make Separate Areas: Unlike Tanner Serpa, who cuts glass for his projects, I opted for ready-made glass dividers.
I applied all-purpose silicone along the edges of the glass panels and fixed them into the tank to build land and water sections. Wearing gloves made this step less messy since the silicone can be quite stubborn to clean off your hands.
Step 3: Building the Land Structure
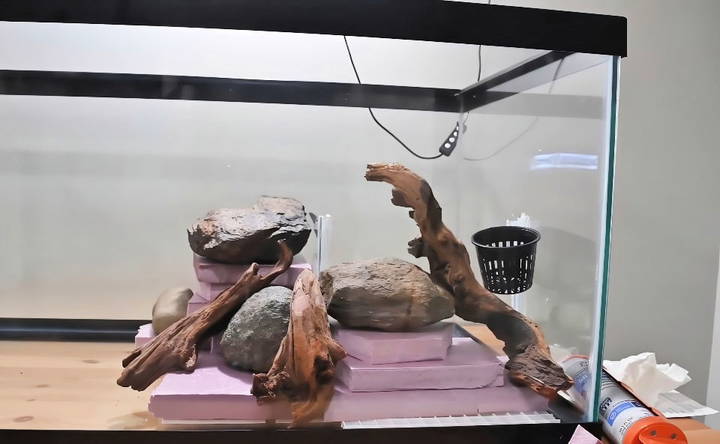
- Add Support and Structure: For the landform, I used an egg crate light diffuser as the base to distribute the weight evenly. I arranged pieces of broken-up foam, driftwood, and rocks (which I got from a local aquarium shop). This step needs creativity, so feel free to arrange them in any way that looks appealing and functional.
- Apply the Foam: Next, I added Great Stuff pond and stone foam to solidify the structure. While foaming, it's critical to weigh down the foam to prevent it from floating later on. Unfortunately, I later learned that I didn't use enough rocks, which caused some floating issues.
Step 4: Carving and Refining the Foam
- Shape the Foam: Once the foam hardened, I used a carving knife to shape the foam to my desired form. This part may seem tedious, but it ensures that the foam landscape looks natural and provides the right texture for the next steps.
Step 5: Decorating the Background
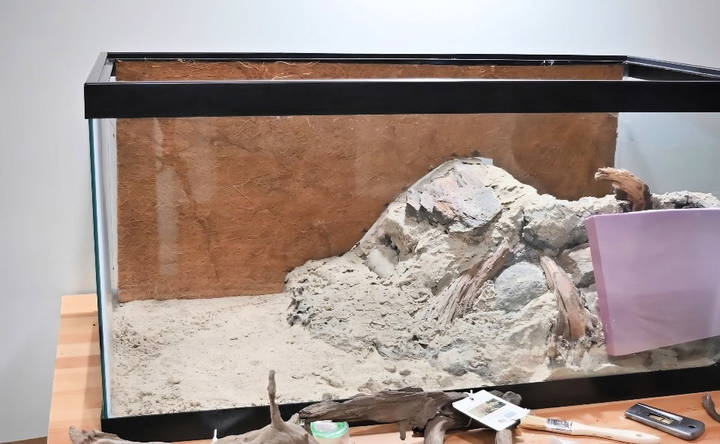
- Apply the Coco Fiber Mat: Silicone the coco fiber mat onto the background of the tank to give it a natural, earthy appearance. This background not only looks good but also provides a climbing and basking surface for the turtles.
- Foam in Driftwood: Turning the tank on its side, I secured pieces of driftwood with foam to add dimension and contours, making the background more dynamic.
Step 6: Preparing the Substrate
- Making the Mixture: I designed a spongy, moisture-retaining substrate by mixing sphagnum moss, eco earth coco fiber, orchid bark, and activated charcoal. This mix builds a perfect environment for plant growth and prevents substrate compression, which turtles dislike.
Step 7: Setting Up the Water Section
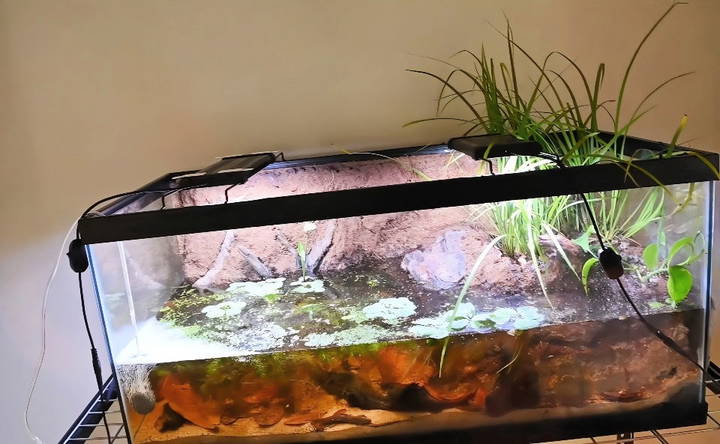
- Fill with Water and Add Plants: After filling the water section, I added Indian almond leaves and oak leaves for natural tannins. I also included water lettuce for additional natural filtration.
- Install a Bubbler and Filter: To keep the water clean, I initially placed an air stone but eventually switched to a filter filled with filter floss and aquarium sponge. The filter helps in maintaining the water quality without pulling out all the nitrates necessary for plant growth.
Step 8: Lighting and Finishing Touches
- Install Lighting: For proper UVB exposure, I installed Zoo Med Labs' full spectrum light fixture with a UVB bulb. I used Velcro to secure the light fixture above the tank, ensuring it's stable and effective.
- Final Adjustments and Improvements: After the initial setup, I encountered a floating issue with the foam, forcing me to improvise. I replaced the floating sections with cork bark rounds, securing them tightly. This added more functionality and aesthetics to the tank, providing caves for the turtles and better swimming space.
Step 9: Adding the Turtles
- Introducing the Turtles: After ensuring everything was in place and functional, I introduced my Blanding's turtles to their new habitat. They absolutely loved basking on the cork bark and exploring the lush land area and water sections.
Maintaining the Paludarium
- Regular Checks: Maintain the tank by checking water quality, cleaning the filter, and ensuring the lighting is functional. Keep an eye on the plants and substrate, adding water or nutrients as needed to keep everything thriving.
Troubleshooting Your DIY Turtle Tank
When it comes to maintaining a healthy environment for your turtle, encountering issues is common. Here's a straightforward guide to troubleshooting common problems in a DIY turtle tank:
Unclear Water
- Cause: Overfeeding, inadequate filtration, or lack of water changes.
- Solution: Reduce feeding, improve filtration, and establish a regular water change schedule.
Algae Growth
- Cause: Excessive light or nutrients in the water.
- Solution: Limit light exposure to 10-12 hours a day and clean the tank regularly to remove excess food and waste.
Foul Odor
- Cause: Decaying organic matter or poor water quality.
- Solution: Clean the tank thoroughly, check the filter's performance, and ensure proper water quality.
Turtle Health Issues
- Symptoms: Lethargy, loss of appetite, or visible wounds.
- Solution: Consult a veterinarian, as these could be signs of illness or injury.
Equipment Failure
- Cause: Wear and tear or electrical issues.
- Solution: Regularly inspect and maintain equipment. Have a backup plan for essential components like heaters and filters.
Fluctuating Water Temperature
- Cause: Heater malfunction or incorrect settings.
- Solution: Verify the heater's function and adjust settings according to the turtle's needs.
Consistent care ensures a thriving turtle habitat. When in doubt, consult a professional. Maintain cleanliness, high water quality, and working equipment for a happy, healthy turtle.
FAQs About DIY Turtle Tank
Discover essential FAQs about DIY turtle tank setups, including tips, materials, and care guidelines for happy and healthy turtles.
The size of your turtle tank should be based on the size and species of your turtle. As a general rule, provide 10 gallons of water for every inch of your turtle’s shell length. For example, a turtle with a 5-inch shell should have a 50-gallon tank. This ensures enough space for swimming and basking.
Yes, you can use tap water in your turtle tank, but it's important to treat it with a water conditioner to remove chlorine, chloramines, and other harmful chemicals. Alternatively, you can let the water sit for 24-48 hours to allow the chlorine to evaporate before adding it to the tank.
Maintaining a healthy environment involves regular water changes, typically 25% every week, and monitoring water parameters like pH and ammonia levels. Use a water filter to help keep the water clean and clear. Also, remove uneaten food and waste promptly to prevent water contamination.
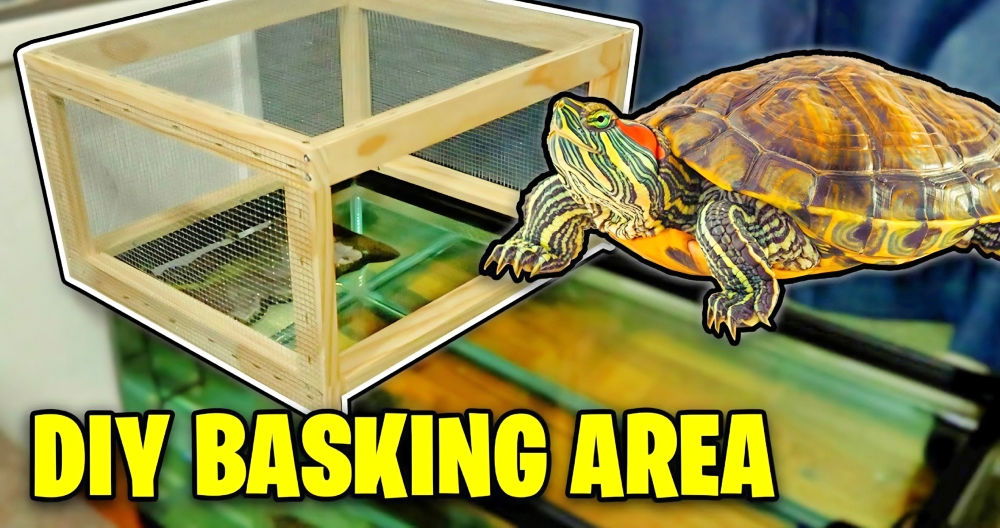
To build a basking area, you need a flat, stable surface above the water level where your turtle can dry off and absorb heat and UVB light. You can use commercially available floating docks or build your own using non-toxic materials like rocks, driftwood, or foam platforms. Ensure the basking area is easily accessible and secure for your turtle.
Ensuring water quality is crucial for the health of your turtle. Regularly test the water for nitrate, nitrite, ammonia levels, and pH. Aim to keep ammonia and nitrite levels at zero and nitrates below 20 ppm. The pH should be stable, ideally between 6.5 and 8. Use a reliable water testing kit to monitor these parameters. Additionally, a good filtration system is essential to maintain clean water and reduce the frequency of water changes.
Conclusion:
Wrapping up, building a DIY turtle tank can be a rewarding project that provides a perfect habitat for your pet turtle. By following the steps discussed, you can build a customized, comfortable, and healthy environment. Remember, a well-maintained turtle tank contributes significantly to your turtle's well-being.


