As someone always on the lookout for DIY projects that can save money and enhance my lifestyle, I recently stumbled upon a fascinating challenge: building what was claimed to be the "most powerful antenna in the world." The promise? Plugging this homemade wonder into my TV to unlock all the channels, completely free. Intrigued by the potential, I decided to dive in, and here's how I did it.
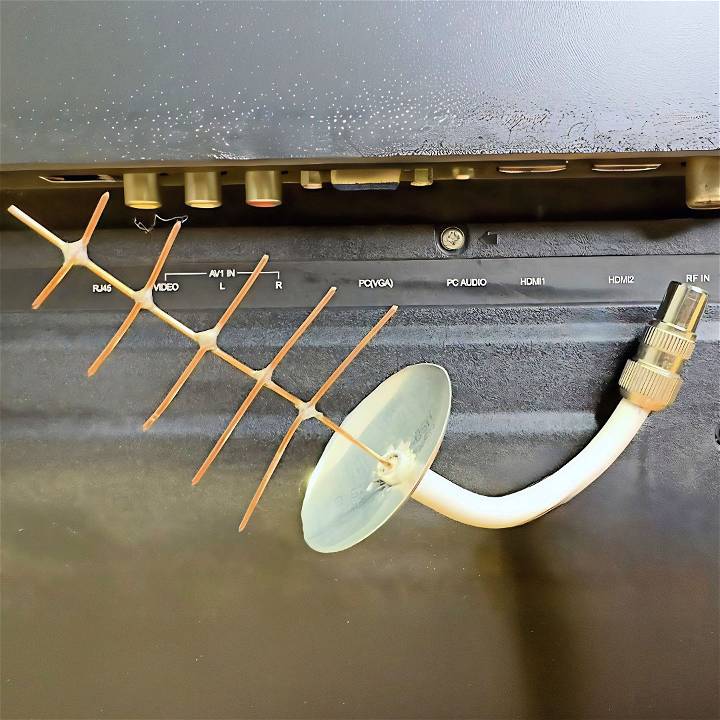
Gathering the Materials
The materials list was surprisingly short, a refreshing change from other DIY projects that seem to require half the hardware store. Here's what I needed:
- An aluminum can (I used a Coca-Cola can): This acts as the reflective surface for the antenna.
- A piece of coaxial cable, about 15 cm long: This is what connects the antenna to the TV, transmitting the signal it captures.
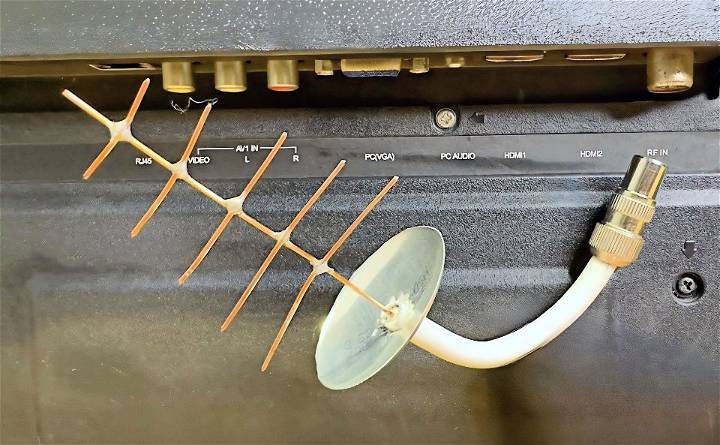
- Five pieces of copper wire: These serve as the actual receiving elements of the antenna.
- Soldering tools and solder: For attaching the wires and ensuring good electrical connections.
- A drill with a 9mm bit: To make a hole in the can for the antenna parts to fit through.
Each material plays a crucial role in the construction and performance of the antenna, from the can's reflective properties to the specific dimensions of the coaxial cable and copper wire. As I gathered these items, I was struck by the simplicity of the concept, yet I was eager to see if it could genuinely deliver.
Step by Step Instructions
Learn how to make a DIY TV antenna with our step-by-step instructions. Save money and get better reception with this easy project.
Step One: Preparing the Can
The first step involved drilling a hole in the bottom of the aluminum can. The precision here mattered; the 9mm drill bit was the perfect size to ensure the coaxial cable and wires would fit snugly, optimizing the antenna's performance. This process made me appreciate the importance of accuracy in DIY projects; small details can significantly impact the outcome.
Step Two: Attaching the Coaxial Cable
Next, I prepared the coaxial cable, stripping one end to expose the inner wiring, which I would later solder to the can. This step was crucial for establishing a solid connection between the antenna and my TV. The meticulous stripping and soldering process underscored the value of patience and precision in achieving the best results.
Step Three: Adding the Copper Wires
The copper wires were cut and shaped to serve as the antenna's receptors. Attaching them at specific points around the can's rim required a steady hand and a bit of soldering skill. Each wire had to be placed just so, optimizing the antenna's ability to capture signals. This stage of the project illustrated the importance of attention to detail; each wire's placement could enhance or diminish the antenna's effectiveness.
Step Four: Final Assembly
With all the components prepared, it was time to assemble the antenna. The coaxial cable went through the hole in the can, connecting to the TV, while the copper wires radiated outward, ready to catch broadcast signals. The final step was positioning the antenna in an optimal location, preferably high and with minimal obstructions. This was a reminder of the practical aspects of antenna use; even a powerful DIY antenna must be sensibly placed to work well.
The Result: A Powerful Antenna
After completing the assembly and connecting the antenna to my TV, the moment of truth arrived. To my amazement, the screen filled with clear, free channels. The performance of this homemade antenna exceeded all my expectations, providing a wealth of viewing options without the need for expensive subscriptions or equipment.
Troubleshooting Common Issues
When embarking on the journey of building your own DIY TV antenna, you might encounter a few hiccups along the way. Don't worry; this is a normal part of the DIY process. Here's a helpful guide to troubleshooting some common issues you may face, ensuring your antenna provides the best possible reception.
Problem: Weak or No Signal
- Check Connections: Ensure all connections are secure. Loose cables can lead to signal loss.
- Reposition Antenna: Sometimes, simply adjusting the position of your antenna can improve reception. Try different locations in your home.
- Obstructions: Remove or avoid physical obstructions that may block the signal, such as large furniture or walls.
Problem: Pixelation or Signal Freeze
- Signal Interference: Keep your antenna away from electronic devices that could cause interference, like microwaves or wireless routers.
- Weather Conditions: Bad weather can affect signal strength. If the problem is intermittent, it might just be the weather.
Problem: Only Receiving Certain Channels
- Rescan for Channels: Your TV might need to rescan for channels if you've moved the antenna or after a weather event.
- Frequency Adjustment: Some antennas have adjustable dials for fine-tuning frequency. Consult your antenna's manual for guidance.
Problem: Antenna Damage
- Inspect for Damage: Check your antenna for any visible signs of damage, such as bent elements or broken parts.
- DIY Repairs: Simple repairs can often be done with household items. For example, use aluminum foil to improve conductivity or tape for securing loose parts.
Safety Tip: Always prioritize your safety. If your antenna installation requires climbing or working at heights, make sure to use proper safety equipment and consider seeking professional help if needed.
Keep this troubleshooting guide handy, and you'll be prepared to tackle any challenges that come your way.
Optimizing Antenna Performance
Achieving the best performance from your DIY TV antenna is crucial for clear, uninterrupted viewing. Here's a straightforward guide to optimizing your antenna's performance, ensuring you get the most out of your homemade device.
Location, Location, Location
- Height Matters: The higher you place your antenna, the better the reception. Aim for the highest possible point within your residence.
- Avoid Obstructions: Keep the antenna away from metal objects and electronics that can interfere with signal reception.
Direction is Key
- Find the Broadcast Towers: Use a website or app to locate nearby broadcast towers. Point your antenna in that direction for optimal signal capture.
- Experiment with Placement: Sometimes, the ideal position isn't where you'd expect. Try different spots to see where the signal is strongest.
Fine-Tuning for Perfection
- Adjust the Antenna Elements: If your antenna has adjustable rods or elements, tweak them for better reception of specific channels.
- Scan for Channels Regularly: Rescan for channels periodically, as broadcasters often change frequencies or add new channels.
Minimize Interference
- Use Quality Cables: Invest in high-quality coaxial cables to connect your antenna to your TV, reducing signal loss.
- Keep Cables Short: The shorter the cable, the less likely you are to lose signal strength.
Maintenance is Important
- Regular Checks: Inspect your antenna now and then for any wear and tear, especially if it's outdoors.
- Clean Contacts: Dust and dirt can accumulate on the antenna's contacts, so clean them gently with a dry cloth to ensure a good connection.
By following these tips, you'll enhance your DIY TV antenna's performance significantly. Remember, a little patience and experimentation can go a long way in providing you with the best free-to-air TV experience possible. Enjoy your crystal-clear reception!
FAQs About DIY TV Antennas
Get answers to all your questions about DIY TV antennas in this comprehensive FAQ guide. Learn how to build, install, and troubleshoot your own antenna.
Can I really build an effective TV antenna myself?
Absolutely! Many people have successfully maked their own antennas using household items. With the right instructions and materials, you can build an antenna that captures over-the-air digital signals effectively.
How do I find the best location for my DIY antenna?
The ideal location for your antenna is usually at the highest point in your home, such as an attic or on a roof, and away from obstructions like trees or buildings. Use online tools to find the direction of the nearest broadcast tower and point your antenna accordingly.
Will a DIY antenna work as well as a store-bought one?
In many cases, yes. A well-made DIY antenna can match or even outperform some commercial antennas. The key is precise construction and proper placement to ensure optimal reception.
What are the most common problems with DIY antennas and how can I solve them?
Common issues include weak signals, pixelation, or missing channels. These can often be resolved by checking connections, repositioning the antenna, or rescanning for channels. Regular maintenance and adjustments can also improve performance.
Is it legal to build and use my own TV antenna?
Yes, it is legal to build your own antenna for personal use. However, be sure to check local regulations if you plan to install it outside, as there may be restrictions related to structure height or placement.
By addressing these FAQs, you can feel more confident in your ability to make and optimize a DIY TV antenna, ensuring you enjoy free and clear television broadcasts.
Reflecting on the Project
Building the world's "most powerful antenna" taught me valuable lessons in DIY projects: the importance of precision, the value of patience, and the joy of making something practical and effective. This project wasn't just about saving money on TV channels; it was an enriching experience that combined learning, crafting, and ultimately, achieving.
Whether you're a seasoned DIY enthusiast or a curious beginner, this antenna project is a stellar example of how simple materials, a bit of know-how, and a dash of creativity can yield fantastic results. So, why not give it a try? You might just unlock a world of free TV while discovering the joys of do-it-yourself ingenuity.


