If you've ever looked at your large flat-screen TV and thought it clashed with the aesthetic of your living space, you're not alone. TVs are essential, but they can stick out in a well-designed room. Here's everything you need to know, including materials, steps, and practical tips, so you can make your own beautiful DIY TV frame.
Project Overview
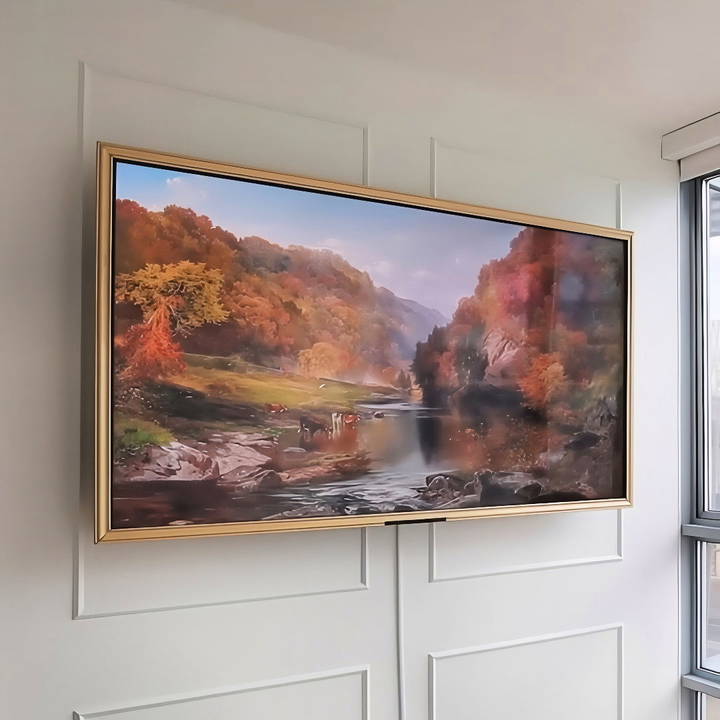
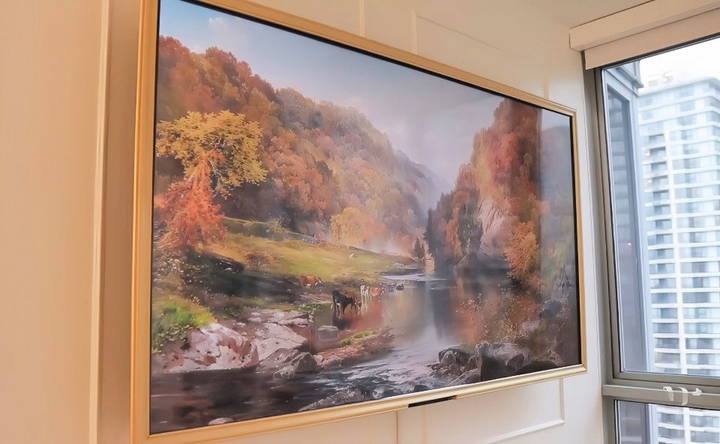
The goal of this project is to disguise a standard TV as an elegant artwork by framing it in a way that complements your room's decor. By mounting the TV and making a custom frame, you can give it a vintage or artistic look that adds sophistication to your living space.
Project Difficulty: Intermediate
Estimated Time: 6-8 hours (excluding drying time for paint and adhesives)
Cost Estimate: Around $100-$200 for materials
Materials and Tools Needed
Discover essential materials and tools for making a stylish TV frame. Enhance your decor with easy-to-follow tips and supplies.
Materials:
- TV Wall Mount: Ensure it's compatible with your TV size and weight.
- Wood for the Frame:
- Molding for the Front Frame: Choose molding that has a decorative style fitting your aesthetic.
- Flat Wood Pieces for the Side Frame
- Drywall Anchors: Heavy-duty ones capable of supporting the weight of your TV.
- Long Screws and Washers: For added security when mounting.
- No More Nails Construction Adhesive: Strong adhesive for joining frame pieces.
- Metallic Paint: Gold or another metallic tone for an antique finish.
- Cord Covers: For hiding visible cords.
- Extension Outlet: Optional, for better cable management.
Tools:
- Electric Drill and Drill Bits: For mounting the TV and making holes in the wall.
- Hand Saw or Jigsaw: For cutting molding and wood pieces.
- Measuring Tape and Level: To ensure accurate alignment.
- Screwdriver: For securing the wall mount and frame.
- Painter's Tape: To hold pieces in place while the adhesive dries.
Step by Step Instructions
Learn how to make a stylish DIY TV frame with step-by-step instructions, from mounting and building to painting and finishing touches.
Step 1: Mounting the TV
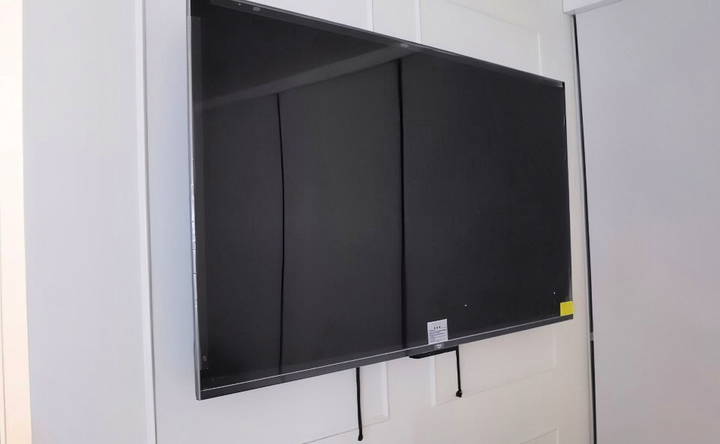
The first step is mounting the TV to the wall, ideally in a spot where it can be viewed comfortably without obstructing decorative wall moldings or other design elements.
- Choose the Right Position: Place the TV so that it aligns well with your eye level. For a clean aesthetic, you may need to mount it slightly higher to avoid blocking any decorative elements on the wall.
- Install the Wall Mount: Attach the TV mount to the back of the TV according to the instructions. Then, determine where the mount should be on the wall. Use a level and mark drill points to ensure it's straight and centered.
- Dealing with Obstacles: When drilling, you may encounter obstacles like metal sheets or electrical boxes inside the wall. If your drill meets resistance, consider using high-quality drywall anchors to support the TV.
- Secure the TV with Anchors: For heavier objects like a TV, standard anchors won't work. Use toggle bolts or similar heavy-duty anchors to ensure stability. Drill holes, insert the anchors, and pull them tight to secure them inside the wall.
- Double Check Stability: Before attaching the TV, test the strength of the mount by lightly pulling or hanging on it (with caution). If the mount holds firmly, it's ready for the TV.
Step 2: Designing and Building the Frame
Once the TV is securely mounted, it's time to build the frame. The design involves two components: a front-facing frame for decoration and a side frame to slide over the TV.
- Select Your Wood and Design: Choose molding that reflects your style. For a vintage or artistic feel, ornate moldings with a classic design can give the frame a luxurious look.
- Cutting the Wood: Measure the dimensions of the TV carefully.
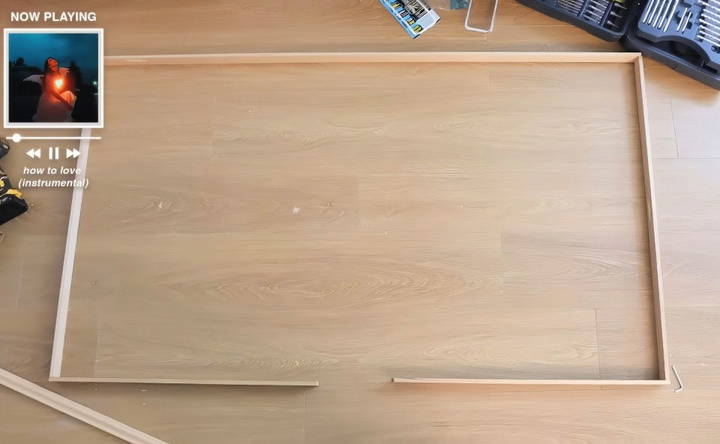
- Cut the flat pieces of wood to match the TV's perimeter for the side frame.
- Use a hand saw or jigsaw to build 45-degree angles at the edges of the front molding for a seamless look.
- Make a Notch for the Sensor: Remember that most TVs have sensors or controls on the front that need to remain unobstructed. Measure and cut out a small notch in the frame molding to allow access to these areas.
- Assemble the Frame: Attach the flat wood pieces to form the side frame.
- Attach the decorative molding pieces for the front frame using nails or construction adhesive.
- Ensure each piece aligns correctly, then let it dry completely before moving on.
Step 3: Attaching the Frame to the TV
To avoid permanently fixing the frame to the TV, the side frame is designed to slide over the TV. Here's how to do it:
- Apply Adhesive Carefully: Attach the front molding to the side frame with construction adhesive. Be cautious to prevent any adhesive from getting on the TV screen.
- Use Painter's Tape for Stability: Hold each piece of the frame in place with the painter's tape while it dries.
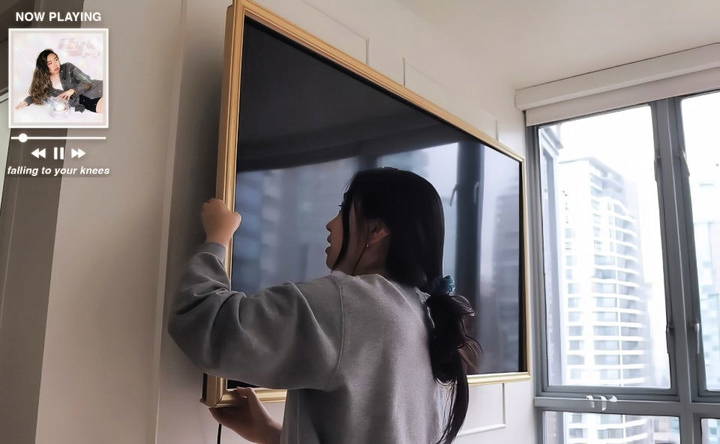
- Fit and Adjust: After the adhesive dries, carefully place the frame over the TV. If it doesn't fit perfectly the first time, make any necessary adjustments by sanding down edges or re-cutting parts of the molding.
Step 4: Painting and Finishing Touches
For the final artistic touch, painting the frame will give it a polished, antique look.
- Choose the Right Paint: A gold or brass metallic paint can lend an antique feel to the frame, making it look like a vintage artwork.
- Apply Even Coats: Use a small brush to apply even coats, focusing on small details of the molding. Allow each coat to dry fully before applying another.
- Optional: Add a Protective Finish: For extra durability, you can add a clear protective finish. This will keep the frame looking fresh over time.
Final Setup and Concealing Wires
With the frame completed and in place, the last step is cable management.
- Use Cord Covers: Hide any exposed cords by using cord covers along the wall. These covers can be painted to match the wall color for a seamless look.
- Attach an Extension Outlet: Install an extension outlet on the wall behind the TV. This will help in plugging in additional devices without visible wires running down the wall.
Troubleshooting Tips and Lessons Learned
Every DIY project has its challenges. Here are a few common issues and tips for handling them:
- Finding Wall Studs: If your wall lacks wooden studs, invest in high-quality drywall anchors designed for heavy-duty applications.
- Frame Fit Issues: If the frame doesn't align perfectly on the first try, don't hesitate to sand down rough edges or re-cut sections as needed.
- Paint Finishing: Sometimes metallic paint doesn't turn out exactly as expected. Test on a small area first, and consider layering with different tones to get the desired finish.
- Securing the Frame: While adhesive works, you may need to add extra support with nails or screws in discrete areas, especially for larger TVs.
- Avoiding Visible Gaps: If there are any visible gaps between the frame and TV, use painter's tape to mask these areas before applying a final paint touch-up.
Conclusion
A DIY TV frame is a brilliant way to turn your flat-screen TV into a decorative piece of art. With careful planning, the right materials, and some patience, you can build a frame that not only blends with your interior but also elevates the aesthetic of your entire room. The key to success is to take each step slowly, test for stability, and add your own unique touch to make the frame a true reflection of your style.
Transforming your TV into an artwork takes effort, but the result is a gorgeous, elegant piece that blends with any decor and brings a unique charm to your living space. Happy DIYing!
FAQs About DIY TV Frame
Discover answers to common questions about DIY TV frames and enhance your living room decor with ease and creativity.
While Samsung’s Frame TV offers built-in art features, you can replicate the effect on other TVs. Many TVs, like Amazon Fire models, allow custom art displays through screensaver settings. Upload images to Amazon Photos or a similar app, then set them as your screensaver for a continuous art display.
No, the frame can stay on while you watch TV. The frame is designed to fit snugly around the TV's edges, leaving the screen fully visible. You may need a notch for sensors or controls, ensuring the remote works without frame interference.
Metal studs require extra caution as they can’t securely hold heavy items. For mounting on walls with metal studs, use toggle bolts or high-quality wall anchors specifically designed for metal framing, which will help secure the TV safely.
Adding a matte screen protector can significantly reduce screen glare, making the TV look more like a framed painting. Matte screens also minimize reflections from windows and lights, enhancing the artwork effect.
Use lightweight wood and select a molding style that matches your room’s decor. Flat wood for the frame sides and decorative moldings for the front work well. Lightweight materials ensure the frame doesn’t add unnecessary strain to the TV mount.
If left on all day, even with dim settings, art mode will increase energy use. To save power, limit art mode use to specific times or occasions. Consider setting a timer if you want the display on only when you're around.
Yes, even if your TV isn't wall-mountable, you can build a frame that rests on a cabinet or console table. Attach the frame directly around the TV's edges, then use sturdy brackets to hold the frame in place without the need for wall mounting.
If the frame doesn't align with the TV on the first try, sand down any edges or re-cut molding sections. Patience and careful adjustments will help achieve a tight fit without noticeable gaps.


