There's something immensely rewarding about crafting a furniture piece with your own hands. I found myself diving headfirst into woodworking during a season where my living space screamed for a bit of a facelift. A mid-century modern TV stand seemed like the perfect challenge. Reflecting on this journey, I hope to provide some practical advice and tips for making your own, ensuring you don't encounter the same hiccups I did.
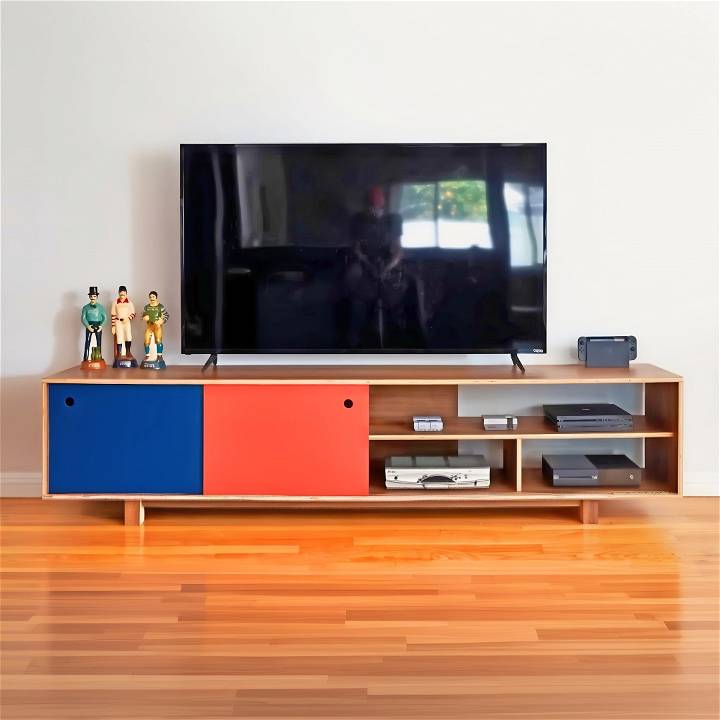
Why Build Your Own TV Stand?
My motivation stemmed from a desire for a furniture piece that wasn't just functional but also aesthetically pleasing—a piece that could hold my TV at the perfect height and complement the rest of my living room with its mid-century flair. The pre-built options either didn't fit the bill or were exorbitantly priced. Thus, the decision to build one became an exciting project.
Materials and Tools Needed
- Two sheets of 3/4 inch plywood: I chose walnut veneer for that authentic mid-century look.
- One sheet of 1/4 inch plywood for backing.
- Circular saw: For breaking down the plywood sheets. It's manageable and perfect for those without a table saw.
- Drill: Essential for assembling parts together.
- Sander: A sander or sandpaper for smoothing out edges and surfaces.
- Finish of choice: I went with a tung oil finish for durability and aesthetic.
Step by Step Instructions
Learn how to build your own TV stand with our step by step instructions. From breaking down plywood to finishing touches, make a custom piece with patience and precision.
Step 1: Breaking Down Plywood Sheets
It's critical to measure twice and cut once. I marked my measurements meticulously on the plywood, ensuring the stand's dimensions would fit my space and TV perfectly. I used a circular saw for cutting, setting the depth slightly more than the thickness of the plywood to prevent tear-out.
Step 2: Assembling the Frame
With all pieces cut, I began the assembly. Starting with the sides and bottom, I drilled pilot holes to avoid wood splitting before securing them with screws and glue. The glue added extra strength, ensuring a sturdy build. A level was indispensable during this step to ensure everything remained square and true.
Step 3: Adding Dividers and Shelf
Here's where customization played a big role. Depending on your storage needs, you can add dividers or shelves. I opted for a single shelf for equipment and a compartment for displaying books. Accurate measurements were crucial for these pieces to fit snugly.
Step 4: Finishing Touches
Sanding came next. Starting from a coarse grit and working my way up to a finer grit, I ensured all surfaces were smooth. After a thorough cleanup to remove any dust, I applied the tung oil finish, which brought out the walnut's beautiful grain.
Step 5: Attaching the Base
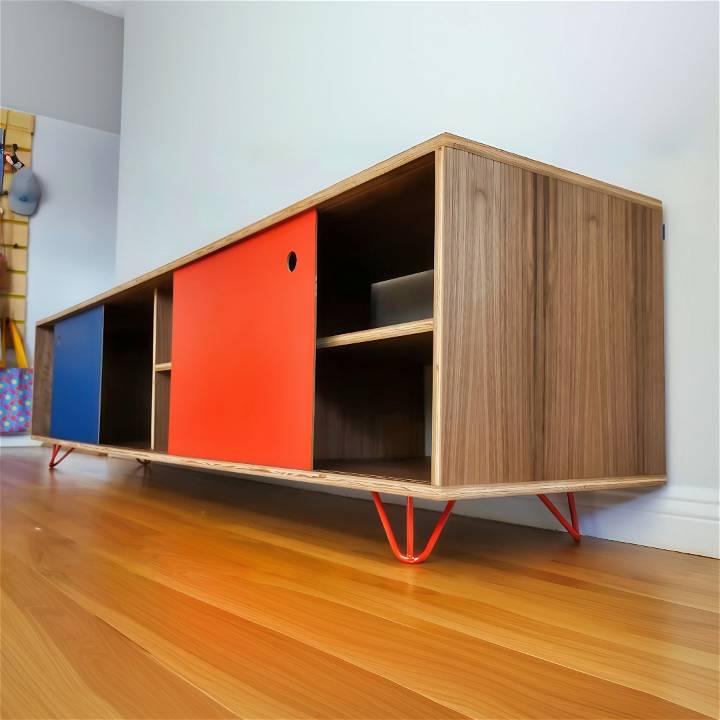
I decided against pre-made hairpin legs and instead crafted a base from the remaining plywood for a cohesive look. This involved cutting strips for the legs and assembling them into a frame that I then fixed to the bottom of the stand. This step was, perhaps, the most satisfying, seeing the stand almost complete.
The Importance of Patience and Precision
Throughout this process, patience and precision were my greatest allies. Each step required careful thought and accurate execution. From measuring and cutting to drilling and finishing, haste could lead to mistakes. I learned to embrace the meticulous nature of woodworking, finding joy in each stroke of the saw and turn of the screwdriver.
Customization Ideas for Your DIY TV Stand
When it comes to making a DIY TV stand that complements your home's decor, customization is key. Here are some ideas to inspire you to personalize your project:
- Choose Your Style: Start by selecting a design style that resonates with you. Whether it's sleek and modern, cozy and rustic, or eclectic and vintage, your TV stand should reflect your personal taste.
- Color Your World: Paint can transform your TV stand. Opt for neutral shades to blend with your room or bold colors to make a statement. Remember, a few coats of paint can make a world of difference.
- Add Texture: Incorporate materials like rattan, metal mesh, or fabric for doors and drawers. This adds depth and interest to your TV stand.
- Play with Patterns: Use stencils or wallpaper to add patterns to the sides or shelves of your TV stand. Geometric shapes or floral designs can add a unique touch.
- Switch Up Hardware: The knobs and pulls on drawers and cabinets are easy to change. Choose hardware that complements your style and adds a touch of elegance or fun.
- Light It Up: Consider adding LED strips or puck lights for ambiance and to highlight decor items on shelves.
- Accessorize: Decorate the top and shelves of your TV stand with items that tell a story about you. Books, vases, and personal mementos can all contribute to the stand's charm.
- Functionality First: Think about how you use your space. Add hooks for headphones or controllers, or a rack for DVDs and games if that suits your lifestyle.
- Safety Measures: Ensure your TV stand is not only stylish but also safe. Secure it to the wall to prevent tipping, and consider rounded corners if you have little ones running around.
By incorporating these ideas, you'll make a TV stand that's not just functional but also a reflection of your personality and style.
Storage Solutions for Your DIY TV Stand
Making a DIY TV stand is not just about aesthetics; it's also about functionality. Here's how you can maximize storage and keep everything organized:
- Plan for Devices: Consider the devices you'll place on or near your TV stand. Make room for your cable box, game consoles, and media players. Measure each device to ensure a perfect fit.
- Cable Management: Keep cables out of sight for a clean look. Use built-in channels or clips behind the stand to route wires neatly. You can also make a small compartment to house a power strip.
- Shelving and Compartments: Add adjustable shelves to accommodate various items. Use dividers in drawers for remotes and accessories. Think about ventilation if you're enclosing electronic devices.
- Hidden Storage: Utilize the space at the back of the stand or underneath for hidden storage. This is great for items you don't use frequently.
- Open vs. Closed Storage: Decide what you want to display and what to hide. Open shelves can showcase decorative items, while closed compartments can conceal clutter.
- Accessibility: Ensure that everything you need is within easy reach. Avoid deep cabinets where items can get lost at the back.
- Safety: If you have children or pets, consider soft-close hinges to prevent fingers from getting caught and secure heavy items to avoid tipping.
By incorporating these storage solutions, your DIY TV stand will be both beautiful and practical, making it a central piece in your living space that serves all your needs.
FAQs About DIY TV Stands
Building a DIY TV stand can be a rewarding project. Here are answers to some common questions to help you get started:
What tools do I need to build a TV stand?
You'll need basic tools like a saw, drill, screwdriver, measuring tape, sander or sandpaper, and clamps. These tools will help you cut, assemble, and finish your TV stand.
How do I choose the right materials?
Select materials based on durability, style, and budget. Common choices include solid wood, plywood, MDF, and metal. Consider the weight of your TV and the look you want to achieve.
Can I make a TV stand if I'm new to woodworking?
Absolutely! Start with a simple design and follow step-by-step instructions. There are many plans available that are designed for beginners.
How do I ensure my TV stand is stable?
Use sturdy materials and follow a reliable plan with a solid base and even weight distribution. Test the stand by gently pushing on it to check for wobbling.
How can I customize my TV stand?
Personalize your stand by choosing a paint or stain that matches your decor. Add unique hardware, use stencils for patterns, or incorporate lighting for a custom look.
Final Thoughts
As I placed my TV on the newly completed stand, a sense of accomplishment washed over me. This wasn't just a piece of furniture; it was a testament to the skills I'd honed and the patience I'd practiced. For those considering a similar project, my advice is straightforward: plan meticulously, proceed with patience, and don't be afraid to take on challenges. The end result is more than just a TV stand—it's a personal achievement that adds character and warmth to your home.


