Building a DIY TV wall mount was one of the most rewarding projects I've ever done. My living room needed more space, and I thought mounting my TV on the wall would help. I gathered all my materials: plywood, metal brackets, screws, and a drill. I carefully measured and marked the spots on the wall, making sure everything was in the right place.
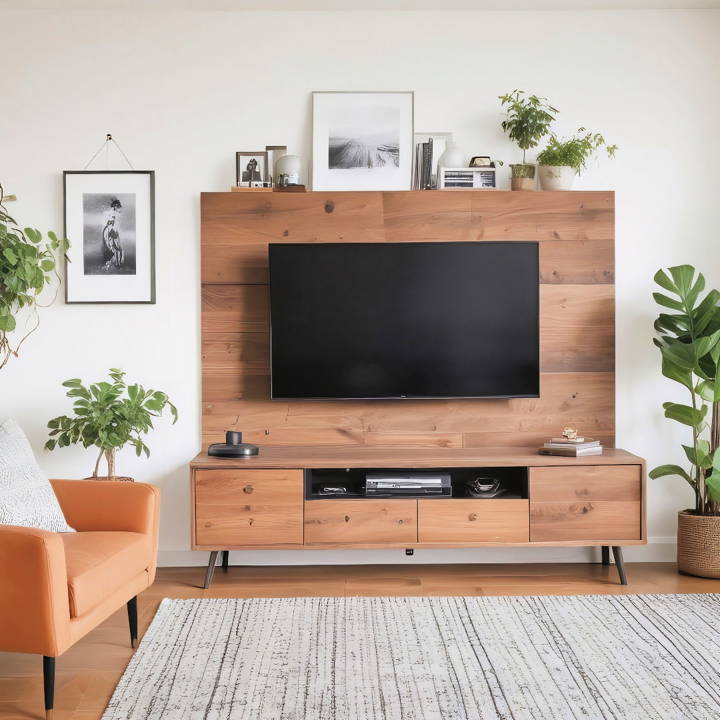
It took a bit of time and patience, but seeing the final product was worth it. Installing the brackets was simple after pre-drilling the holes. Finally, I lifted my TV and secured it to the mount. Now, my living room looks bigger and more modern. If you need more space or just want a neat look, these steps might help you. I'm sharing my experience to make your project easier.
Materials Needed and Why
- TV wall mount bracket: Essential for securing the TV to the wall. Ensure it's compatible with the size and weight of your TV.
- Stud finder: To locate the studs in your wall for a secure mount.
- Level: To ensure your TV is perfectly horizontal and avoids a tilted viewing angle.
- Tape measure: For precise measurements and to align the mount accurately.
- Drill and bits: For making pilot holes in the studs.
- Screwdriver or impact driver: To tighten the bolts and screws securely.
- Pencil and painters tape: For marking drill points and visual alignment without leaving permanent marks.
- Socket wrench: Often required for tightening bolts on the bracket.
Step by Step Instructions
Learn how to build a DIY TV wall mount step by step, from planning your setup to managing cables. Perfect guide for a secure and stylish TV installation.
Step 1: Planning Your Setup
- Identify the Viewing Height: Sit in your usual viewing spot and measure the height from the floor to your eye level. This is your ideal center-screen height, which keeps you from straining your neck.
- Decide on the Location: Pick a spot that reduces glare from windows and provides a comfortable viewing angle.
Step 2: Choosing the Right Bracket
There are various brackets available – fixed, tilting, and full-motion. Your choice depends on the need for adjusting angles and the distance from the wall.
Step 3: Finding the Studs
Use a stud finder to locate the studs on your wall. It's crucial to mount your TV on studs for support, especially for heavier models. Mark the stud locations with painter's tape.
Step 4: Preparing the Bracket
Attach the mounting bracket to the back of the TV. Make sure it is centered and level. If the bracket allows for tilt or rotation, adjust it to your desired viewing angle.
Step 5: Marking the Wall
Hold the wall portion of the bracket against the wall, aligned with your previously marked studs and eye-level measurement. Use a level to ensure it's not tilted. Mark the drill points through the bracket holes onto the wall with a pencil.
Step 6: Drilling and Securing the Bracket
Drill pilot holes on the marked points. Ensure the holes are the correct size for the provided wall anchors or bolts. Attach the bracket to the wall using a socket wrench to tighten the bolts securely.
Step 7: Hanging the TV
With assistance, lift the TV and hook it onto the wall bracket. Ensure it locks in place according to the bracket's design. Use a level again to check that the TV is perfectly horizontal.
Step 8: Cable Management
To keep things looking clean, route your cables through any built-in management system your bracket might have. If not, consider attaching a cable raceway to the wall to conceal the cables.
Finalizing the Setup
Once the TV is mounted, sit back in your usual spot and adjust the viewing angle if your mount allows for it. This might be the moment you adjust the tilt slightly to reduce glare or improve the line of sight.
Additional Tips
- Safety First: Always double-check the strength of your setup by gently pulling on the mount. It should hold firm without any give.
- Use a Friend: Mounting a TV is a two-person job, especially when it comes to hanging the TV on the bracket.
- Check Connectivity: Before the final placement, ensure that your cables reach their respective ports and that there's easy access for future adjustments.
https://www.youtube.com/watch?v=XHMTQ5-F4is&ab_channel=HomeRenoVisionDIY
Customization Tips for Different Room Layouts
When it comes to mounting your TV, the layout of your room plays a pivotal role in ensuring both optimal viewing and aesthetic harmony. Here are some practical tips to customize your TV wall mount to fit different room layouts:
For Small Rooms:
- Mount Higher on the Wall: In smaller spaces, consider mounting the TV slightly higher to save floor space and reduce clutter.
- Corner Mounts: Utilize corner mounts to maximize space and ensure comfortable viewing from all angles.
Large Rooms:
- Central Placement: For spacious rooms, a central placement ensures the TV can be viewed comfortably from multiple seating areas.
- Articulating Mounts: Choose mounts that extend, tilt, and swivel, providing flexibility to adjust the screen according to different viewing spots.
For Rooms with Bright Lighting:
- Tilt for Glare Reduction: If your room has lots of natural light, a tilting mount can help reduce glare during different times of the day.
- Consider TV Position Relative to Windows: Be mindful of window placement to minimize reflections and optimize picture quality.
Bedrooms:
- Higher Placement for Bed Viewing: If you're watching from bed, a higher mount point can make viewing more comfortable when lying down.
- Swivel Mounts for Adjustable Viewing: A swivel mount allows you to adjust the angle for the perfect view from your bed or seating area.
For Multi-Use Spaces:
- Rotating Mounts for Versatility: In rooms serving multiple purposes, a rotating mount can adapt the TV position to different activities, whether it's exercise, dining, or relaxation.
- Cable Management Solutions: Keep cables organized and out of sight to maintain a clean look, no matter how the room is being used.
Plan carefully for a DIY TV wall mount. Measure and consider furniture and viewing habits to choose the right mount and placement. Keep it simple and ask for help if needed.
Advanced Features and Smart Home Integration
In the era of smart homes, integrating your TV mount with advanced features and home automation systems can significantly enhance your viewing experience. Here's how you can make the most out of these technologies:
Smart Mounts for the Ultimate Convenience
- Voice-Activated Controls: Opt for TV mounts that can be controlled with voice commands through smart home assistants like Alexa or Google Home.
- Programmable Positions: Some mounts come with memory settings to save your favorite viewing angles, and they are easily adjustable with a remote or app.
Seamless Integration with Home Automation
- Automated Lighting: Sync your TV mount with smart lighting systems to automatically dim lights when the TV turns on.
- Temperature Control: Integrate with smart thermostats to adjust room temperature for a cozy movie night.
Enhancing Safety and Security
- Motion Sensors: Attach motion sensors to pause or mute the TV if movement is detected in a designated area, perfect for households with children.
- Automatic Retraction: For added safety, select mounts that retract automatically when the TV is not in use, preventing accidents and saving space.
Connectivity and Compatibility
- Wireless Connectivity: Ensure your TV mount is compatible with Wi-Fi or Bluetooth to connect with other smart devices seamlessly.
- Universal Design: Choose mounts that support a wide range of TV models and sizes for future-proofing your setup.
User-Friendly Interface
- Easy-to-Use Apps: Look for mounts with intuitive apps that provide easy control over all features and allow for customization according to your preferences.
- Clear Instructions: Ensure the mount comes with a user-friendly manual or online tutorials for hassle-free installation and operation.
Add these features to your TV mount for convenience and functionality. Ensure device compatibility and plan for upgrades to enhance your smart home experience.
Troubleshooting Common Issues
When you're setting up your DIY TV wall mount, you might run into a few hiccups along the way. Here's a handy guide to troubleshooting some of the most common issues you may encounter:
The TV Seems Unstable or Wobbly
- Solution: Double-check all the mount connections. Make sure every bolt and screw is tightened properly. If the wall is the issue, you may need to use sturdier anchors or a different mounting method.
The TV Is Not Level
- Solution: Use a spirit level to adjust the TV position. Most mounts have built-in level adjustments; refer to the manual to make precise changes.
Difficulty Managing Cables
- Solution: Plan your cable management before mounting the TV. Use cable ties and clips to secure them along the mount's arms. Consider installing a cable management box to hide excess cables.
The TV Is Too High or Too Low
- Solution: The center of the TV should be at eye-level when seated. If it's not, you may need to reposition the mount. For future adjustments, consider a mount with vertical movement capabilities.
Difficulty Connecting Peripheral Devices
- Solution: Ensure there's enough space between the wall and the TV for cable connections. If space is tight, right-angle adapters can help connect your devices without bending cables.
The Mount Doesn't Fit the TV
- Solution: Check the VESA (Video Electronics Standards Association) size on the back of your TV and the mount. They must match. If not, you'll need an adapter plate or a different mount.
The Wall Is Damaged During Installation
- Solution: If the wall is damaged, patch up any holes with spackle and repaint if necessary. To prevent future damage, use a stud finder to locate solid support within the walls.
Anticipate common issues and know how to tackle them to handle challenges in your DIY project. Patience and planning are key to success.
FAQs About DIY TV Wall Mount
Discover answers to common questions about DIY TV wall mount installations. Learn tips, tools, and safety measures for a perfect setup.
The ideal height for your TV is at eye level when seated. This is typically around 42 inches from the floor to the middle of the TV. Adjustments may be needed based on your seating arrangement to ensure a comfortable viewing experience for everyone in the room.
Yes, you can mount a TV by yourself if you’re comfortable with basic tools. However, it’s important to follow the instructions carefully and ensure the mount is secured properly to avoid any accidents. If you’re not confident, it’s best to seek professional help or ask a friend for assistance.
There are several ways to manage your TV cables for a neat appearance:
Cable concealment kits: These can hide cables behind the wall without the need for an electrician.
Paintable cable raceways: A simpler option that allows you to run cables along the wall and paint over them to match.
Cable ties and clips: These can help bundle and route cables neatly if you prefer not to conceal them.
To ensure your TV mount is secure, follow these steps:
Locate the studs: Use a stud finder to find the studs in your wall. These will provide the strongest support for your TV mount.
Use the right hardware: Make sure to use the hardware that comes with your TV mount kit, as it’s designed to fit your specific mount and TV.
Check for level: After attaching the mount to the wall, use a level to make sure it’s perfectly horizontal before hanging your TV.
Tighten all connections: Ensure all bolts and screws are tightened properly to prevent any movement or sagging.
Mounting a TV on different types of walls requires specific considerations:
Drywall with studs: This is the most common scenario. Use a stud finder to locate the studs and drill into them for the most secure mount.
Concrete or brick walls: You'll need concrete anchors and a hammer drill to mount your TV securely. Make sure to use the correct size of the drill bit and anchors for your TV's weight.
Plaster walls: These can be delicate, so it's important to find the studs and use anchors that are designed for plaster to avoid cracking or damaging the wall.
Conclusion
With these tips and steps, you can start building your own DIY TV mount. Just remember to be patient and double-check your measurements. Good luck, and I hope this helps you with your DIY project!


