Making DIY vinyl decal stickers has been a game-changer for me when it comes to adding a personal touch to everyday items. Whether it's a label on a kitchen canister or a personalized decal on a water bottle, using Cricut makes this crafting process seamless and enjoyable. In this guide, I want to share my personal experience and lead you through the entire process—right from making a design to the application of the decal on your desired object.
Step by Step Instructions
Learn DIY vinyl lettering with our step-by-step guide! Perfect your cricut skills and make stunning designs effortlessly.
The Basics of Cricut Design Space
Learn the basics of cricut design space with steps on logging in, making your design, and adjusting for perfection. Perfect for beginners!
Step 1: Logging into Cricut Design Space
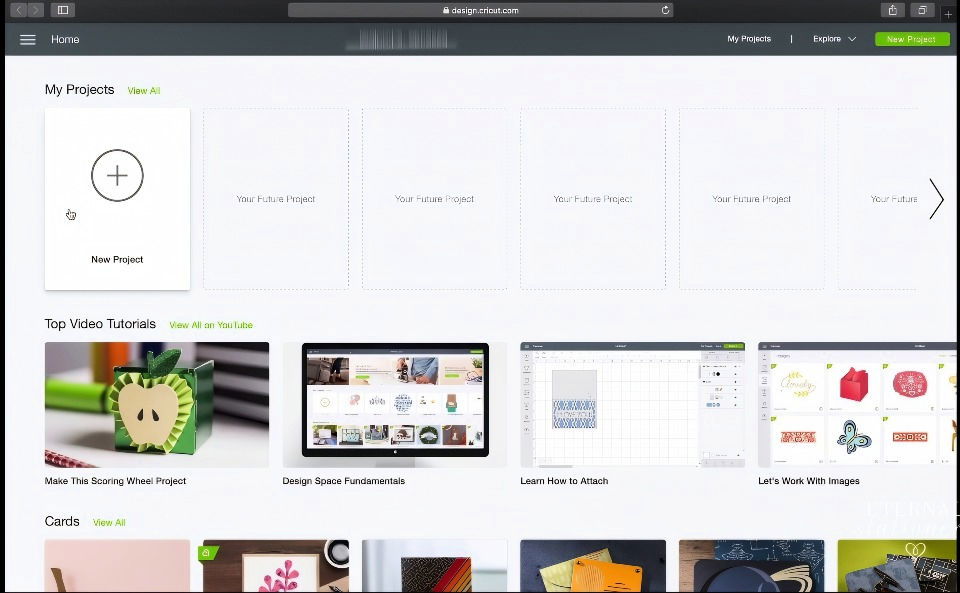
To begin, I always log into Cricut Design Space. It's a user-friendly platform where creativity knows no bounds. For those who prefer alternative software, Adobe Illustrator or Photoshop are great options too. However, I find Cricut Design Space to be perfectly suited for this task, as it directly aligns with the cutting capabilities of the Cricut machine.
Step 2: Making Your Design
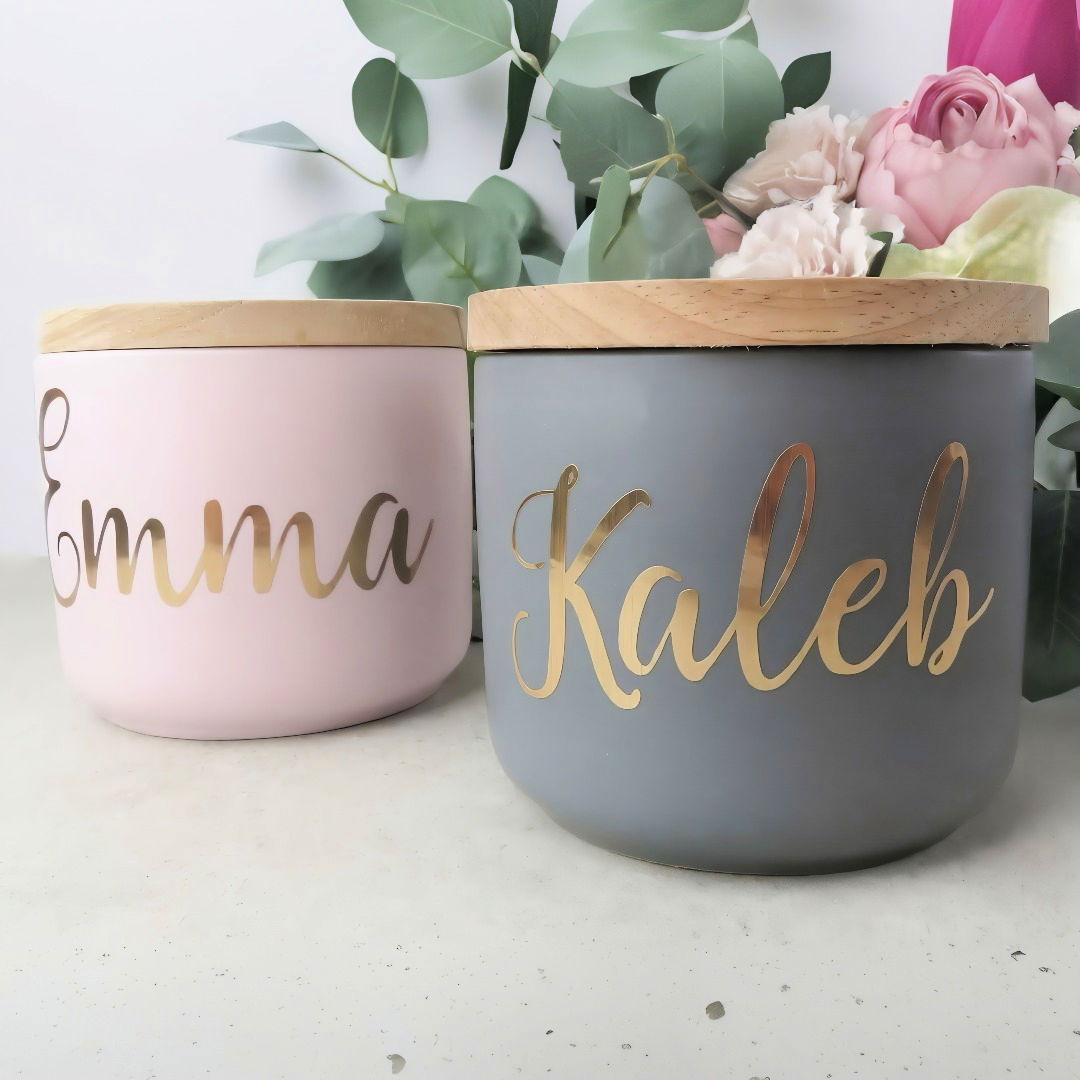
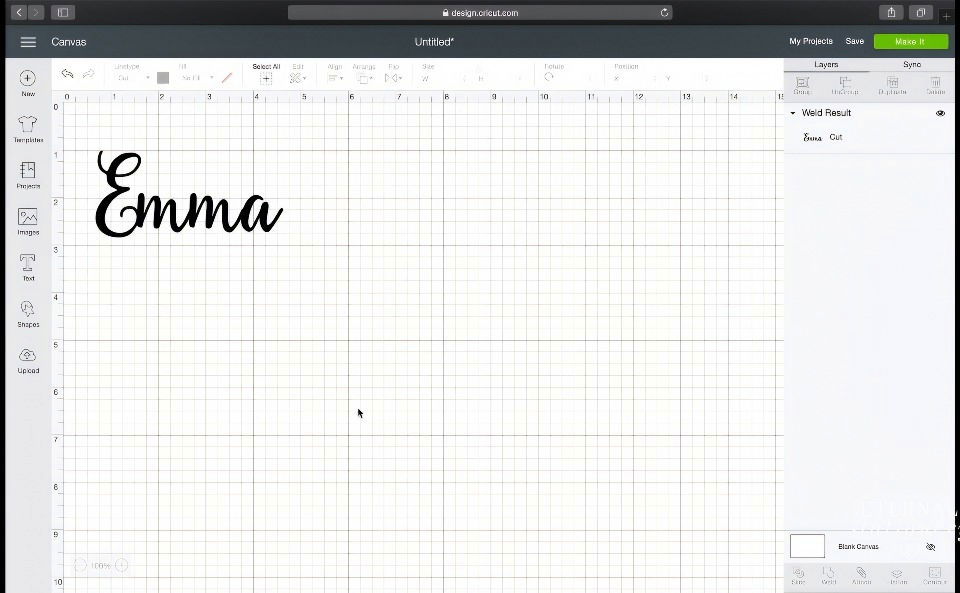
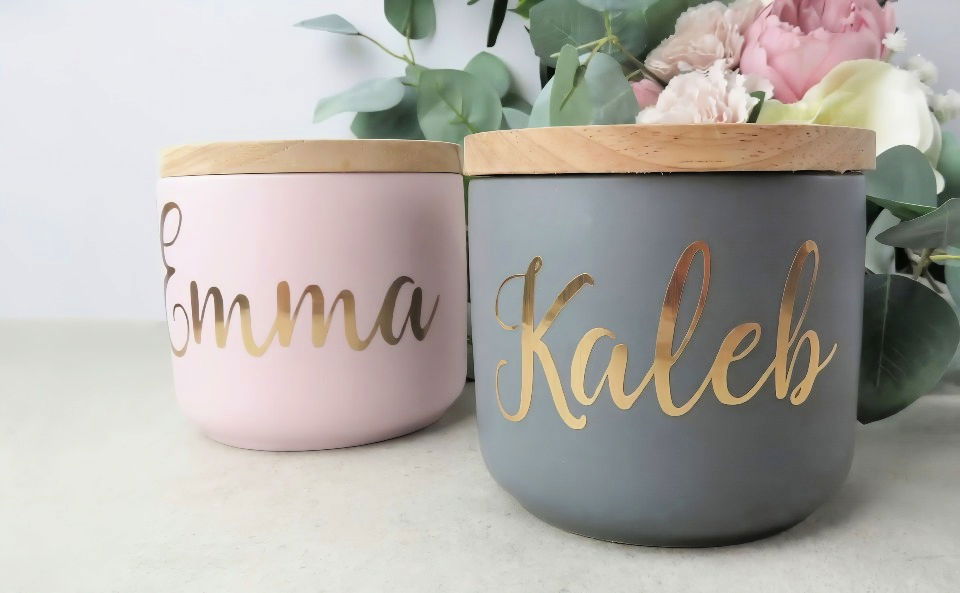
Once logged into Cricut Design Space, I select the type tool to start my design process. For a recent project, I chose to customize kitchen canisters with the name "Emma". I typed the name and selected Severus Script as my font. Although it's not a free font, you can use any font you prefer.
Step 3: Adjusting for Perfection
Tweaking the letter spacing is crucial to ensure the letters connect smoothly, making a cohesive design that's visually appealing. After making sure the name fits the canister's surface area, I right-click and select "weld." This welding step ensures the design stays unified when cut.
Preparing the Vinyl and Cricut Machine
Learn how to prepare vinyl and set up your cricut machine for optimal crafting. Step-by-step guide to selecting materials and getting started right.
Step 4: Selecting the Right Materials
Choosing the right materials is essential for quality decal creation. For this project, I used gold adhesive foil. It adds a luxurious touch and stands out beautifully on most surfaces. Transfer tape is also necessary, as it aids in transferring the decal from the backing paper to the object.
Step 5: Setting Up Your Cricut
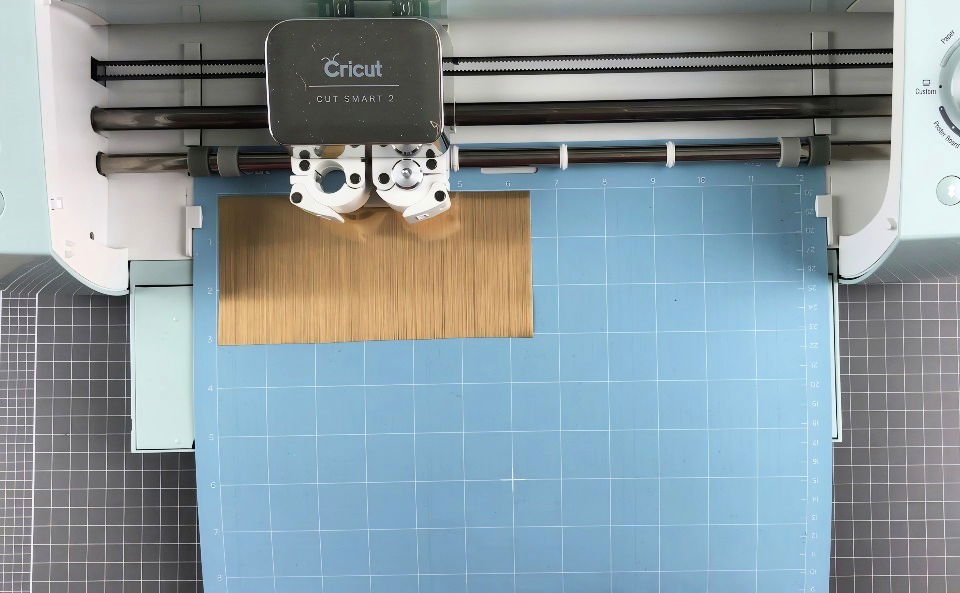
The next step involves prepping the Cricut machine. I cut a piece of adhesive foil and place it onto a light grip mat, which holds the material steady while the machine cuts. Ensuring the Cricut dial is set to 'Custom' is crucial for adjusting the cut depth to prevent cutting all the way through the foil. Regularly used blades may require pressure adjustments, which can be made in the settings within Cricut Design Space.
Cutting and Weeding the Design
Learn step-by-step instructions for cutting and weeding the design, including executing the cut and applying transfer tape efficiently.
Step 6: Executing the Cut
With the mat ready, I load it into the Cricut and select “Make It” on the software. The Cricut then effortlessly cuts the design. Afterward, I carefully remove any excess foil, a process often referred to as "weeding".
Step 7: Applying Transfer Tape
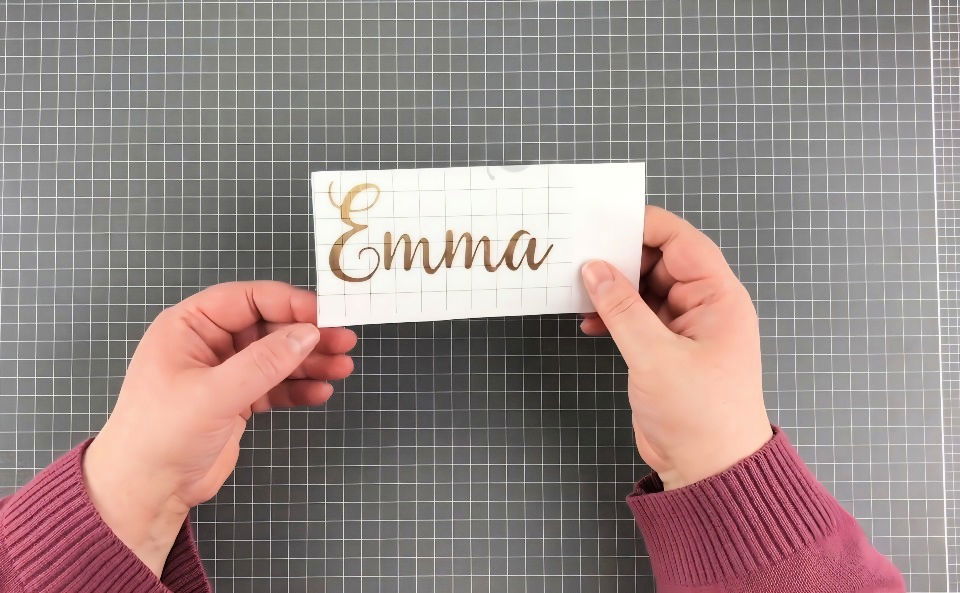
Once the design is weeded, I peel the backing off a piece of transfer tape and align it with the cut foil design. Using a burnishing tool—this can be any kind of scraper—I press firmly on the tape, securing the foil to it. This ensures the design stays intact during the transfer.
Applying the Vinyl Decal to an Object
Learn how to apply a vinyl decal to an object in three simple steps: transfer, align, and remove the tape for a perfect finish.
Step 8: Transferring the Design
Carefully peeling the foil and transfer tape off the backing paper, I ensure all parts of the design adhere to the tape. This step requires patience as all pieces need to transfer cleanly.
Step 9: Aligning and Applying on the Canister
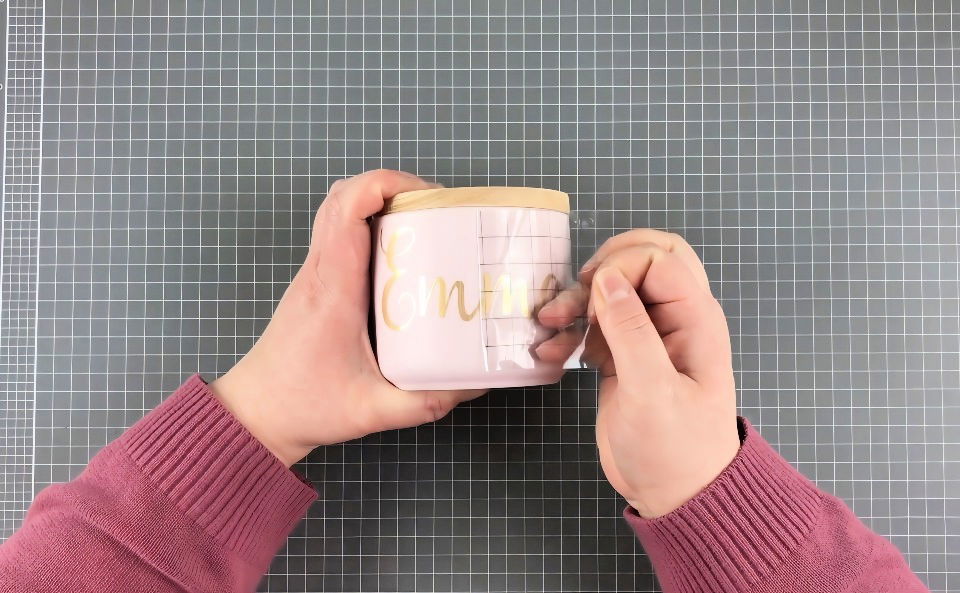
I meticulously align the decal on the canister's surface. Smoothing from the center outwards, I press firmly with the burnishing tool to ensure the foil adheres properly to the canister.
Step 10: Removing the Transfer Tape
Slowly, I remove the transfer tape. Rolling it back on itself rather than pulling it upwards minimizes disruption to the decal, resulting in a flawless application.
Advanced Techniques
Learn advanced techniques for vinyl crafting: layering, heat gun usage, removing letters, making shadows, specialty vinyl, and troubleshooting tips.
Layering Vinyl
Layering vinyl allows you to make multi-colored designs. Start by cutting each color layer separately. Apply the first layer to your surface. Then, carefully align and apply the next layer on top. Use transfer tape to help with alignment. This technique is great for adding depth and complexity to your projects.
Using a Heat Gun
A heat gun can improve vinyl adhesion. After applying the vinyl, gently heat it with a heat gun. This helps the vinyl conform to the surface, especially on curved or textured areas. Be careful not to overheat, as this can damage the vinyl or the surface.
Removing Vinyl Letters
Removing vinyl letters can be tricky. Use a heat gun or hairdryer to warm the vinyl. This softens the adhesive, making it easier to peel off. Start at a corner and slowly pull the vinyl away from the surface. If any adhesive residue remains, use a mild adhesive remover to clean it off.
Making Shadow Effects
To make a shadow effect, cut two sets of letters in different colors. Apply the first set of letters. Then, slightly offset the second set and apply it on top. This makes a shadow effect, adding a professional touch to your design.
Using Specialty Vinyl
Specialty vinyl, like glitter or holographic vinyl, can make your projects stand out. These types of vinyl are applied the same way as regular vinyl but add a unique finish. Be sure to follow the manufacturer's instructions for best results.
Combining Vinyl with Other Materials
Combine vinyl with other materials like wood, glass, or fabric for unique projects. For example, you can apply vinyl lettering to a wooden sign or a glass jar. This technique expands the possibilities for your DIY projects.
Troubleshooting Common Issues
- Misalignment: Use a ruler or grid lines to ensure your letters are straight.
- Bubbles: Use a squeegee to smooth out bubbles as you apply the vinyl.
- Wrinkles: Gently lift the vinyl and reapply, smoothing out wrinkles as you go.
By mastering these advanced techniques, you can take your vinyl lettering projects to the next level. Experiment with different methods to find what works best for you.
Common Mistakes and How to Avoid Them
Discover how to avoid common vinyl application mistakes like misalignment, bubbles, poor prep, and more for flawless results every time.
Misalignment Issues
One of the most common mistakes in vinyl lettering is misalignment. This happens when letters are not straight or evenly spaced. To avoid this, use a ruler or a grid to guide your placement. You can also use masking tape to make a straight line on your surface. This will help you align your letters perfectly.
Bubbles and Wrinkles
Bubbles and wrinkles can ruin the look of your vinyl lettering. To prevent this, apply the vinyl slowly and use a squeegee to smooth it out as you go. If you do get bubbles, use a pin to puncture them and then smooth out the vinyl. For wrinkles, gently lift the vinyl and reapply it, smoothing it out as you go.
Poor Surface Preparation
Applying vinyl to a dirty or uneven surface can cause it to peel off. Always clean your surface thoroughly before applying vinyl. Use a mild cleaner and make sure the surface is dry and smooth. If the surface is rough, sand it down to make a smooth base for your vinyl.
Incorrect Cutting
Cutting vinyl incorrectly can lead to jagged edges and uneven letters. Make sure your cutting tool is sharp and that you are using the correct settings for your vinyl type. If you are using a cutting machine, double-check your design and settings before cutting.
Inadequate Adhesion
If your vinyl does not stick well, it may be due to inadequate pressure during application. Use a squeegee to apply firm, even pressure across the entire surface of the vinyl. This will help the adhesive bond properly to the surface.
Overlapping Letters
Overlapping letters can make your design look messy. To avoid this, plan your design carefully and ensure there is enough space between each letter. Use transfer tape to help position your letters accurately.
Not Using Transfer Tape
Skipping transfer tape can make it difficult to apply your vinyl letters accurately. Transfer tape helps you move your design from the backing paper to your surface without losing alignment. Always use transfer tape for best results.
Ignoring Manufacturer Instructions
Each type of vinyl may have specific application instructions. Ignoring these can lead to poor results. Always read and follow the manufacturer's instructions for the best outcome.
By being aware of these common mistakes and taking steps to avoid them, you can ensure your vinyl lettering projects turn out beautifully.
FAQs About DIY Vinyl Lettering
Explore the most common FAQs about DIY vinyl lettering, covering tips, tools, and techniques for your next creative project.
To ensure your vinyl letters adhere well:
Clean the surface: Make sure the surface is free of dust, grease, and moisture.
Apply pressure: Use a squeegee or a plastic card to press the vinyl firmly.
Use heat: A blow dryer can help the vinyl stick better by warming it slightly.
To remove vinyl lettering:
Heat the vinyl: Use a hair dryer to warm the vinyl, making it easier to peel off.
Peel the vinyl: Gently peel the vinyl off the surface.
Clean the residue: Use an adhesive remover or isopropyl alcohol to clean any remaining adhesive.
Vinyl lettering can be applied to a variety of surfaces, including:
Walls: Ideal for home decor and office spaces.
Glass: Perfect for windows, mirrors, and glass doors.
Metal: Suitable for cars, appliances, and metal signs.
Wood: Great for wooden signs and furniture.
Plastic: Works well on plastic containers and gadgets.
Vinyl lettering is generally designed for one-time use. Once removed, it loses its adhesive properties and may not stick well if reapplied. If you need reusable options, consider using static cling vinyl or magnetic sheets.
To design your own vinyl lettering:
Choose a design software: Programs like Adobe Illustrator, Cricut Design Space, or free options like Inkscape.
Select a font: Pick a font that suits your project. Ensure it's easy to cut and weed.
Make your design: Type out your text and adjust the size and spacing.
Save your design: Save it in a format compatible with your cutting method, such as SVG for cutting machines or a printed template for hand-cutting.
Beyond Canisters: Other Creative Applications
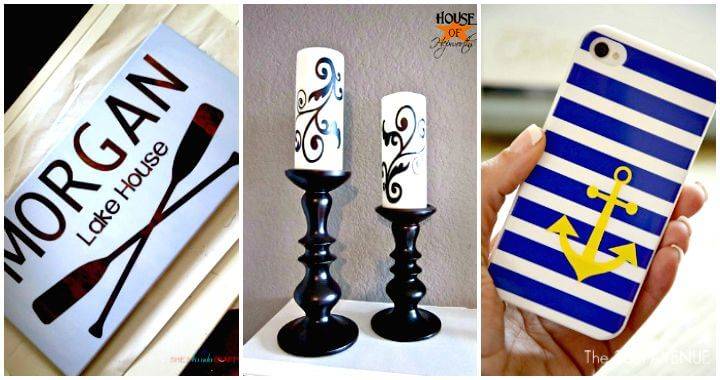
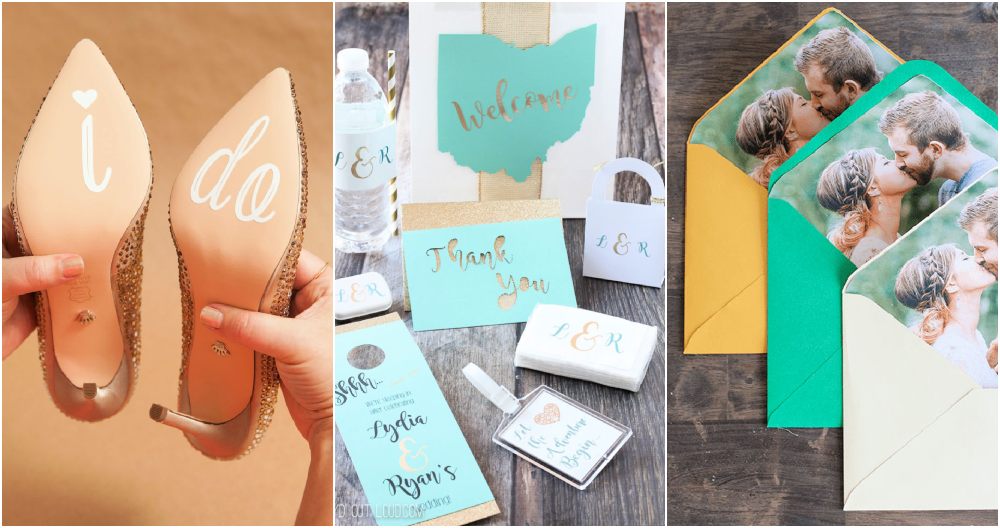
This technique of making vinyl decals is versatile. From personalized water bottles to decorative mirrors, the possibilities are endless. I've even used this method to make welcoming signs and elegant wedding menus. Customization is only limited by one's creativity.
Building Expertise and Trust
Making vinyl decals has enriched my DIY capabilities and allowed me to produce professional-looking crafts, enhancing any personal or home project. Sharing my journey not only showcases my expertise but also builds trust with fellow crafters who wish to explore this rewarding hobby.
Troubleshooting Common Issues
Even seasoned crafters can face challenges. Here are some common issues and how to resolve them:
- Adhesion Problems: Ensure the surface is clean and free of oils or dust. Sometimes, using a stronger adhesive foil or a higher-quality transfer tape can make a difference.
- Cutting Errors: Re-evaluate the pressure and blade settings in Cricut Design Space. Each material and blade may require unique adjustments.
- Misalignment: Use grid-marked transfer tape to assist in precise alignment.
Conclusion: Encouraging Creativity with Trust
The process of making vinyl decal stickers not only offers a fantastic way to personalize objects but also provides an opportunity to dive into the world of craft with confidence. My personal journey with Cricut and adhesive foils highlights a skill-set that can be continuously refined, promoting creativity and precision. I invite you to embark on this journey, ensuring your creations reflect your own personal touch and style.
By incorporating my experiences and insights, I aim to provide a guide that is helpful, trustworthy, and accessible, empowering you to explore and master the art of making vinyl decals at your own pace.


