If you're like me, making music or recording vocals at home, you've probably wondered how to get the best sound without breaking the bank. A proper vocal booth can improve your recordings by reducing room noise and capturing cleaner, more professional-quality vocals.
But let's be honest: professional booths can be expensive, and many of us don't have thousands of dollars to spare. I've been there! That's why I'm excited to share how I built a fully functional DIY vocal booth for under $100 using everyday items and some affordable supplies.
Why Build a Vocal Booth?
Before diving into the how-to, let me explain why a vocal booth matters. When you're recording, even the slightest background noise can make editing a nightmare. I learned this the hard way while recording my own tracks. I could hear room echoes, outside noise, and other distractions. A vocal booth minimizes these issues by isolating your voice and reducing reflections, making your recordings sound clean from the start. This saves you time during the editing process and enhances the overall quality of your projects.
Materials You'll Need
For this build, you don't need much. Most of the items can be found around your house or studio. Here's what worked for me:
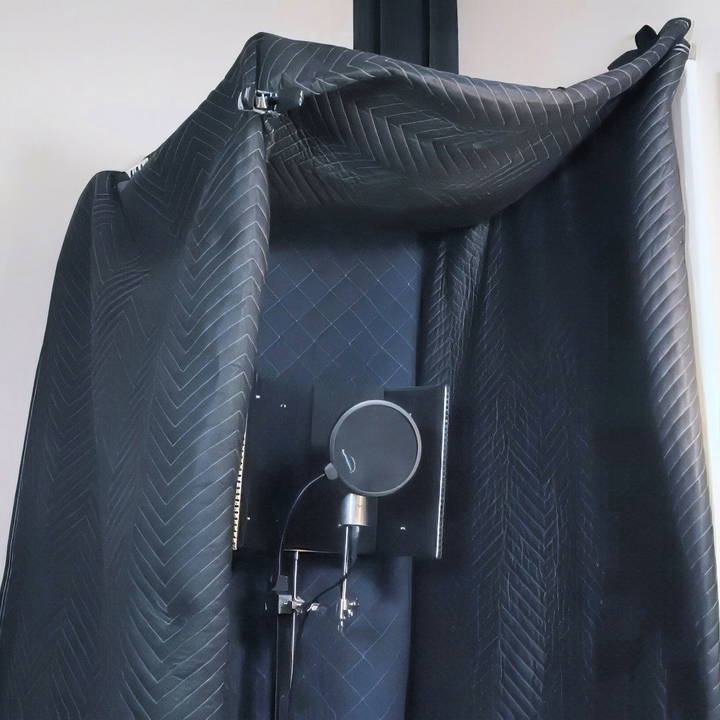
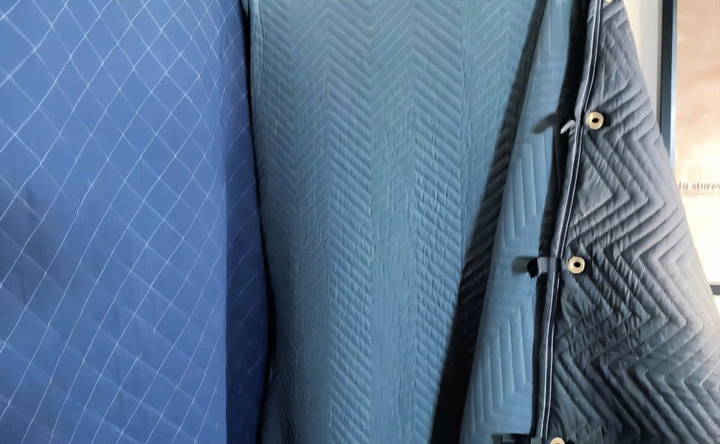
- Heavy-duty blankets or quilts: I used two industrial grommeted blankets, and one regular quilt I had lying around. The key is the thickness and density. These blankets trap sound, dampening any room noise.
- Hooks for hanging the blankets: I picked up simple black metal hooks from Amazon. These help secure the blankets to the walls.
- Clamps: Heavy-duty clamps are essential to hold everything in place. I used four clamps, though having a few extra can come in handy.
- Mic stand or lighting C-stand: You'll need a sturdy stand to hold part of the booth structure in place. I used an old mic stand, but any stable stand will work.
- Some weights or books: If your stand isn't heavy enough, books or small dumbbells can help stabilize it.
Personal Tip: Getting the Blankets Right
The blankets are the star of this setup. The thicker they are, the more effective they'll be at absorbing sound. I chose grommeted blankets because they're easy to hang using hooks. When I was first trying this setup, I made the mistake of using thinner blankets, which didn't block out enough noise. Lesson learned—go for heavy-duty ones!
Step by Step Instructions
Learn how to build a DIY vocal booth step by step. From choosing your space to sound testing, follow our detailed guide for the perfect recording setup.
1. Choose Your Space
First, pick a spot in your room. Ideally, use a closet door or a corner to help form two sides of the booth. This setup gives you natural walls to hang your blankets from, which means fewer materials needed.
In my case, I used a closet door. This gave me a stable foundation to hang the first blanket and build one wall for the booth. But don't worry if you don't have a closet—you can easily set up in any corner of your room and use stands to support the blankets.
2. Set Up the First Wall
For the first wall, I draped a quilt over the closet door. You don't need this to be fancy—just a regular quilt will do. This will serve as the first layer of soundproofing.
3. Hang the Grommeted Blanket
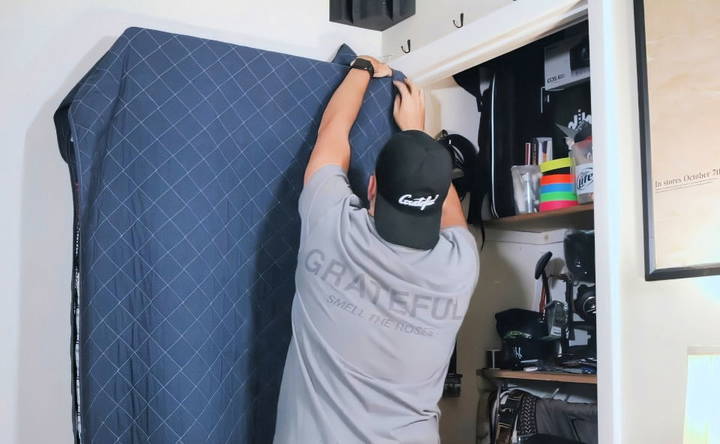
Next, grab one of your grommeted blankets. Use the grommet holes to measure where to drill your hooks. Once you've secured the hooks in the wall, hang the blanket. This will serve as your second wall.
At first, I was worried about drilling hooks into the wall, but it turned out to be pretty easy. And because the hooks are small, they don't leave big holes if you ever need to remove them.
4. Create the Third Wall and Ceiling
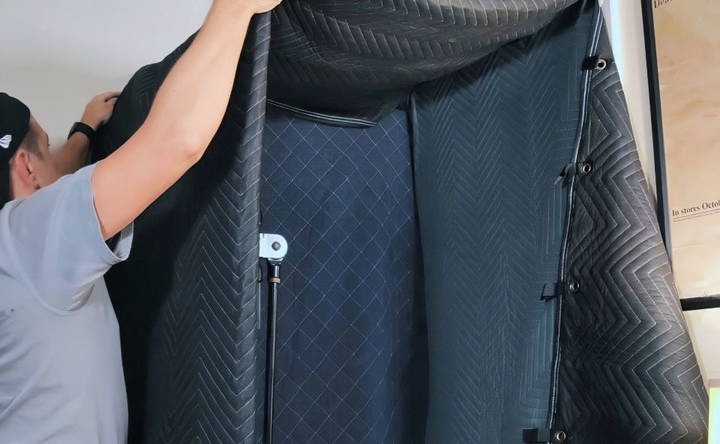
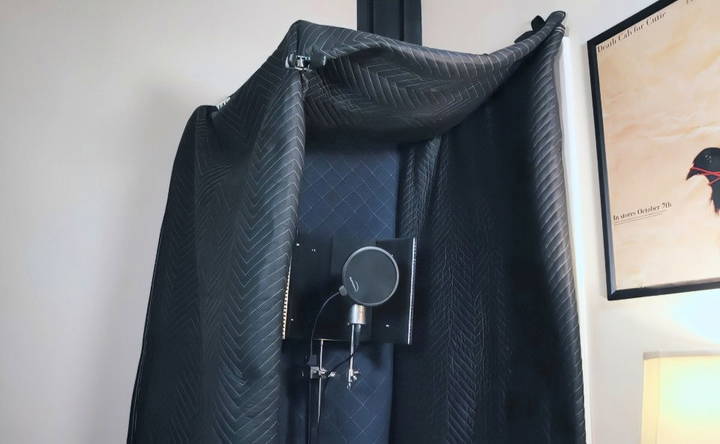
For the third wall and the ceiling, take your second grommeted blanket and fold it in half. You'll hang one end of the blanket on the hooks you've already installed and then drape the rest over your mic stand (or C-stand). This builds a makeshift roof for your booth.
This step is crucial because the blanket overhead will help block out any reflections coming from above, giving you a more isolated sound. I realized the difference it made when I first tested recording inside the booth—it immediately sounded cleaner and more isolated.
5. Secure Everything with Clamps
Now that your blankets are in place, use the clamps to secure everything. Start by clamping the blanket to the mic stand or the doorframe. Make sure everything is tight so there's no movement when you're recording.
I found that four clamps were enough for my setup, but if your blankets are heavier or your stand isn't very stable, you may need a few extra clamps to hold things together.
6. Adjust the Setup as Needed
If your mic stand is a bit lightweight or wobbly, like mine was, use some books or weights to stabilize the base. You don't want the stand tipping over mid-session! I used a couple of dumbbells to keep mine steady.
I was initially concerned about the weight of the blankets pulling on the stand, but once I added the weights, the whole structure felt solid. This is an easy fix if you're working with lighter gear.
Sound Test: The Proof Is in the Recording
Now comes the fun part—testing out the sound! When I first stepped inside my new DIY booth, I could immediately tell the difference. Outside the booth, I could hear all the room noise: echoes, the sound of my computer fan, and distant traffic. But inside? Almost dead silent.
When I recorded my vocals, I noticed how clean they sounded right off the bat. There was no need for excessive noise reduction during editing, which made the mixing process smoother and faster. This setup may not be a professional studio-grade booth, but for under $100, it does an amazing job.
Personal Tip: Experiment with Placement
Depending on the acoustics of your room, you might need to tweak the placement of the blankets or adjust how tightly they're secured. I found that angling myself slightly while singing into the booth helped minimize any remaining reflections.
Why This Setup Works
This DIY booth works because the blankets trap sound waves, preventing them from bouncing around the room. By making three walls and a ceiling, you're surrounding your voice with a thick layer of sound-dampening material. This ensures that what gets recorded is just your voice, without any room noise.
The grommeted blankets also make setup and teardown a breeze. You can easily remove the blankets after a session and store them away if you need to free up space.
Soundproofing Tips
Making an effective DIY vocal booth requires good soundproofing to ensure high-quality recordings. Here are some practical tips to help you achieve the best results:
Effective Soundproofing Materials
- Acoustic Foam: Acoustic foam panels are excellent for absorbing sound and reducing echo. They are easy to install and come in various shapes and sizes.
- Moving Blankets: These are a budget-friendly option. Hang them on the walls of your booth to dampen sound.
- Carpets and Rugs: Place thick carpets or rugs on the floor to minimize sound reflections and absorb noise.
- Mass Loaded Vinyl (MLV): This dense material is great for blocking sound. You can attach it to the walls and ceiling of your booth.
DIY Soundproofing Hacks
- Thick Curtains: Use heavy curtains or drapes to cover windows and doors. They help block external noise.
- Weatherstripping: Seal gaps around doors and windows with weatherstripping tape to prevent sound leakage.
- Egg Cartons: While not as effective as professional materials, egg cartons can help reduce echo if you're on a tight budget.
Installation Tips
- Cover All Surfaces: Ensure that all surfaces, including walls, ceiling, and floor, are covered with soundproofing materials.
- Layering: For better soundproofing, use multiple layers of different materials. For example, combine acoustic foam with moving blankets.
- Seal Gaps: Pay attention to small gaps and cracks. Use sealant or weatherstripping to close them, as even tiny openings can let sound escape.
Testing and Adjusting
- Sound Tests: After setting up your booth, record some test audio. Listen for any unwanted noise or echo.
- Adjust as Needed: If you notice issues, add more soundproofing materials or rearrange existing ones. Sometimes, small adjustments can make a big difference.
Budget-Friendly Options
- Second-Hand Materials: Look for second-hand acoustic panels or moving blankets online. They can be much cheaper than new ones.
- DIY Panels: Make your own acoustic panels using wooden frames, fabric, and insulation material. There are many tutorials available online.
Use these tips to make a soundproof vocal booth and improve your recordings. Experiment and adjust for the best results.
FAQs About DIY Vocal Booths
Discover essential FAQs about DIY vocal booths, and learn how to build, optimize, and enhance your home studio for perfect sound recording.
A DIY vocal booth is a small, enclosed space designed to record clear and professional-quality vocals at home. It helps to isolate your voice from external noise and room reflections, ensuring that your recordings are dry and free from unwanted reverb. This is crucial for achieving a clean and polished sound in your music or voice-over projects.
While using a closet might seem like a convenient option, it's not always the best choice. Closets are often too small and don't have enough material to properly absorb sound. This can result in poor sound quality with unwanted reflections and reverb. It's better to build a dedicated DIY vocal booth with proper acoustic treatment.
To enhance the soundproofing of your DIY vocal booth, consider the following tips:
Seal gaps and cracks: Use weather stripping or acoustic sealant to seal any gaps or cracks in the booth.
Double-layered walls: Construct double-layered walls with an air gap in between to reduce sound transmission.
Mass-loaded vinyl (MLV): Add MLV to the walls for additional soundproofing.
Heavy curtains or blankets: Hang heavy curtains or blankets around the booth to further dampen sound.
Yes, a DIY vocal booth can be used for recording instruments, especially those that require close-miking, like acoustic guitars or wind instruments. Ensure the booth is large enough to accommodate the instrument and musician comfortably. Proper acoustic treatment will help capture a clean and clear sound.
Improving the acoustics inside your DIY vocal booth can significantly enhance the quality of your recordings. Here are some tips:
Use bass traps: Place bass traps in the corners of the booth to absorb low-frequency sounds.
Diffusers: Add diffusers to scatter sound waves and reduce echoes.
Acoustic foam placement: Strategically place acoustic foam on the walls and ceiling to absorb mid and high frequencies.
Carpet or foam flooring: Use carpet or foam on the floor to minimize sound reflections from below.
Final Thoughts
For anyone looking to improve their vocal recordings without spending a fortune, this budget-friendly DIY vocal booth is a game changer. I've used this setup for my own singles and projects for other artists, and it has never let me down. It's simple, effective, and best of all—affordable.
Don't be afraid to experiment with your setup. Every room is different, so what worked for me might need some adjustments for you. But with a bit of tweaking, you'll be amazed at how much better your recordings sound, all for less than $100.


