I've always loved volleyball, but finding someone to practice with isn't always easy. So, I decided to take matters into my own hands and build a DIY volleyball rebounder. This project was not only fun but also incredibly rewarding. Let me walk you through how I made it, step by step.
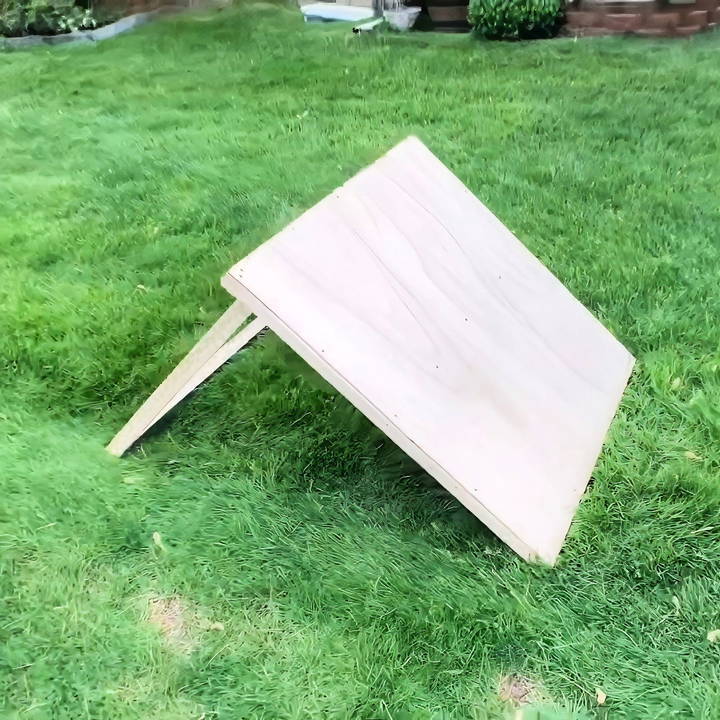
Gathering Materials and Tools
Before diving into the construction, I made a list of all the materials and tools I'd need. Having everything on hand made the process smoother.
Materials I Used
- Two-by-fours: I ripped these in half to build two-by-twos for the frame.
- Half-inch sanded plywood: This would serve as the rebound surface.
- Decking screws: For assembling the frame and attaching the plywood.
Tools That Came in Handy
- Circular saw: To cut the plywood and rip the two-by-fours.
- Miter saw: For precise cuts on the frame pieces.
- Tape measure: Essential for accurate measurements.
- Impact driver: To drive the screws securely.
- Speed square: To ensure all cuts and assemblies were square.
Step by Step Instructions
Learn how to build a DIY volleyball rebounder with our step-by-step guide. Perfect for practice and skill improvement! Follow easy instructions now.
Building the Frame
The frame is the backbone of the rebounder, so I wanted to make sure it was sturdy and well-constructed.
Cutting the Frame Pieces
I started by taking the two-by-fours and ripping them in half, making two-by-twos. Then, I measured and cut them to the desired lengths for the frame. Precision was key here, so I double-checked all measurements before making any cuts.
Assembling the Frame
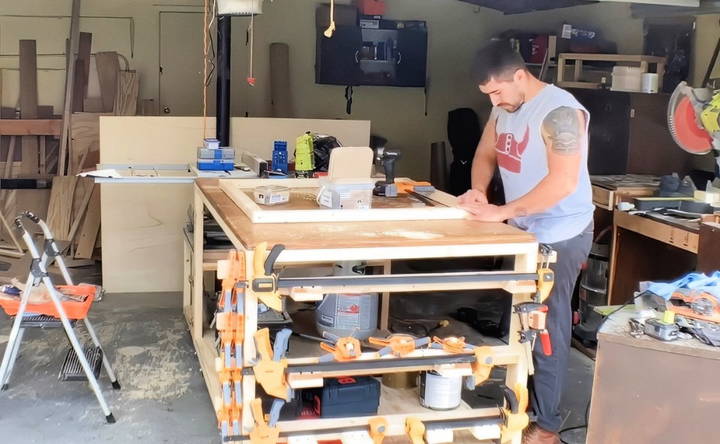
With all the pieces cut, I laid them out on a flat surface to form a rectangle. Using the impact driver and decking screws, I connected the pieces, ensuring all corners were square with the help of the speed square. The frame started to take shape, and it felt great seeing the first part come together.
Adding the Plywood Surface
The plywood would be the surface the volleyball bounces off, so it needed to be securely attached and well-supported.
Cutting the Plywood to Size
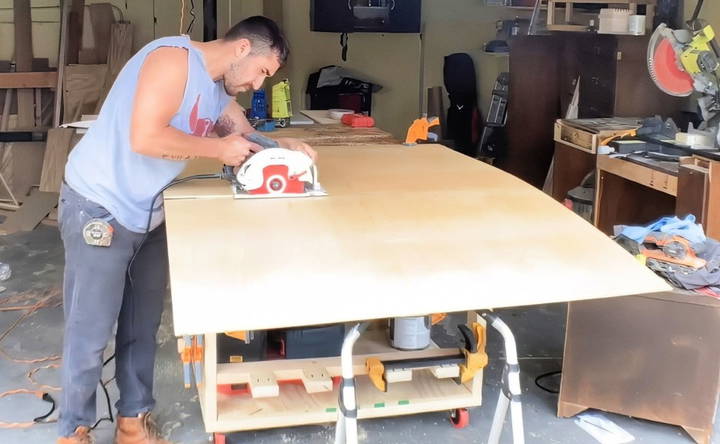
I placed the frame on top of the plywood sheet and traced its outline. Using the circular saw, I carefully cut along the lines, making sure the plywood would fit perfectly over the frame.
Securing the Plywood to the Frame
I positioned the plywood on top of the frame and used decking screws to attach it. I started by securing the corners, then added screws along the edges every few inches. This ensured the plywood was firmly attached with no gaps.
Adding a Middle Brace for Support
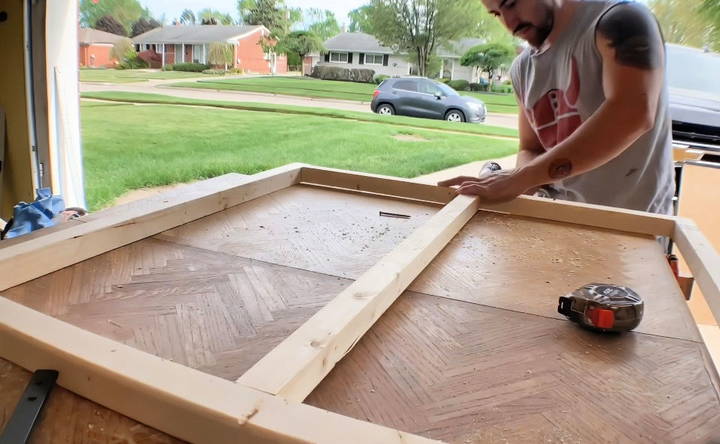
I noticed there was a bit of flex in the plywood when pressed in the center. To fix this, I cut another two-by-two to fit as a middle brace across the frame. I secured it with screws from the sides of the frame and then added screws through the plywood into the brace. This added the necessary support and eliminated the flex.
Crafting the Adjustable Legs
Building adjustable legs was one of the more challenging parts of the project. I wanted the rebounder to stand at an angle, and adjusting that angle would help vary the ball's return trajectory.
First Attempt: Simple Legs
Initially, I cut two pieces of two-by-two to serve as legs and tried attaching them directly to the frame. However, they didn't rotate as I hoped, and the stability wasn't there.
Second Attempt: 45-Degree Angles
I decided to cut 45-degree angles at the top ends of the legs, thinking this would allow them to pivot inside the frame. After assembling, I realized that the legs still didn't move freely and the angle was too steep.
Third Attempt: 22.5-Degree Angles
Not giving up, I cut new legs with 22.5-degree angles at the tops. This was better, but there was still room for improvement.
Final Modification: Enhanced Mobility
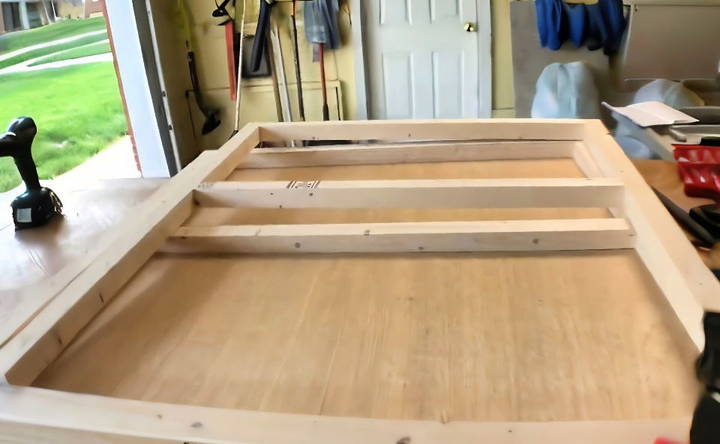
I made one last adjustment by cutting 45-degree angles at the bottoms of the legs as well. This allowed the legs to rotate more freely and provided a greater range of motion. Now, I could adjust the rebounder's angle to my liking.
Securing the Legs
I attached the legs to the inside of the frame using bolts, which acted as pivot points. This setup allowed the legs to fold flat against the frame for storage and swing out when in use. I also added a cross brace between the legs for added stability.
Testing the Rebounder
With everything assembled, it was time to test my creation.
First Test Run
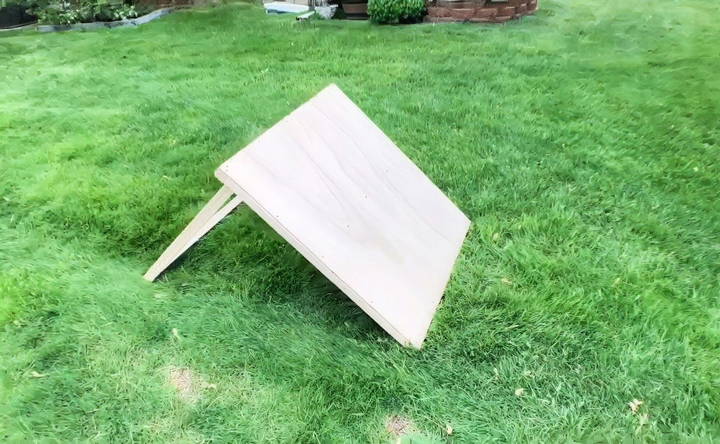
I set up the rebounder in my backyard, adjusted the angle, and grabbed my volleyball. The first few hits were exciting—the ball bounced back nicely, and the rebounder held up well.
Adjustments After Testing
I noticed that adjusting the angle significantly changed how the ball returned. This was perfect for practicing different types of hits. I was thrilled that the adjustable legs worked as intended.
Tips and Insights from My Experience
Building this rebounder taught me a lot. Here are some tips if you're considering making one yourself.
Double-Check Measurements
Accuracy is crucial. Measure twice, cut once. This saves time and materials.
Be Prepared for Trial and Error
Not everything works on the first try. Don't get discouraged if you need to make adjustments along the way.
Secure All Connections
Ensure all screws are tight and the structure is solid. This is important for safety and functionality.
Customize to Your Needs
Feel free to adjust dimensions or features to suit your preferences. The beauty of DIY is making something that's perfect for you.
Enjoying the Fruits of My Labor
Now that the rebounder is complete, I've been using it regularly.
Improving My Skills
Practicing with the rebounder has noticeably improved my reaction time and hitting accuracy. It's like having a personal trainer available anytime.
Sharing with Friends
My friend Jermaine came over to try it out, and we had a blast. It's great for solo practice or with a group.
Customization and Upgrades
Your DIY volleyball rebounder doesn't have to be a one-size-fits-all solution. With a few clever tweaks and upgrades, you can tailor it to your specific needs and skill level.
Adjustable Features
- Rebound Angle: Design your rebounder with an adjustable frame or net system. This allows you to change the angle of the rebound, simulating different types of volleyball shots and challenging yourself as you improve.
- Net Height: Make the net height adjustable to accommodate players of different ages and skill levels. A lower net is great for beginners, while a higher net provides a more challenging workout for experienced players.
- Portability: If you plan to move your rebounder around frequently, consider adding wheels or handles for easy transport. You could even make it collapsible for convenient storage.
Upgrade Ideas
- Target Zones: Attach different colored targets or zones to the net to practice accuracy and aim. This adds an element of fun and competition to your training sessions.
- Ball-Feeding Mechanisms: For solo practice, consider adding a simple ball-feeding mechanism, like a ramp or chute, to automatically deliver balls to the rebounder. This frees you up to focus on your technique and footwork.
- Training Drills Integration: Design your rebounder to incorporate specific training drills, such as setting, spiking, or serving. You could add markings or attachments to the frame or net to guide your practice.
Customization options are limitless. Have fun making a rebounder that fits your needs and boosts your volleyball skills.
Comparison with Commercial Rebounders
Before you dive into your DIY project, it's wise to compare your homemade rebounder to commercially available options. This will help you make an informed decision based on your needs, budget, and DIY skills.
Cost Analysis
- DIY Rebounder: Building your own rebounder can be significantly cheaper than buying one. You'll mainly pay for materials, which can vary depending on your design and chosen materials. With some resourcefulness, you can even repurpose items you already have to further reduce costs.
- Commercial Rebounder: Commercial rebounders range in price from around $100 to several hundred dollars, depending on features and size. While the upfront cost is higher, you may save time and effort compared to building your own.
Feature Comparison
- DIY Rebounder: A major advantage of a DIY rebounder is customization. You have complete control over its size, angle, net tension, and additional features. This allows you to tailor it to your specific training needs. However, it requires some effort, skills, and tools to construct.
- Commercial Rebounder: Commercial rebounders often come with pre-set features, which might limit customization options. However, they are generally ready to use out of the box and may offer a more polished look. Some models come with additional features like ball feeders or target zones, which may not be easy to replicate in a DIY version.
Choose DIY for customization and budget. Opt for commercials for convenience and if you have the budget.
Troubleshooting and Common Mistakes
Even the most experienced DIYers can run into hiccups. Here are some common issues you might encounter when building your volleyball rebounder and how to fix them.
Problem-Solving
- Wobbly Frame: If your rebounder feels unstable, check if all joints and connections are secure. Reinforce any weak points with additional screws, brackets, or glue. Also, ensure the base is wide and sturdy enough to support the frame and net.
- Sagging Net: If the net sags too much, it won't provide a good rebound. Tighten the net by adjusting its tension or adding support ropes or bungee cords. Choose a net material that's strong and durable to prevent future sagging.
- Incorrect Rebound Angle: The rebound angle is crucial for effective practice. If the angle is too steep or too shallow, adjust the frame or net accordingly. You may need to experiment to find the ideal angle for your needs.
Common Mistakes
- Underestimating Material Strength: Don't skimp on materials. Choose sturdy wood or metal for the frame and a strong, weather-resistant net. This ensures your rebounder can withstand repeated use and outdoor elements.
- Neglecting Measurements: Take precise measurements before cutting or assembling any parts. Even small errors can affect the stability and functionality of your rebounder. Double-check everything before proceeding.
- Ignoring Safety: Always consider safety when building and using your rebounder. Sand down any rough edges, secure all screws and bolts, and use caution when handling tools.
Avoid potential problems and mistakes to safely and effectively enhance your skills with a volleyball rebounder.
FAQs About DIY Volleyball Rebounders
Discover answers to the most common questions about DIY volleyball rebounders. Learn how to build, use, and optimize your own practice equipment.
Absolutely! There are many simple DIY rebounder designs that require minimal tools and experience. Look for plans that use readily available materials like PVC pipes, wood, or even repurposed items like old bed frames or trampolines. Start with a basic design and gradually add complexity as you gain confidence.
Ideally, you'll want a durable, weather-resistant net that provides consistent rebound. Volleyball-specific netting is readily available online or at sports stores. Alternatively, you could repurpose a sturdy mesh material like a trampoline net or even a cargo net.
If you want a rebounder that's easy to move and store, consider using lightweight materials like PVC pipes and a collapsible frame design. Adding wheels or handles can make it even easier to transport. For storage, look for plans that allow the rebounder to fold flat or disassemble into smaller pieces.
While designed primarily for volleyball, your DIY rebounder can potentially be used for other sports that involve ball skills, like soccer or basketball. Adjust the angle and net height accordingly, and ensure the net material is suitable for the type of ball you're using.
Regular cleaning and maintenance will help prolong the life of your rebounder. Wipe down the frame and net periodically to remove dirt and debris. If it's kept outdoors, consider applying a weather-resistant coating to the frame and storing the net indoors when not in use. Check for any loose screws or worn-out parts and repair them promptly to prevent accidents.
Final Thoughts
Building my own DIY volleyball rebounder was a fulfilling project that combined my love for sports and DIY. Not only did I end up with a useful training tool, but I also enjoyed the process of making something with my own hands.
If you're a volleyball enthusiast like me, I highly recommend giving this project a try. It's a fun way to enhance your skills and have some DIY fun along the way.


